
Submitted by Very on
修改模板文件
现在让我们看一下如何自定义page.tpl.php 文件。这个文件定义了整个页面的HTML的结构。主题
引擎和启用的模块在这个文件里面创建了很多变量,这些变量通过PHP的pirnt函数输出内容。让我们
通过移动“网站导航栏”到头部区域来改变我们的主题。我们要做成如图11-10的样子。

图11-9. 机器可读的内容类型名称, 它们可用于命名模板文件。
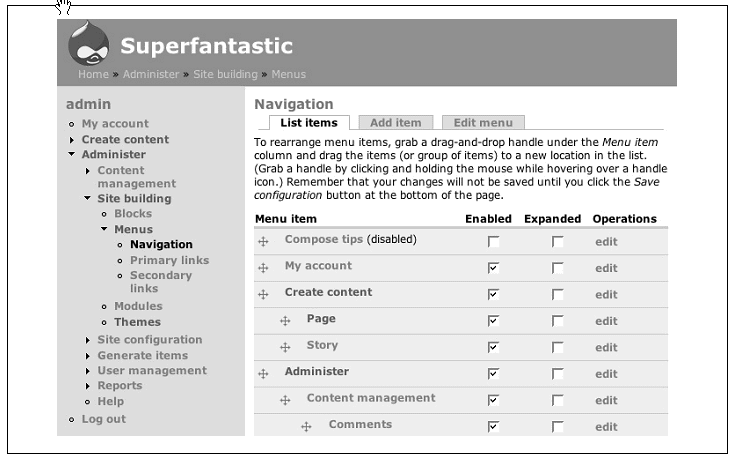
图11-10. 网站导航栏出现在了头部区域
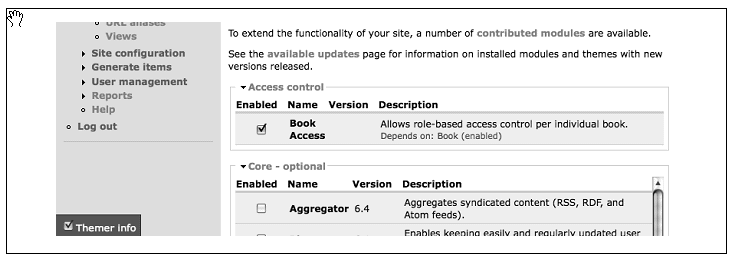
图11-11. 在启用了主题开发模块后的,Themer info 选择框出现了。
 | 在模板文件中有很多变量,但是不是所有Drupal内核提供的变量在主题中都用到。 你可以到http://drupal.org/phptemplate找到这个变量列表,这里说明了每个变量 在模板文件中的位置,但是,模块会添加或改变这个列表,所以一个很好的办法就是 通过使用 Devel Themer模块,来寻找变量。 |
1,我们要使用Theme developer 模块来帮助我们,所以到Administer→
Site building→Modules (admin/build/modules)开启以下模块。
• Development package
— Devel
— Theme developer
2.你在页面的左下角会看到一个Themer info选择框如图11-11.选择这个框来到Theme developer模块页面。
| 如果你的theme developer工具没有正常工作。可能是PHP超过了内存限制。因为开启很多模块,比较耗费内存 特别是开启了这个模块,你在不用这个模块的时候最好关闭它。 |
3,选择这个选择框后,有一个新的灰色框将出现在浏览器的右上角,标题为Drupal Themer Information
这时,点击页面上的任何元素你就会看到对应的主题函数和模板文件。把鼠标移动到“页面导航”,你就会看到在它
周围出现一个红框。点击它就会出现关于它的信息。如图11-12
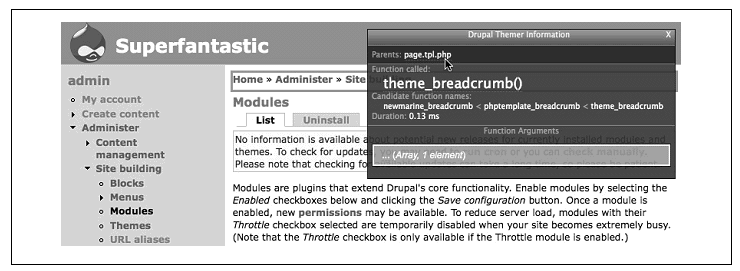
图11-12. Theme Developer information for the breadcrumbs
4,我们想要的信息是是哪个模板文件输出了这个元素。看这个信息的第一个部分,
你会看到“Parents: page.tpl.php.”,这说明breadcrumb 是来自page.tpl.php的
5,打开 page.tpl.php 文件,到29行,这里是$header变量,在42行是 $breadcrumb变量。
29 <tr>
30 <td colspan="2"><div><?php print $header ?></div></td>
31 </tr>
32</table>
33
34<table border="0" cellpadding="0" cellspacing="0" id="content">
35 <tr>
36 <?php if ($left) { ?><td id="sidebar-left">
37 <?php print $left ?>
38 </td><?php } ?>
39 <td valign="top">
40 <?php if ($mission) { ?><div id="mission"><?php print $mission ?></div>
<?php } ?>
41 <div id="main">
42 <?php print $breadcrumb ?>
43 <h1 class="title"><?php print $title ?></h1>
6,现在让我们修改这个文件的breadcrumbs 到header后面,剪切42行,复制到30行,如下所示
29 <tr>
30 <td colspan="2"><div><?php print $header ?><?php print $breadcrumb ?>
</div></td>
31 </tr>
32</table>
33
34<table border="0" cellpadding="0" cellspacing="0" id="content">
35 <tr>
36 <?php if ($left) { ?><td id="sidebar-left">
37 <?php print $left ?>
38 </td><?php } ?>
39 <td valign="top">
40 <?php if ($mission) { ?><div id="mission"><?php print $mission ?>
</div><?php } ?>
41 <div id="main">
42
43 <h1 class="title"><?php print $title ?></h1>
7.保存文件
8.刷新页面看效果,这时颜色和位置还不太理想,我们来修改下CSS
9, 在style.css文件的171行,我们发现有:
.breadcrumb {
margin-bottom: .5em;
}
10,改成:
.breadcrumb {
margin-left: 2em;
}
.breadcrumb a {
color: #ccc;
font-weight: normal;
}
现在我们的breadcrumbs 到了头部,而且显示效果也不错了。
主题化某个内容类型
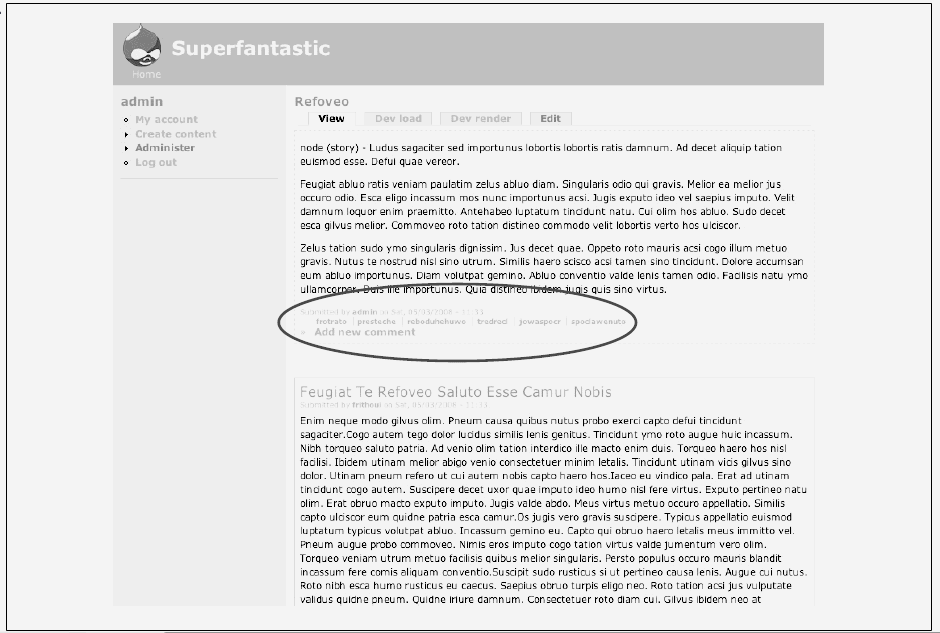
为看到如何创建新的模板文件来改变某个内容类型,我们将用story节点做实验。我们想要在内容的下面
显示作者信息和分类信息。如图11-13
1,复制node.tpl.php到你的主题目录改名为node-story.tpl.php。
2,打开这个文件,你会看到如下代码。
<?php
// $Id: node.tpl.php,v 1.7 2007/08/07 08:39:36 goba Exp $
?>
<div class="node<?php if ($sticky) { print " sticky"; } ?><?php if (!$status)
{ print " node-unpublished"; } ?>">
<?php if ($picture) {
print $picture;
}?>
<?php if ($page == 0) { ?><h2 class="title"><a href="<?php print $node_url?>">
<?php print $title?></a></h2><?php }; ?>
<span class="submitted"><?php print $submitted?></span>
<div class="taxonomy"><?php print $terms?></div>
<div class="content"><?php print $content?></div>
<?php if ($links) { ?><div class="links">»
<?php print $links?></div><?php }; ?>
</div>
3.现在我们移动submitted 和taxonomy到内容的下面,
<?php
// $Id: node.tpl.php,v 1.7 2007/08/07 08:39:36 goba Exp $
?>
<div class="node<?php if ($sticky) { print " sticky"; } ?><?php if (!$status)
{ print " node-unpublished"; } ?>">
<?php if ($picture) {
print $picture;
}?>
<?php if ($page == 0) { ?><h2 class="title"><a href="<?php print $node_url?>">
<?php print $title?></a></h2><?php }; ?>
<div class="content"><?php print $content?></div>
<span class="submitted"><?php print $submitted?></span>
<div class="taxonomy"><?php print $terms?></div>
<?php if ($links) { ?><div class="links">»
<?php print $links?></div><?php }; ?>
</div>
覆盖模块的模板文件
现在让我们说明如何覆盖模块的默认模板文件,我们就修改Comment的comment-wrapper.tpl.php来举例。
我们要在评论的顶部添加一个“Comments:”文本,以说明一下是多节点的评论。完成后如图11-14
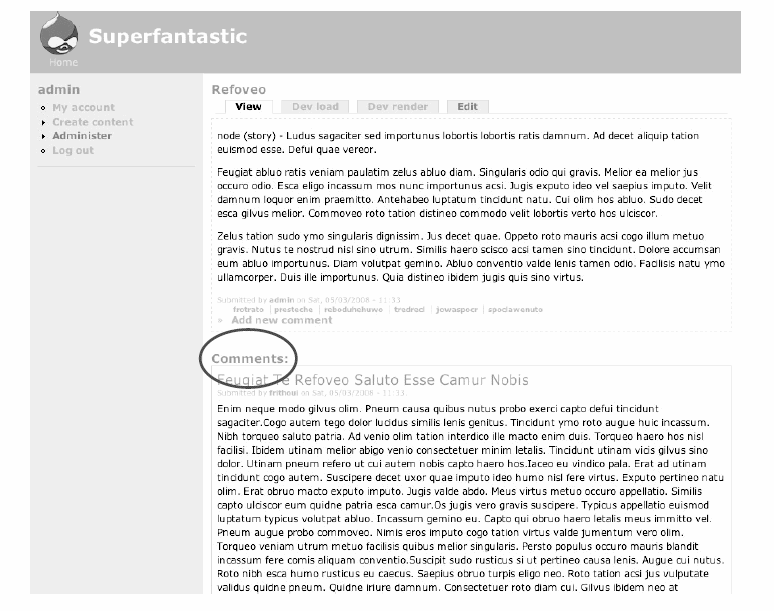
图11-14. 评论的顶部显示了“Comments:” 文本。
步骤是:
1,找到modules/comment/comment-wrapper.tpl.php文件,复制到sites/all/themes/custom/newmarine
你要确定是复制而不是移动,因为我们如果换别的主题后会出错。
2,打开这个文件,里边有很多变量:
{syntaxhighlighter brush: php;fontsize: 100; first-line: 1; }<?php
// $Id: comment-wrapper.tpl.php,v 1.2 2007/08/07 08:39:35 goba Exp $
/**
* @file comment-wrapper.tpl.php
* Default theme implementation to wrap comments.
*
* Available variables:
* - $content: All comments for a given page. Also contains sorting controls
* and comment forms if the site is configured for it.
*
* The following variables are provided for contextual information.
* - $node: Node object the comments are attached to.
* The constants below the variables show the possible values and should be
* used for comparison.
* - $display_mode
* - COMMENT_MODE_FLAT_COLLAPSED
* - COMMENT_MODE_FLAT_EXPANDED
* - COMMENT_MODE_THREADED_COLLAPSED
* - COMMENT_MODE_THREADED_EXPANDED
* - $display_order
* - COMMENT_ORDER_NEWEST_FIRST
* - COMMENT_ORDER_OLDEST_FIRST
* - $comment_controls_state
* - COMMENT_CONTROLS_ABOVE
* - COMMENT_CONTROLS_BELOW
* - COMMENT_CONTROLS_ABOVE_BELOW
* - COMMENT_CONTROLS_HIDDEN
*
* @see template_preprocess_comment_wrapper()
* @see theme_comment_wrapper()
*/
?>
<div id="comments">
<?php print $content; ?>
</div>
3. Add a new <h2> element containing Comments:. In our modified example here, we’ve
removed the comments for brevity, but it won’t hurt to leave them in. We are also
wrapping this text in the t() function so that it is accessible to Drupal’s language
translation system if needed:
<div id="comments">
<h2 class="title"><?php print t('Comments:'); ?></h2>
<?php print $content; ?>
</div>{/syntaxhighlighter}
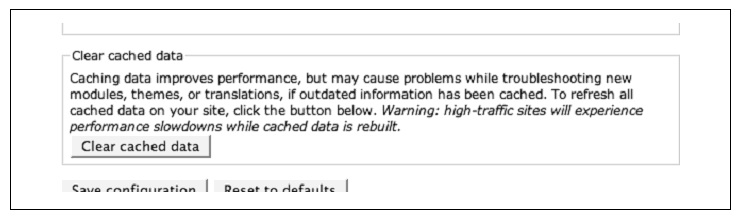
图11-15 如果我们的改变不能及时生效,我们因该使用的“Clear cached data” 按钮。
3,添加一个新的<h2> 元素包含“Comments:”我们可以直接写上这个文本在里面,但是我们
支持Drupal的语言翻译系统,我们加个t()函数。
{syntaxhighlighter brush: xml;fontsize: 100; first-line: 1; }<div id="comments">
<h2 class="title"><?php print t('Comments:'); ?></h2>
<?php print $content; ?>
</div>{/syntaxhighlighter}
4,记得,为了让Drupal识别到我们的模板,你需要刷新主题注册信息,
到 Administer→Site configuration→Performance(admin/settings/performance)
点“Clear cached data”按钮,如图11-15
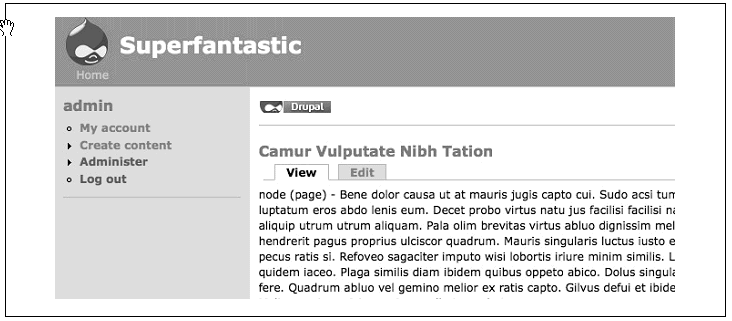
图11-16. Powered by Drupal 模块放在内容区域的顶部。
创建一个新的内容区域
drupal提供了很多内容区域。这个“content” 区域使用了一种我们不需要的方式处理区块。当我们在这个区域
里面放一个区块是,区别总是显示在底部而不是顶部。默认情况下我们没有办法在主内容区的顶部添加区块。
好,我们有功能强大的 .info文件和模板文件,让我们添加一个新的区域来满足我们的需求吧。
如图11-16所示,就是有一个Powered by Drupal区块,放到了内容区域的顶部。
1,首先,我们需要让Drupal知道我们的新区域。打开 newmarine.info文件,我们要定义我们的
区域。记住,要添加新的区域,我们需要定义我们想要的所有区域,包括默认区域。在我们的
尾巴添加如下代码:
regions[header] = Header
regions[left] = Left sidebar
regions[right] = Right sidebar
regions[content_top] = Content Top
regions[content] = Content
regions[footer] = Footer
2,下面,我们需要清除缓存,到Administer→Site configuration→Performance,点 “Clear
cache” 按钮。
3,到 Administer→Site building→Blocks (admin/build/block),当你看区域列表的时候,
你会看到一个“Content Top”区域。把“Powered by Drupal”区块拖动这里来,点击保存。
4,你会看到这个区块消失了,即没在底部也没在内容顶部。虽然我们的顶部已经存在了,但是drupal
不知道要把它显示在那里。我们需要在模板文件中添加这个区域,所以打开page.tpl.php.文件
5,我们需要把它添加在“main” div的顶部,所有在42行添加代码如下:
41 <div id="main">
42 <?php print $content_top; ?>
43 <h1 class="title"><?php print $title ?></h1>
44 <div class="tabs"><?php print $tabs ?></div>
45 <?php if ($show_messages) { print $messages; } ?>
46 <?php print $help ?>
47 <?php print $content; ?>
48 <?php print $feed_icons; ?>
49 </div>
6. 保存文件,刷新文件,你就会看到“Powered by Drupal” 了。
来自 http://www.verynic.com/node/142