You are here
操作系统的一款服务器管理工具 有大用
supervisor 是由python语言编写、基于linux操作系统的一款服务器管理工具,用以监控服务器的运行,发现问题能立即自动预警及自动重启等功能。
Supervisor是一个进程管理工具,官方的说法
用途就是有一个进程需要每时每刻不断的跑,但是这个进程又有可能由于各种原因有可能中断。当进程中断的时候我希望能自动重新启动它,此时,我就需要使用到了Supervisor
这个工具主要就两个命令:
supervisord : supervisor的服务器端部分,启动supervisor就是运行这个命令
supervisorctl:启动supervisor的命令行窗口。
安装(Centos):
# yum install python-setuptools
# easy_install supervisor
如果easy_install不好使就从官方下载:
然后通过python安装:
# tar zxf supervisor-3.1.3.tar.gz
# cd supervisor
# python setup.py install
成功安装后可以登陆python控制台输入import supervisor 查看是否能成功加载。
生成配置文件(supervisord.conf):
echo_supervisord_conf > /etc/supervisord.conf
修改配置文件:
在supervisord.conf最后增加(分号后边的表示注释,可以不写):
[program:bandwidth]
command=python26 /usr/local/bin/bandwidth.sh ;需要执行的命令wd)
user =root ;(default is current user , required if root)
autostart=true ;start at supervisord start (default: true)
autorestart=true ;whether/when to restart (default: unexpected)
startsecs=3 ;number of secs prog must stay running ( def . 1)
stderr_logfile=/tmp/bandwidth_err.log ;redirect proc stderr to stdout (default false) 错误输出重定向
stdout_logfile=/tmp/bandwidth.log ;stdout log path, NONE for none; default AUTO, log输出
(更多配置说明请参考:http://supervisord.org/configuration.html)
运行命令:
supervisord -c /etc/supervisord.conf //启动supervisor
supervisorctl //打开命令行
[root @iZ2365j7l5bZ bin]# supervisorctl status
bandwidth RUNNING pid 2423 , uptime 0 : 06 : 35
[root @iZ2365j7l5bZ bin]# supervisorctl help
default commands (type help <topic>):
=====================================
add clear fg open quit remove restart start stop update
avail exit maintail pid reload reread shutdown status tail version
ctl中: help //查看命令
ctl中: status //查看状态
另外需要注意:如果修改了 /etc/supervisord.conf ,需要执行 supervisorctl reload 来重新加载配置文件,否则不会生效。。。
[配置文件]
[root@vm source]# echo_supervisord_conf > /etc/supervisord.conf
[监视一个程序]
; The [include] section can just contain the "files" setting.  This
; setting can list multiple files (separated by whitespace or
; newlines).  It can also contain wildcards.  The filenames are
; interpreted as relative to this file.  Included files *cannot*
; include files themselves.

[include] /**我是注释,一定要把前面的分号;去掉,不然不会开启include功能,太傻了**/
files = /etc/supervisor/*.ini
在 /etc/supervisor/ 目录下建立 redis.ini 文件
[program:redis]
command=/usr/bin/redis-server /usr/local/redis/redis.conf
autorstart=true
autorestart=true
stdout_logfile=/tmp/supervisor.log
[Web配置]
[inet_http_server]         ; inet (TCP) server disabled by default
port=*:9001        ; (ip_address:port specifier, *:port for all iface)
;username=user              ; (default is no username (open server))
;password=123               ; (default is no password (open server))
如果配置了用户名和密码,就需要输入用户名和密码才能进入web界面。
[启动supervisord]
[root@vm source]# supervisord

可能会输出一堆信息出来

/usr/lib/python2.6/site-packages/supervisor-3.1.3-py2.6.egg/supervisor/options.py:296: UserWarning: Supervisord is running as root and it is searching for its configuration file in default locations (including its current working directory); you probably want to specify a "-c" argument specifying an absolute path to a configuration file for improved security.
  'Supervisord is running as root and it is searching '
/usr/lib/python2.6/site-packages/supervisor-3.1.3-py2.6.egg/supervisor/options.py:383: DeprecationWarning: Parameters to load are deprecated.  Call .resolve and .require separately.
  return pkg_resources.EntryPoint.parse("x="+spec).load(False)
不用管它 不要管它 (命令改成 supervisord -c /etc/supervisord.conf 就没有上面的一大堆信息)
  [root@vm source]# ps -ef |grep supervisord
  root     20041     1  0 03:21 ?        00:00:00 /usr/bin/python /usr/bin/supervisord

  [root@vm source]# ps -ef| grep redis
  root     20074 20073  0 03:23 ?        00:00:00 /usr/bin/redis-server *:6379
有上述进程,就表明成功了。
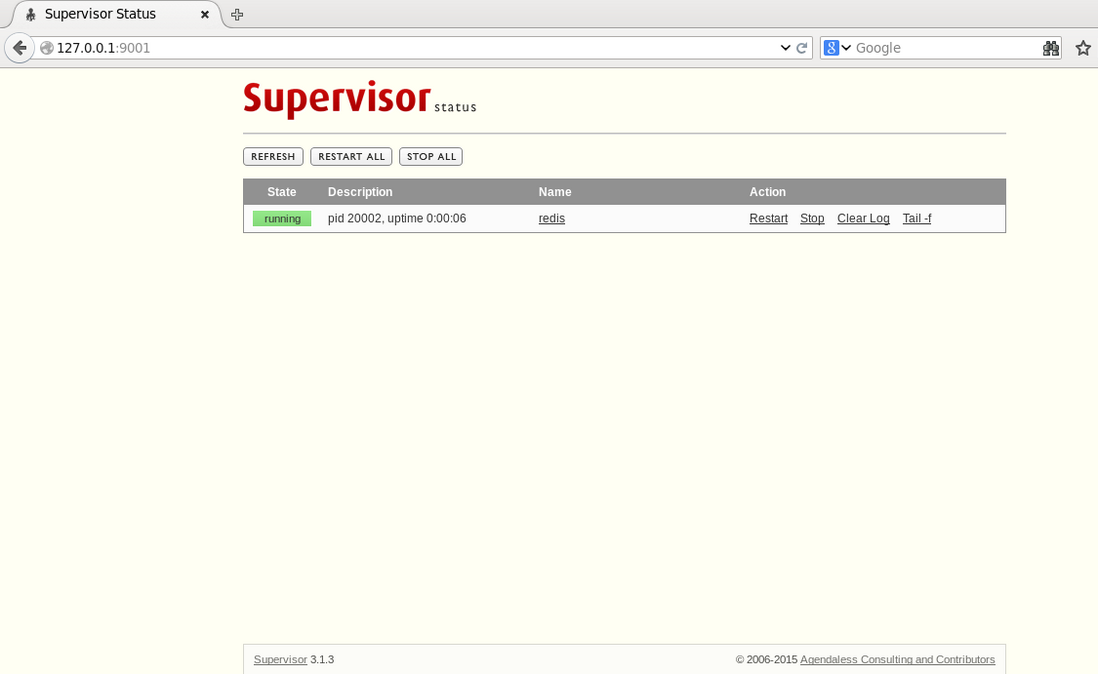
[WEB管理界面]
[命令行管理工具]
[root@vm source]# supervisorctl status
redis RUNNING pid 20074, uptime 0:13:25来源:http://www.cnblogs.com/sss-justdDoIt/p/5631513.html
supervisor安装和配置
直接命令 easy_install supervisor
如果报错先安装 yum install python-setuptools,再上面一条命令;
安装成功后显示finished,我们再次进行python环境,输入import supervisor ,如果没提示错误则表示安装成功。
接下来是对supervisor配置,首先我们要生成配置文件,在shell终端输入echo_supervisord_conf > /etc/supervisord.conf
接着编辑配置文件
vi /etc/supervisord.conf
这里,每个不同的项目,使用了一个单独的配置的文件,放置在 下面,于是修改 ,加上如下内容:
运行命令:
sevice supervisord start
执行命令supervisorctl,启动supervisorctl,进入shell界面
如果修改了 /etc/supervisord.conf ,需要执行 supervisorctl reload 来重新加载配置文件,否则不会生效。。
=============================================
centos7安装supervisord
#yum -y install supervisor
安装路径/usr/bin/supervisord,,配置文件/etc/supervisor.conf
一、手动启动/关闭
supervisor手动启动:
#/usr/bin/supervisord -c /etc/supervisor.conf
supervisor手动关闭:
#/usr/bin/supervisorctl stop all 先关闭supervisor启动脚本,之后再关闭supervisord服务
#kill pid
supervisord开机自启动脚本(各版本系统):https://github.com/Supervisor/initscripts
二、添加开机自启动服务:
centos7 开机自启动脚本:
#vim /lib/systemd/system/supervisord.service
# supervisord service for sysstemd (CentOS 7.0+)
# by ET-CS (https://github.com/ET-CS)
[Unit]
Description=Supervisor daemon
[Service]
ExecStart=/usr/bin/supervisord
ExecStop=/usr/bin/supervisorctl $OPTIONS shutdown
ExecReload=/usr/bin/supervisorctl $OPTIONS reload
KillMode=process
Restart=on-failure
RestartSec=42s
[Install]
WantedBy=multi-user.target
这个自启动脚本需要修改/etc/supervisord.conf配置文件:
#vim /etc/supervisrod.conf
nodaemon=false 改成true
或者:#vim /lib/systemd/system/supervisord.service
[Unit]
Description=Process Monitoring and Control Daemon
After=rc-local.service
[Service]
Type=forking
ExecStart=/usr/bin/supervisord -c /etc/supervisord.conf
SysVStartPriority=99
[Install]
WantedBy=multi-user.target
无需修改/etc/supervisord.conf配置文件
两个自启动脚本都能够添加到systemctl自启动服务
#systemctl enable supervisord.service
#systemctl start/restart/stop supervisord.service来自 https://blog.csdn.net/freeking101/article/details/53516859