欢迎各位兄弟 发布技术文章

这里的技术是共享的

You are here

Laravel使用 Laravel Excel文件导出图片功能 php excel 导出图片

Laravel使用 Laravel Excel文件导出图片功能

96 
stiller 关注            
2017.06.01 14:31* 字数 124 阅读 2172评论 0喜欢 2            

Laracel 中可以使用Laravel Excel进行Excel或者PDF的导出,使用composer进行安装此差价,Laravel-Excel将PHPExcel进行封装。
其官方文档:http://www.maatwebsite.nl/laravel-excel/docs
其中并未解释出如何导出图片excel

其实是可以使用PHPExcel的方式进行图片的导出的,这里给出一个实例。
首先需要引入使用的Excel,和导入图片所使用的PHPExcel_Worksheet_Drawing
use Maatwebsite\Excel\Facades\Excel;
use PHPExcel_Worksheet_Drawing;            

        //其中$array为数据(已经有相应的格式),$temp_img(已经确定了以列名为key,所有的图片地址值为value的形式)
        Excel::create($subTaskId, function ($excel) use ($array, $temp_img) {
            $excel->sheet('玩家数据', function ($sheet) use ($array, $temp_img) {       
                //写入所有的数据 
                $sheet->fromArray(
                    $array
                );
                //这里直接在最后输出图片
                $num = sizeof($array[0]);
              //这个主要是为了确定列数
                $title_array = ['A', 'B', 'C', 'D', 'E', 'F', 'G', 'H', 'I', 'J', 'K', 'L', 'M', 'N', 'O', 'P', 'Q',
                    'R', 'S', 'T', 'U', 'V', 'W', 'X', 'Y', 'Z', 'AA', 'AB', 'AC', 'AD', 'AE', 'AF', 'AG', 'AH'];
                foreach ($temp_img as $k => $v) {
              //写入列名
                    $sheet->cell($title_array[$num] . '1', function ($cell) use ($k) {
                        $cell->setValue($k);
                    });
                    $i = 2;
                //循环输出图片
                    foreach ($v as $k1 => $v1) {
                        foreach ($v1 as $k2=>$v2){
                            $objDrawing = new PHPExcel_Worksheet_Drawing;
                            $objDrawing->setPath(public_path($v2));
                            $objDrawing->setCoordinates($title_array[$num] . $i);
                            $objDrawing->setHeight(50);
                            $objDrawing->setOffsetX(100);
                            $objDrawing->setRotation(100);
                            $objDrawing->setWorksheet($sheet);
                        }
                        $i = $i + 1;
                    }
                    $num = $num + 1;
                }
            });
        })->download('xls');
       

来自  https://www.jianshu.com/p/975341d8e2e3    


laravel excel 导出图片

2018年04月17日 10:25:38 EricSanchez 阅读数:412                    

工作中遇到一个需求,将摄像头抓拍的图片,放入excel中,并导出。找了一大圈,找到一篇文章 点击这里,根据这个自己改动了一些,下面直接上 代码,框架为laravel5.5 

  1. //虚拟数据                                
  2. $cellData[] = ['学号','姓名','年龄','成绩','名次','图片'];
  3. $cellData[] = ['10001','林',19,100,1,'face/2018/04/13/thumb/7.png'];
  4. $cellData[] = ['10001','林',19,100,1,'face/2018/04/13/thumb/2.png'];
  5. $cellData[] = ['10001','林',19,100,1,'face/2018/04/13/thumb/3.png'];
  6. $cellData[] = ['10001','林',19,100,1,'face/2018/04/13/thumb/4.png'];
  7. $cellData[] = ['10001','林',19,100,1,'face/2018/04/13/thumb/5.png'];
  8. $cellData[] = ['10001','林',19,100,1,'face/2018/04/13/thumb/6.png'];
  9. Excel::create("学生成绩",function ($excel) use ($cellData){
  10. $excel->sheet('score',function ($sheet) use ($cellData) {
  11. //init列                                
  12. $title_array = ['A', 'B', 'C', 'D', 'E', 'F', 'G', 'H', 'I', 'J', 'K', 'L', 'M', 'N', 'O', 'P', 'Q',
  13. 'R', 'S', 'T', 'U', 'V', 'W', 'X', 'Y', 'Z', 'AA', 'AB', 'AC', 'AD', 'AE', 'AF', 'AG', 'AH'];
  14. //遍历数据                                
  15. for($i=0;$i<sizeof($cellData);$i++){
  16. foreach($cellData[$i] as $k=>$v){
  17. //设置图片列高度                                
  18. $i>0 && $sheet->setHeight($i+1, 65);
  19. //设置图片列宽度                                
  20. $sheet->setWidth(array('F'=>12));
  21. //判断图片列,如果是则放图片                                
  22. if($k == 5 && $i>0){
  23. $objDrawing = new PHPExcel_Worksheet_Drawing;
  24. $objDrawing->setPath('/app/images/'.$v);
  25. $objDrawing->setCoordinates($title_array[$k] . ($i+1));
  26. $objDrawing->setHeight(80);
  27. $objDrawing->setOffsetX(1);
  28. $objDrawing->setRotation(1);
  29. $objDrawing->setWorksheet($sheet);
  30. continue;
  31. }
  32. //否则放置文字数据                                
  33. $sheet->cell($title_array[$k] . ($i+1), function ($cell) use ($v) {
  34. $cell->setValue($v);
  35. });
  36. }
  37. }
  38. });
  39. })->export('xls');
                   

导出excel 如下图


来自 https://blog.csdn.net/Eric_Alive/article/details/79970725    


laravel-admin 自定义导出excel功能,并导出图片    

https://www.jianshu.com/p/91975f66427d

最近用laravel-admin在做一个小项目,其中用到了excel导出功能。

但是laravel-admin自带的导出功能不带图片,并且导出的数据有很多冗余的字段,并非我所需要的功能。

所以参考官方文档调整代码,实现了自定义导出excel文件,并且带上图片;

步骤如下:

1. 安装laravel-excel插件                    

可参考laravel5.5 中使用laravel-excel                    

composer require maatwebsite/excel:~2.1.0

php artisan vendor:publish

--provider="MaatwebsiteExcelExcelServiceProvider"
               

2. 自定义导出类                        

我是参照laravel-admin官方文档建立的导出类:app/Admin/Extensions/ExcelExpoter.php;

导出类中需要引入使用的Excel,和导入图片所使用的PHPExcel_Worksheet_Drawing

use MaatwebsiteExcelFacadesExcel;

use PHPExcel_Worksheet_Drawing;
                       
复制代码                            
具体代码如下: 
<?php    /**     * Created by PhpStorm.     * User: yuran     * Date: 2018/10/13     * Time: 10:04     */    namespace App\Admin\Extensions;    use Encore\Admin\Grid\Exporters\AbstractExporter;    use Maatwebsite\Excel\Facades\Excel;    use PHPExcel_Worksheet_Drawing;    class ExcelExpoter extends AbstractExporter    {        protected $head = [];        protected $body = [];        public function setAttr($head, $body){            $this->head = $head;            $this->body = $body;        }        public function export()        {            //定义文件名称为日期拼上uniqid() $fileName = date('YmdHis') . '-' . uniqid();            Excel::create($fileName, function($excel) {                $excel->sheet('sheet1', function($sheet) {                    // 这段逻辑是从表格数据中取出需要导出的字段 $head = $this->head;                    $body = $this->body;                    //init列 $title_array = ['A', 'B', 'C', 'D', 'E', 'F', 'G', 'H', 'I', 'J', 'K', 'L', 'M', 'N', 'O', 'P', 'Q', 'R', 'S', 'T', 'U', 'V', 'W', 'X', 'Y', 'Z', 'AA', 'AB', 'AC', 'AD', 'AE', 'AF', 'AG', 'AH'];                    $rows = collect([$head]); //写入标题 $sheet->rows($rows);                    collect( $this->getData() )->map( function ($item,$k)use($body,$sheet,$title_array ) {                        foreach ($body as $i=>$keyName){                            if($keyName == 'url') { //判断图片列,如果是则放图片 $objDrawing = new PHPExcel_Worksheet_Drawing;                                $v = public_path('/upload/'). array_get($item, $keyName); //拼接图片地址 $objDrawing->setPath( $v );                                $sp = $title_array[$i];                                $objDrawing->setCoordinates( $sp . ($k+2) );                                $sheet->setHeight($k+2, 65); //设置高度 $sheet->setWidth(array( $sp =>12)); //设置宽度 $objDrawing->setHeight(80);                                $objDrawing->setOffsetX(1);                                $objDrawing->setRotation(1);                                $objDrawing->setWorksheet($sheet);                            } else { //否则放置文字数据 $v = array_get($item, $keyName);                                $sheet->cell($title_array[$i] . ($k+2), function ($cell) use ($v) {                                    $cell->setValue($v);                                });                            }                        }                    });                });            })->export('xls');        }    }
                           
复制代码                            

3. 调用                        

在model-grid中使用这个导出类:

 $excel = new ExcelExpoter();
        $excel->setAttr(['id', '名称', '类型', '二维码', '上传人'], ['id', 'name', 'type', 'url', 'admin']);
        $grid->exporter($excel);
                       

4. 最终效果
原数据                        


导出结果


来自  https://www.cnblogs.com/lxwphp/p/9804651.html                    


Laravel使用 Laravel Excel文件导出图片功能

2017年06月01日 14:31:00 weixin_34092370 阅读数:4                                    

Laracel 中可以使用Laravel Excel进行Excel或者PDF的导出,使用composer进行安装此差价,Laravel-Excel将PHPExcel进行封装。
其官方文档:http://www.maatwebsite.nl/laravel-excel/docs
其中并未解释出如何导出图片excel

其实是可以使用PHPExcel的方式进行图片的导出的,这里给出一个实例。
首先需要引入使用的Excel,和导入图片所使用的PHPExcel_Worksheet_Drawing
use Maatwebsite\Excel\Facades\Excel;
use PHPExcel_Worksheet_Drawing;                                        

  1. //其中$array为数据(已经有相应的格式),$temp_img(已经确定了以列名为key,所有的图片地址值为value的形式)                                                    
  2. Excel::create($subTaskId, function ($excel) use ($array, $temp_img) {
  3. $excel->sheet('玩家数据', function ($sheet) use ($array, $temp_img) {
  4. //写入所有的数据                                                    
  5. $sheet->fromArray(
  6. $array
  7. );
  8. //这里直接在最后输出图片                                                    
  9. $num = sizeof($array[0]);
  10. //这个主要是为了确定列数                                                    
  11. $title_array = ['A', 'B', 'C', 'D', 'E', 'F', 'G', 'H', 'I', 'J', 'K', 'L', 'M', 'N', 'O', 'P', 'Q',
  12. 'R', 'S', 'T', 'U', 'V', 'W', 'X', 'Y', 'Z', 'AA', 'AB', 'AC', 'AD', 'AE', 'AF', 'AG', 'AH'];
  13. foreach ($temp_img as $k => $v) {
  14. //写入列名                                                    
  15. $sheet->cell($title_array[$num] . '1', function ($cell) use ($k) {
  16. $cell->setValue($k);
  17. });
  18. $i = 2;
  19. //循环输出图片                                                    
  20. foreach ($v as $k1 => $v1) {
  21. foreach ($v1 as $k2=>$v2){
  22. $objDrawing = new PHPExcel_Worksheet_Drawing;
  23. $objDrawing->setPath(public_path($v2));
  24. $objDrawing->setCoordinates($title_array[$num] . $i);
  25. $objDrawing->setHeight(50);
  26. $objDrawing->setOffsetX(100);
  27. $objDrawing->setRotation(100);
  28. $objDrawing->setWorksheet($sheet);
  29. }
  30. $i = $i + 1;
  31. }
  32. $num = $num + 1;
  33. }
  34. });
  35. })->download('xls');
                                   

来自 https://blog.csdn.net/weixin_34092370/article/details/87332160            


Laravel中使用Laravel Excel 实现Excel文件导入导出

2018年03月15日 17:06:57 skyisbluening 阅读数:3264                

原文链接:http://laravelacademy.org/post/2024.html

GitHub地址:https://github.com/Maatwebsite/Laravel-Excel                

一、安装

根目录下安装依赖

composer require maatwebsite/excel ~2.0.0
               

安装成功之后

发现composer.json文件里的"require"多了一行:

"maatwebsite/excel": "~2.1.0",
               

还有vendor目录下面多了一个maatwebsite的文件夹

二、配置

config/app.php中注册服务提供者到providers数组:

Maatwebsite\Excel\ExcelServiceProvider::class,
               

同样在config/app.php中注册门面到aliases数组:

'Excel' => Maatwebsite\Excel\Facades\Excel::class,
               

如果想要对Laravel Excel进行更多的自定义配置,执行以下命令:

php artisan vendor:publish
               

执行成功后会在config目录下生成一个配置文件excel.php可以自行修改excel的配置信息

三、导出Excel文件

执行

php artisan make:controller ExcelController 
               

生成一个Excel的控制器

并在routes/api.php里添加路由信息

  1. Route::get('excel/export','ExcelController@export');
  2. Route::get('excel/import','ExcelController@import');
               

然后在ExcelController 里定义export文件导出方法

  1. <?php                            
  2. namespace App\Http\Controllers;
  3. use Illuminate\Http\Request;
  4. use App\Http\Requests;
  5. use App\Http\Controllers\Controller;
  6. use Excel;
  7. class ExcelController extends Controller                            
  8. {
  9. //Excel文件导出功能 By Laravel学院                            
  10. public function export(){
  11. $cellData = [
  12. ['编号','姓名','绩效','电话号码'],
  13. ['10001','AAAAA','99','150-xxxx-xxxx'],
  14. ['10002','BBBBB','92','137-xxxx-xxxx'],
  15. ['10003','CCCCC','95','157-xxxx-xxxx'],
  16. ['10004','DDDDD','89','177-xxxx-xxxx'],
  17. ['10005','EEEEE','96','188-xxxx-xxxx'],
  18. ['10006','FFFFF','96','180-xxxx-xxxx'],
  19. ['10007','ggggg','96','181-xxxx-xxxx'],
  20. ['10008','HHHHH','96','182-xxxx-xxxx'],
  21. ];
  22. /*                            
  23.    * 如果你要导出csv或者xlsx文件,只需将 export 方法中的参数改成csv或xlsx即可。                            
  24.    * 如果还要将该Excel文件保存到服务器上,可以使用 store 方法:                            
  25.    */                            
  26. Excel::create(iconv('UTF-8', 'GBK', '模板文件'),function($excel) use ($cellData){
  27. $excel->sheet('score', function($sheet) use ($cellData){
  28. $sheet->rows($cellData);
  29. });
  30. })->store('xls')->export('xls');
  31. }
  32. iconv('UTF-8', 'GBK', '模板文件'),function($excel) use ($cellData){
  33. $excel->sheet('score', function($sheet) use ($cellData){
  34. $sheet->rows($cellData);
  35. });
  36. })->store('xls')->export('xls');
  37. }


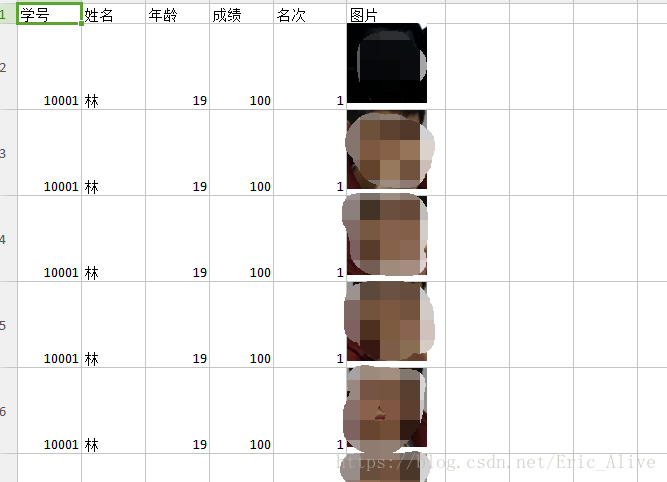
我们在浏览器中访问http://laravel.app:8000/api/excel/export,会导出一个名为模板文件.xls的Excel文件                

如果你要导出csv或者xlsx文件,只需将export方法中的参数改成csv或xlsx即可。                

如果在windows上反倒不需要加iconv('UTF-8', 'GBK', '模板文件')就可以正常输出中文不会乱码,linux上面必须设置转码                

在这里被坑了一把,一开始直接参照模板来,没有在export导出方法里改那个iconv                

然后直接在import里直接套用的里面带有iconv的导入方法,然后一直报一个

Notice: iconv() [function.iconv]: Detected an illegal character in input string ...                

这样的错误,然后按照网上的各种方法也改了,也还是没用,然后最后是先把export里的文件在创建的时候就要跟import里的一样用iconv,在下面导入Excel的时候才不会报那个错误。。。。

如果是要把数据库里的某个表或者某两个表的数据用excel导出而且还可以自己控制筛选条件,并且是和前端进行对接,我的做法是直接把文件导出保存在服务器,返回返回前端可以下载此文件的url地址。进行了如下尝试,也可以很好的满足我的需求。

比如

在service层写一个筛选数据源的方法

  1. public static function  beforeExportExcel($data){
  2. $cellData =Train::whereHas('TrainSignup', function ($query) {
  3. $query->where('audit_status', '=', 1);
  4. })
  5. ->where('del_flag',0)
  6. ->select('name', 'id_no', 'mobile');
  7. if(isset($data['train_class_id'])){
  8. $cellData->where('train_class_id',$data['train_class_id']);
  9. }
  10. $cellData=$cellData->get()->toArray();
  11. $cellData1 = array('姓名','身份证号','移动电话');
  12. array_unshift($cellData, $cellData1);
  13. return $cellData;
  14. }
               

 在controller层

  1. public function export(Request $request)                            
  2. {
  3. $data = $request->json()->all();
  4. $this->validate($request, [
  5. ]);
  6. //设置文件格式 默认xls                            
  7. $format=isset($data['format'])?$data['format']:'xls';
  8. //设置文件名称 默认xxx                            
  9. $name=isset($data['table_name'])?$data['table_name']:'xxx';
  10. //调用刚刚在service层写的获取数据源的方法                            
  11. $response= xxxService::beforeExportExcel($data);
  12. //设置保存文件的文件夹路径 如果没有则新建                            
  13. $resource_path='/storage/uploads/file/';
  14. $file_path =public_path().$resource_path.date('Y').'/'.date('m').'/'.date('d');
  15. if (!is_dir($file_path)){
  16. mkdir($file_path,0775, true);
  17. }
  18. //调用公共方法导出保存excel文件                            
  19. ExcelController::export($response,$name,$format);
  20. //将可以访问到文件的url返回给前端                            
  21. $domain =Config::get('app.domain');
  22. $url =$domain.$resource_path.date('Y').'/'.date('m').'/'.date('d').'/'.$name.'.'.$format;
  23. $ret = RetObject::genSuccess('导出成功',$url);
  24. return response()->json($ret);
  25. }
               

在这里设置了文件的保存路径,注意在再上面config目录下生成的excel.php文件中,找到store的path修改为跟上面一致的路径 

  1. 'store'                       => [
  2. /*                            
  3.            |--------------------------------------------------------------------------                            
  4.            | Path                            
  5.            |--------------------------------------------------------------------------                            
  6.            |                            
  7.            | The path we want to save excel file to                            
  8.            |                            
  9.            */                            
  10. 'path'       => public_path().'/storage/uploads/file/'.date('Y').'/'.date('m').'/'.date('d'),
  11. /*                            
  12.            |--------------------------------------------------------------------------                            
  13.            | Return info                            
  14.            |--------------------------------------------------------------------------                            
  15.            |                            
  16.            | Whether we want to return information about the stored file or not                            
  17.            |                            
  18.            */                            
  19. 'returnInfo' => false                            
  20. ],
               

新建一个类,写一个导出保存excel的公共方法

  1. class ExcelController extends Controller                            
  2. {
  3. public static function export($cellData,$name,$format){
  4. ini_set('memory_limit','500M');
  5. set_time_limit(0);//设置超时限制为0分钟                            
  6. for($i=0;$i<count($cellData);$i++){
  7. $cellData[$i] = array_values($cellData[$i]);
  8. $cellData[$i][0] = str_replace('=',' '.'=',$cellData[$i][0]);
  9. //判断是否有字段过长,如身份证号会显示科学计数法                            
  10. for($j=0;$j<count($cellData[$i]);$j++){
  11. if(strlen($cellData[$i][$j])>15){
  12. $cellData[$i][$j]="\t".$cellData[$i][$j]."\t";
  13. }
  14. }
  15. }
  16. // dd($cellData);                            
  17. /*                            
  18.         * 如果你要导出csv或者xlsx文件,只需将 export 方法中的参数改成csv或xlsx即可。                            
  19.         * 如果还要将该Excel文件保存到服务器上,可以使用 store 方法:                            
  20.         */                            
  21. Excel::create(iconv('UTF-8', 'GBK', $name),function($excel) use ($cellData){
  22. $excel->sheet('报名信息', function($sheet) use ($cellData){
  23. $sheet->rows($cellData);
  24. });
  25. })->store($format);
  26. }
  27. }
               

四、导入Excel文件

我们将刚才保存到服务器上的Excel文件导入进来,导入很简单,使用Excel门面上的load方法即可:

  1. //Excel文件导入功能 By Laravel学院
  2. public function import(){
  3. $filePath = 'storage\exports/'.iconv('UTF-8', 'GBK', '模板文件').'.xls';
  4. Excel::load($filePath, function($reader) {
  5. $data = $reader->all();
  6. dd($data);
  7. });
  8. }
               

然后在浏览器中访问http://laravel.app:8000/api/excel/import                

来自  https://blog.csdn.net/weixin_38682852/article/details/79570377                                


来自  


laravel 导出数据加图片到excel

96 
嘉勇__Lynne 关注            
2019.01.23 14:45* 字数 134 阅读 15评论 0喜欢 1            
                   
image

需求:将多行这样的数据,按一个优惠券属于多个店的,将用户领取情况导出到excel,如图的话三个店,六个用户就要导出18行数据

导出最后入下图

                   
image

首先安装好laravel-excel:

composer require maatwebsite/excel:~2.1.0

php artisan vendor:publish --provider="Maatwebsite\Excel\ExcelServiceProvider"

然后在引入两个类

useEncore\Admin\Grid\Exporters\AbstractExporter;

useMaatwebsite\Excel\Facades\Excel;
还有

use PHPExcel_Worksheet_Drawing;

然后自定义导出类

                   
image

主要是export函数


public function export()

{

    Excel::create('优惠券名单',function ($excel) {

    $excel->sheet('优惠券名单',function ($sheet) {

    $sheet->setStyle([

            'font' => [

            'name' => 'Calibri',

            'size' => 15,

          'bold' => false,

      ]

  ]);

$head= $this->head;

 //init列
    $title_array = ['A', 'B', 'C', 'D', 'E', 'F', 'G', 'H', 'I', 'J', 'K', 'L', 'M', 'N', 'O', 'P', 'Q',
                    'R', 'S', 'T', 'U', 'V', 'W', 'X', 'Y', 'Z', 'AA', 'AB', 'AC', 'AD', 'AE', 'AF', 'AG', 'AH'];
    $rows = collect([$head]);
    $sheet->rows($rows);
    $arr = [];
    $autoNum=0;

 foreach ($this->getData()as $item)

 {

           $coupons_user= CouponsUser::where('coupons_id',$item['coupons_id'])->get();

           if (!$coupons_user->isEmpty())

          {

                   foreach ($coupons_user as $val)
                        {
                            $seller = explode(',',$item['seller_id']);

                            foreach ($seller as $v)
                            {
                                $seller_name = Seller::where('seller_id',$v)->first();
                                $user  = User::where('user_id',$val['user_id'])->first();
                                $arr[$autoNum]['seller_name'] = $seller_name['seller_name'];
                                $arr[$autoNum]['coupons_name'] = $item['coupons_name'];
                                $arr[$autoNum]['user_nickname'] = $user['user_nickname'];
                                $arr[$autoNum]['user_mobile'] = $user['user_mobile'];
                                $arr[$autoNum]['receive_time'] = date('Y:m:d H:i:s',$val['receive_time']);
                                $autoNum++;
//                                商家','优惠券','领取用户名称','领取用户电话','领取时间','用户头像'
                            }
                        }

             }

}

$sheet->rows($arr);//插入excel

//img img必须要独立处理

 foreach ($arras $k=> &$item)

{

        $user= User::where('user_mobile',$item['user_mobile'])->first();

        if(!empty($user['user_img'])&& file_exists(base_path(). '/public/uploads/' . $user['user_img'])){

                 $item['user_img']= base_path(). '/public/uploads/' . $user['user_img'];

                  $obj= new PHPExcel_Worksheet_Drawing();//使用phpExcel

                  $obj->setPath($item['user_img']);

                  $sp= $title_array[0 + 3];

                  $obj->setCoordinates('F'.($k+2));//设置图片要插入的单元格

                  $sheet->setHeight($k+ 2,65);//设置高度

                  $sheet->setWidth(array($sp=> 11));//设置宽度

                  $obj->setHeight(80);

                  $obj->setOffsetX(1);设置偏移量

                  $obj->setRotation(1);

                  $obj->setWorksheet($sheet);

        }

}

});

})->export('xls');

}

       
普通分类: