Laravel入门教程——一个简单cms的实现(03)
作者:douyasi
时间:2014年10月13日
分类:Laravel入门教程
作者: douyasi
网站:https://douyasi.com/category/startlaravel/
备注:本教程是在当前最新Laravel稳定版v4.2.X下实现的,其它相异版本如果有问题请自行排除。
本文为作者原创记录,转载请保留署名与来源。
页面显示与路由控制
建立静态首页
实际上,由于目前数据很少,复杂的首页页面对我们来说是种干扰,不如先写一个简单的首页。
为了方便快捷起见,我们把控制器,视图,模型文件都放在app对应目录下,位于顶级命名空间下,当然你也可以使用或建立 workbench 来管理的你的代码。
好,在 /app/views/ 下新建一个 index.blade.php,写下代码:
<!DOCTYPE html>
<html>
<head>
    <meta charset="UTF-8">
    <title>首页</title>
</head>
<body>
    <p>这是首页</p>
</body>
</html>
现在,我们需要实现访问网站域名首页就能展示“这是首页”内容。
下面,我们修改下路由,文件位于 /app/route.app :
Route::get('/',function()
{
    returnView::make('index');
});
随后,我们访问下网站首页,就能看到“这是首页”4个字。
展示登录页面
首页我们已经显示出来,下面,我们开始实现登录页面。 Laravel 的 Blade 模版对于某些新接触的人来说,很不习惯,实际上我也不习惯,当然你也可以不使用它的一些语法,直接使用原生的HTML/PHP 标签。
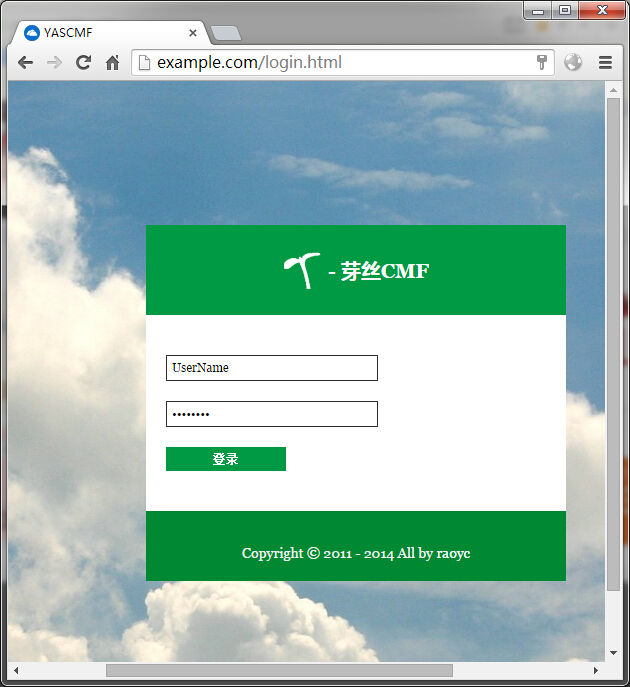
我们先把登录页面给套出来,登录页面看起来像下图:

设计不好,不喜勿喷啊。
我们先把 js、img、css 等资源按一定的规范放在网站根目录 /public/assets 文件夹下。 assets 文件夹下包括所有静态资源,目录结构大概如下:
/public/
    |__ css/
        |_ style.css
        |_ ...
    |__ img/
        |_ favicon.ico
        |_ ...
    |__ js/
        |_ script.js
        |_ ...
    |__ lib/
        |__ font-awesome/
            |__ fonts/
                |__ ...
            |__ ...
既然使用 Laravel,还是要必要学习下它的 blade 模版语法,以及其相关表单和HTML标签。
本人比较喜欢那种头中尾切分的那种 layout 布局,我们可以把 layout 模版按头中尾切分细一点。由于登录页面布局跟后台布局没有多大统一地方(估计就只有 HTML meta 声明部分有些一样),故我按以下来设置 layout 和 blade 代码。
文件位置:/app/view/layout/base.blade.php
<!DOCTYPE html>
<html>
<head>
    <meta charset="UTF-8">
    <title>@section('title') YASCMF - YASCMF @show{{-- 页面标题 --}}</title>
    <meta name="description" content="{{{ isset($description) ? $description : 'YASCMF' }}}" />
    <meta name="keywords" content="{{{ isset($keywords) ? $keywords : 'YASCMF' }}}" />
    <meta name="author" content="{{{ isset($author) ? $$author : 'http://raoyc.com' }}}" />
    <meta name="renderer" content="webkit">{{-- 360浏览器使用webkit内核渲染页面 --}}
    <meta http-equiv="X-UA-Compatible" content="IE=Edge,chrome=1" />{{-- IE(内核)浏览器优先使用高版本内核 --}}
    <meta name="viewport" content="width=device-width, initial-scale=1.0, minimum-scale=1.0, maximum-scale=1.0, user-scalable=no">{{-- 移动端页面缩放 --}}

    <link rel="shortcut icon" href="{{ asset('assets/img/favicon.ico') }}" type="image/x-icon">{{-- favicon --}}

    @section('head_css')
    @show{{-- head区域css样式表 --}}

    @section('head_js')
    @show{{-- head区域javscript脚本 --}}

    @section('beforeStyle')
    @show{{-- 在内联样式之前填充一些东西 --}}

    @section('head_style')
    @show{{-- head区域内联css样式表 --}}

    @section('afterStyle')
    @show{{-- 在内联样式之后填充一些东西 --}}
</head>
<body>
    @section('beforeBody')
    @show{{--在正文之后填充一些东西 --}}

    @section('body')
    @show{{-- 正文部分 --}}

    @section('afterBody')
    @show{{-- 在正文之后填充一些东西,比如统计代码之类的东东 --}}

</body>
</html>
我们先来学习下一些blade语法:
@section('title') 为区块,以便后续模版继承与修改。
{{{ isset($description) ? $description : 'YASCMF' }}} 输出 $description 之前先检查该变量是否存在,如果存在则输出,否则给默认值 YASCMF 。
三个连大括号({})表示对变量中的特殊字符串进行自动转义。
{{-- 这是注释内容 --}} 表示注释。
我们已经写好了一个基础的 layout,下面我们开始写下针对登录页面的 blade 模版页面。
文件位置:/app/view/authority/login.blade.php
@extends('layout.base')
@section('title') 登录 - YASCMF @stop
@section('head_style')
<style type="text/css">
body{font-family:Georgia,Tahoma,"Microsoft YaHei",SimSun;font-size:12px;background:url('{{ asset('assets/img/bg/bg.jpg') }}') no-repeat scroll center center;}
.clearfix:after{content:".";display:block;height:0;clear:both;visibility:hidden;}
a{text-decoration:none;color:#999;}
a:hover{text-decoration:underline;}
img{vertical-align:middle;margin-top:-4px;}
#login_wrapper {width: 960px;margin: 10px auto;}
#login_box{width:420px;margin:15% auto;}
.lb_top{width:420px;height:90px;margin:0 auto;background-color:#094;}
#lb_title{text-align:center;font-weight:bold;font-size:20px;color:#fff;margin:10px;padding:30px;}
.lb_form{width:420px;background-color:#fff;padding-top:20px;padding-bottom:20px;text-align:center;}
#login_form input{display:block;width:200px;margin:20px;padding:5px;color:#000;border:1px solid #333;clear:both;}
input,textarea,select {font-size:12px;font-family:Georgia,"Times New Roman",Times,serif;}
input#sf_submit {display:block;width:120px;font-size:12px;font-weight: bold;text-transform: uppercase;color:#fff;background-color: #094;border:none;cursor:pointer;}
.lb_bottom{width:420px;height:50px;background-color:#083;text-align:center;padding-top:20px;font-size:14px;color:#f0f0f0;}
.lb_bottom a{color:#fff;}
</style>
@parent
@stop
@section('body')
<div id="login_wrapper">
<div id="login_box">
<div>
<div id="lb_title"><a href="{{ url('') }}"><img src="{{ asset('assets/img/yas_logo.png')}}" /></a> - 芽丝CMF</div>
</div>
<div>
{{ Form::open(array('route' => 'login','id' => 'login_form', 'method' => 'post')) }}
{{ Form::text('username',null,array('placeholder'=>'请输入用户名', 'class' => 'input_text', 'id' =>'username', 'maxlength'=>20, 'onFocus' => "this.value=(this.value=='UserName')? '' : this.value;")) }}
{{ Form::password('password', array('placeholder'=>'请输入用户密码', 'class' => 'input_text', 'id' =>'password', 'maxlength'=>20, 'onFocus' => "this.value=(this.value=='PassWord')? '' : this.value;")) }}
{{ Form::submit('登录',array('id' => 'sf_submit')) }}
{{ Form::close() }}
</div>
<div>
<p>Copyright © 2011 - 2014 All by <a href="http://raoyc.com/" />raoyc</a></p>
</div>
</div>
</div>
@stop我们接着学习 blade 标签和一些生成 Form 表单方法:
上段代码里,我们看到了@extends('layout.base'),这个表示继承我们最上面的base.blade.php,继承以后,我们需要根据当前登录页面实际,修改自己特定的section,比如标题 @section('title') 、head内联样式 @section('head_style') 、正文body @section('body')。
我们发现一些 Form::xxx 之类的代码,这些是 Laravel 内置的一些生成 Form 表单元素的方法,具体请查阅官方帮助手册,如果你觉得很麻烦,也可以使用原生的HTML代码。
模版页面我们都弄好了,现在通过修改路由与控制器,访问前台登录页面看看。
修改路由,文件位置:/app/routes.php ,这里我们使用到路由群组和路由筛选器(关于路由筛选器 filter,后文再谈),以便后期维护方便。
/*路由群组*/
Route::group(array('prefix' => 'auth'), function () {
    $Authority = 'AuthorityController@';
    Route::group(array('before' => 'guest'), function () use ($Authority) {
        # 登录
        Route::get('login', array('as' => 'login', 'uses' => $Authority.'getLogin'));
        Route::post('login', $Authority.'postLogin');
    });
});
上面路由代码,把对 auth/login 的 get 访问映射到 AuthorityController 的 getLogin 方法,post 访问映射到AuthorityController 的 postLogin 方法。
下面我们开始书写AuthorityController,文件位置:/app/controllers/AuthorityController.php。
<?php
class AuthorityController extends BaseController {

    public function getLogin()
    {
        return View::make('authority.login');
    }

    public function postLogin()
    {

    }

}postLogin方法我们暂时留空,后面用它会来处理登录事务。
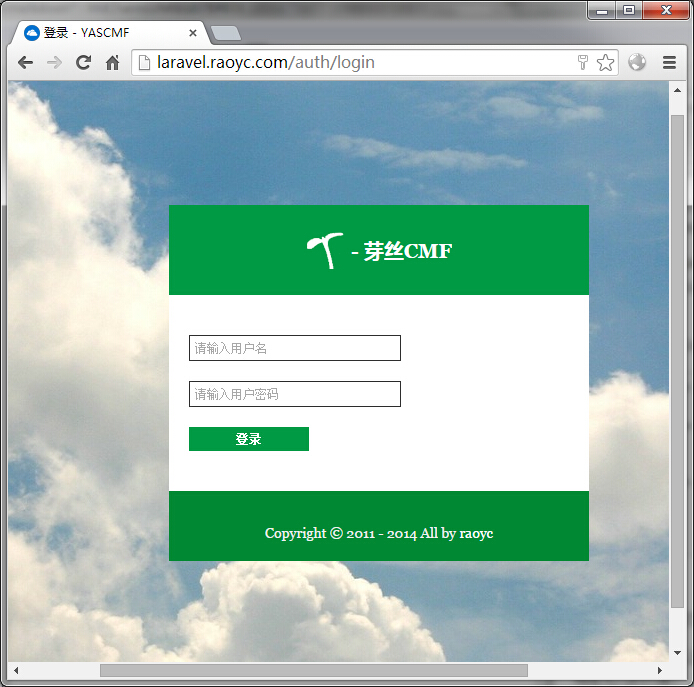
现在我们在浏览器上访问 http://{locdomain}/auth/login ,然后出现与我们设计图相差无几的界面:

处理登录逻辑
登录页面已经完整展示出来了,我们现在处理下登录业务逻辑,就是点击登录按钮之后的对POST过来的进行校验的那一步。
处理登录的位于AuthorityController 的 postLogin方法里,代码如下:
    public function postLogin()
    {
        $credentials = array('username'=>Input::get('username'), 'password'=>Input::get('password'));  //认证凭证
        if (Auth::attempt($credentials))
        {
            return Redirect::intended();
        }
        else {
            // 登录失败,跳回
            return Redirect::back()
                ->withInput()
                ->withErrors(array('attempt' => '“用户名”或“密码”错误,请重新登录!'));
        }
    }
这里我们使用到 Laravel 自带的 Auth 认证与安全类方法,默认情况下,Laravel 是对数据库 users 表进行相关身份认证的,而我们这里操作的是 admin 表用户,所以我们需要修改 model 里面 Admin.php,给其继承 Auth 相关 Traits 和 Interface,否则会报错。
文件/apps/models/Admin.php的代码:
<?php
use Illuminate\Auth\UserTrait;
use Illuminate\Auth\UserInterface;
use Illuminate\Auth\Reminders\RemindableTrait;
use Illuminate\Auth\Reminders\RemindableInterface;

class Admin extends Eloquent implements UserInterface, RemindableInterface{
    use UserTrait, RemindableTrait;
    protected $table = 'admin';
    //protected $hidden = array('password', 'remember_token');
}
修改 Laravel 认证相关配置,将原有默认User和users修改为Admin和admin文件位于/apps/config/auth.php :
'model' => 'Admin',
'table' => 'admin',
上面控制器 postLogin()方法在登录校验失败时,会传递一个错误信息到 login 视图里,我们需要简单修改下 login.blade.php。
......
{{ Form::close() }}
<p style="color:#f00;">{{ $errors->first('attempt') }}</p>
</div>
<div>
<p>Copyright © 2011 - 2014 All by <a href="http://raoyc.com/" />raoyc</a></p>
</div>
......好的,现在我们尝试下登录看看。
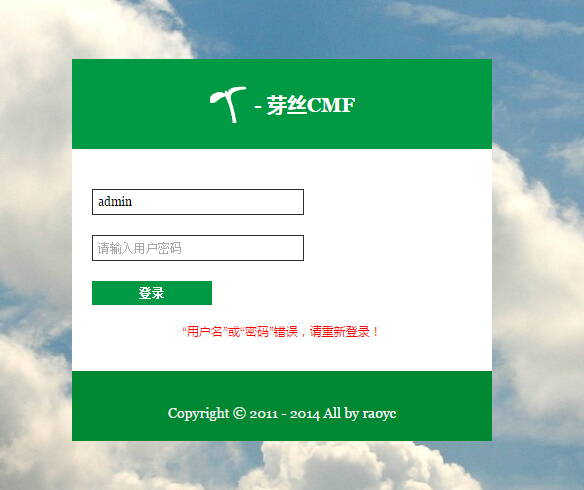
在用户名和密码错误的情况下,会出现下图:

在用户名和密码正确的情况下,会跳回首页。
好了,这一节就讲到这里,下一节我们继续深入。
标签:laravel
