You are here
马哥 24_04 _编译安装LAMP之配置httpd以FastCGI方式与php整合 有大用
httpd
fastcgi 的模块(要提供这个模块,才能fastcgi的方式进行通信)
2.4以后就已经自带了,叫fcgi (proxy_mode,proxy_fcgi)
php
cgi
module
fastcgi(fpm) (5.3.6, 5.4以后) httpd以fastcgi的方式与fpm进行通信


--enable-modules=most ,能够实现fcgi ,同时就能够实现我们以前的模块
卸载了mysql 和 php,只保留了apache2.4.4
[root@localhost ~]# httpd -v
Server version: Apache/2.4.4 (Unix)
Server built: Apr 2 2019 20:59:39
[root@localhost ~]#
使用通用二进制格式安装 mysql5.6.10
[root@www ~]# wget https://downloads.mysql.com/archives/get/file/mysql-5.6.10-linux-glibc2.5-i686.tar.gz
[root@www ~]# tar xf mysql-5.6.10-linux-glibc2.5-i686.tar.gz -C /usr/local
[root@www ~]#
[root@www ~]# id mysql
uid=306(mysql) gid=306(mysql) groups=306(mysql)
[root@www ~]#
[root@www ~]# ls -la /mydata/
总计 16
drwxr-xr-x 3 root root 4096 04-04 04:15 .
drwxr-xr-x 28 root root 4096 04-30 03:10 ..
drwxr-x--- 2 mysql mysql 4096 04-30 03:53 data
[root@www ~]#
[root@www local]# ln -sv mysql-5.6.10-linux-glibc2.5-i686 mysql
创建指向“mysql-5.6.10-linux-glibc2.5-i686”的符号链接“mysql”
[root@www local]#
[root@www local]# cd mysql
[root@www mysql]# ls
bin data include lib mysql-test scripts sql-bench
COPYING docs INSTALL-BINARY man README share support-files
[root@www mysql]#
属主属组改为 mysql
[root@www mysql]# chown -R mysql.mysql ./
[root@www mysql]#
[root@www mysql]# ll
总计 76
drwxr-xr-x 2 mysql mysql 4096 04-30 03:49 bin
-rw-r--r-- 1 mysql mysql 17987 2013-01-23 COPYING
drwxr-xr-x 4 mysql mysql 4096 04-30 03:49 data
drwxr-xr-x 2 mysql mysql 4096 04-30 03:49 docs
drwxr-xr-x 3 mysql mysql 4096 04-30 03:49 include
-rw-r--r-- 1 mysql mysql 7468 2013-01-23 INSTALL-BINARY
drwxr-xr-x 3 mysql mysql 4096 04-30 03:50 lib
drwxr-xr-x 4 mysql mysql 4096 04-30 03:50 man
drwxr-xr-x 10 mysql mysql 4096 04-30 03:50 mysql-test
-rw-r--r-- 1 mysql mysql 2552 2013-01-23 README
drwxr-xr-x 2 mysql mysql 4096 04-30 03:49 scripts
drwxr-xr-x 28 mysql mysql 4096 04-30 03:49 share
drwxr-xr-x 4 mysql mysql 4096 04-30 03:49 sql-bench
drwxr-xr-x 3 mysql mysql 4096 04-30 03:50 support-files
[root@www mysql]#
[root@www mysql]# scripts/mysql_install_db --user=mysql --datadir=/mydata/data
Installing MySQL system tables...2019-04-30 04:07:54 0 [Warning] TIMESTAMP with implicit DEFAULT value is deprecated. Please use --explicit_defaults_for_timesta mp server option (see documentation for more details).
2019-04-30 04:07:54 4934 [Note] InnoDB: The InnoDB memory heap is disabled
2019-04-30 04:07:54 4934 [Note] InnoDB: Mutexes and rw_locks use InnoDB's own im plementation
2019-04-30 04:07:54 4934 [Note] InnoDB: Compressed tables use zlib 1.2.3
2019-04-30 04:07:54 4934 [Note] InnoDB: CPU does not support crc32 instructions
2019-04-30 04:07:54 4934 [Note] InnoDB: Using Linux native AIO
2019-04-30 04:07:54 4934 [Note] InnoDB: Initializing buffer pool, size = 128.0M
2019-04-30 04:07:54 4934 [Note] InnoDB: Completed initialization of buffer pool
2019-04-30 04:07:54 4934 [Note] InnoDB: The first specified data file ./ibdata1 did not exist: a new database to be created!
2019-04-30 04:07:54 4934 [Note] InnoDB: Setting file ./ibdata1 size to 12 MB
2019-04-30 04:07:54 4934 [Note] InnoDB: Database physically writes the file full : wait...
2019-04-30 04:07:55 4934 [Note] InnoDB: Setting log file ./ib_logfile101 size to 48 MB
2019-04-30 04:07:56 4934 [Note] InnoDB: Setting log file ./ib_logfile1 size to 4 8 MB
2019-04-30 04:07:57 4934 [Note] InnoDB: Renaming log file ./ib_logfile101 to ./i b_logfile0
2019-04-30 04:07:57 4934 [Warning] InnoDB: New log files created, LSN=45781
2019-04-30 04:07:57 4934 [Note] InnoDB: Doublewrite buffer not found: creating n ew
2019-04-30 04:07:57 4934 [Note] InnoDB: Doublewrite buffer created
2019-04-30 04:07:57 4934 [Note] InnoDB: 128 rollback segment(s) are active.
2019-04-30 04:07:57 4934 [Warning] InnoDB: Creating foreign key constraint syste m tables.
2019-04-30 04:07:57 4934 [Note] InnoDB: Foreign key constraint system tables cre ated
2019-04-30 04:07:57 4934 [Note] InnoDB: Creating tablespace and datafile system tables.
2019-04-30 04:07:57 4934 [Note] InnoDB: Tablespace and datafile system tables cr eated.
2019-04-30 04:07:57 4934 [Note] InnoDB: Waiting for purge to start
2019-04-30 04:07:57 4934 [Note] InnoDB: 1.2.10 started; log sequence number 0
2019-04-30 04:08:01 4934 [Note] Binlog end
2019-04-30 04:08:01 4934 [Note] InnoDB: FTS optimize thread exiting.
2019-04-30 04:08:01 4934 [Note] InnoDB: Starting shutdown...
2019-04-30 04:08:03 4934 [Note] InnoDB: Shutdown completed; log sequence number 1625977
OK
Filling help tables...2019-04-30 04:08:03 0 [Warning] TIMESTAMP with implicit DE FAULT value is deprecated. Please use --explicit_defaults_for_timestamp server o ption (see documentation for more details).
2019-04-30 04:08:03 4957 [Note] InnoDB: The InnoDB memory heap is disabled
2019-04-30 04:08:03 4957 [Note] InnoDB: Mutexes and rw_locks use InnoDB's own im plementation
2019-04-30 04:08:03 4957 [Note] InnoDB: Compressed tables use zlib 1.2.3
2019-04-30 04:08:03 4957 [Note] InnoDB: CPU does not support crc32 instructions
2019-04-30 04:08:03 4957 [Note] InnoDB: Using Linux native AIO
2019-04-30 04:08:03 4957 [Note] InnoDB: Initializing buffer pool, size = 128.0M
2019-04-30 04:08:03 4957 [Note] InnoDB: Completed initialization of buffer pool
2019-04-30 04:08:03 4957 [Note] InnoDB: Highest supported file format is Barracu da.
2019-04-30 04:08:03 4957 [Note] InnoDB: 128 rollback segment(s) are active.
2019-04-30 04:08:03 4957 [Note] InnoDB: Waiting for purge to start
2019-04-30 04:08:03 4957 [Note] InnoDB: 1.2.10 started; log sequence number 1625 977
2019-04-30 04:08:03 4957 [Note] Binlog end
2019-04-30 04:08:03 4957 [Note] InnoDB: FTS optimize thread exiting.
2019-04-30 04:08:03 4957 [Note] InnoDB: Starting shutdown...
2019-04-30 04:08:05 4957 [Note] InnoDB: Shutdown completed; log sequence number 1625987
OK
To start mysqld at boot time you have to copy
support-files/mysql.server to the right place for your system
PLEASE REMEMBER TO SET A PASSWORD FOR THE MySQL root USER !
To do so, start the server, then issue the following commands:
./bin/mysqladmin -u root password 'new-password'
./bin/mysqladmin -u root -h www.a.org password 'new-password'
Alternatively you can run:
./bin/mysql_secure_installation
which will also give you the option of removing the test
databases and anonymous user created by default. This is
strongly recommended for production servers.
See the manual for more instructions.
You can start the MySQL daemon with:
cd . ; ./bin/mysqld_safe &
You can test the MySQL daemon with mysql-test-run.pl
cd mysql-test ; perl mysql-test-run.pl
Please report any problems with the ./bin/mysqlbug script!
The latest information about MySQL is available on the web at
Support MySQL by buying support/licenses at http://shop.mysql.com
New default config file was created as ./my.cnf and
will be used by default by the server when you start it.
You may edit this file to change server settings
WARNING: Default config file /etc/my.cnf exists on the system
This file will be read by default by the MySQL server
If you do not want to use this, either remove it, or use the
--defaults-file argument to mysqld_safe when starting the server
[root@www mysql]#
(5.6.8的上面的脚本会自动在当前的目录下创建 my.cnf 的文件)
以后直接使用 my.cnf 这个文件就可以了,不用复制到 /etc 目录下 (复制过去也可以)
[root@www mysql]# cd support-files/
You have new mail in /var/spool/mail/root
[root@www support-files]# pwd
/usr/local/mysql/support-files
[root@www support-files]# ls
binary-configure my-default.cnf mysql-log-rotate solaris
magic mysqld_multi.server mysql.server
#mysql.server是服务启动脚本
[root@www support-files]#
[root@www support-files]# cp mysql.server /etc/init.d/mysqld
cp:是否覆盖“/etc/init.d/mysqld”? y (覆盖以前的)
[root@www support-files]#
[root@www support-files]# chkconfig --add mysqld
[root@www support-files]#
[root@www support-files]# chkconfig --list mysqld
mysqld 0:关闭 1:关闭 2:启用 3:启用 4:启用 5:启用 6:关闭
[root@www support-files]#
[root@www support-files]# ls
binary-configure my-default.cnf mysql-log-rotate solaris
magic mysqld_multi.server mysql.server
#my-default.cnf
[root@www support-files]#
[root@www support-files]# cat my-default.cnf
# For advice on how to change settings please see
# http://dev.mysql.com/doc/refman/5.6/en/server-configuration-defaults.html
# *** DO NOT EDIT THIS FILE. It's a template which will be copied to the
# *** default location during install, and will be replaced if you
# *** upgrade to a newer version of MySQL.
[mysqld]
# Remove leading # and set to the amount of RAM for the most important data
# cache in MySQL. Start at 70% of total RAM for dedicated server, else 10%.
# innodb_buffer_pool_size = 128M
# Remove leading # to turn on a very important data integrity option: logging
# changes to the binary log between backups.
# log_bin
# These are commonly set, remove the # and set as required.
# basedir = .....
# datadir = .....
# port = .....
# server_id = .....
# socket = .....
# Remove leading # to set options mainly useful for reporting servers.
# The server defaults are faster for transactions and fast SELECTs.
# Adjust sizes as needed, experiment to find the optimal values.
# join_buffer_size = 128M
# sort_buffer_size = 2M
# read_rnd_buffer_size = 2M
sql_mode=NO_ENGINE_SUBSTITUTION,STRICT_TRANS_TABLES
[root@www support-files]#
建议提供 mysql5.5提供的样例文件 (my-large.cnf 或 my-huge.cnf)
可以把 my-default.cnf 复制到 /etc/my.cnf
[root@www support-files]# cp my-default.cnf /etc/my.cnf
cp:是否覆盖“/etc/my.cnf”? y
[root@www support-files]#
[root@www support-files]# vim /etc/my.cnf
......................................
datadir = /mydata/data
......................................
[root@www support-files]# cd ..
You have new mail in /var/spool/mail/root
[root@www mysql]# pwd
/usr/local/mysql
[root@www mysql]#
[root@www mysql]# ll
总计 80
drwxr-xr-x 2 mysql mysql 4096 04-30 03:49 bin
-rw-r--r-- 1 mysql mysql 17987 2013-01-23 COPYING
drwxr-xr-x 4 mysql mysql 4096 04-30 03:49 data
drwxr-xr-x 2 mysql mysql 4096 04-30 03:49 docs
drwxr-xr-x 3 mysql mysql 4096 04-30 03:49 include
-rw-r--r-- 1 mysql mysql 7468 2013-01-23 INSTALL-BINARY
drwxr-xr-x 3 mysql mysql 4096 04-30 03:50 lib
drwxr-xr-x 4 mysql mysql 4096 04-30 03:50 man
-rw-r--r-- 1 root root 943 04-30 04:07 my.cnf #这个文件属主属组是 root
drwxr-xr-x 10 mysql mysql 4096 04-30 03:50 mysql-test
-rw-r--r-- 1 mysql mysql 2552 2013-01-23 README
drwxr-xr-x 2 mysql mysql 4096 04-30 03:49 scripts
drwxr-xr-x 28 mysql mysql 4096 04-30 03:49 share
drwxr-xr-x 4 mysql mysql 4096 04-30 03:49 sql-bench
drwxr-xr-x 3 mysql mysql 4096 04-30 03:50 support-files
[root@www mysql]#
把属主改为root
[root@www mysql]# chown -R root ./
[root@www mysql]#
[root@www mysql]# service mysqld start
Starting MySQL. [确定]
[root@www mysql]#
编辑环境变量
[root@www mysql]# vim /etc/profile.d/mysql.sh
export PATH=$PATH:/usr/local/mysql/bin
下面可以看见版本是 5.6.10
[root@www mysql]# mysql
Welcome to the MySQL monitor. Commands end with ; or \g.
Your MySQL connection id is 1
Server version: 5.6.10 MySQL Community Server (GPL)
Copyright (c) 2000, 2013, Oracle and/or its affiliates. All rights reserved.
Oracle is a registered trademark of Oracle Corporation and/or its
affiliates. Other names may be trademarks of their respective
owners.
Type 'help;' or '\h' for help. Type '\c' to clear the current input statement.
mysql>
mysql的头文件的输出 库文件的输出 man文件的输出就不演示了
下面安装 php5.4.13,而且是以 fpm 的方式在工作
[root@www ~]# wget http://museum.php.net/php5/php-5.4.13.tar.bz2 --no-check-certificate
[root@www ~]# tar xf php-5.4.13.tar.bz2
[root@www ~]# cd php-5.4.13 #编译php
[root@www php-5.4.13]#
./configure --prefix=/usr/local/php --with-mysql=/usr/local/mysql --with-openssl --with-mysqli=/usr/local/mysql/bin/mysql_config --enable-mbstring --with-freetype-dir --with-jpeg-dir --with-png-dir --with-zlib --with-libxml-dir=/usr --enable-xml --enable-sockets --with-apxs2=/usr/local/apache/bin/apxs --with-mcrypt --with-config-file-path=/etc --with-config-file-scan-dir=/etc/php.d --with-bz2 --enable-maintainer-zts
把 --with-apxs2=/usr/local/apache/bin/apxs 改为 --enable-fpm
( 既然不是以模块化的方式apxs2跟apache一起工作,而且也不是线程模型,所以 --enable-maintainer-zts 也不用了 )
[root@www php-5.4.13]# pwd
/root/php-5.4.13
[root@www php-5.4.13]# ./configure --prefix=/usr/local/php --with-mysql=/usr/local/mysql --with-openssl --with-mysqli=/usr/local/mysql/bin/mysql_config --enable-mbstring --with-freetype-dir --with-jpeg-dir --with-png-dir --with-zlib --with-libxml-dir=/usr --enable-xml --enable-sockets --enable-fpm --with-mcrypt --with-config-file-path=/etc --with-config-file-scan-dir=/etc/php.d --with-bz2
...............................
[root@www php-5.4.13]# make & make install
...................................
这种方式编译安装的时候,它会自动的在php的安装目录下给我们生成一个叫做fpm (php-fpm) 的二进制程序,还提供一个配置文件,这只是个默认的配置文件,要复制成其所需要的才行
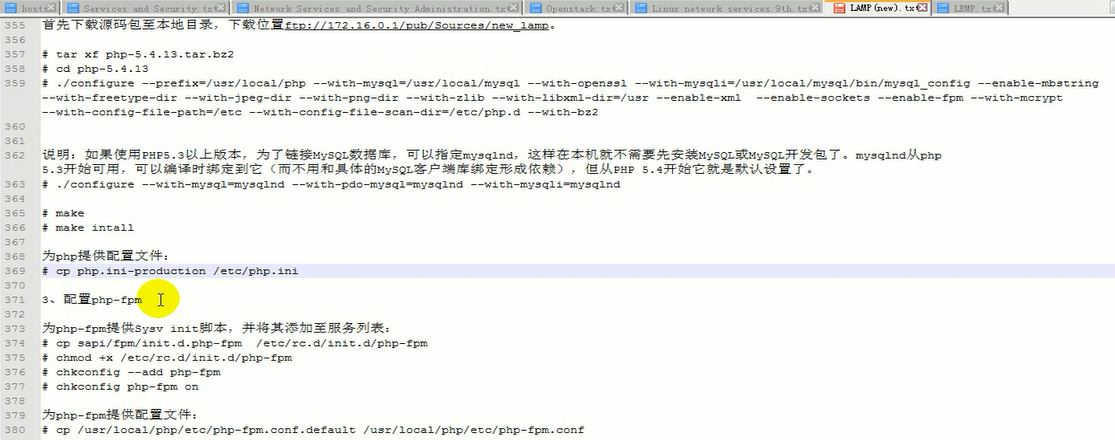
php-fpm的运行 依赖于 /usr/local/php/etc/php-fpm.conf 这个配置文件(它本不存在,需要/usr/local/php/etc/php-fpm.conf.default 复制过来) 我们需要编辑 /usr/local/php/etc/php-fpm.conf 内容


php-fpm 的 许多配置,初始几个进程,最小几个进程,最大几个进程,与 prefork 的配置机制是一样的
pm.max_children = 50 #最多有多少个子进程
pm.start_servers = 5 # 刚开始时有几个进程
pm.min_spare_servers = 2 # 最小有几个空闲进程
pm.max_spare_servers = 5 # 最大有几个空闲进程
pid = /usr/local/php/var/run/php-fpm.pid # 这一项可以不用改 (也可以直接定义在 /var/run/php-fpm.pid )
(我们的服务脚本 /etc/rc.d/init.d/php-fpm 默认是到/usr/local/php/var/run/php-fpm.pid 找pid 文件的
所以 这个pid = /usr/local/php/var/run/php-fpm.pid 路径改了,相应的要到 /etc/rc.d/init.d/php-fpm 改pid的路径
)
默认监听在 127.0.0.1:9000 端口上,
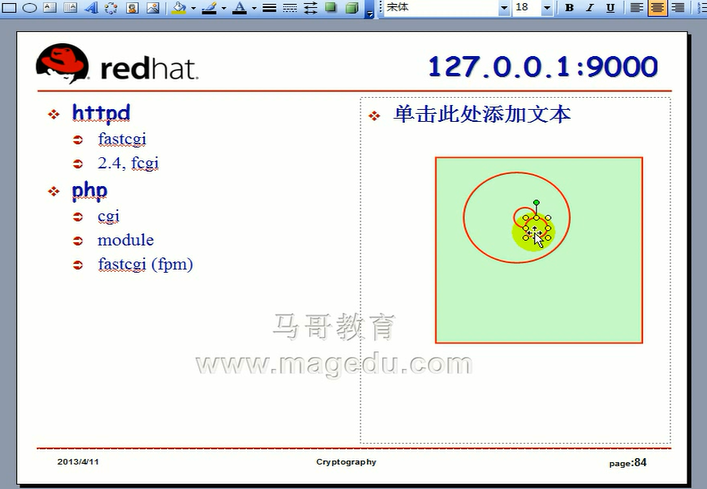
如果 php服务器与 web服务器不在同一台主机上 那么 就不是 127.0.0.1:9000 了 ,就是另外的ip:9000了
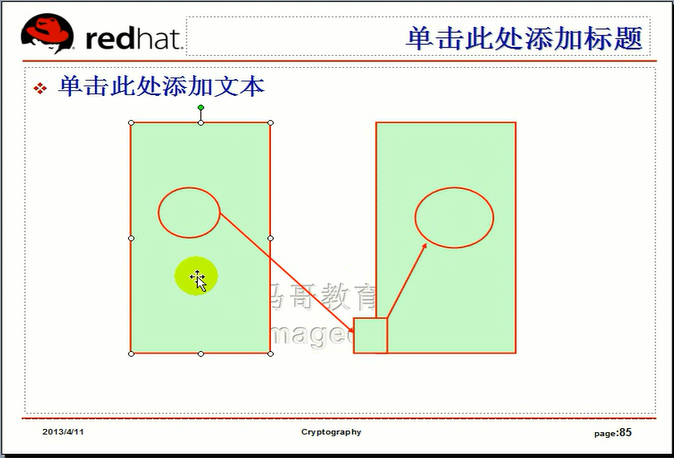
我们还要配置 我们的apache (httpd) 能够以fcgi的方式跟后端的 php-fpm 结合起来工作
要启用 httpd的两个模块, mod_proxy_fcgi.so mod_proxy.so 把下图的两个 LoadModule 前面的井号的注释去掉
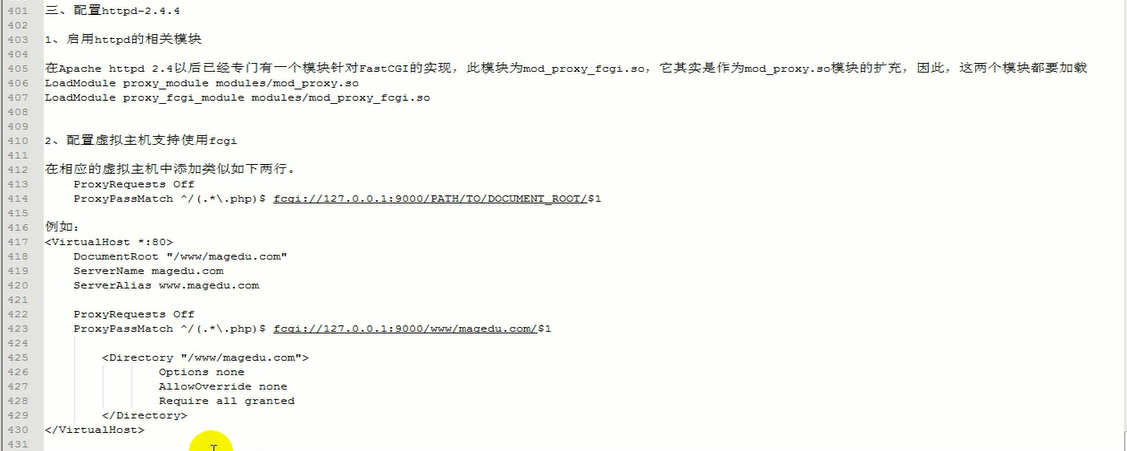

只需要在虚拟主机里面添加如下两行
ProxyRequests off #关闭apache的正向代理功能
ProxyPassMatch ^/(.*\.php)$ fcgi://127.0.0.1:9000/PATH/TO/DOCUMENT_ROOT/$1 #有点类似于 ProxyPass 指令 监听的套接字 127.0.0.1:9000 PATH/TO/DOCUMENT_ROOT/ 指的是(比如本来站点的位置是 /www/magedu.com 这里 PATH/TO/DOCUMENT_ROOT 就要改成 /www/magedu.com ) $1 指的是(类似于正则表达式中的\1) 引用小括号中的内容,这里就是 (.*\.php) 内容 有第二个括号,就使用 $2 来进行引用了
#ProxyPass URI HTTP (比如 ProxyPass /images/a.jpg http://172.16.100.2/images/a.jpg)
# 比如请求 http://172.16.100.1/images/a.jpg 真正请求的是 http://172.16.100.2/images/a.jpg 然后再返回过来,给客户端 这就叫反向代理
反向代理 ,客户端请求A服务器 ,到另一台服务器B上去取,取了之后,返回给服务器A,再返回给客户端
ProxyPass 只能转换URL 到另外一个路径
ProxyPassMatch 能支持正则表达式
[root@www php-5.4.13]# pwd
/root/php-5.4.13
[root@www php-5.4.13]#
[root@www php-5.4.13]# cp php.ini-production /etc/php.ini
[root@www php-5.4.13]# cp sapi/fpm/init.d.php-fpm /etc/init.d/php-fpm
[root@www php-5.4.13]# chmod +x /etc/init.d/php-fpm
[root@www php-5.4.13]#
[root@www php-5.4.13]# chkconfig --add php-fpm
[root@www php-5.4.13]#
[root@www php-5.4.13]# chkconfig --list php-fpm (默认就是 2345 ,不需要 # chkconfig php-fpm on 了 )
php-fpm 0:关闭 1:关闭 2:启用 3:启用 4:启用 5:启用 6:关闭
[root@www php-5.4.13]#
[root@www etc]# pwd
/usr/local/php/etc
[root@www etc]#
[root@www php-5.4.13]# cd /usr/local/php/etc/
[root@www etc]# ls
pear.conf php-fpm.conf.default
[root@www etc]#
[root@www etc]# cp php-fpm.conf.default php-fpm.conf
[root@www etc]#
[root@www etc]# vim php-fpm.conf
..........................................................
listen = 127.0.0.1:9000 #指定监听端口的
..........................................................
pm = dynamic #说明是动态创建进程
..........................................................
#pm.max_children = 5 #最多可以创建2个进程 最多允许多少个同时在线
pm.max_children =100
; The number of child processes created on startup.
; Note: Used only when pm is set to 'dynamic'
; Default Value: min_spare_servers + (max_spare_servers - min_spare_servers) / 2
;pm.start_servers = 2 #刚开始启动的时候是2个(进程?)
pm.start_servers = 5
; The desired minimum number of idle server processes.
; Note: Used only when pm is set to 'dynamic'
; Note: Mandatory when pm is set to 'dynamic'
;pm.min_spare_servers = 1 #最少有一个空闲的
pm.min_spare_servers = 5
; The desired maximum number of idle server processes.
; Note: Used only when pm is set to 'dynamic'
; Note: Mandatory when pm is set to 'dynamic'
pm.max_spare_servers = 3 #最多有8个空闲的
pm.max_spare_servers = 8
; The number of seconds after which an idle process will be killed.
; Note: Used only when pm is set to 'ondemand'
; Default Value: 10s
;pm.process_idle_timeout = 10s;
; The number of requests each child process should execute before respawning.
; This can be useful to work around memory leaks in 3rd party libraries. For
; endless request processing specify '0'. Equivalent to PHP_FCGI_MAX_REQUESTS.
; Default Value: 0
;pm.max_requests = 500 #同时允许连进来多少个请求
......................................................
[root@www etc]# service php-fpm restart
Gracefully shutting down php-fpm . done
Starting php-fpm done ( 没看到ok,这个不是遵循 redhat 风格的脚本 )
[root@www etc]# netstat -tnlp
Active Internet connections (only servers)
Proto Recv-Q Send-Q Local Address Foreign Address State PID/Program name
tcp 0 0 127.0.0.1:2208 0.0.0.0:* LISTEN 3815/./hpiod
tcp 0 0 127.0.0.1:9000 0.0.0.0:* LISTEN 4460/php-fpm
tcp 0 0 0.0.0.0:684 0.0.0.0:* LISTEN 3470/rpc.statd
tcp 0 0 0.0.0.0:111 0.0.0.0:* LISTEN 3420/portmap
tcp 0 0 0.0.0.0:22 0.0.0.0:* LISTEN 3846/sshd
tcp 0 0 127.0.0.1:631 0.0.0.0:* LISTEN 3860/cupsd
tcp 0 0 127.0.0.1:25 0.0.0.0:* LISTEN 4017/sendmail
tcp 0 0 127.0.0.1:2207 0.0.0.0:* LISTEN 3820/python
tcp 0 0 :::3306 :::* LISTEN 4084/mysqld
tcp 0 0 :::80 :::* LISTEN 4088/httpd
tcp 0 0 :::22 :::* LISTEN 3846/sshd
[root@www etc]#
[root@www xcache-3.0.1]# vim /etc/httpd/httpd.conf
.......................
#DocumentRoot "/usr/local/apache/htdocs" #注释掉中心主机
.......................
Include /etc/httpd/extra/httpd-vhosts.conf #启用虚拟主机
.........................
[root@www ~]# vim /etc/httpd/extra/httpd-vhosts.conf
.........................
<VirtualHost *:80>
ServerName www.a.org
# ServerAdmin webmaster@dummy-host.example.com
DocumentRoot "/www/a.org"
ProxyRequests Off #关闭正向代理
ProxyPassMatch ^/(.*\.php)$ fcgi://127.0.0.1:9000/www/a.org/$1 #代理匹配
<Directory "/www/a.org">
Options none
AllowOverride none
Require all granted
</Directory>
# ServerAlias www.dummy-host.example.com
ErrorLog "/var/log/httpd/a.org-error_log"
CustomLog "/var/log/httpd/a.org-access_log" combined
</VirtualHost>
.........................
#httpd -t

Invalide common 'ProxyRequests', perhaps misspelled or defined by a module not included in the server configuration
[root@www ~]# vim /etc/httpd/httpd.conf
....................
LoadModule proxy_module modules/mod_proxy.so #启用代理模块
#LoadModule proxy_connect_module modules/mod_proxy_connect.so
#LoadModule proxy_ftp_module modules/mod_proxy_ftp.so
#LoadModule proxy_http_module modules/mod_proxy_http.so
LoadModule proxy_fcgi_module modules/mod_proxy_fcgi.so #启用fastcgi代理模块
#LoadModule proxy_scgi_module modules/mod_proxy_scgi.so
...................
AddType application/x-compress .Z
AddType application/x-gzip .gz .tgz
AddType application/x-httpd-php .php #这是让支持php格式的页面 能够理解处理php结尾的页面文件
AddType application/x-httpd-php-source .phps # 这是让支持php源码格式的文件
..........................
<IfModule dir_module>
DirectoryIndex index.php index.html #让主页面同时也支持 index.php
</IfModule>
.........................
[root@www ~]# httpd -t
Syntax OK
[root@www ~]#
[root@www ~]# ls /www/a.org
Discuz_X2.5 phpMyAdmin-3.4.3.2-all-languages.zip
Discuz_X2.5_BETA_SC_GBK_XiaZaiBa.zip pma
index.html test3.html
index.php test.html
index.php-bak
[root@www ~]#
改配置文件后 重启服务器
[root@www ~]# service httpd restart
停止 httpd: [确定]
启动 httpd: [确定]
[root@www ~]#
访问 http://www.a.org 有问题
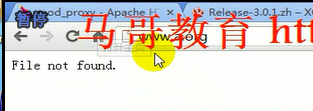
[root@www ~]# tail /var/log/httpd/a.org-error_log
[Sat May 11 06:14:26.058712 2019] [proxy_fcgi:error] [pid 13338:tid 3075722128] [client 192.168.1.251:5315] AH01071: Got error 'Primary script unknown\n'

[root@www ~]# cd /www/a.org/
[root@www a.org]# pwd
/www/a.org
[root@www a.org]# vim index.php
<?php
echo phpinfo();
?>
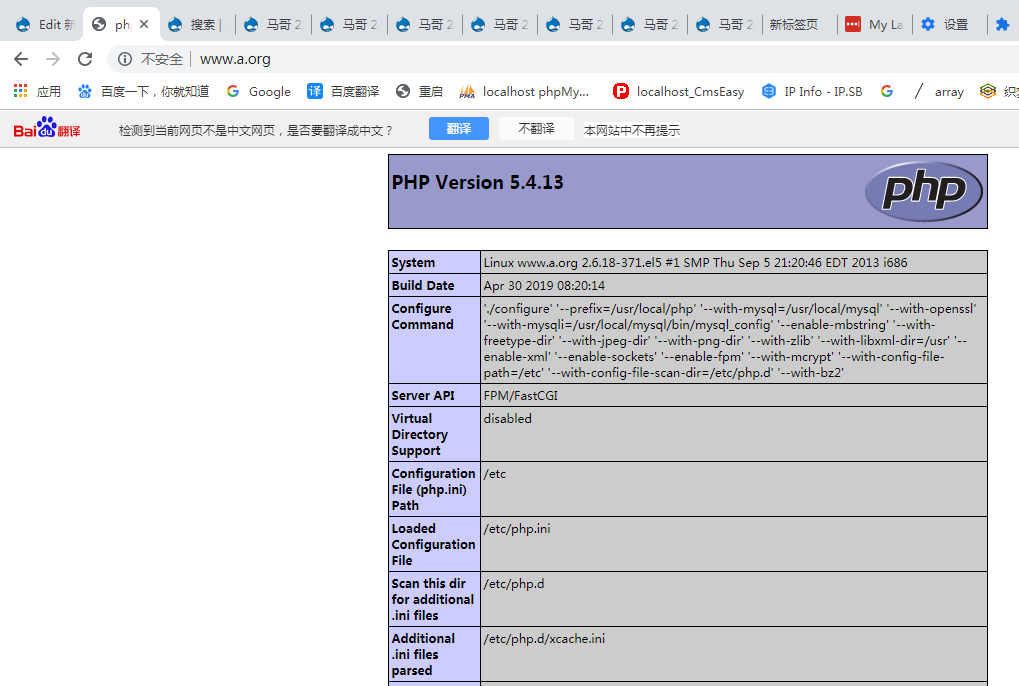
下面表示使用的是fast cgi ( 以前默认的是 sapi )
| Server API | FPM/FastCGI |
安装 Xcache
https://xcache.lighttpd.net/pub/Releases/3.0.1/
# wget https://xcache.lighttpd.net/pub/Releases/3.0.1/xcache-3.0.1.tar.bz2
[root@www ~]# tar xf xcache-3.0.1.tar.bz2
[root@www ~]# cd xcache-3.0.1
[root@www xcache-3.0.1]# /usr/local/php/bin/phpize
[root@www xcache-3.0.1]# ./configure --enable-xcache --with-php-config=/usr/local/php/bin/php-config
..............................
[root@www xcache-3.0.1]# make
..............................
[root@www xcache-3.0.1]# make install

# 这里 no-debug-non-zts-20100525 多了一个 non (支持 zts即线程安全的话,那么就 没有non)
[root@www xcache-3.0.1]# mkdir /etc/php.d
[root@www xcache-3.0.1]# cp xcache.ini /etc/php.d
[root@www xcache-3.0.1]# vim /etc/php.d/xcache.ini
;; this is an example, it won't work unless properly configured into php.ini
[xcache-common]
;; non-Windows example:
extension = xcache.so #路径应该不需要改吧,会自动找到对应的so文件(模块文件)
;; Windows example:
; extension = php_xcache.dll
[xcache.admin]
......................
[root@www xcache-3.0.1]# service php-fpm restart (安装 xcache ,配置后,不需要重启 httpd ( apache )了)
Gracefully shutting down php-fpm . done
Starting php-fpm done
[root@www xcache-3.0.1]#
http://www.a.org/ 可以看到 xcache ,并且它已经启用了
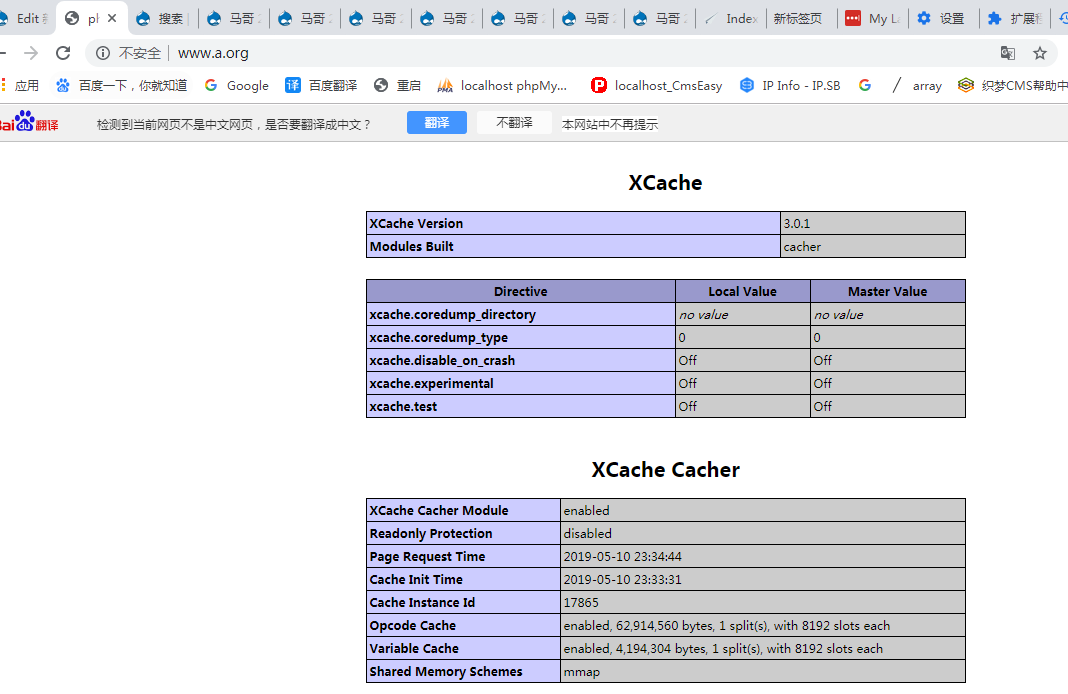
此时不能访问正常的html文件 ?将来url重写能够实现 (好像可以正常访问的)

[root@www a.org]# vim test.html
末行模式下
:.,$d #删除从当前行到结尾行
[root@www a.org]# vim test.html
html test
http://www.a.org/test.html 看来是可以访问 html的 因为我们只有.php结尾的才交给php-fpm服务器代理
所以只要不是 php结尾的,就直接由 apache服务器响应了
(刚才 可能是主页面必须要求是php的?马哥说主页面应该是支持html页面的?)
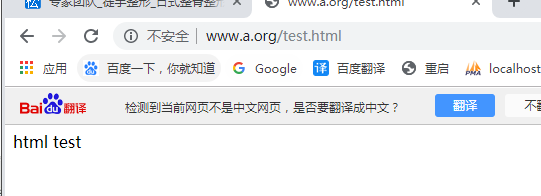
此时就把动态内容和静态内容分开来处理了,所有的静态内容由apache来处理,所有的动态内容由后端的php-fpm服务器来处理
[root@www ~]# unzip phpMyAdmin-3.5.1-all-languages.zip
[root@www ~]# cp -r phpMyAdmin-3.5.1-all-languages /www/a.org
[root@www ~]#
[root@www a.org]# ls
Discuz_X2.5 phpMyAdmin-3.4.3.2-all-languages.zip
Discuz_X2.5_BETA_SC_GBK_XiaZaiBa.zip phpMyAdmin-3.5.1-all-languages
index.html pma
index.php test3.html
index.php-bak test.html
[root@www a.org]#
[root@www a.org]# mv phpMyAdmin-3.5.1-all-languages/ pma
[root@www a.org]#
[root@www pma]# cp config.sample.inc.php config.inc.php
[root@www pma]# vim config.inc.php
......................
$cfg['blowfish_secret'] = 'aaabepsfe'; #给这个随机一下
......................
空密码不能登录
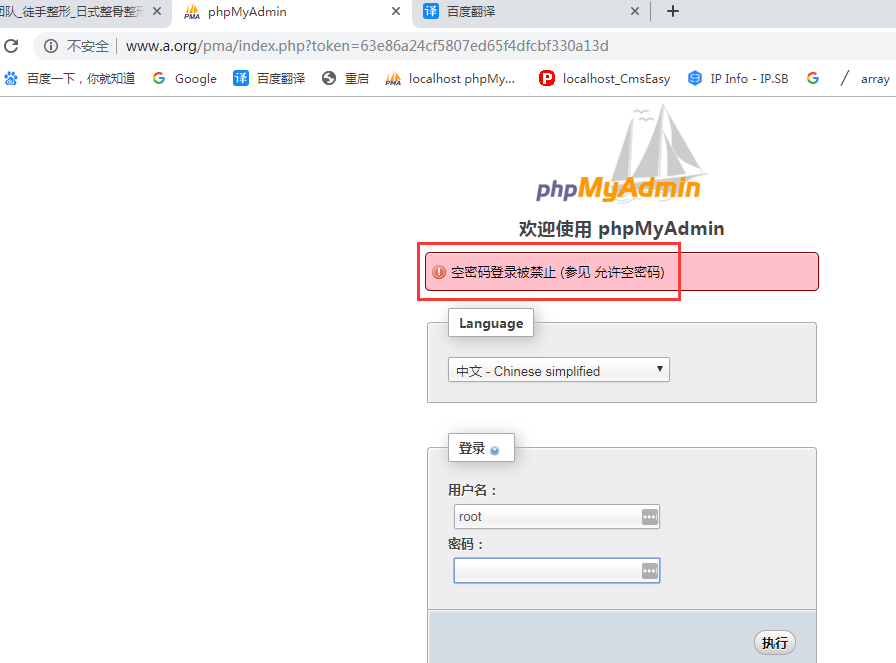
[root@www pma]# mysqladmin -uroot password 'abcde'
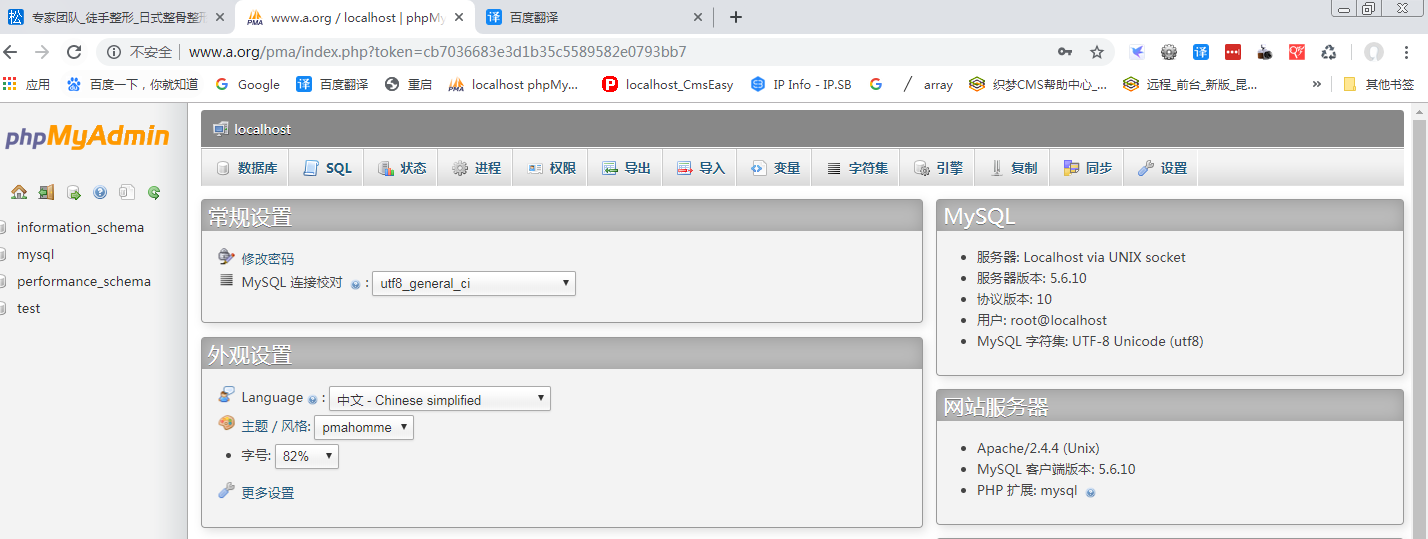
输入用户名密码可以登进来了
