You are here
Angular Material 7 教程 有大用 有大大用

1)确保安装了 nodejs
2)
# npm install @angular/cli --global
用它在本地创建一个 Angular 项目,
# cd Desktop/
# ng new ninghao-angular #会有提示询问是否带上路由功能,使用什么css(比如css sass等) 这个命令里面有 npm install功能,但是老是提示 npm install 安装不成功,我执行yarn 安装吧,使用yarn 见 /node-admin/18340 /node-admin/18338 /node-admin/18339 /node-admin/14818 (# ng new ninghao-angular --routing # 如果加上 --routing 表示直接同时带上routing功能了 )
# npm install -g yarn
# yarn config set registry https://registry.npm.taobao.org --global
# yarn config set disturl https://npm.taobao.org/dist --global
# yarn
# ng new ninghao-angular #再执行一下 ng new ninghao-angular 吧
# cd ninghao-angular
# ng serve (ng run start) #package.json中定义,是启动本地的类似于apache的服务
//下面三个语句是实现同样的功能
# yarn add @angular/material @angular/cdk @angular/animations #使用它吧,不用npm了
# npm install --save @angular/material @angular/cdk @angular/animations hammerjs #不用它了
# ng add @angular/material #相当于执行上面的两个命令吧,,,该 ng add 命令将安装 Angular Material、组件开发工具包(CDK)、Angular 动画,并询问一些问题,可以看看 https://material.angular.cn/guide/getting-started https://material.angular.cn/guide/schematics
# yarn add hammerjs #使用它吧,不用npm了,,hammerjs是支持手机的js的触屏功能
# npm install --save hammerjs #不用它了
在styles.css文件中添加以下条目以获得主题。@import "~@angular/material/prebuilt-themes/indigo-pink.css";
在index.htm文件中添加以下条目以获得 material 图标支持。<link href = "https://fonts.googleapis.com/icon?family=Material+Icons" rel = "stylesheet">
Angular Material 7 教程
Angular Material 7是为Angular开发者提供的用户界面组件库。Angular Material组件有助于构建有吸引力、一致且功能强大的网页和网络应用,同时遵循现代网络设计原则,如浏览器便携性、设备独立性和优雅降级。它有助于创建更快、更漂亮、更敏感的网站。它受到Google Material Design的启发。
观众
本教程是为那些渴望学习Angular Material的基础知识以及如何使用它来创建更快、更漂亮、更有响应性的网站的专业人士准备的。本教程解释了Angular Material的基本概念。
先决条件
在继续学习本教程之前,您应该对Typescript/JS脚本文本编辑器和程序执行等有一个基本的了解。因为我们将使用Angular开发基于网络的应用程序,所以如果您了解其他网络技术,如HTML、CSS和AJAX,将会很好。
来自 https://www.kaifaxueyuan.com/frontend/angular-material7/angular-material7-home.html
Angular Material 7 概述
Angular Material 7是为Angular开发人员提供的界面组件库。Angular Material的可重用用户界面组件有助于构建有吸引力、一致且功能强大的网页和网络应用程序,同时遵守现代网络设计原则,如浏览器可移植性、设备独立性和优雅降级。
Angular Material的几个显著特征如下:
内置响应设计。
占用空间最小的标准CSS。
包括新版本通用的用户界面控件,如按钮、复选框和文本字段,它们适用于遵循Material Design概念。
包括增强的和专门的功能,如cards, toolbar, speed dial, side nav, swipe等。
跨浏览器支持,并可用于创建可重用的网络组件。
响应式设计
Angular Material 内置的响应设计,因此使用Angular Material 创建的网站将根据设备大小重新设计自己。
Angular Material 类的创建方式使得网站可以适应任何屏幕尺寸。
使用Angular Material 创建的网站与PC、平板电脑和移动设备完全兼容。
可扩展
Angular Material从设计上来说是最小化和平滑的。
它的设计考虑到一个事实,即添加新的CSS规则比覆盖现有的CSS规则容易得多。
它支持shadows 和 bold colors。
颜色和色调在各种平台和设备上保持一致。
最重要的是,Angular Material可以免费使用。
来自 https://www.kaifaxueyuan.com/frontend/angular-material7/angular-material7-overview.html
Angular Material 7 安装
本教程将指导您如何准备一个开发环境来开始使用Angular框架和Angular Material。在本章中,我们将讨论角Angular 6所需的环境设置。要安装Angular 6,我们需要以下条件:
Nodejs
Npm
Angular CLI
任意的IDE工具
Nodejs必须大于8.11,npm必须大于5.6。
Nodejs
要检查系统上是否安装了nodejs,请在终端中键入node -v。这将帮助您查看系统上当前安装的nodejs版本。
C:\>node -v
v8.11.3
如果它不输出任何东西,请先在您的系统上安装nodejs。要安装nodejs,请转到nodejs的主页https://nodejs.org/en/download/,并根据您的操作系统安装软件包。
nodejs的主页将如下所示:
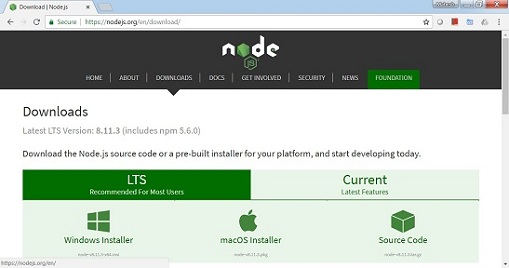
根据您的操作系统安装所需的软件包。一旦安装了nodejs,npm也将随之安装。要检查是否安装了npm,请在终端中键入npm -v。它应该显示npm的版本。
C:\>npm -v
5.6.0
Angular 6安装在angular CLI的帮助下非常简单。访问https://cli.angular.io/获取命令的参考。
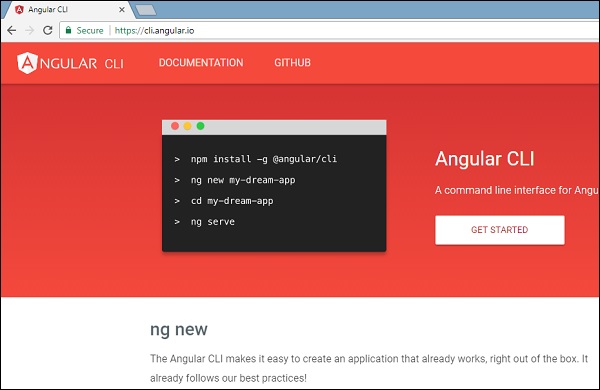
输入npm install -g @angular/cli安装Augular.
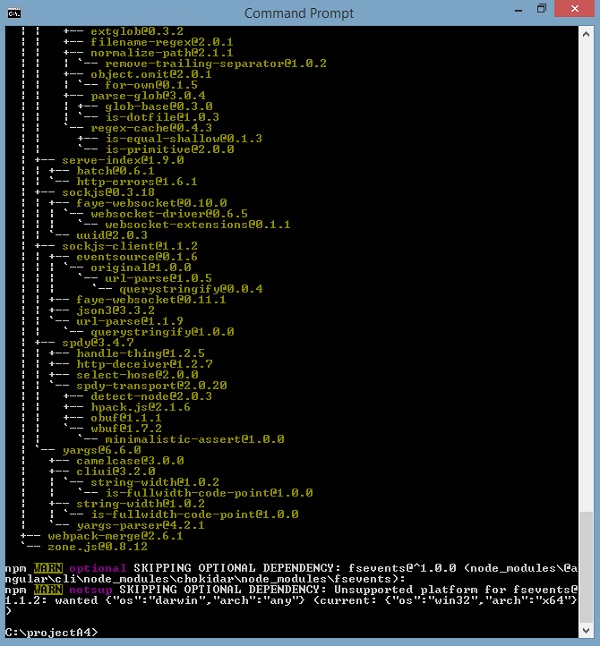
一旦安装了Angular CLI,您将在您的终端中获得上述安装。您可以使用自己选择的任何集成开发环境,如 WebStorm, Atom, Visual Studio Code等。
安装Angular Material
运行以下命令,在创建的项目中安装Angular Material模块及其相关组件。
materialApp>npm install --save @angular/material @angular/cdk @angular/animations hammerjs

+ @angular/animations@6.1.10
+ @angular/cdk@7.0.3
+ @angular/material@7.0.3
+ hammerjs@2.0.8
added 4 packages and updated 1 package in 39.699s
Add the following entry in app.module.ts file

import {BrowserAnimationsModule} from '@angular/platform-browser/animations';
import {FormsModule, ReactiveFormsModule} from '@angular/forms';

imports: [
    ...
   FormsModule,
   ReactiveFormsModule,
   BrowserAnimationsModule
],
在styles.css文件中添加以下条目以获得主题。
@import "~@angular/material/prebuilt-themes/indigo-pink.css";
在index.htm文件中添加以下条目以获得 material 图标支持。
<link href = "https://fonts.googleapis.com/icon?family=Material+Icons" rel = "stylesheet">
来自 https://www.kaifaxueyuan.com/frontend/angular-material7/angular-material7-environment-setup.html
Angular Material 7 自动完成(Auto-Complete)
<mat-autocomplete>是一个Angular Material 指令,被用作一个特殊的输入控件,带有一个内置的下拉列表来显示与自定义查询的所有可能匹配。一旦用户在输入区域中键入,该控件就充当实时意见箱。<mat-autocomplete>可用于提供本地或远程数据源的搜索结果。
在本章中,我们将展示使用Angular Material绘制自动完成控件所需的配置。
创建Angular应用
按照以下步骤更新我们在Angular 6 -项目设置章节中创建的Angular 应用程序
步骤 描述
1 创建一个名为materialApp的项目。
2 修改app.module.ts, app.component.ts, app.component.css和app.component.html。其余文件不变。
3 编译并运行应用程序来验证实现的逻辑的结果。
以下是修改后的app.module.ts的内容。
import { BrowserModule } from '@angular/platform-browser';
import { NgModule } from '@angular/core';
import { AppComponent } from './app.component';
import {BrowserAnimationsModule} from '@angular/platform-browser/animations';
import {MatAutocompleteModule,MatInputModule} from '@angular/material';
import {FormsModule, ReactiveFormsModule} from '@angular/forms';
@NgModule({
   declarations: [
      AppComponent
   ],
   imports: [
      BrowserModule,
      BrowserAnimationsModule,
      MatAutocompleteModule,
      MatInputModule,
      FormsModule,
      ReactiveFormsModule
   ],
   providers: [],
   bootstrap: [AppComponent]
})
export class AppModule { }
以下是修改后的app.component.html的内容。
<form class = "tp-form">
   <mat-form-field class = "tp-full-width">
      <input type = "text"
         placeholder = "US State"
         aria-label = "Number"
         matInput
         [formControl] = "myControl"
         [matAutocomplete] = "auto">
      <mat-autocomplete #auto = "matAutocomplete">
         <mat-option *ngFor = "let state of states" [value] = "state.value">
            {{state.display}}
         </mat-option>
      </mat-autocomplete>
   </mat-form-field>
</form>
以下是修改后的 app.component.css的内容
.tp-form {
   min-width: 150px;
   max-width: 500px;
   width: 100%;
}
.tp-full-width {
   width: 100%;
}
以下是修改后的app.component.ts的内容。
import { Component } from '@angular/core';
import { FormControl } from "@angular/forms";
@Component({
   selector: 'app-root',
   templateUrl: './app.component.html',
   styleUrls: ['./app.component.css']
})
export class AppComponent {
   title = 'materialApp';
   myControl = new FormControl();
   states;
   constructor(){
      this.loadStates();
   }
   //build list of states as map of key-value pairs
   loadStates() {
      var allStates = 'Alabama, Alaska, Arizona, Arkansas, California, Colorado, Connecticut, Delaware,\
         Florida, Georgia, Hawaii, Idaho, Illinois, Indiana, Iowa, Kansas, Kentucky, Louisiana,\
         Maine, Maryland, Massachusetts, Michigan, Minnesota, Mississippi, Missouri, Montana,\
         Nebraska, Nevada, New Hampshire, New Jersey, New Mexico, New York, North Carolina,\
         North Dakota, Ohio, Oklahoma, Oregon, Pennsylvania, Rhode Island, South Carolina,\
         South Dakota, Tennessee, Texas, Utah, Vermont, Virginia, Washington, West Virginia,\
         Wisconsin, Wyoming';
      this.states =  allStates.split(/, +/g).map( function (state) {
         return {
            value: state.toUpperCase(),
            display: state
         };
      });
   }
}
结果
验证结果
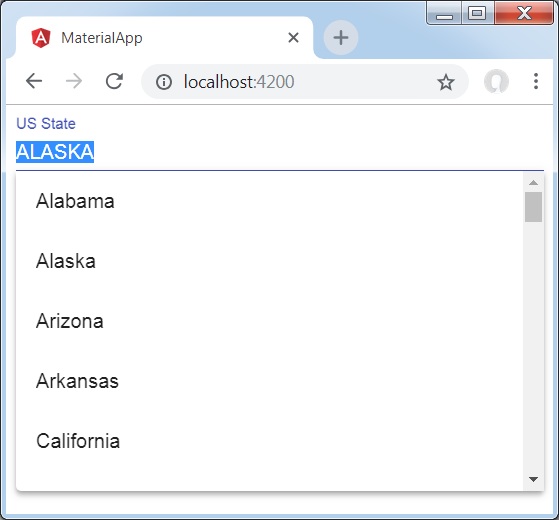
细节
首先,我们创建了一个输入框,并使用[matAutocomplete]属性绑定了一个名为auto的自动完成功能。
然后,我们使用mat-autocomplete标签创建了一个名为autocomplete的自动完成控件。
接下来,使用*ng For循环创建选项。
来自 https://www.kaifaxueyuan.com/frontend/angular-material7/angular-material7-autocomplete.html
Angular Material 7 复选框(CheckBox)
<mat-checkbox>是一个具有Material设计样式和动画功能的增强复选框的Angular指令。
在本章中,我们将展示使用Angular Material绘制复选框控件所需的配置。
创建Angular应用
按照以下步骤更新我们创建的Angular应用程序
1.创建一个名为materialApp的项目。
2.修改app.module.ts, app.component.ts, app.component.css和app.component.html,其余文件不变。
3.编译并运行应用程序来验证实现的逻辑的结果。
以下是修改后的app.module.ts.的内容。
import { BrowserModule } from '@angular/platform-browser';
import { NgModule } from '@angular/core';
import { AppComponent } from './app.component';
import {BrowserAnimationsModule} from '@angular/platform-browser/animations';
import {MatCheckboxModule} from '@angular/material';
import {FormsModule, ReactiveFormsModule} from '@angular/forms';
@NgModule({
   declarations: [
      AppComponent
   ],
   imports: [
      BrowserModule,
      BrowserAnimationsModule,
      MatCheckboxModule,
      FormsModule,
      ReactiveFormsModule
   ],
   providers: [],
   bootstrap: [AppComponent]
})
export class AppModule { }
下面是修改后的app.component.html的内容。
<h2 class = "tp-h2">Checkbox configuration</h2>
<section class = "tp-section">
   <mat-checkbox class = "tp-margin" [(ngModel)] = "checked">Checked</mat-checkbox>
   <mat-checkbox class = "tp-margin" [(ngModel)] = "indeterminate">Indeterminate</mat-checkbox>
</section>
<section class = "tp-section">
   <mat-checkbox class = "tp-margin" [(ngModel)] = "disabled">Disabled</mat-checkbox>
</section>
<h2 class = "tp-h2">Result</h2>
<section class = "tp-section">
   <mat-checkbox
      class = "tp-margin"
      [(ngModel)] = "checked"
      [(indeterminate)] = "indeterminate"
      [labelPosition] = "labelPosition"
      [disabled] = "disabled">
      Sample Checkbox
   </mat-checkbox>
</section>
下面是app.component.css文件的内容.
.tp-h2 {
   margin: 10px;
}
.tp-section {
   display: flex;
   align-content: center;
   align-items: center;
   height: 60px;
}
.tp-margin {
   margin: 0 10px;
}
下面是app.component.ts的文件内容。
import { Component } from '@angular/core';
import { FormControl } from "@angular/forms";
@Component({
   selector: 'app-root',
   templateUrl: './app.component.html',
   styleUrls: ['./app.component.css']
})
export class AppComponent {
   title = 'materialApp';
   checked = false;
   indeterminate = false;
   labelPosition = 'after';
   disabled = false;
}
结果
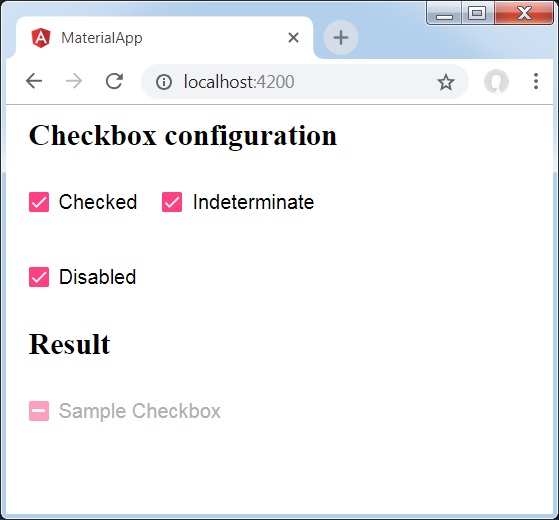
细节
首先,我们使用mat-checkbox创建了三个复选框,并使用带有变量的ngModel绑定它们。
然后,我们创建了另一个复选框,并展示了它与.ts文件中的变量绑定各种属性。
来自 https://www.kaifaxueyuan.com/frontend/angular-material7/angular-material7-checkbox.html
Angular Material 7 日期选择器(DatePicker)
<mat-datepicker>用于创建日期选择器控件,使用该控件可以从日历中选择日期,也可以使用输入框直接输入日期。
在本章中,我们将展示使用Angular Material绘制日期选择器控件所需的配置。
创建Angular应用
按照以下步骤创建应用程序
1.创建一个名为materialApp的项目
2.如下所述,修改app.module.ts, app.component.ts, app.component.css and app.component.html。保持其余文件不变。
3.编译并运行应用程序来验证实现逻辑的结果。
以下是修改后的app.module.ts的内容。
import { BrowserModule } from '@angular/platform-browser';
import { NgModule } from '@angular/core';
import { AppComponent } from './app.component';
import {BrowserAnimationsModule} from '@angular/platform-browser/animations';
import {MatDatepickerModule, MatInputModule,MatNativeDateModule} from '@angular/material';
import {FormsModule, ReactiveFormsModule} from '@angular/forms';
@NgModule({
   declarations: [
      AppComponent
   ],
   imports: [
      BrowserModule,
      BrowserAnimationsModule,
      MatDatepickerModule, MatInputModule,MatNativeDateModule,
      FormsModule,
      ReactiveFormsModule
   ],
   providers: [],
   bootstrap: [AppComponent]
})
export class AppModule { }
以下是修改后的app.component.html
<mat-form-field>
   <input matInput [matDatepicker] = "picker" placeholder = "Choose a date">
   <mat-datepicker-toggle matSuffix [for] = "picker"></mat-datepicker-toggle>
   <mat-datepicker #picker></mat-datepicker>
</mat-form-field>
结果
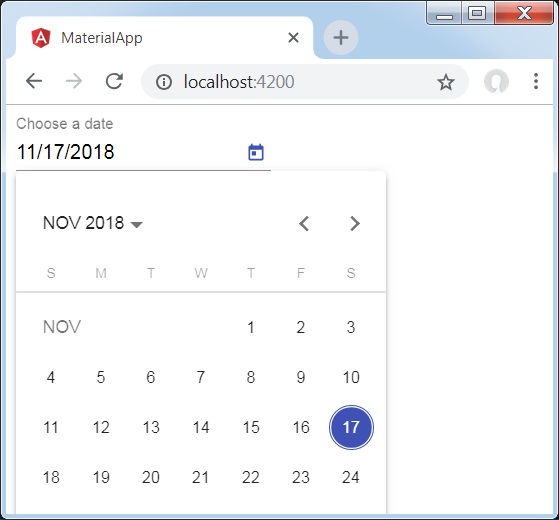
细节
首先,我们创建了一个输入框,并使用[matDatepicker]属性绑定了一个名为picker的日期选择器。
然后,我们使用mat-datepicker标记创建了一个名为picker的日期选择器。
来自 https://www.kaifaxueyuan.com/frontend/angular-material7/angular-material7-datepicker.html
Angular Material 7 表单
<mat-form-field>用于创建Angular组件的封装,例如应用下划线、粗体、提示等文本样式。
下面是<mat-form-field>的用法:
<input matNativeControl>
<textarea matNativeControl>
<select matNativeControl>
<mat-select>
<mat-chip-list>
在本章中,我们将展示在Angular Material中使用mat-form-field所需的配置。
创建Angular应用
按照以下步骤创建的Angular Material应用程序
1.创建一个名为materialApp的项目。
2.修改app.module.ts, app.component.ts, app.component.css and app.component.htmls。保持其余文件不变。
3.编译并运行程序。
下面是修改后的app.module.ts的内容.
import { BrowserModule } from '@angular/platform-browser';
import { NgModule } from '@angular/core';
import { AppComponent } from './app.component';
import {BrowserAnimationsModule} from '@angular/platform-browser/animations';
import {MatInputModule,MatOptionModule, MatSelectModule, MatIconModule} from '@angular/material'
import {FormsModule, ReactiveFormsModule} from '@angular/forms';
@NgModule({
   declarations: [
      AppComponent
   ],
   imports: [
      BrowserModule,
      BrowserAnimationsModule,
      MatInputModule,MatOptionModule, MatSelectModule, MatIconModule,
      FormsModule,
      ReactiveFormsModule
   ],
   providers: [],
   bootstrap: [AppComponent]
})
export class AppModule { }
下面是修改后的app.component.css.
.tp-container {
   display: flex;
   flex-direction: column;
}
.tp-container > * {
   width: 100%;
}
下面是修改后的app.component.html.
<div class = "tp-container">
   <mat-form-field appearance = "standard">
      <input matInput placeholder = "Input">
      <mat-icon matSuffix>sentiment_very_satisfied</mat-icon>
      <mat-hint>Sample Hint</mat-hint>
   </mat-form-field>
   <mat-form-field appearance = "fill">
      <textarea matInput placeholder = "Textarea"></textarea>
   </mat-form-field>
   <mat-form-field appearance = "outline">
      <mat-select placeholder = "Select">
         <mat-option value = "A">A</mat-option>
         <mat-option value = "B">B</mat-option>
         <mat-option value = "C">C</mat-option>
      </mat-select>
   </mat-form-field>
</div>
结果
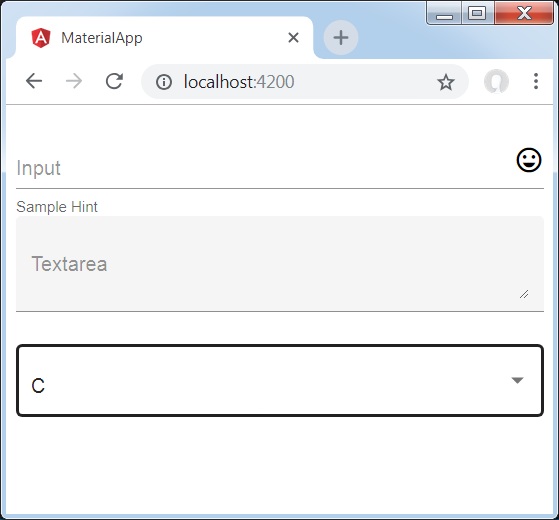
细节
首先,我们使用mat-form-field包装器创建了一个表单字段。我们已经使用外观属性更改了表单域的外观。
然后,将表单控件添加到表单域中。
来自 https://www.kaifaxueyuan.com/frontend/angular-material7/angular-material7-form-field.html
Angular Material 7 输入
<mat-input>用于<input>和<textarea>元素在<mat-form-field> 下工作。
<mat-input>中可以使用以下输入类型。
color
date
datetime-local
email
month
number
password
search
tel
text
time
url
week
在本章我们将展示在Angular Material中使用mat-input 控件所需的配置。
创建 Angular 应用
按照以下步骤创建应用程序
1.创建一个名为materialApp的项目。
2.修改app.module.ts, app.component.ts, app.component.css and app.component.htmls。保持其余文件不变。
3.编译并运行程序。
下面是修改后的app.module.ts的内容.
import { BrowserModule } from '@angular/platform-browser';
import { NgModule } from '@angular/core';
import { AppComponent } from './app.component';
import {BrowserAnimationsModule} from '@angular/platform-browser/animations';
import {MatInputModule} from '@angular/material'
import {FormsModule, ReactiveFormsModule} from '@angular/forms';
@NgModule({
   declarations: [
      AppComponent
   ],
   imports: [
      BrowserModule,
      BrowserAnimationsModule,
      MatInputModule,
      FormsModule,
      ReactiveFormsModule
   ],
   providers: [],
   bootstrap: [AppComponent]
})
export class AppModule { }
下面是app.component.css的内容:
.tp-form {
   min-width: 150px;
   max-width: 500px;
   width: 100%;
}
.tp-full-width {
   width: 100%;
}
下面是app.component.ts的内容:
import { Component } from '@angular/core';
import { FormControl } from "@angular/forms";
import {Validators} from '@angular/forms';
@Component({
   selector: 'app-root',
   templateUrl: './app.component.html',
   styleUrls: ['./app.component.css']
})
export class AppComponent {
   title = 'materialApp';
   emailFormControl = new FormControl('', [
      Validators.required,
      Validators.email,
  ]);
}
下面是app.component.html的内容:
<form class = "tp-form">
   <mat-form-field class = "tp-full-width">
      <input matInput placeholder = "Favorite Food" value = "Pasta">
   </mat-form-field>
   <mat-form-field class = "tp-full-width">
      <textarea matInput placeholder = "Enter your comment"></textarea>
   </mat-form-field>
   <mat-form-field class = "tp-full-width">
      <input matInput placeholder = "Email" [formControl] = "emailFormControl">
      <mat-error *ngIf = "emailFormControl.hasError('email')
         && !emailFormControl.hasError('required')">
         Please enter a valid email address
      </mat-error>
      <mat-error *ngIf = "emailFormControl.hasError('required')">
         Email is <strong>required</strong>
      </mat-error>
   </mat-form-field>
</form>
结果
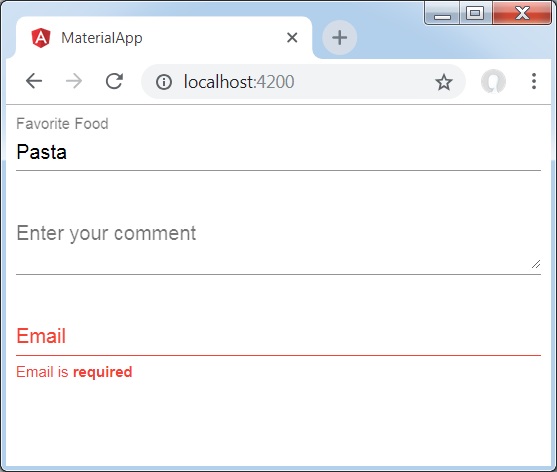
细节
首先,我们使用mat-form-field包装器创建了一个表单字段。
然后,使用输入和匹配输入属性将表单控件添加到表单字段中。
来自 https://www.kaifaxueyuan.com/frontend/angular-material7/angular-material7-input.html
Angular Material 7 单选按钮
<mat-radiobutton>用于<input type="radio">增强基于Material的样式.
在本章中,我们将展示使用Angular Material绘制单选按钮控件所需的配置。
创建 Angular 应用
按照以下步骤创建应用程序
1.创建一个名为materialApp的项目。
2.修改app.module.ts, app.component.ts, app.component.css and app.component.htmls。保持其余文件不变。
3.编译并运行程序。
下面是修改后的app.module.ts文件内容.
import { BrowserModule } from '@angular/platform-browser';
import { NgModule } from '@angular/core';
import { AppComponent } from './app.component';
import {BrowserAnimationsModule} from '@angular/platform-browser/animations';
import {MatRadioModule} from '@angular/material'
import {FormsModule, ReactiveFormsModule} from '@angular/forms';
@NgModule({
   declarations: [
      AppComponent
   ],
   imports: [
      BrowserModule,
      BrowserAnimationsModule,
      MatRadioModule,
      FormsModule,
      ReactiveFormsModule
   ],
   providers: [],
   bootstrap: [AppComponent]
})
export class AppModule { }
下面是修改后的app.component.css的内容.
.tp-radio-group {
   display: inline-flex;
   flex-direction: column;
}
.tp-radio-button {
   margin: 5px;
}
.tp-selected-value {
   margin: 15px 0;
}
下面是修改后的app.component.ts的内容.
import { Component } from '@angular/core';
import { FormControl } from "@angular/forms";
import { Validators } from "@angular/forms";
@Component({
   selector: 'app-root',
   templateUrl: './app.component.html',
   styleUrls: ['./app.component.css']
})
export class AppComponent {
   title = 'materialApp';
   favoriteSeason: string;
   seasons: string[] = ['Winter', 'Spring', 'Summer', 'Autumn'];
}
下面是修改后的file app.component.html内容.
<mat-radio-group class = "tp-radio-group" [(ngModel)] = "favoriteSeason">
   <mat-radio-button class = "tp-radio-button"
      *ngFor = "let season of seasons" [value] = "season">
      {{season}}
   </mat-radio-button>
</mat-radio-group>
<div class = "tp-selected-value">
   Selected Season: {{favoriteSeason}}
</div>
结果
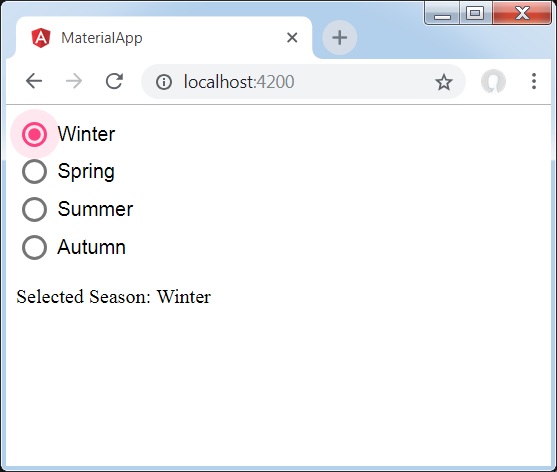
细节
首先,我们使用与ngModel绑定的mat-radio-group创建了一个单选按钮组。
然后,我们使用mat-radio-button添加了单选按钮。
来自 https://www.kaifaxueyuan.com/frontend/angular-material7/angular-material7-radio-button.html
Angular Material 7 下拉菜单
<mat-select>用于创建<select>标签,以增强基于Angular Material设计的样式。
在本章中,我们将展示使用Angular Material绘制select控件所需的配置。
创建 Angular 应用
按照以下步骤创建应用程序
1.创建一个名为materialApp的项目。
2.修改app.module.ts, app.component.ts, app.component.css and app.component.htmls。保持其余文件不变。
3.编译并运行程序。
下面是修改后的app.module.ts文件内容。
import { BrowserModule } from '@angular/platform-browser';
import { NgModule } from '@angular/core';
import { AppComponent } from './app.component';
import {BrowserAnimationsModule} from '@angular/platform-browser/animations';
import {MatSelectModule} from '@angular/material'
import {FormsModule, ReactiveFormsModule} from '@angular/forms';
@NgModule({
   declarations: [
      AppComponent
   ],
   imports: [
      BrowserModule,
      BrowserAnimationsModule,
      MatSelectModule,
      FormsModule,
      ReactiveFormsModule
   ],
   providers: [],
   bootstrap: [AppComponent]
})
export class AppModule { }
下面是修改后的app.component.ts文件内容.
import { Component } from '@angular/core';
import { FormControl } from "@angular/forms";
export interface Food {
  value: string;
  display: string;
}
@Component({
   selector: 'app-root',
   templateUrl: './app.component.html',
   styleUrls: ['./app.component.css']
})
export class AppComponent {
   title = 'materialApp';
   selectedValue: string;
   foods: Food[] = [
      {value: 'steak', display: 'Steak'},
      {value: 'pizza', display: 'Pizza'},
      {value: 'tacos', display: 'Tacos'}
   ];
}
下面是修改后的app.component.html文件内容.
<form>
   <h4>mat-select</h4>
   <mat-form-field>
      <mat-select placeholder = "Favorite food"
         [(ngModel)] = "selectedValue" name = "food">
         <mat-option *ngFor = "let food of foods"
            [value] = "food.value">
            {{food.display}}
         </mat-option>
      </mat-select>
   </mat-form-field>
   <p> Selected food: {{selectedValue}} </p>
</form>
结果
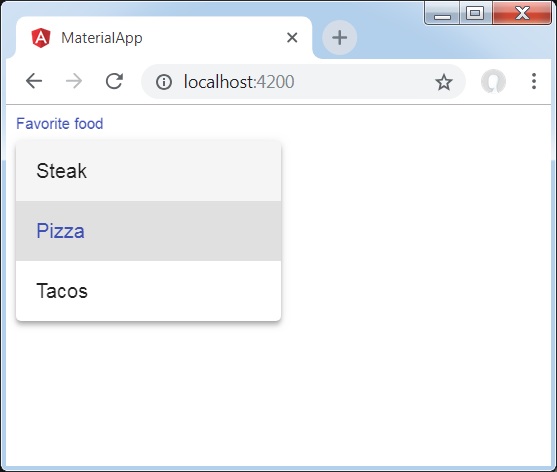
细节
首先,我们使用与ngModel绑定的mat-select创建了一个选择。
然后,我们使用mat-option添加了选项。
来自 https://www.kaifaxueyuan.com/frontend/angular-material7/angular-material7-select.html
Angular Material 7滑动
<mat-slider>用作增强的范围选择器,具有Angular Material样式和动画功能。
在本章中,我们将展示使用Angular Material绘制滑块控件所需的配置
创建 Angular 应用
按照以下步骤创建应用程序
1.创建一个名为materialApp的项目。
2.修改app.module.ts, app.component.ts, app.component.css and app.component.htmls。保持其余文件不变。
3.编译并运行程序。
下面是修改后的app.module.ts文件内容。
import { BrowserModule } from '@angular/platform-browser';
import { NgModule } from '@angular/core';
import { AppComponent } from './app.component';
import {BrowserAnimationsModule} from '@angular/platform-browser/animations';
import {MatSliderModule, MatCheckboxModule} from '@angular/material'
import {FormsModule, ReactiveFormsModule} from '@angular/forms';
@NgModule({
   declarations: [
      AppComponent
   ],
   imports: [
      BrowserModule,
      BrowserAnimationsModule,
      MatSliderModule, MatCheckboxModule,
      FormsModule,
      ReactiveFormsModule
   ],
   providers: [],
   bootstrap: [AppComponent]
})
export class AppModule { }
下面是修改后的app.component.html的内容.
<mat-slider
   class = "tp-margin"
   [disabled] = "disabled"
   [invert] = "invert"
   [thumbLabel] = "thumbLabel"
   [(ngModel)] = "value"
   [vertical] = "vertical">
</mat-slider>
<section class = "tp-section">
   <mat-checkbox class = "tp-margin" [(ngModel)] = "thumbLabel">Show thumb label</mat-checkbox>
</section>
<section class = "tp-section">
   <mat-checkbox class = "tp-margin" [(ngModel)] = "vertical">Vertical</mat-checkbox>
   <mat-checkbox class = "tp-margin" [(ngModel)] = "invert">Inverted</mat-checkbox>
</section>
<section class = "tp-section">
   <mat-checkbox class = "tp-margin" [(ngModel)] = "disabled">Disabled</mat-checkbox>
</section>
下面是app.component.css的内容.
.tp-section {
   display: flex;
   align-content: center;
   align-items: center;
   height: 60px;
}
.tp-margin {
   margin: 30px;
}

.mat-slider-horizontal {
   width: 300px;
}
.mat-slider-vertical {
   height: 300px;
}
下面是修改后的app.component.ts的内容.
import { Component } from '@angular/core';
@Component({
   selector: 'app-root',
   templateUrl: './app.component.html',
   styleUrls: ['./app.component.css']
})
export class AppComponent {
   title = 'materialApp';
   disabled = false;
   invert = false;
   thumbLabel = false;
   value = 0;
   vertical = false;
}
结果
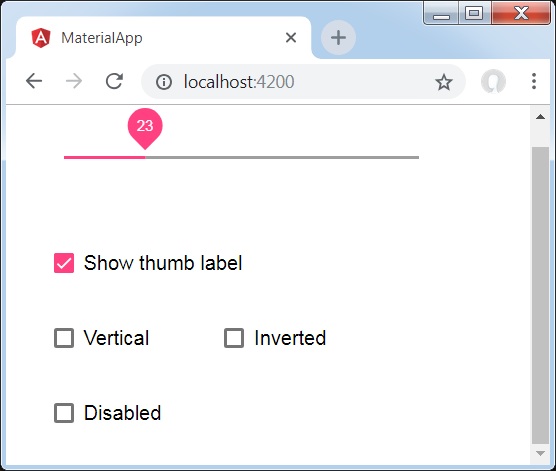
细节
首先,我们使用mat-checkbox创建了四个复选框,并使用带有变量的ngModel绑定它们。这些属性将用于自定义滑块。
然后,我们创建了滑块,并展示了它与.ts文件中的变量绑定的各种属性。
来自 https://www.kaifaxueyuan.com/frontend/angular-material7/angular-material7-slider.html
Angular Material 7 滑动开关
<mat-slide-toggle>用作创建具有Angular Material 样式和动画功能的滑动开关。
在本章中,我们将展示使用具有Angular Material 样式和动画功能绘制滑动开关控件所需的配置。
创建 Angular 应用
按照以下步骤创建应用程序
1.创建一个名为materialApp的项目。
2.修改app.module.ts, app.component.ts, app.component.css and app.component.htmls。保持其余文件不变。
3.编译并运行程序。
下面是修改后的app.module.ts文件内容。
import { BrowserModule } from '@angular/platform-browser';
import { NgModule } from '@angular/core';
import { AppComponent } from './app.component';
import {BrowserAnimationsModule} from '@angular/platform-browser/animations';
import {MatSlideToggleModule, MatCheckboxModule} from '@angular/material'
@NgModule({
   declarations: [
      AppComponent
   ],
   imports: [
      BrowserModule,
      BrowserAnimationsModule,
      MatSlideToggleModule, MatCheckboxModule,
      FormsModule,
      ReactiveFormsModule
   ],
   providers: [],
   bootstrap: [AppComponent]
})
export class AppModule { }
下面是修改后的app.component.html的内容.
<mat-slide-toggle
   class = "tp-margin"
   [checked] = "checked"
   [disabled] = "disabled">
   Slide!
</mat-slide-toggle>
<section class = "tp-section">
   <mat-checkbox class = "tp-margin" [(ngModel)] = "checked">Checked</mat-checkbox>
   <mat-checkbox class = "tp-margin" [(ngModel)] = "disabled">Disabled</mat-checkbox>
</section>
下面是app.component.css的内容。
.tp-section {
   display: flex;
   align-content: center;
   align-items: center;
   height: 60px;
}
.tp-margin {
   margin: 30px;
}
下面是修改后的app.component.ts的内容.
import { Component } from '@angular/core';
@Component({
   selector: 'app-root',
   templateUrl: './app.component.html',
   styleUrls: ['./app.component.css']
})
export class AppComponent {
   title = 'materialApp';
   disabled = false;
   checked = false;
}
结果
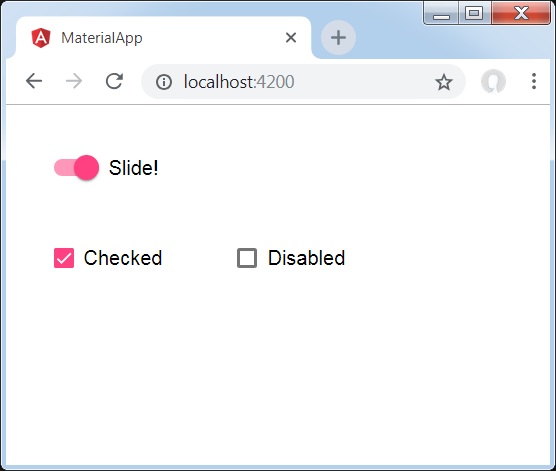
细节
首先,我们使用mat-checkbox创建了两个复选框,并使用带有变量的ngModel绑定它们。这些属性将用于处理滑动开关。
然后,我们创建了滑动开关,并展示了它与ts文件中的变量绑定的各种属性。
来自 https://www.kaifaxueyuan.com/frontend/angular-material7/angular-material7-slider-toggle.html
Angular Material 7 菜单
<mat-menu>用于创建一个具有Angular Material样式和动画功能的菜单控件。
在本章中,我们将展示使用Angular Material绘制菜单控件所需的配置。
创建 Angular 应用
按照以下步骤创建应用程序
1.创建一个名为materialApp的项目。
2.修改app.module.ts, app.component.ts, app.component.css and app.component.htmls。保持其余文件不变。
3.编译并运行程序。
下面是修改后的app.module.ts文件内容。
import { BrowserModule } from '@angular/platform-browser';
import { NgModule } from '@angular/core';
import { AppComponent } from './app.component';
import {BrowserAnimationsModule} from '@angular/platform-browser/animations';
import {MatMenuModule, MatButtonModule} from '@angular/material'
import {FormsModule, ReactiveFormsModule} from '@angular/forms';
@NgModule({
   declarations: [
      AppComponent
   ],
   imports: [
      BrowserModule,
      BrowserAnimationsModule,
      MatMenuModule, MatButtonModule,
      FormsModule,
      ReactiveFormsModule
   ],
   providers: [],
   bootstrap: [AppComponent]
})
export class AppModule { }
下面是修改后的app.component.html的内容。
<button mat-button [matMenuTriggerFor] = "menu">File</button>
<mat-menu #menu = "matMenu">
   <button mat-menu-item>New</button>
   <button mat-menu-item>Open</button>
   <button mat-menu-item [matMenuTriggerFor] = "recent">Recent</button>
</mat-menu>
<mat-menu #recent = "matMenu">
   <button mat-menu-item>File 1</button>
   <button mat-menu-item>File 2</button>
</mat-menu>
结果
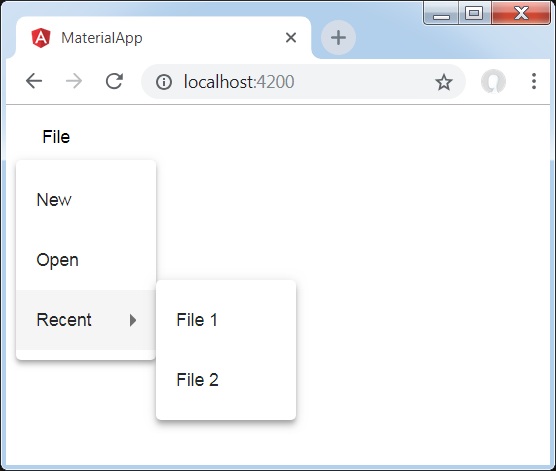
细节
首先,我们使用mat-menu创建了两个菜单,并使用matMenuTriggerFor将它们绑定到按钮。
matMenuTriggerFor被传递菜单标识符以附加菜单。
来自 https://www.kaifaxueyuan.com/frontend/angular-material7/angular-material7-menu.html
Angular Material 7 侧边导航
<mat-sidenav>用于创建具有Angular Material样式和动画功能的侧边导航栏和主内容面板。
<mat-sidenav-container>-代表主容器。
<mat-sidenav-content>-代表内容面板。
<mat-sidenav>-代表侧边导航。
在本章中,我们将展示使用Angular Material绘制侧边导航控件所需的配置。
创建 Angular 应用
按照以下步骤创建应用程序
1.创建一个名为materialApp的项目。
2.修改app.module.ts, app.component.ts, app.component.css and app.component.htmls。保持其余文件不变。
3.编译并运行程序。
下面是修改后的app.module.ts文件内容。
import { BrowserModule } from '@angular/platform-browser';
import { NgModule } from '@angular/core';
import { AppComponent } from './app.component';
import {BrowserAnimationsModule} from '@angular/platform-browser/animations';
import {MatSidenavModule} from '@angular/material'
import {FormsModule, ReactiveFormsModule} from '@angular/forms';
@NgModule({
   declarations: [
      AppComponent
   ],
   imports: [
      BrowserModule,
      BrowserAnimationsModule,
      MatSidenavModule,
      FormsModule,
      ReactiveFormsModule
   ],
   providers: [],
   bootstrap: [AppComponent]
})
export class AppModule { }
下面是修改后的app.component.css文件内容。.
.tp-container {
   position: absolute;
   top: 0;
   bottom: 0;
   left: 0;
   right: 0;
   background: #eee;
}
.tp-section {
   display: flex;
   align-content: center;
   align-items: center;
   height: 60px;
   width:100px;
}
下面是修改后的app.component.html文件内容。
<mat-sidenav-container class = "tp-container">
   <mat-sidenav mode = "side" opened>
      <section class = "tp-section">
         <span>File</span>
      </section>
      <section class = "tp-section">
         <span>Edit</span>
      </section>
   </mat-sidenav>
   <mat-sidenav-content>Main content</mat-sidenav-content>
</mat-sidenav-container>
结果
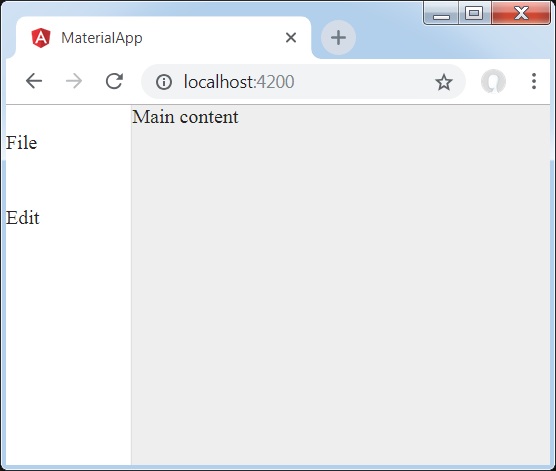
细节
首先,我们创建了一个横跨整个页面的主容器。
然后使用mat-sidenav创建侧边导航,使用mat-sidenav-content创建内容面板。
来自 https://www.kaifaxueyuan.com/frontend/angular-material7/angular-material7-sidenav.html
Angular Material 7 工具栏
<mat-toolbar>用于创建以显示标题、标题或任何操作按钮的工具栏。
<mat-toolbar> -代表主容器。
<mat-toolbar-row> -添加新行。
在本章中,我们将展示使用Angular Material绘制工具栏控件所需的配置。
创建 Angular 应用
按照以下步骤创建应用程序
1.创建一个名为materialApp的项目。
2.修改app.module.ts, app.component.ts, app.component.css and app.component.htmls。保持其余文件不变。
3.编译并运行程序。
下面是修改后的app.module.ts文件内容。
import { BrowserModule } from '@angular/platform-browser';
import { NgModule } from '@angular/core';
import { AppComponent } from './app.component';
import {BrowserAnimationsModule} from '@angular/platform-browser/animations';
import {MatToolbarModule} from '@angular/material'
import {FormsModule, ReactiveFormsModule} from '@angular/forms';
@NgModule({
   declarations: [
      AppComponent
   ],
   imports: [
      BrowserModule,
      BrowserAnimationsModule,
      MatToolbarModule,
      FormsModule,
      ReactiveFormsModule
   ],
   providers: [],
   bootstrap: [AppComponent]
})
export class AppModule { }
下面是修改后的app.component.css文件内容。
.filler {
   flex: 1 1 auto;
}
.gap {
   margin-right: 10px;
}
下面是修改后的 app.component.html文件内容。
<mat-toolbar color = "primary">
   <span class = "gap">File</span>
   <span>Edit</span>
   <span class = "filler"></span>
   <span>About</span>
</mat-toolbar>
结果
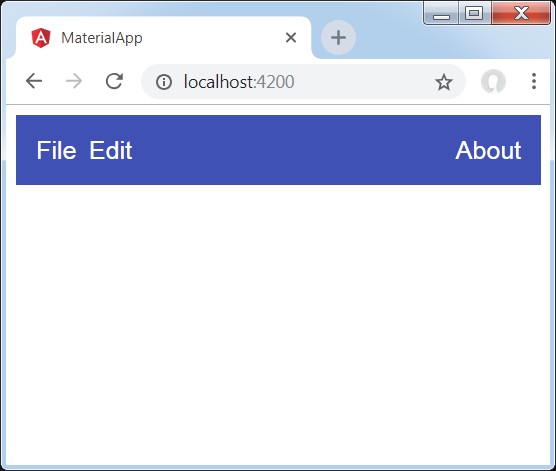
细节
首先,我们创建了一个横跨整个页面的工具栏。
然后添加了标签。
来自 https://www.kaifaxueyuan.com/frontend/angular-material7/angular-material7-toolbar.html
Angular Material 7 Card布局
<mat-card>用于创建具有Angular Material样式和动画功能的Card布局。
<mat-card-title>-代表标题部分。
<mat-card-subtitle>-表示副标题部分。
<mat-card-content>-代表内容部分。
<mat-card-actions>-代表动作部分。
<mat-card-footer>-代表页脚部分。
在本章中,我们将展示使用Angular Material绘制Card控件所需的配置。
创建 Angular 应用
按照以下步骤创建应用程序
1.创建一个名为materialApp的项目。
2.修改app.module.ts, app.component.ts, app.component.css and app.component.htmls。保持其余文件不变。
3.编译并运行程序。
下面是修改后的app.module.ts文件内容。
import { BrowserModule } from '@angular/platform-browser';
import { NgModule } from '@angular/core';
import { AppComponent } from './app.component';
import {BrowserAnimationsModule} from '@angular/platform-browser/animations';
import {MatCardModule, MatButtonModule} from '@angular/material'
import {FormsModule, ReactiveFormsModule} from '@angular/forms';
@NgModule({
   declarations: [
      AppComponent
   ],
   imports: [
      BrowserModule,
      BrowserAnimationsModule,
      MatCardModule, MatButtonModule,
      FormsModule,
      ReactiveFormsModule
   ],
   providers: [],
   bootstrap: [AppComponent]
})
export class AppModule { }
下面是修改后的app.component.css文件内容。
.tp-card {
   max-width: 400px;
}
.tp-header-image {
   background-image: url('https://www.tutorialspoint.com/materialize/src/html5-mini-logo.jpg');
   background-size: cover;
}
下面是修改后的app.component.html文件内容。
<mat-card class = "tp-card">
   <mat-card-header>
      <div mat-card-avatar class = "tp-header-image"></div>
      <mat-card-title>HTML5</mat-card-title>
      <mat-card-subtitle>HTML Basics</mat-card-subtitle>
   </mat-card-header>
   <img mat-card-image src = "https://www.tutorialspoint.com/materialize/src/html5-mini-logo.jpg" alt = "Learn HTML5">
   <mat-card-content>
      <p>
         HTML5 is the next major revision of the HTML standard superseding
         HTML 4.01, XHTML 1.0, and XHTML 1.1. HTML5 is a standard for
         structuring and presenting content on the World Wide Web.
      </p>
   </mat-card-content>
   <mat-card-actions>
      <button mat-button>LIKE</button>
      <button mat-button>SHARE</button>
   </mat-card-actions>
</mat-card>
结果
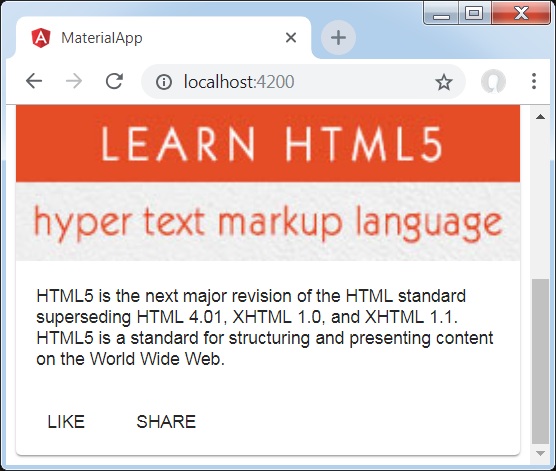
细节
这里,我们用mat-card制作了一个卡片布局。
来自 https://www.kaifaxueyuan.com/frontend/angular-material7/angular-material7-card.html
Angular Material 7 分隔符
<mat-divider>用于创建具有Angular Material样式和动画功能的分割器。它提供了两个项目之间分隔符。
在本章中,我们将展示使用Angular Material绘制分割器控件所需的配置。
创建 Angular 应用
按照以下步骤创建应用程序
1.创建一个名为materialApp的项目。
2.修改app.module.ts, app.component.ts, app.component.css and app.component.htmls。保持其余文件不变。
3.编译并运行程序。
下面是修改后的app.module.ts文件内容。
import { BrowserModule } from '@angular/platform-browser';
import { NgModule } from '@angular/core';
import { AppComponent } from './app.component';
import {BrowserAnimationsModule} from '@angular/platform-browser/animations';
import {MatDividerModule, MatListModule} from '@angular/material'
import {FormsModule, ReactiveFormsModule} from '@angular/forms';
@NgModule({
   declarations: [
      AppComponent
   ],
   imports: [
      BrowserModule,
      BrowserAnimationsModule,
      MatDividerModule, MatListModule,
      FormsModule,
      ReactiveFormsModule
   ],
   providers: [],
   bootstrap: [AppComponent]
})
export class AppModule { }
下面是修改后的app.component.html文件内容。
<mat-list>
   <mat-list-item>Apple</mat-list-item>
   <mat-divider></mat-divider>
   <mat-list-item>Orange</mat-list-item>
   <mat-divider></mat-divider>
   <mat-list-item>Banana</mat-list-item>
</mat-list>
结果
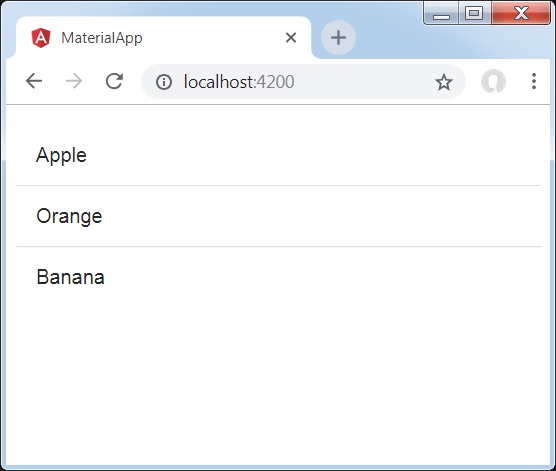
细节
首先,我们使用mat-list创建了一个列表。
然后,我们使用mat-divider在列表项之间添加了分隔线。
来自 https://www.kaifaxueyuan.com/frontend/angular-material7/angular-material7-divider.html
Angular Material 7 可展开面板
<mat-expansion-panel>用于创建可展开的详细v/s摘要视图。
<mat-expansion-panel-header>:代表标题部分。包含面板摘要,并作为展开或折叠面板的控件。
<mat-panel-title>:代表面板标题。
<mat-panel-description>:代表面板摘要。
<mat-action-row>:表示底部的操作面板。
在本章中,我们将展示使用Angular Material绘制可展开面板控件所需的配置。
创建 Angular 应用
按照以下步骤创建应用程序
1.创建一个名为materialApp的项目。
2.修改app.module.ts, app.component.ts, app.component.css and app.component.htmls。保持其余文件不变。
3.编译并运行程序。
下面是修改后的app.module.ts文件内容。
import { BrowserModule } from '@angular/platform-browser';
import { NgModule } from '@angular/core';
import { AppComponent } from './app.component';
import {BrowserAnimationsModule} from '@angular/platform-browser/animations';
import {MatExpansionModule, MatInputModule} from '@angular/material'
import {FormsModule, ReactiveFormsModule} from '@angular/forms';
@NgModule({
   declarations: [
      AppComponent
   ],
   imports: [
      BrowserModule,
      BrowserAnimationsModule,
      MatExpansionModule, MatInputModule,
      FormsModule,
      ReactiveFormsModule
   ],
   providers: [],
   bootstrap: [AppComponent]
})
export class AppModule { }
下面是修改后的app.component.html文件内容。
<mat-expansion-panel>
   <mat-expansion-panel-header>
      <mat-panel-title>
         Personal data
      </mat-panel-title>
      <mat-panel-description>
         Type name and age
      </mat-panel-description>
   </mat-expansion-panel-header>
   <mat-form-field>
      <input matInput placeholder="Name">
   </mat-form-field>
   <mat-form-field>
      <input matInput placeholder="Age">
   </mat-form-field>
</mat-expansion-panel>
结果
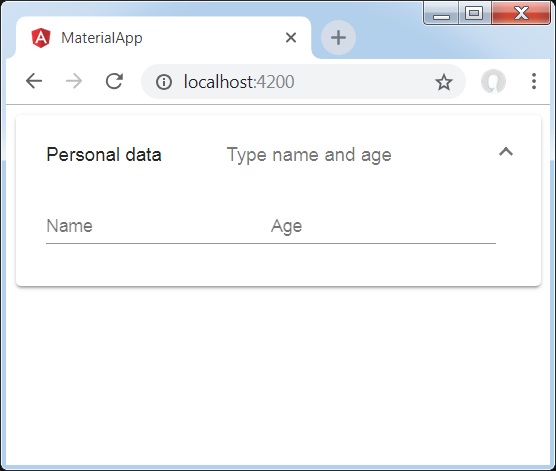
细节
首先,我们使用mat-expansion-panel创建了展开面板。
然后,我们添加了标题、副标题和内容。
来自 https://www.kaifaxueyuan.com/frontend/angular-material7/angular-material7-expansion-panel.html
Angular Material 7 网格列表
<mat-grid-list>用于创建二维视图,将单元格排列成基于网格的布局。
在本章中,我们将展示使用Angular Materia绘制网格列表控件所需的配置。
创建 Angular 应用
按照以下步骤创建应用程序
1.创建一个名为materialApp的项目。
2.修改app.module.ts, app.component.ts, app.component.css and app.component.htmls。保持其余文件不变。
3.编译并运行程序。
下面是修改后的app.module.ts文件内容。
import { BrowserModule } from '@angular/platform-browser';
import { NgModule } from '@angular/core';
import { AppComponent } from './app.component';
import {BrowserAnimationsModule} from '@angular/platform-browser/animations';
import {MatGridListModule} from '@angular/material'
import {FormsModule, ReactiveFormsModule} from '@angular/forms';
@NgModule({
   declarations: [
      AppComponent
   ],
   imports: [
      BrowserModule,
      BrowserAnimationsModule,
      MatGridListModule,
      FormsModule,
      ReactiveFormsModule
   ],
   providers: [],
   bootstrap: [AppComponent]
})
export class AppModule { }
下面是修改后的app.component.css文件内容。
mat-grid-tile {
   background: lightblue;
}
下面是修改后的app.component.html文件内容。
<mat-grid-list cols = "4" rowHeight = "100px">
   <mat-grid-tile
   [colspan] = "3"
   [rowspan] = "1">1
   </mat-grid-tile>
   <mat-grid-tile
   [colspan] = "1"
   [rowspan] = "2">2
   </mat-grid-tile>
   <mat-grid-tile
   [colspan] = "1"
   [rowspan] = "1">3
   </mat-grid-tile>
   <mat-grid-tile
   [colspan] = "2"
   [rowspan] = "1">4
   </mat-grid-tile>
</mat-grid-list>
结果
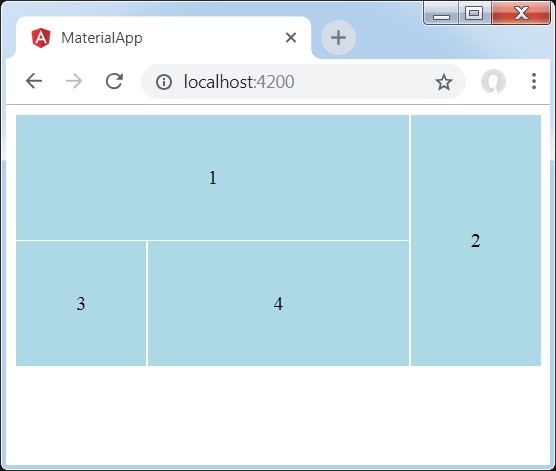
细节
首先,我们使用mat-grid-list创建了网格列表。
然后,我们使用mat-grid-tile添加内容。
来自 https://www.kaifaxueyuan.com/frontend/angular-material7/angular-material7-grid-list.html
Angular Material 7 列表
<mat-list>用于创建一个容器来承载和格式化一系列项目。
在本章中,我们将展示使用Angular Material绘制列表控件所需的配置。
创建 Angular 应用
按照以下步骤创建应用程序
1.创建一个名为materialApp的项目。
2.修改app.module.ts, app.component.ts, app.component.css and app.component.htmls。保持其余文件不变。
3.编译并运行程序。
下面是修改后的app.module.ts文件内容。
import { BrowserModule } from '@angular/platform-browser';
import { NgModule } from '@angular/core';
import { AppComponent } from './app.component';
import {BrowserAnimationsModule} from '@angular/platform-browser/animations';
import {MatListModule} from '@angular/material'
import {FormsModule, ReactiveFormsModule} from '@angular/forms';
@NgModule({
   declarations: [
      AppComponent
   ],
   imports: [
      BrowserModule,
      BrowserAnimationsModule,
      MatListModule,
      FormsModule,
      ReactiveFormsModule
   ],
   providers: [],
   bootstrap: [AppComponent]
})
export class AppModule { }
下面是修改后的app.component.html文件内容。
<mat-list role = "list">
   <mat-list-item role = "listitem">One</mat-list-item>
   <mat-list-item role = "listitem">Two</mat-list-item>
   <mat-list-item role = "listitem">Three</mat-list-item>
</mat-list>
结果
细节
首先,我们使用mat-list创建了列表。
然后,我们使用mat-list-item添加了内容。
来自 https://www.kaifaxueyuan.com/frontend/angular-material7/angular-material7-list.html
Angular Material 7 步进器
<mat-stepper>用于创建一个类似工作流程步骤的向导。
在本章中,我们将展示使用Angular Material绘制步进控制器所需的配置。
创建 Angular 应用
按照以下步骤创建应用程序
1.创建一个名为materialApp的项目。
2.修改app.module.ts, app.component.ts, app.component.css and app.component.htmls。保持其余文件不变。
3.编译并运行程序。
下面是修改后的app.module.ts文件内容。
import { BrowserModule } from '@angular/platform-browser';
import { NgModule } from '@angular/core';
import { AppComponent } from './app.component';
import {BrowserAnimationsModule} from '@angular/platform-browser/animations';
import {MatStepperModule, MatInputModule, MatButtonModule} from '@angular/material'
import {FormsModule, ReactiveFormsModule} from '@angular/forms';
@NgModule({
   declarations: [
      AppComponent
   ],
   imports: [
      BrowserModule,
      BrowserAnimationsModule,
      MatStepperModule, MatInputModule, MatButtonModule,
      FormsModule,
      ReactiveFormsModule
   ],
   providers: [],
   bootstrap: [AppComponent]
})
export class AppModule { }
下面是修改后的app.component.html文件内容。
<mat-horizontal-stepper [linear] = "isLinear" #stepper>
   <mat-step [stepControl] = "firstFormGroup">
      <form [formGroup] = "firstFormGroup">
         <ng-template matStepLabel>Enter your name</ng-template>
         <mat-form-field>
            <input matInput placeholder = "Last name, First name" formControlName = "firstCtrl" required>
         </mat-form-field>
         <div>
           <button mat-button matStepperNext>Next</button>
         </div>
      </form>
   </mat-step>
   <mat-step [stepControl] = "secondFormGroup">
      <form [formGroup] = "secondFormGroup">
         <ng-template matStepLabel>Enter your address</ng-template>
         <mat-form-field>
           <input matInput placeholder = "Address" formControlName = "secondCtrl" required>
         </mat-form-field>
         <div>
           <button mat-button matStepperPrevious>Back</button>
           <button mat-button matStepperNext>Next</button>
         </div>
      </form>
   </mat-step>
   <mat-step>
      <ng-template matStepLabel>Done</ng-template>
         Details taken.
      <div>
         <button mat-button matStepperPrevious>Back</button>
         <button mat-button (click) = "stepper.reset()">Reset</button>
      </div>
   </mat-step>
</mat-horizontal-stepper>
下面是修改后的app.component.ts文件内容。
import { Component } from '@angular/core';
import { FormControl } from "@angular/forms";
import { FormGroup } from "@angular/forms";
import { FormBuilder } from "@angular/forms";
import { Validators } from "@angular/forms";
export interface Food {
   value: string;
   display: string;
}
@Component({
   selector: 'app-root',
   templateUrl: './app.component.html',
   styleUrls: ['./app.component.css']
})
export class AppComponent {
   title = 'materialApp';
   firstFormGroup: FormGroup;
   secondFormGroup: FormGroup;
   constructor(private _formBuilder: FormBuilder) {}
   ngOnInit() {
      this.firstFormGroup = this._formBuilder.group({
         firstCtrl: ['', Validators.required]
      });
      this.secondFormGroup = this._formBuilder.group({
         secondCtrl: ['', Validators.required]
      });
   }
}
结果
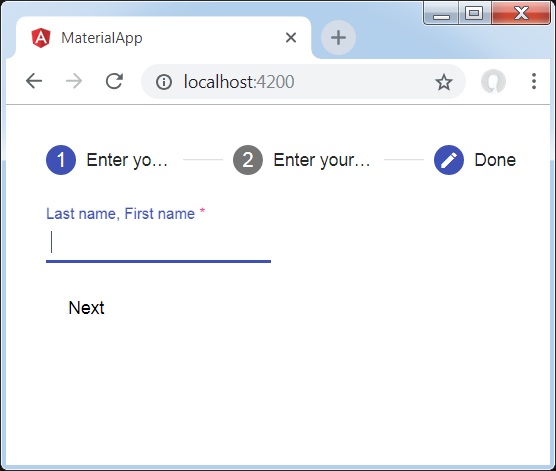
细节
首先,我们已经使用mat-stepper创建了步进机。
然后,我们使用mat-step添加了内容
来自 https://www.kaifaxueyuan.com/frontend/angular-material7/angular-material7-stepper.html
Angular Material 7 Tabs选项卡
<mat-tab-group>用于创建选项卡式布局。
在本章中,我们将展示使用Angular Material绘制选项卡控件所需的配置
创建 Angular 应用
按照以下步骤创建应用程序
1.创建一个名为materialApp的项目。
2.修改app.module.ts, app.component.ts, app.component.css and app.component.htmls。保持其余文件不变。
3.编译并运行程序。
下面是修改后的app.module.ts文件内容。
import { BrowserModule } from '@angular/platform-browser';
import { NgModule } from '@angular/core';
import { AppComponent } from './app.component';
import {BrowserAnimationsModule} from '@angular/platform-browser/animations';
import {MatTabsModule} from '@angular/material'
import {FormsModule, ReactiveFormsModule} from '@angular/forms';
@NgModule({
   declarations: [
      AppComponent
   ],
   imports: [
      BrowserModule,
      BrowserAnimationsModule,
      MatTabsModule,
      FormsModule,
      ReactiveFormsModule
   ],
   providers: [],
   bootstrap: [AppComponent]
})
export class AppModule { }
下面是修改后的app.component.html文件内容。
<mat-tab-group>
   <mat-tab label = "A"> Apple </mat-tab>
   <mat-tab label = "B"> Banana </mat-tab>
   <mat-tab label = "C"> Carrot </mat-tab>
</mat-tab-group>
结果
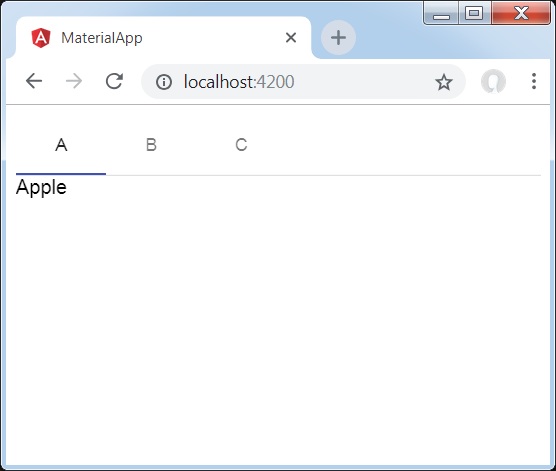
细节
首先,我们使用mat-tab-group创建了选项卡。
然后,我们使用mat-tab添加内容,其中每个mat-tab代表不同的选项卡。
来自 https://www.kaifaxueyuan.com/frontend/angular-material7/angular-material7-tabs.html
Angular Material 7 树控件
<mat-tree>用于创建一个具有显示层次数据的树。
在本章中,我们将展示使用Angular Material绘制树控件所需的配置。
下面是修改后的app.module.ts文件内容。
import { BrowserModule } from '@angular/platform-browser';
import { NgModule } from '@angular/core';
import { AppComponent } from './app.component';
import {BrowserAnimationsModule} from '@angular/platform-browser/animations';
import {MatTreeModule, MatIconModule, MatButtonModule} from '@angular/material'
import {FormsModule, ReactiveFormsModule} from '@angular/forms';
@NgModule({
   declarations: [
      AppComponent
   ],
   imports: [
      BrowserModule,
      BrowserAnimationsModule,
      MatTreeModule, MatIconModule, MatButtonModule,
      FormsModule,
      ReactiveFormsModule
   ],
   providers: [],
   bootstrap: [AppComponent]
})
export class AppModule { }
下面是修改后的app.component.html文件内容。
<mat-tree [dataSource] = "dataSource" [treeControl] = "treeControl">
   <mat-tree-node *matTreeNodeDef = "let node" matTreeNodeToggle matTreeNodePadding>
      <button mat-icon-button disabled></button>
      {{node.filename}} : {{node.type}}
   </mat-tree-node>
   <mat-tree-node *matTreeNodeDef = "let node;when: hasChild" matTreeNodePadding>
      <button mat-icon-button matTreeNodeToggle [attr.aria-label] = "'toggle ' + node.filename">
         <mat-icon class = "mat-icon-rtl-mirror">
            {{treeControl.isExpanded(node) ? 'expand_more' : 'chevron_right'}}
         </mat-icon>
      </button>
      {{node.filename}}
   </mat-tree-node>
</mat-tree>
下面是修改后的app.component.ts文件内容。
import {FlatTreeControl} from '@angular/cdk/tree';
import {Component, Injectable} from '@angular/core';
import {MatTreeFlatDataSource, MatTreeFlattener} from '@angular/material/tree';
import {BehaviorSubject, Observable, of as observableOf} from 'rxjs';
export class FileNode {
   children: FileNode[];
   filename: string;
   type: any;
}
export class FileFlatNode {
   constructor(
      public expandable: boolean, public filename: string, public level: number, public type: any) {}
}
const TREE_DATA = JSON.stringify({
   Documents: {
      angular: {
         src: {
            compiler: 'ts',
            core: 'ts'
         }
      },
      material2: {
         src: {
            button: 'ts',
            checkbox: 'ts',
            input: 'ts'
         }
      }
   }
});
@Injectable()
export class FileDatabase {
   dataChange = new BehaviorSubject<FileNode[]>([]);
   get data(): FileNode[] { return this.dataChange.value; }
   constructor() {
      this.initialize();
   }
   initialize() {
      const dataObject = JSON.parse(TREE_DATA);
      const data = this.buildFileTree(dataObject, 0);
      this.dataChange.next(data);
   }
   buildFileTree(obj: {[key: string]: any}, level: number): FileNode[] {
      return Object.keys(obj).reduce<FileNode[]>((accumulator, key) => {
         const value = obj[key];
         const node = new FileNode();
         node.filename = key;
         if (value != null) {
            if (typeof value === 'object') {
               node.children = this.buildFileTree(value, level + 1);
            } else {
               node.type = value;
            }
         }
         return accumulator.concat(node);
      }, []);
   }
}
@Component({
   selector: 'app-root',
   templateUrl: 'app.component.html',
   styleUrls: ['app.component.css'],
   providers: [FileDatabase]
})
export class AppComponent {
   treeControl: FlatTreeControl<FileFlatNode>;
   treeFlattener: MatTreeFlattener<FileNode, FileFlatNode>;
   dataSource: MatTreeFlatDataSource<FileNode, FileFlatNode>;
   constructor(database: FileDatabase) {
      this.treeFlattener = new MatTreeFlattener(this.transformer, this._getLevel,
      this._isExpandable, this._getChildren);
      this.treeControl = new FlatTreeControl<FileFlatNode>(this._getLevel, this._isExpandable);
      this.dataSource = new MatTreeFlatDataSource(this.treeControl, this.treeFlattener);
      database.dataChange.subscribe(data => this.dataSource.data = data);
   }
   transformer = (node: FileNode, level: number) => {
      return new FileFlatNode(!!node.children, node.filename, level, node.type);
   }
   private _getLevel = (node: FileFlatNode) => node.level;
   private _isExpandable = (node: FileFlatNode) => node.expandable;
   private _getChildren = (node: FileNode): Observable<FileNode[]> => observableOf(node.children);
   hasChild = (_: number, _nodeData: FileFlatNode) => _nodeData.expandable;
}
结果
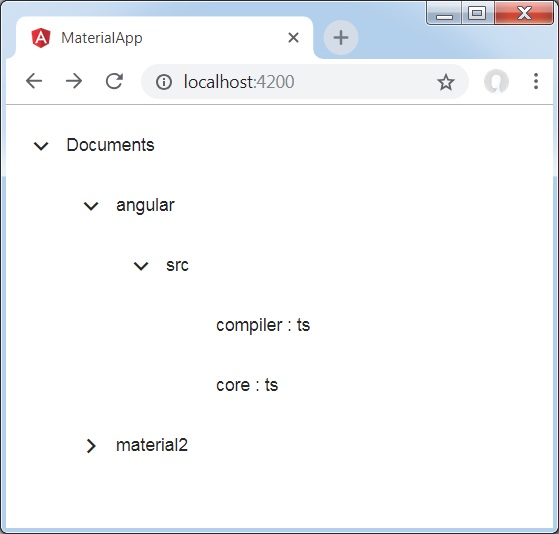
细节
首先,我们使用mat-tree和mat-tree-node创建了树。
然后,我们在ts文件中创建了数据源,并用mat-tree绑定它。
来自 https://www.kaifaxueyuan.com/frontend/angular-material7/angular-material7-tree.html
Angular Material 7 按钮
<mat-button>于创建带有Material样式和动画的按钮。
在本章中,我们将展示使用Angular Material绘制按钮控件所需的配置。
创建 Angular 应用
按照以下步骤创建应用程序
1.创建一个名为materialApp的项目。
2.修改app.module.ts, app.component.ts, app.component.css and app.component.htmls。保持其余文件不变。
3.编译并运行程序。
下面是修改后的app.module.ts文件内容。
import { BrowserModule } from '@angular/platform-browser';
import { NgModule } from '@angular/core';
import { AppComponent } from './app.component';
import {BrowserAnimationsModule} from '@angular/platform-browser/animations';
import {MatButtonModule,MatIconModule} from '@angular/material'
import {FormsModule, ReactiveFormsModule} from '@angular/forms';
@NgModule({
   declarations: [
      AppComponent
   ],
   imports: [
      BrowserModule,
      BrowserAnimationsModule,
      MatButtonModule,MatIconModule,
      FormsModule,
      ReactiveFormsModule
   ],
   providers: [],
   bootstrap: [AppComponent]
})
export class AppModule { }
下面是修改后的app.component.css文件内容。
.tp-button-row button,
.tp-button-row a {
   margin-right: 8px;
}
下面是修改后的app.component.html文件内容。
<div class = "example-button-row">
   <button mat-button>Basic</button>
   <button mat-raised-button>Raised</button>
   <button mat-stroked-button>Stroked</button>
   <button mat-flat-button>Flat</button>
   <button mat-icon-button>
      <mat-icon aria-label="Heart">favorite</mat-icon>
   </button>
   <button mat-fab>Fab</button>
   <button mat-mini-fab>Mini</button>
   <a mat-button routerLink = ".">Link</a>
</div>
结果

细节
在这里,我们使用mat-buttons的各种变体创建了按钮
来自 https://www.kaifaxueyuan.com/frontend/angular-material7/angular-material7-button.html
Angular Material 7 切换按钮
<mat-button-toggle>用于创建带有Material样式和动画的切换或开/关按钮。mat-button-toggle按钮可以配置为单选按钮或复选框。通常它们是<mat-button-toggle-group>的一部分。
在本章中,我们将展示使用Angular Material绘制按钮切换控件所需的配置。
创建 Angular 应用
按照以下步骤创建应用程序
1.创建一个名为materialApp的项目。
2.修改app.module.ts, app.component.ts, app.component.css and app.component.htmls。保持其余文件不变。
3.编译并运行程序。
下面是修改后的app.module.ts文件内容。
import { BrowserModule } from '@angular/platform-browser';
import { NgModule } from '@angular/core';
import { AppComponent } from './app.component';
import {BrowserAnimationsModule} from '@angular/platform-browser/animations';
import {MatButtonToggleModule, MatIconModule} from '@angular/material'
import {FormsModule, ReactiveFormsModule} from '@angular/forms';
@NgModule({
   declarations: [
      AppComponent
   ],
   imports: [
      BrowserModule,
      BrowserAnimationsModule,
      MatButtonToggleModule, MatIconModule,
      FormsModule,
      ReactiveFormsModule
   ],
   providers: [],
   bootstrap: [AppComponent]
})
export class AppModule { }
下面是修改后的app.component.css文件内容。
.tp-selected-value {
   margin: 15px 0;
}
下面是修改后的app.component.html文件内容。
<mat-button-toggle-group #group = "matButtonToggleGroup">
   <mat-button-toggle value = "left">
      <mat-icon>format_align_left</mat-icon>
   </mat-button-toggle>
   <mat-button-toggle value = "center">
      <mat-icon>format_align_center</mat-icon>
   </mat-button-toggle>
   <mat-button-toggle value = "right">
      <mat-icon>format_align_right</mat-icon>
   </mat-button-toggle>
   <mat-button-toggle value = "justify" disabled>
      <mat-icon>format_align_justify</mat-icon>
   </mat-button-toggle>
</mat-button-toggle-group>
<div class = "tp-selected-value">Selected value: {{group.value}}</div>
结果
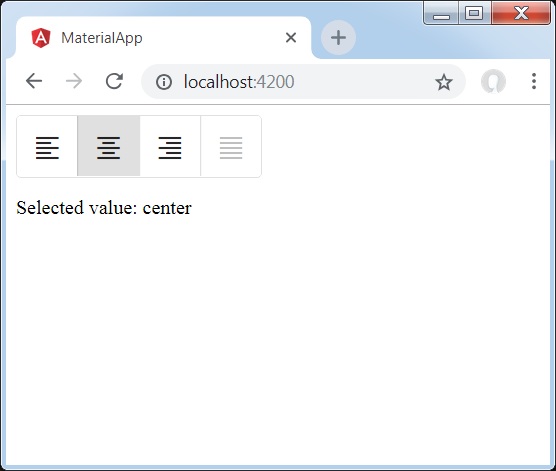
细节
首先,我们使用mat-button-toggle-group创建了一个切换按钮组。
然后,我们使用mat-button-toggle向组中添加了切换按钮。
来自 https://www.kaifaxueyuan.com/frontend/angular-material7/angular-material7-toggle-button.html
Angular Material 7 Badge(徽章)
<mat-badge>用于创建徽章,这是用户界面元素的一个小状态描述符号,徽章通常带有一个数字或其他短字符集,出现在另一个用户界面元素附近。
在本章中,我们将展示使用Angular Material绘制徽章控件所需的配置。
创建 Angular 应用
按照以下步骤创建应用程序
1.创建一个名为materialApp的项目。
2.修改app.module.ts, app.component.ts, app.component.css and app.component.htmls。保持其余文件不变。
3.编译并运行程序。
下面是修改后的app.module.ts文件内容。
import { BrowserModule } from '@angular/platform-browser';
import { NgModule } from '@angular/core';
import { AppComponent } from './app.component';
import {BrowserAnimationsModule} from '@angular/platform-browser/animations';
import {MatBadgeModule, MatButtonModule, MatIconModule} from '@angular/material'
import {FormsModule, ReactiveFormsModule} from '@angular/forms';
@NgModule({
   declarations: [
      AppComponent
   ],
   imports: [
      BrowserModule,
      BrowserAnimationsModule,
      MatBadgeModule, MatButtonModule, MatIconModule,
      FormsModule,
      ReactiveFormsModule
   ],
   providers: [],
   bootstrap: [AppComponent]
})
export class AppModule { }
下面是修改后的app.component.html文件内容。
<p><span matBadge = "4" matBadgeOverlap = "false">Mail</span></p>
<p>
   <button mat-raised-button color = "primary"
      matBadge = "8" matBadgePosition = "before" matBadgeColor = "accent">
      Action
   </button>
</p>
<p><mat-icon matBadge = "15" matBadgeColor = "warn">home</mat-icon></p>
结果
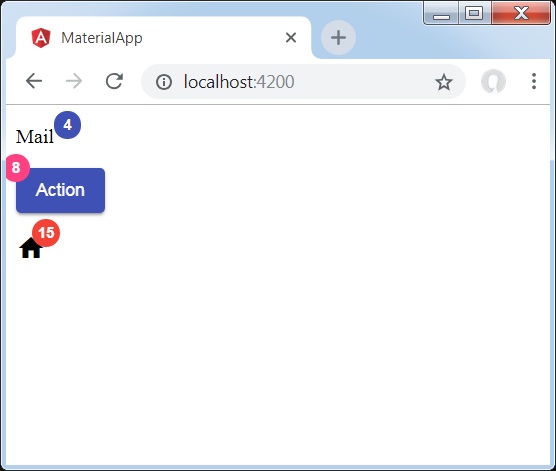
细节
首先,我们创建了一个span元素、一个按钮和一个图标。
然后,我们使用mat-badge属性为每个元素添加了徽章。
来自 https://www.kaifaxueyuan.com/frontend/angular-material7/angular-material7-badge.html
Angular Material 7 Chips
<mat-chip-list>用于作为chip的值列表.
在本章中,我们将展示使用Angular Material绘制chip控制所需的配置。
创建 Angular 应用
按照以下步骤创建应用程序
1.创建一个名为materialApp的项目。
2.修改app.module.ts, app.component.ts, app.component.css and app.component.htmls。保持其余文件不变。
3.编译并运行程序。
下面是修改后的app.module.ts文件内容。
import { BrowserModule } from '@angular/platform-browser';
import { NgModule } from '@angular/core';
import { AppComponent } from './app.component';
import {BrowserAnimationsModule} from '@angular/platform-browser/animations';
import {MatChipsModule} from '@angular/material'
import {FormsModule, ReactiveFormsModule} from '@angular/forms';
@NgModule({
   declarations: [
      AppComponent
   ],
   imports: [
      BrowserModule,
      BrowserAnimationsModule,
      MatChipsModule,
      FormsModule,
      ReactiveFormsModule
   ],
   providers: [],
   bootstrap: [AppComponent]
})
export class AppModule { }
下面是修改后的app.component.html文件内容。
<mat-chip-list>
   <mat-chip>One</mat-chip>
   <mat-chip>Two</mat-chip>
   <mat-chip color = "primary" selected>Tree</mat-chip>
   <mat-chip color = "accent" selected>Four</mat-chip>
</mat-chip-list>
结果
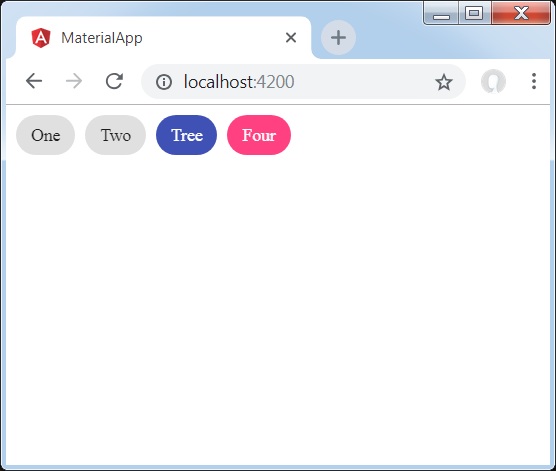
细节
首先,我们使用mat-chip-list创建了chip列表。
然后,我们使用mat-chip将chip添加到每个chip列表中。
来自 https://www.kaifaxueyuan.com/frontend/angular-material7/angular-material7-chips.html
Angular Material 7 图标
<mat-icon>是用于添加基于Material样式的矢量/svg的图标。
在本章中,我们将展示使用Angular Material绘制图标控件所需的配置。
创建 Angular 应用
按照以下步骤创建应用程序
1.创建一个名为materialApp的项目。
2.修改app.module.ts, app.component.ts, app.component.css and app.component.htmls。保持其余文件不变。
3.编译并运行程序。
下面是修改后的app.module.ts文件内容。
import { BrowserModule } from '@angular/platform-browser';
import { NgModule } from '@angular/core';
import { AppComponent } from './app.component';
import {BrowserAnimationsModule} from '@angular/platform-browser/animations';
import {MatIconModule} from '@angular/material'
import {FormsModule, ReactiveFormsModule} from '@angular/forms';
@NgModule({
   declarations: [
      AppComponent
   ],
   imports: [
      BrowserModule,
      BrowserAnimationsModule,
      MatIconModule,
      FormsModule,
      ReactiveFormsModule
   ],
   providers: [],
   bootstrap: [AppComponent]
})
export class AppModule { }
下面是修改后的app.component.html文件内容。
<mat-icon>home</mat-icon>
结果
细节
这里,我们用mat-icon创建了home图标。我们使用的是google material icons。
来自 https://www.kaifaxueyuan.com/frontend/angular-material7/angular-material7-icons.html
Angular Material 7 进度微调器
<mat-progress-spinner>用于显示带有Material样式的进度微调器。
在本章中,我们将展示使用Angular Material绘制确定性和不确定性进度微调器所需的配置。
创建 Angular 应用
按照以下步骤创建应用程序
1.创建一个名为materialApp的项目。
2.修改app.module.ts, app.component.ts, app.component.css and app.component.htmls。保持其余文件不变。
3.编译并运行程序。
下面是修改后的app.module.ts文件内容。
import { BrowserModule } from '@angular/platform-browser';
import { NgModule } from '@angular/core';
import { AppComponent } from './app.component';
import {BrowserAnimationsModule} from '@angular/platform-browser/animations';
import {MatProgressSpinnerModule, MatRadioModule, MatSliderModule} from '@angular/material'
import {FormsModule, ReactiveFormsModule} from '@angular/forms';
@NgModule({
   declarations: [
      AppComponent
   ],
   imports: [
      BrowserModule,
      BrowserAnimationsModule,
      MatProgressSpinnerModule, MatRadioModule, MatSliderModule,
      FormsModule,
      ReactiveFormsModule
   ],
   providers: [],
   bootstrap: [AppComponent]
})
export class AppModule { }
下面是修改后的app.component.css文件内容。
.tp-section {
   display: flex;
   align-content: center;
   align-items: center;
   height: 60px;
}
.tp-margin {
   margin: 0 10px;
}
下面是修改后的app.component.html文件内容。
<section class = "tp-section">
   <label class = "tp-margin">Color:</label>
   <mat-radio-group [(ngModel)] = "color">
      <mat-radio-button class = "tp-margin" value = "primary">
         Primary
      </mat-radio-button>
      <mat-radio-button class = "tp-margin" value = "accent">
         Accent
      </mat-radio-button>
      <mat-radio-button class = "tp-margin" value = "warn">
         Warn
      </mat-radio-button>
   </mat-radio-group>
</section>
<section class = "tp-section">
   <label class = "tp-margin">Mode:</label>
   <mat-radio-group [(ngModel)] = "mode">
      <mat-radio-button class = "tp-margin" value = "determinate">
         Determinate
      </mat-radio-button>
      <mat-radio-button class = "tp-margin" value = "indeterminate">
         Indeterminate
      </mat-radio-button>
   </mat-radio-group>
</section>
<section class = "tp-section" *ngIf = "mode === 'determinate'">
   <label class = "tp-margin">Progress:</label>
   <mat-slider class = "tp-margin" [(ngModel)] = "value"></mat-slider>
</section>
<section class = "tp-section">
   <label class = "tp-margin">Mode: {{mode}}</label>
   <mat-progress-spinner
      class = "tp-margin"
      [color] = "color"
      [mode] = "mode"
      [value] = "value">
   </mat-progress-spinner>
</section>
下面是修改后的app.component.ts文件内容。
import { Component } from '@angular/core';
@Component({
   selector: 'app-root',
   templateUrl: './app.component.html',
   styleUrls: ['./app.component.css']
})
export class AppComponent {
   title = 'materialApp';
   color = 'primary';
   mode = 'determinate';
   value = 50;

}
结果
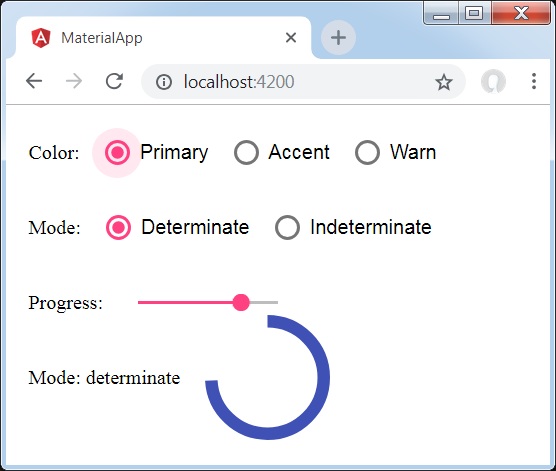
细节
这里,我们使用mat-progress-spinner创建了进度微调器。
来自 https://www.kaifaxueyuan.com/frontend/angular-material7/angular-material7-progress-spinner.html
Angular Material 7 进度条
<mat-progress-bar>用于显示带有Material样式的进度条。
在本章中,我们将展示使用Angular Material绘制确定性进度条和非确定性进度条所需的配置。
创建 Angular 应用
按照以下步骤创建应用程序
1.创建一个名为materialApp的项目。
2.修改app.module.ts, app.component.ts, app.component.css and app.component.htmls。保持其余文件不变。
3.编译并运行程序。
下面是修改后的app.module.ts文件内容。
import { BrowserModule } from '@angular/platform-browser';
import { NgModule } from '@angular/core';
import { AppComponent } from './app.component';
import {BrowserAnimationsModule} from '@angular/platform-browser/animations';
import {MatProgressBarModule, MatRadioModule, MatSliderModule} from '@angular/material'
import {FormsModule, ReactiveFormsModule} from '@angular/forms';
@NgModule({
   declarations: [
      AppComponent
   ],
   imports: [
      BrowserModule,
      BrowserAnimationsModule,
      MatProgressBarModule, MatRadioModule, MatSliderModule,
      FormsModule,
      ReactiveFormsModule
   ],
   providers: [],
   bootstrap: [AppComponent]
})
export class AppModule { }
下面是修改后的app.component.css.文件内容。
.tp-section {
   display: flex;
   align-content: center;
   align-items: center;
   height: 60px;
}
.tp-margin {
   margin: 0 10px;
}
下面是修改后的app.component.html文件内容。
<section class = "tp-section">
   <label class = "tp-margin">Color:</label>
   <mat-radio-group [(ngModel)] = "color">
      <mat-radio-button class = "tp-margin" value = "primary">
         Primary
      </mat-radio-button>
      <mat-radio-button class = "tp-margin" value = "accent">
         Accent
      </mat-radio-button>
      <mat-radio-button class = "tp-margin" value = "warn">
         Warn
      </mat-radio-button>
   </mat-radio-group>
</section>
<section class = "tp-section">
   <label class = "tp-margin">Mode:</label>
   <mat-radio-group [(ngModel)] = "mode">
      <mat-radio-button class = "tp-margin" value = "determinate">
         Determinate
      </mat-radio-button>
      <mat-radio-button class = "tp-margin" value = "indeterminate">
         Indeterminate
      </mat-radio-button>
      <mat-radio-button class = "tp-margin" value = "buffer">
         Buffer
      </mat-radio-button>
      <mat-radio-button class = "tp-margin" value = "query">
         Query
      </mat-radio-button>
   </mat-radio-group>
</section>
<section class = "tp-section" *ngIf = "mode === 'determinate' || mode === 'buffer'">
   <label class = "tp-margin">Progress:</label>
   <mat-slider class = "tp-margin" [(ngModel)] = "value"></mat-slider>
</section>
<section class = "tp-section" *ngIf = "mode === 'buffer'">
   <label class = "tp-margin">Buffer:</label>
   <mat-slider class = "tp-margin" [(ngModel)] = "bufferValue"></mat-slider>
</section>
<section class = "tp-section">
   <label class = "tp-margin">Mode: {{mode}}</label>
   <mat-progress-bar
      class = "tp-margin"
      [color] = "color"
      [mode] = "mode"
      [value] = "value"
      [bufferValue] = "bufferValue"
      >
   </mat-progress-bar>
</section>
下面是修改后的app.component.ts文件内容。
import { Component } from '@angular/core';
@Component({
   selector: 'app-root',
   templateUrl: './app.component.html',
   styleUrls: ['./app.component.css']
})
export class AppComponent {
   title = 'materialApp';
   color = 'primary';
   mode = 'determinate';
   value = 50;
   bufferValue = 75;
}
结果
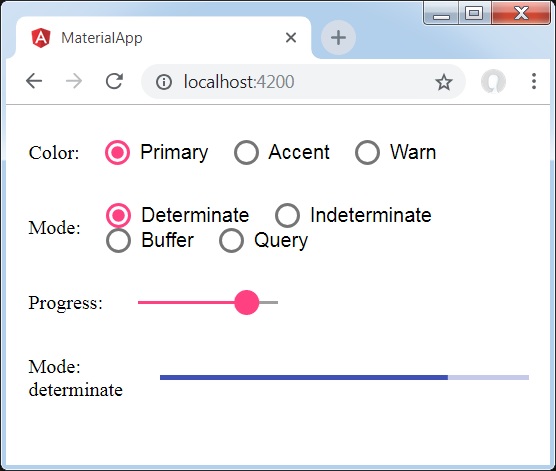
细节
这里,我们使用mat-progress-bar创建了进度条。
来自 https://www.kaifaxueyuan.com/frontend/angular-material7/angular-material7-progress-bar.html
Angular Material 7 Ripples
<mat-ripple>用于定义描述用户交互的区域。
在本章中,我们将展示使用Angular Material绘制波纹效果所需的配置。
下面是修改后的app.module.ts文件内容。
import { BrowserModule } from '@angular/platform-browser';
import { NgModule } from '@angular/core';
import { AppComponent } from './app.component';
import {BrowserAnimationsModule} from '@angular/platform-browser/animations';
import {MatRippleModule, MatCheckboxModule, MatInputModule} from '@angular/material'
import {FormsModule, ReactiveFormsModule} from '@angular/forms';
@NgModule({
   declarations: [
      AppComponent
   ],
   imports: [
      BrowserModule,
      BrowserAnimationsModule,
      MatRippleModule, MatCheckboxModule, MatInputModule,
      FormsModule,
      ReactiveFormsModule
   ],
   providers: [],
   bootstrap: [AppComponent]
})
export class AppModule { }
下面是修改后的app.component.html文件内容。
<mat-checkbox [(ngModel)] = "centered" class = "tp-ripple-checkbox">Centered</mat-checkbox>
<mat-checkbox [(ngModel)] = "disabled" class = "tp-ripple-checkbox">Disabled</mat-checkbox>
<mat-checkbox [(ngModel)] = "unbounded" class = "tp-ripple-checkbox">Unbounded</mat-checkbox>
<section>
   <mat-form-field class = "tp-ripple-form-field">
      <input matInput [(ngModel)] = "radius" type = "number" placeholder = "Radius">
   </mat-form-field>
   <mat-form-field class = "tp-ripple-form-field">
      <input matInput [(ngModel)] = "color" type = "text" placeholder = "Color">
   </mat-form-field>
</section>
<div class = "tp-ripple-container mat-elevation-z4"
   matRipple
   [matRippleCentered] = "centered"
   [matRippleDisabled] = "disabled"
   [matRippleUnbounded] = "unbounded"
   [matRippleRadius] = "radius"
   [matRippleColor] = "color">
   Click me
</div>
下面是修改后的app.component.css文件内容。
.tp-ripple-container {
   cursor: pointer;
   text-align: center;
   width: 300px;
   height: 300px;
   line-height: 300px;
   user-select: none;
   -webkit-user-select: none;
   -moz-user-select: none;
   -ms-user-select: none;
   -webkit-user-drag: none;
   -webkit-tap-highlight-color: transparent;
}
.tp-ripple-checkbox {
   margin: 6px 12px 6px 0;
}
.tp-ripple-form-field {
   margin: 0 12px 0 0;
}
下面是修改后的app.component.ts文件内容。
import { Component } from '@angular/core';
@Component({
   selector: 'app-root',
   templateUrl: './app.component.html',
   styleUrls: ['./app.component.css']
})
export class AppComponent {
   title = 'materialApp';
   centered = false;
   disabled = false;
   unbounded = false;
   radius: number;
   color: string;
}
结果
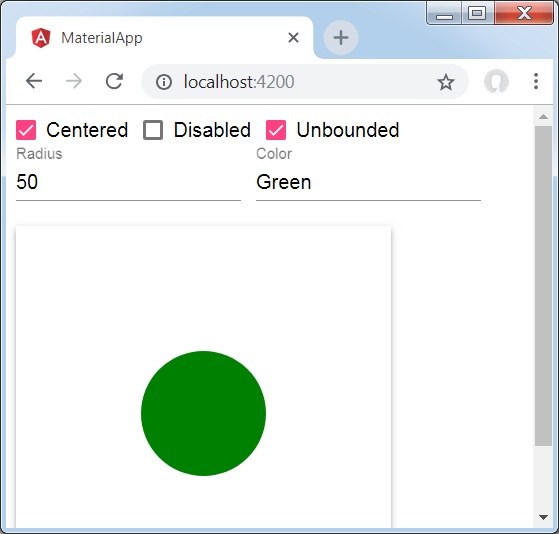
细节
首先,我们使用mat-checkbox创建了复选框,并使用带有变量的ngModel绑定它们。这些属性将用于自定义波纹。
然后,我们创建了ripple,并展示了它与.ts文件中的变量绑定的各种属性。
来自 https://www.kaifaxueyuan.com/frontend/angular-material7/angular-material7-pipples.html
Angular Material 7 通知栏
<MatSnackBar>用于显示一个通知栏,在移动设备上显示,作为对话框/弹出窗口的替代。
在本章中,我们将展示使用Angular Material展示MatSnackBar所需的配置。
下面是修改后的app.module.ts文件内容。
import { BrowserModule } from '@angular/platform-browser';
import { NgModule } from '@angular/core';
import { AppComponent } from './app.component';
import {BrowserAnimationsModule} from '@angular/platform-browser/animations';
import {MatButtonModule,MatSnackBarModule} from '@angular/material'
import {FormsModule, ReactiveFormsModule} from '@angular/forms';
@NgModule({
   declarations: [
      AppComponent
   ],
   imports: [
      BrowserModule,
      BrowserAnimationsModule,
      MatButtonModule,MatSnackBarModule,
      FormsModule,
      ReactiveFormsModule
   ],
   providers: [],
   bootstrap: [AppComponent]
})
export class AppModule { }
下面是修改后的app.component.html文件内容。
<button mat-button (click)="openSnackBar('Party', 'act')">Show snack-bar</button>下面是修改后的app.component.ts文件内容。
import {Component, Injectable} from '@angular/core';
import { MatSnackBar } from "@angular/material";
@Component({
   selector: 'app-root',
   templateUrl: 'app.component.html',
   styleUrls: ['app.component.css']
})
export class AppComponent {
   constructor(public snackBar: MatSnackBar) {}
   openSnackBar(message: string, action: string) {
      this.snackBar.open(message, action, {
         duration: 2000,
      });
   }
}
结果
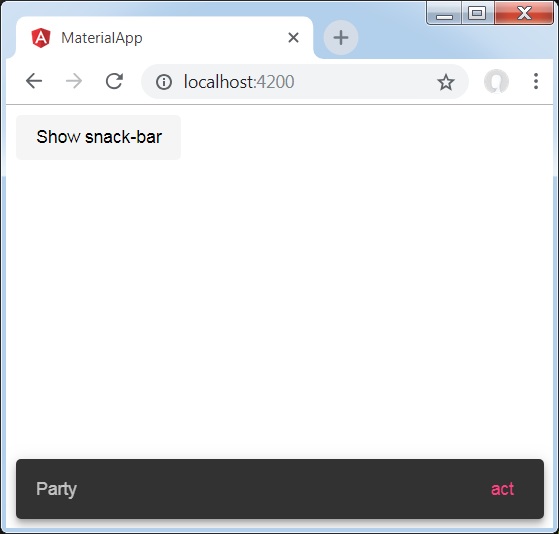
细节
这里,我们用mat-button创建了一个按钮,点击它我们就可以看到通知栏。
来自 https://www.kaifaxueyuan.com/frontend/angular-material7/angular-material7-snackbar.html
Angular Material 7 提示
<MatTooltip>(角度指令)用于显示Material样式的工具提示。
在本章中,我们将展示使用角度材质显示工具提示所需的配置。
下面是修改后的app.module.ts文件内容。
import { BrowserModule } from '@angular/platform-browser';
import { NgModule } from '@angular/core';
import { AppComponent } from './app.component';
import {BrowserAnimationsModule} from '@angular/platform-browser/animations';
import {MatButtonModule,MatTooltipModule} from '@angular/material'
import {FormsModule, ReactiveFormsModule} from '@angular/forms';
@NgModule({
   declarations: [
      AppComponent
   ],
   imports: [
      BrowserModule,
      BrowserAnimationsModule,
      MatButtonModule,MatTooltipModule,
      FormsModule,
      ReactiveFormsModule
   ],
   providers: [],
   bootstrap: [AppComponent]
})
export class AppModule { }
下面是修改后的app.component.html文件内容。
<button mat-raised-button
   matTooltip = "Sample Tooltip"
   aria-label = "Sample Tooltip">
   Click Me!
</button>
结果
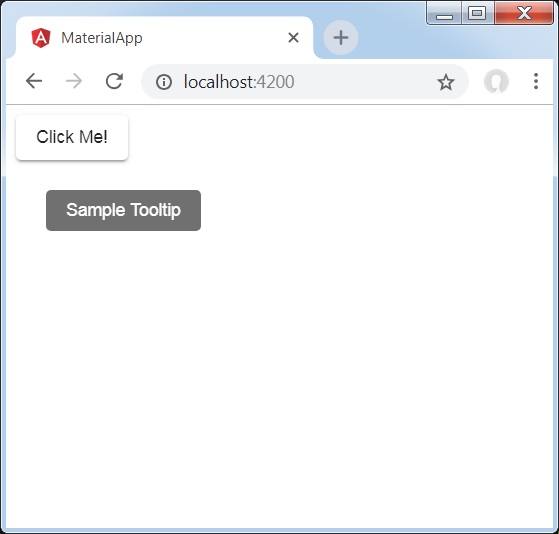
细节
这里,我们使用mat-button创建了一个按钮,鼠标悬停时的我们将显示一个工具提示。
来自 https://www.kaifaxueyuan.com/frontend/angular-material7/angular-material7-tooltip.html
Angular Material 7 分页
<mat-paginator>用于显示带有分页信息的导航器。
在本章中,我们将展示使用Angular Material显示分页器所需的配置。
下面是修改后的app.module.ts文件内容。
import { BrowserModule } from '@angular/platform-browser';
import { NgModule } from '@angular/core';
import { AppComponent } from './app.component';
import {BrowserAnimationsModule} from '@angular/platform-browser/animations';
import {MatPaginatorModule} from '@angular/material'
import {FormsModule, ReactiveFormsModule} from '@angular/forms';
@NgModule({
   declarations: [
      AppComponent
   ],
   imports: [
      BrowserModule,
      BrowserAnimationsModule,
      MatPaginatorModule,
      FormsModule,
      ReactiveFormsModule
   ],
   providers: [],
   bootstrap: [AppComponent]
})
export class AppModule { }
下面是修改后的app.component.html文件内容。
<mat-paginator [length] = "100"
   [pageSize] = "10"
   [pageSizeOptions] = "[5, 10, 25, 100]"
   (page) = "pageEvent = $event">
</mat-paginator>
<div *ngIf = "pageEvent">
   <h5>Page Change Event</h5>
   <div>List length: {{pageEvent.length}}</div>
   <div>Page size: {{pageEvent.pageSize}}</div>
   <div>Page index: {{pageEvent.pageIndex}}</div>
</div>
结果
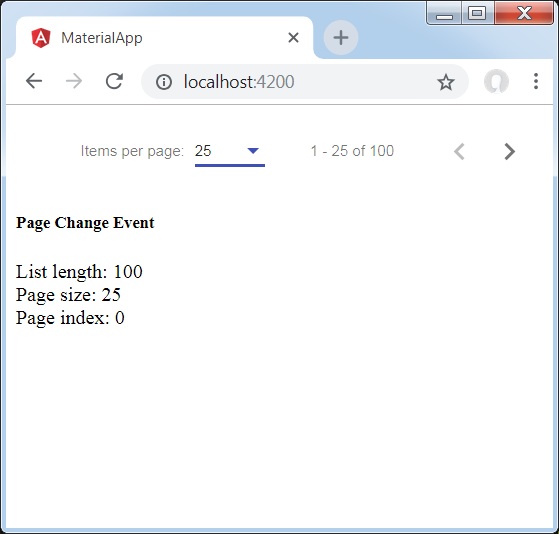
细节
这里,我们使用mat-paginator创建了一个分页器,并处理它的change事件。
来自 https://www.kaifaxueyuan.com/frontend/angular-material7/angular-material7-paginator.html
Angular Material 7 可排序Header
<mat-sort-header>用于为表格标题添加排序功能。
在本章中,我们将展示使用Angular Material显示排序标题所需的配置。
下面是修改后的app.module.ts文件内容。
import { BrowserModule } from '@angular/platform-browser';
import { NgModule } from '@angular/core';
import { AppComponent } from './app.component';
import {BrowserAnimationsModule} from '@angular/platform-browser/animations';
import {MatSortModule} from '@angular/material'
import {FormsModule, ReactiveFormsModule} from '@angular/forms';
@NgModule({
   declarations: [
      AppComponent
   ],
   imports: [
      BrowserModule,
      BrowserAnimationsModule,
      MatSortModule,
      FormsModule,
      ReactiveFormsModule
   ],
   providers: [],
   bootstrap: [AppComponent]
})
export class AppModule { }
下面是修改后的app.component.html文件内容。
<table matSort (matSortChange) = "sortFood($event)">
   <tr>
      <th mat-sort-header = "name">Dessert (100g)</th>
      <th mat-sort-header = "calories">Calories</th>
      <th mat-sort-header = "fat">Fat (g)</th>
      <th mat-sort-header = "carbs">Carbs (g)</th>
      <th mat-sort-header = "protein">Protein (g)</th>
   </tr>
   <tr *ngFor = "let food of sortedFood">
      <td>{{food.name}}</td>
      <td>{{food.calories}}</td>
      <td>{{food.fat}}</td>
      <td>{{food.carbs}}</td>
      <td>{{food.protein}}</td>
   </tr>
</table>
下面是修改后的app.component.ts文件内容。
import {Component, Injectable} from '@angular/core';
import {Sort} from '@angular/material';
export interface Food {
   calories: number;
   carbs: number;
   fat: number;
   name: string;
   protein: number;
}
@Component({
   selector: 'app-root',
   templateUrl: 'app.component.html',
   styleUrls: ['app.component.css']
})
export class AppComponent {
   foods: Food[] = [
      {name: 'Yogurt', calories: 159, fat: 6, carbs: 24, protein: 4},
      {name: 'Sandwich', calories: 237, fat: 9, carbs: 37, protein: 4},
      {name: 'Eclairs', calories: 262, fat: 16, carbs: 24, protein: 6},
      {name: 'Cupcakes', calories: 305, fat: 4, carbs: 67, protein: 4},
      {name: 'Gingerbreads', calories: 356, fat: 16, carbs: 49, protein: 4},
   ];
   sortedFood: Food[];
   constructor() {
      this.sortedFood = this.foods.slice();
   }
   sortFood(sort: Sort) {
      const data = this.foods.slice();
      if (!sort.active || sort.direction === '') {
         this.sortedFood = data;
         return;
      }
      this.sortedFood = data.sort((a, b) => {
         const isAsc = sort.direction === 'asc';
         switch (sort.active) {
            case 'name': return compare(a.name, b.name, isAsc);
            case 'calories': return compare(a.calories, b.calories, isAsc);
            case 'fat': return compare(a.fat, b.fat, isAsc);
            case 'carbs': return compare(a.carbs, b.carbs, isAsc);
            case 'protein': return compare(a.protein, b.protein, isAsc);
            default: return 0;
         }
      });
   }
}
function compare(a: number | string, b: number | string, isAsc: boolean) {
   return (a < b ? -1 : 1) * (isAsc ? 1 : -1);
}
结果
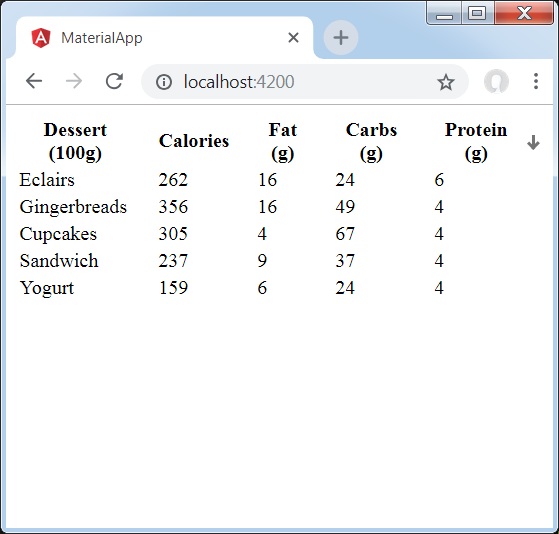
细节
这里,我们创建了一个表,添加了matSort并处理其matSortChange事件。
来自 https://www.kaifaxueyuan.com/frontend/angular-material7/angular-material7-sort-header.html
Angular Material 7 表格
<mat-table>用于创建具有Material风格和样式的表格。
在本章中,我们将展示使用Angular Material显示表格所需的配置。
下面是修改后的app.module.ts文件内容。
import { BrowserModule } from '@angular/platform-browser';
import { NgModule } from '@angular/core';
import { AppComponent } from './app.component';
import {BrowserAnimationsModule} from '@angular/platform-browser/animations';
import {MatTableModule} from '@angular/material'
import {FormsModule, ReactiveFormsModule} from '@angular/forms';
@NgModule({
   declarations: [
      AppComponent
   ],
   imports: [
      BrowserModule,
      BrowserAnimationsModule,
      MatTableModule,
      FormsModule,
      ReactiveFormsModule
   ],
   providers: [],
   bootstrap: [AppComponent]
})
export class AppModule { }
下面是修改后的app.component.html文件内容。
<table mat-table [dataSource] = "dataSource" class = "mat-elevation-z8">
   <ng-container matColumnDef = "name">
      <th mat-header-cell *matHeaderCellDef> Dessert (100g)</th>
      <td mat-cell *matCellDef = "let element"> {{element.name}} </td>
   </ng-container>
   <ng-container matColumnDef = "calories">
      <th mat-header-cell *matHeaderCellDef>Calories</th>
      <td mat-cell *matCellDef = "let element"> {{element.calories}} </td>
   </ng-container>
   <ng-container matColumnDef = "fat">
      <th mat-header-cell *matHeaderCellDef>Fat (g)</th>
      <td mat-cell *matCellDef = "let element"> {{element.fat}} </td>
   </ng-container>
   <ng-container matColumnDef = "carbs">
      <th mat-header-cell *matHeaderCellDef>Carbs (g)</th>
      <td mat-cell *matCellDef = "let element"> {{element.carbs}} </td>
   </ng-container>
   <ng-container matColumnDef = "protein">
      <th mat-header-cell *matHeaderCellDef>Protein (g)</th>
     <td mat-cell *matCellDef = "let element"> {{element.protein}} </td>
   </ng-container>
   <tr mat-header-row *matHeaderRowDef = "displayedColumns"></tr>
   <tr mat-row *matRowDef = "let row; columns: displayedColumns;"></tr>
</table>
Following is the content of the modified ts file app.component.css.

table {
   width: 100%;
}
下面是修改后的app.component.ts文件内容。
import {Component, Injectable} from '@angular/core';
import {Sort} from '@angular/material';
export interface Food {
   calories: number;
   carbs: number;
   fat: number;
   name: string;
   protein: number;
}
@Component({
   selector: 'app-root',
   templateUrl: 'app.component.html',
   styleUrls: ['app.component.css']
})
export class AppComponent {
   dataSource: Food[] = [
      {name: 'Yogurt', calories: 159, fat: 6, carbs: 24, protein: 4},
      {name: 'Sandwich', calories: 237, fat: 9, carbs: 37, protein: 4},
      {name: 'Eclairs', calories: 262, fat: 16, carbs: 24, protein: 6},
      {name: 'Cupcakes', calories: 305, fat: 4, carbs: 67, protein: 4},
      {name: 'Gingerbreads', calories: 356, fat: 16, carbs: 49, protein: 4},
   ];
   displayedColumns: string[] = ['name', 'calories', 'fat', 'carbs','protein'];
}
结果
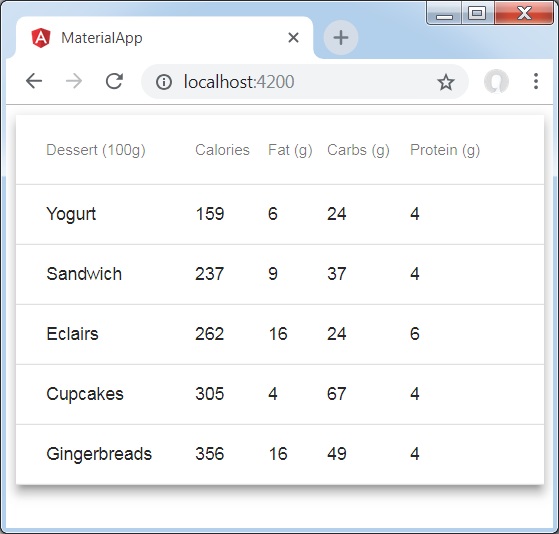
细节
这里,我们使用mat-Table创建了一个表格,并使用mat-row和mat-header-row处理tr和th。
来自 https://www.kaifaxueyuan.com/frontend/angular-material7/angular-material7-sort-table.html
