You are here
马哥 29_04 _samba之二 有大用
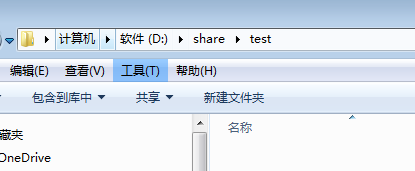
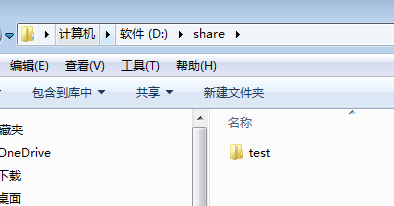
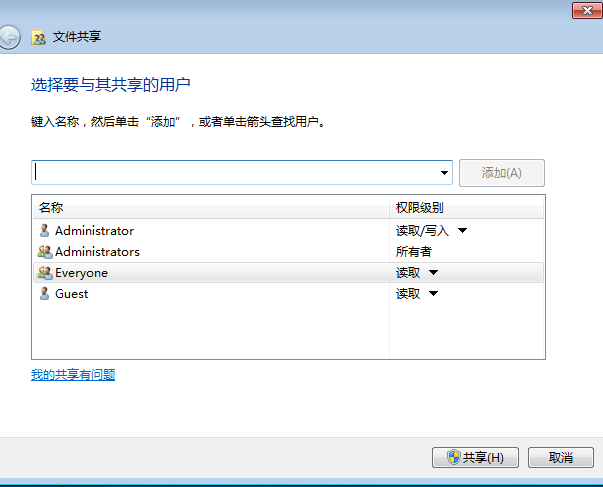
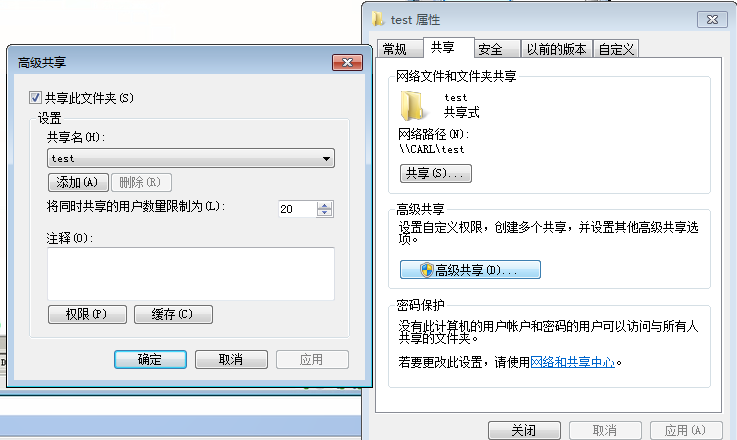
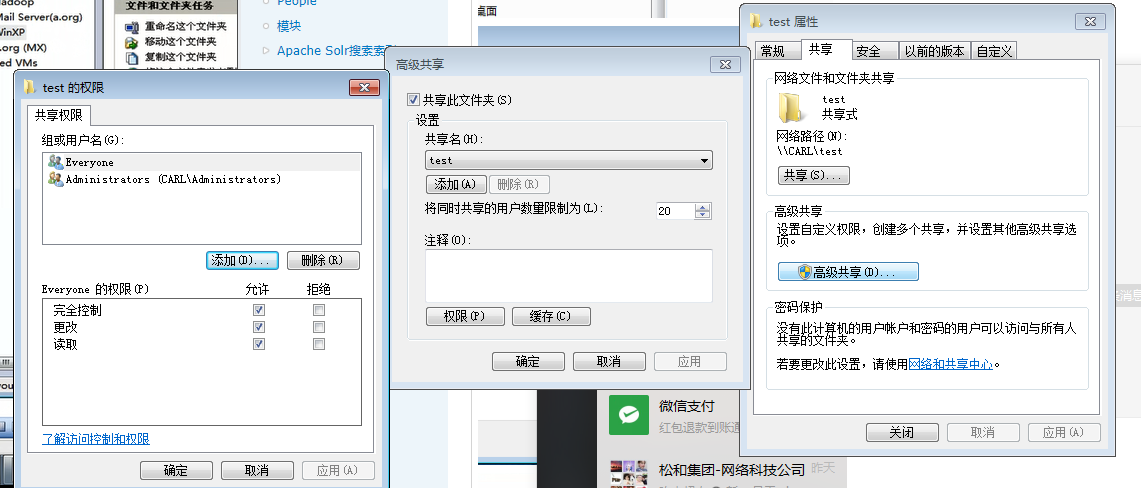
windows 中建目录
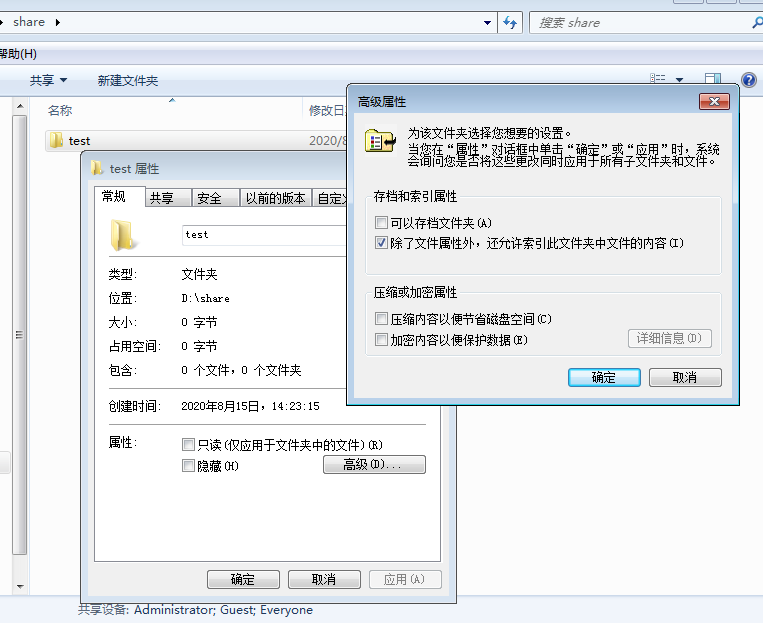
D:\share\test
[root@mail ~]# man smbclient # 类似于 ftp 的 基于命令行的smb客户端工具
-L (-L|--list )
-L NetBIOS_Name(主机名或ip地址)
-U
-U Username
-P ( -P|--machine-pass )
-P password
[root@mail ~]# ping 192.168.1.251

[root@mail ~]# smbclient -L 192.168.1.251 # 来宾账户 不用指定 -U 用户名,不用指定 密码,直接回车
Enter root's password:
protocol negotiation failed: NT_STATUS_INSUFFICIENT_RESOURCES
[root@mail ~]#
在windows 的 dos命令行上执行如下两个命令
> net stop LanmanServer /y
> net start LanmanServer
[root@mail ~]# smbclient -L 192.168.1.251 # 来宾账户 不用指定 -U 用户名,不用指定 密码,直接回车
Enter root's password:
Domain=[CARL] OS=[Windows 7 Ultimate 7601 Service Pack 1] Server=[Windows 7 Ultimate 6.1]
Sharename Type Comment
--------- ---- -------
ADMIN$ Disk 远程管理
C$ Disk 默认共享
D$ Disk 默认共享
E$ Disk 默认共享
F$ Disk 默认共享
G$ Disk 默认共享
IPC$ IPC 远程 IPC
test Disk
共享文件 Disk
共享文件2 Disk
网络公司文件共享 Disk
session request to 192.168.1.251 failed (Called name not present)
session request to 192 failed (Called name not present)
session request to *SMBSERVER failed (Called name not present)
NetBIOS over TCP disabled -- no workgroup available
[root@mail ~]#
windows 中
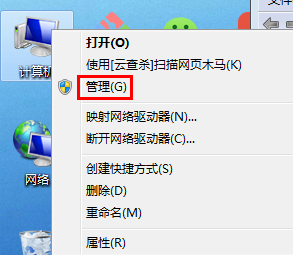
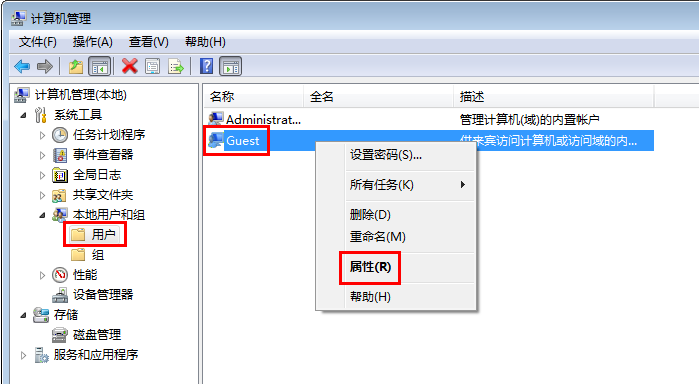
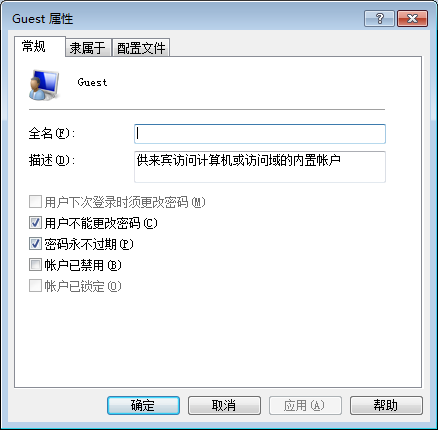
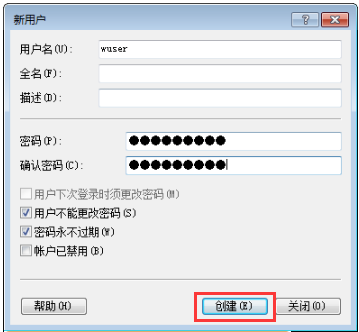
下面两图是建一个叫做 wuser 的用户
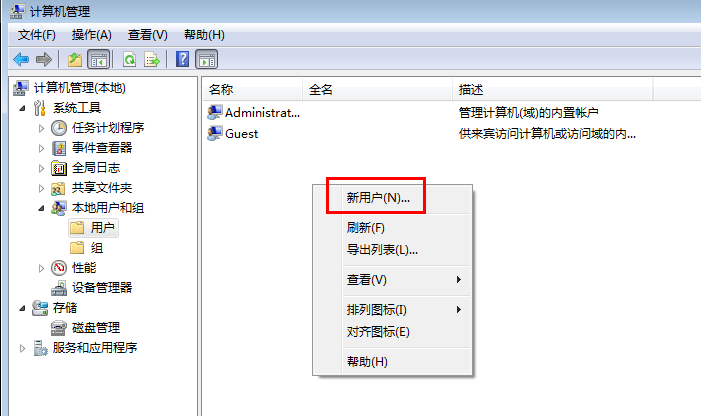
[root@mail ~]# smbclient -L 192.168.1.251 -U wuser # 这里 -P也不用使用了
Enter wuser's password:
Domain=[CARL] OS=[Windows 7 Ultimate 7601 Service Pack 1] Server=[Windows 7 Ulti mate 6.1]
Sharename Type Comment
--------- ---- -------
ADMIN$ Disk 远程管理
C$ Disk 默认共享
D$ Disk 默认共享
E$ Disk 默认共享
F$ Disk 默认共享
G$ Disk 默认共享
IPC$ IPC 远程 IPC
test Disk
共享文件 Disk
共享文件2 Disk
网络公司文件共享 Disk
session request to 192.168.1.251 failed (Called name not present)
session request to 192 failed (Called name not present)
session request to *SMBSERVER failed (Called name not present)
NetBIOS over TCP disabled -- no workgroup available
[root@mail ~]#
smbclient 直接访问 UNC路径 linux上是正斜杠
[root@mail ~]# smbclient //192.168.1.251/test -U wuser
Enter wuser's password:
session request to 192.168.1.251 failed (Called name not present)
Domain=[CARL] OS=[Windows 7 Ultimate 7601 Service Pack 1] Server=[Windows 7 Ultimate 6.1]
smb: \> ls
. DR 0 Mon Aug 17 13:25:56 2020
.. DR 0 Mon Aug 17 13:25:56 2020
desktop.ini HS 69 Mon Aug 17 13:25:56 2020
64683 blocks of size 524288. 8976 blocks available
smb: \>
在 windows 上建一文件 abc.txt
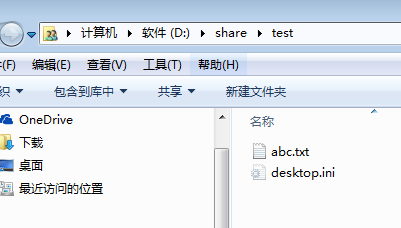
(我这里看到了 abc文件,马哥那里看不到这个abc文件)
smb: \> ls
. DR 0 Mon Aug 17 16:39:12 2020
.. DR 0 Mon Aug 17 16:39:12 2020
abc.txt A 0 Mon Aug 17 16:39:11 2020
desktop.ini HS 69 Mon Aug 17 13:25:56 2020
64683 blocks of size 524288. 8976 blocks available
smb: \>
访问 linux 共享看看 (这里是访问本机) 192.168.1.75
[root@mail ~]# setfacl -m u:eucalyptus:rwx /share/test/ #这个命令的作用是让 eucalyptus 用户对这个目录有写权限
[root@mail ~]# getfacl /share/test/
getfacl: Removing leading '/' from absolute path names
# file: share/test
# owner: root
# group: root
user::rwx
user:eucalyptus:rwx
group::r-x
mask::rwx
other::r-x
[root@mail ~]#
[root@mail ~]# smbclient -L 192.168.1.75
Enter root's password:
Anonymous login successful
Domain=[MYGROUP] OS=[Unix] Server=[Samba 3.6.6-0.136.el5]
Sharename Type Comment
--------- ---- -------
tools Disk Share Testing # tools 可以browsable ,但是未必是 public 的
IPC$ IPC IPC Service (Samba Server Version 3.6.6-0.136.el5)
Anonymous login successful
Domain=[MYGROUP] OS=[Unix] Server=[Samba 3.6.6-0.136.el5]
Server Comment
--------- -------
Workgroup Master
--------- -------
[root@mail ~]#
[root@mail ~]# smbclient //192.168.1.75/tools -U eucalyptus
Enter eucalyptus's password:
Domain=[MYGROUP] OS=[Unix] Server=[Samba 3.6.6-0.136.el5]
smb: \> help # 这里的命令与 ftp 的客户端类似
? allinfo altname archive blocksize
cancel case_sensitive cd chmod chown
close del dir du echo
exit get getfacl geteas hardlink
help history iosize lcd link
lock lowercase ls l mask
md mget mkdir more mput
newer open posix posix_encrypt posix_open
posix_mkdir posix_rmdir posix_unlink print prompt
put pwd q queue quit
readlink rd recurse reget rename
reput rm rmdir showacls setea
setmode stat symlink tar tarmode
translate unlock volume vuid wdel
logon listconnect showconnect .. !
smb: \>
smb: \> lcd /etc # local cd 就是进入客户端本地吧
smb: \>
smb: \> put fstab
putting file fstab as \fstab (13.7 kb/s) (average 13.7 kb/s)
smb: \>
可以看到 fstab 文件
[root@mail ~]# ls /share/test/
fstab
[root@mail ~]#
以 本机作服务器端
[root@mail ~]# smbclient //192.168.1.75/tools -U eucalyptus
Enter eucalyptus's password:
Domain=[MYGROUP] OS=[Unix] Server=[Samba 3.6.6-0.136.el5]
smb: \> cd
Current directory is \
smb: \> pwd #显示的是服务器上的目录
Current directory is \\192.168.1.75\tools\
smb: \>
smb: \> !pwd #感叹号pwd 就是 本地的目录
/etc
smb: \> lcd /home/eucalyptus #切换本地目录
smb: \> !pwd
/home/eucalyptus
smb: \>
smb: \> get fstab
getting file \fstab of size 534 as fstab (18.0 KiloBytes/sec) (average 18.0 KiloBytes/sec)
smb: \>
smb: \> exit
[root@mail ~]#
[root@mail ~]# su - eucalyptus
[eucalyptus@mail ~]$ ls #可以看到家目录下面有fstab文件了
fstab
[eucalyptus@mail ~]$
windows 可以 映射网络驱动器 来挂载 smb
linux 也可以挂载 smb
[root@mail ~]# mount -t cifs //192.168.1.75/tools /mnt -o username=eucalyptus # -o 选项,指定以哪个用户的身份挂载 o 就是option的意思吧
Password: #输入密码后,它就挂载了
[root@mail ~]#
[root@mail ~]# cp /etc/issue /mnt
[root@mail ~]# ls /mnt # 看到 issue
fstab issue
[root@mail ~]# ls /share/test/ #挂载提供的目录(//192.168.1.75/tools) 看到 issue
fstab issue
[root@mail ~]#
想开机自动挂载
[root@mail ~]# vim /etc/fstab
/dev/VolGroup00/LogVol00 / ext3 defaults 1 1
LABEL=/boot /boot ext3 defaults 1 2
tmpfs /dev/shm tmpfs defaults 0 0
devpts /dev/pts devpts gid=5,mode=620 0 0
sysfs /sys sysfs defaults 0 0
proc /proc proc defaults 0 0
/dev/VolGroup00/LogVol01 swap swap defaults 0 0
//192.168.1.75/tools /mnt cifs credentials=/etc/samba/cred.passwd 0 0
#把 凭证写到 /etc/samba/cred.passwd 文件里,只有root 才有对 /etc/samba/cred.passwd 的访问权限
[root@mail ~]# vim /etc/samba/cred.passwd
username=eucalyptus
password=1111
让其它人对它没有访问权限
[root@mail ~]# chmod og=--- /etc/samba/cred.passwd
[root@mail ~]#
卸载掉 //192.168.1.75/tools
[root@mail ~]# umount /mnt
[root@mail ~]# ls /mnt
[root@mail ~]#
[root@mail ~]# mount -a # -a选项 挂载 /etc/fstab 下面的所有的文件系统 ( -a Mount all filesystems (of the given types) mentioned in fstab. )
看到了 挂载的 //192.168.1.75/tools 的内容
[root@mail ~]# ls /mnt
fstab issue
[root@mail ~]#
新建一个共享,共享名为tools,开放给mygrp中的所有用户具有读写权限,其他用户只有读权限 ( /etc/samba/smb.conf )
public = yes ( guest ok = yes )
write list = @mygrp
[tools]
comment =
path =
guest ok = yes
write list = @mygrp
还要注意 让 mygrp 组 对 path定义的目录有写权限
samba:基于IP的访问
1) iptables:
开放 tcp 139 445 端口
开放 udp 137 138 端口
2) samba 配置文件
hosts allow = IP地址(或网络地址) 中间用空格隔开 (选项 (白名单))
hosts deny = ( 选项(黑名单) )
[root@mail ~]# vim /etc/samba/smb.conf
; hosts allow = 127. 192.168.12. 192.168.13. (这里好像不需要用 192.168.0.0/24 这样的格式 ,直接是 192.168.0. )
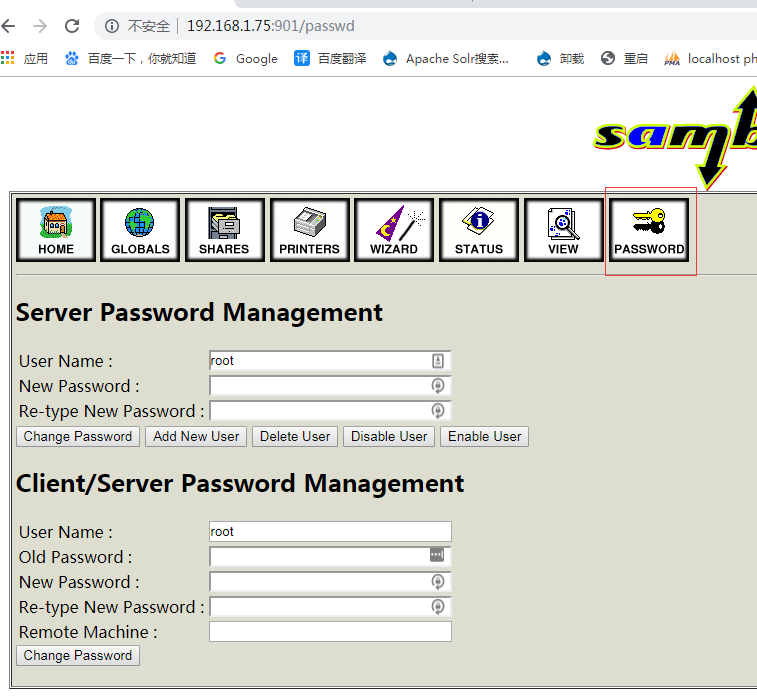
samba-swat 是 samba的 web 服务器访问工具 swat (samba web access tools)
web GUI:基于web的图形配置界面
[root@mail ~]# yum list all | grep samba
This system is not registered to Red Hat Subscription Management. You can use subscription-manager to register.
samba3x.i386 3.6.6-0.136.el5 installed
samba3x-client.i386 3.6.6-0.136.el5 installed
samba3x-common.i386 3.6.6-0.136.el5 installed
samba3x-winbind.i386 3.6.6-0.136.el5 installed
samba.i386 3.0.33-3.39.el5_8 cdrom
samba-client.i386 3.0.33-3.39.el5_8 cdrom
samba-common.i386 3.0.33-3.39.el5_8 cdrom
samba-swat.i386 3.0.33-3.39.el5_8 cdrom
samba3x-doc.i386 3.6.6-0.136.el5 cdrom
samba3x-domainjoin-gui.i386 3.6.6-0.136.el5 cdrom
samba3x-swat.i386 3.6.6-0.136.el5 cdrom
samba3x-winbind-devel.i386 3.6.6-0.136.el5 cdrom
sblim-cmpi-samba.i386 1:1.0-49.el5 cdrom
sblim-cmpi-samba-devel.i386 1:1.0-49.el5 cdrom
sblim-cmpi-samba-test.i386 1:1.0-49.el5 cdrom
system-config-samba.noarch 1.2.41-5.el5 cdrom
[root@mail ~]# yum -y install samba3x-swat #安装 samba3x-swat

samba3x-swat 是一个非独立进程
守护进程:
standalone 独立守护进程
transient 瞬时守护进程(短暂守护进程)(非独立进程)
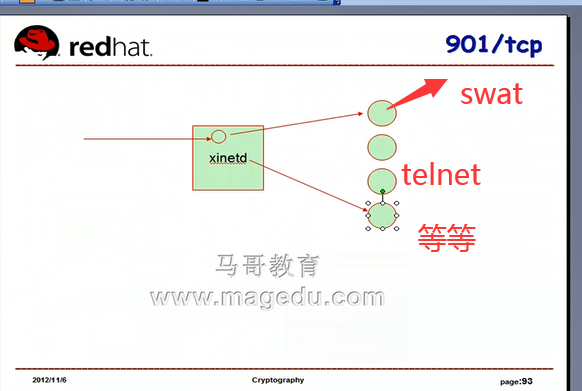
xinetd 超级守护进程,它是一个独立守护进程,本身不提供服务,为那些本身不经常被访问到的服务(如 swat)代为监听端口
,有人通过901(假设901)来了,xined就启动swat,一旦swat提供服务后,swat就又离开了,仍然由
xined 提供监听901端口
不用启动swat ,只要启动 xinetd
[root@mail ~]# service xinetd start
启动 xinetd:
[root@mail ~]#
[root@mail ~]# chkconfig --list xinetd
xinetd 0:关闭 1:关闭 2:关闭 3:启用 4:启用 5:启用 6:关闭
[root@mail ~]#
所有的瞬时守护进程都没有级别的概念
[root@mail ~]# chkconfig --list
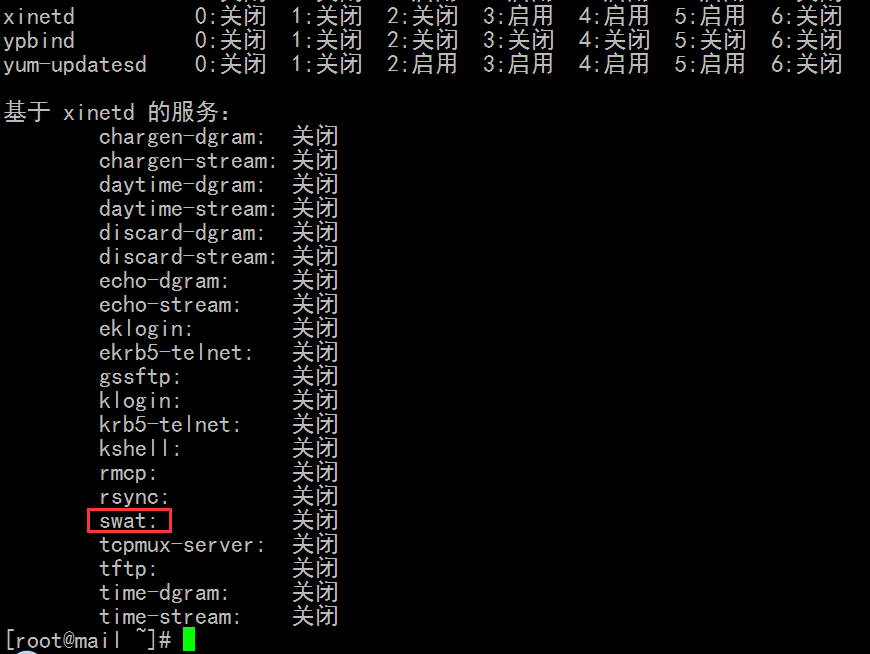
[root@mail ~]# netstat -tnlp # 下面没有看到关于xinetd swat
Active Internet connections (only servers)
Proto Recv-Q Send-Q Local Address Foreign Address State PID/Program name
tcp 0 0 127.0.0.1:2208 0.0.0.0:* LISTEN 3856/./hpiod
tcp 0 0 0.0.0.0:2049 0.0.0.0:* LISTEN -
tcp 0 0 0.0.0.0:32803 0.0.0.0:* LISTEN -
tcp 0 0 127.0.0.1:9000 0.0.0.0:* LISTEN 3869/php-fpm
tcp 0 0 0.0.0.0:3306 0.0.0.0:* LISTEN 4221/mysqld
tcp 0 0 0.0.0.0:139 0.0.0.0:* LISTEN 15271/smbd
tcp 0 0 0.0.0.0:875 0.0.0.0:* LISTEN 7276/rpc.rquotad
tcp 0 0 0.0.0.0:685 0.0.0.0:* LISTEN 3471/rpc.statd
tcp 0 0 0.0.0.0:111 0.0.0.0:* LISTEN 3421/portmap
tcp 0 0 192.168.1.75:53 0.0.0.0:* LISTEN 17774/named
tcp 0 0 127.0.0.1:53 0.0.0.0:* LISTEN 17774/named
tcp 0 0 0.0.0.0:21 0.0.0.0:* LISTEN 4109/vsftpd
tcp 0 0 0.0.0.0:22 0.0.0.0:* LISTEN 3890/sshd
tcp 0 0 127.0.0.1:631 0.0.0.0:* LISTEN 3904/cupsd
tcp 0 0 127.0.0.1:953 0.0.0.0:* LISTEN 17774/named
tcp 0 0 0.0.0.0:25 0.0.0.0:* LISTEN 4394/master
tcp 0 0 0.0.0.0:892 0.0.0.0:* LISTEN 7292/rpc.mountd
tcp 0 0 0.0.0.0:445 0.0.0.0:* LISTEN 15271/smbd
tcp 0 0 127.0.0.1:2207 0.0.0.0:* LISTEN 3861/python
tcp 0 0 :::995 :::* LISTEN 4258/dovecot
tcp 0 0 :::139 :::* LISTEN 15271/smbd
tcp 0 0 :::110 :::* LISTEN 4258/dovecot
tcp 0 0 :::80 :::* LISTEN 4434/httpd
tcp 0 0 :::22 :::* LISTEN 3890/sshd
tcp 0 0 ::1:953 :::* LISTEN 17774/named
tcp 0 0 :::445 :::* LISTEN 15271/smbd
[root@mail ~]#
启动 swat , 瞬时守护进程, 无级别概念
[root@mail ~]# chkconfig swat on
[root@mail ~]#
#由下面 swat 启动了
[root@mail ~]# netstat -tnlp
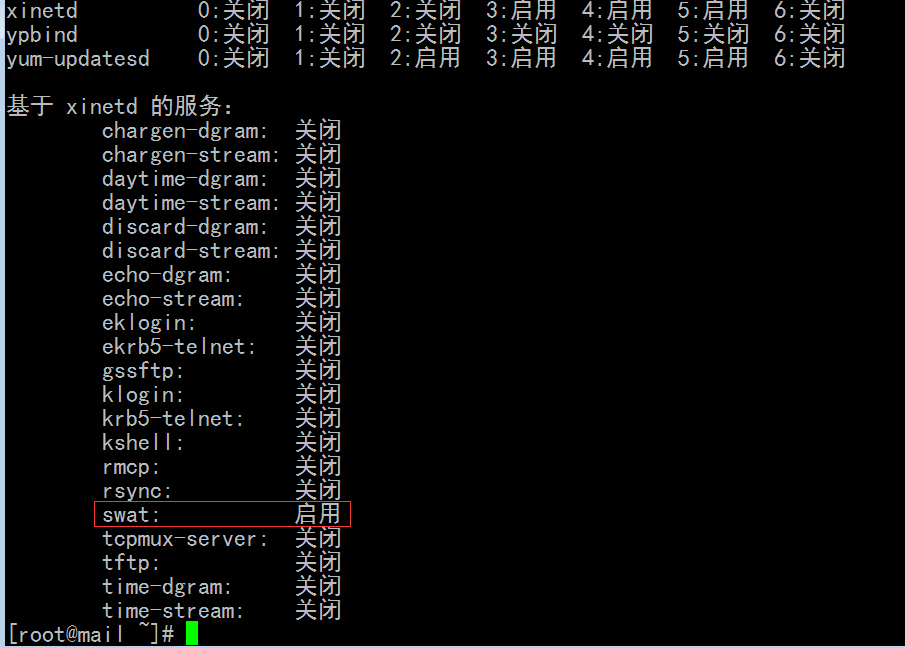
swat 启动后
还要 xinetd 重启下
[root@mail ~]# service xinetd restart
停止 xinetd: [确定]
启动 xinetd: [确定]
[root@mail ~]#
[root@mail ~]# netstat -tnlp
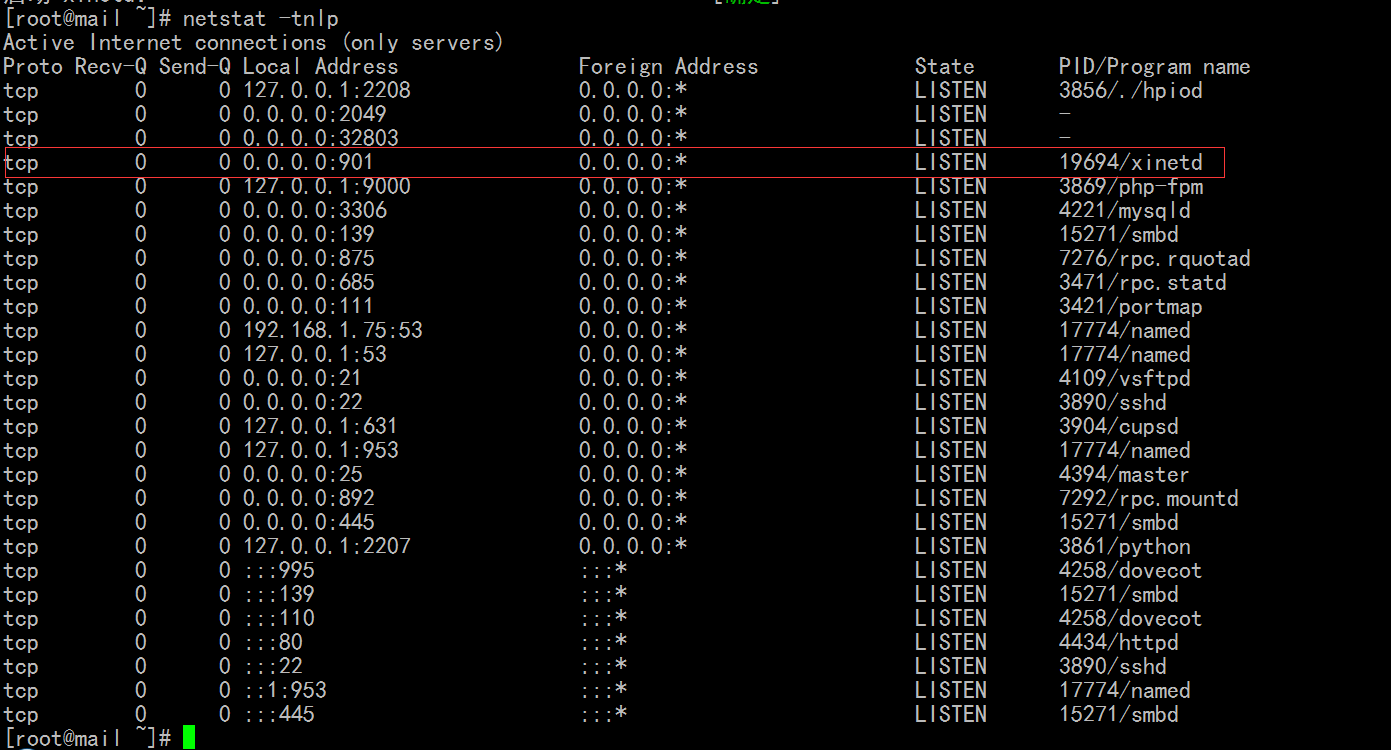
swat 自身是一个独立的web服务,不需apache
每一个非独立守护进程,都有自己的配置文件
[root@mail ~]# cd /etc/xinetd.d
[root@mail xinetd.d]# ls # 可看到 swat
chargen-dgram discard-stream gssftp rsync time-stream
chargen-stream echo-dgram klogin swat
daytime-dgram echo-stream krb5-telnet tcpmux-server
daytime-stream eklogin kshell tftp
discard-dgram ekrb5-telnet rmcp time-dgram
[root@mail xinetd.d]#
[root@mail xinetd.d]# pwd
/etc/xinetd.d
[root@mail xinetd.d]#
[root@mail xinetd.d]# vim swat
# default: off
# description: SWAT is the Samba Web Admin Tool. Use swat \
# to configure your Samba server. To use SWAT, \
# connect to port 901 with your favorite web browser.
service swat
{
disable = yes #此时禁用
port = 901
socket_type = stream
wait = no
only_from = 127.0.0.1
user = root
server = /usr/sbin/swat
log_on_failure += USERID
}
~
~
~
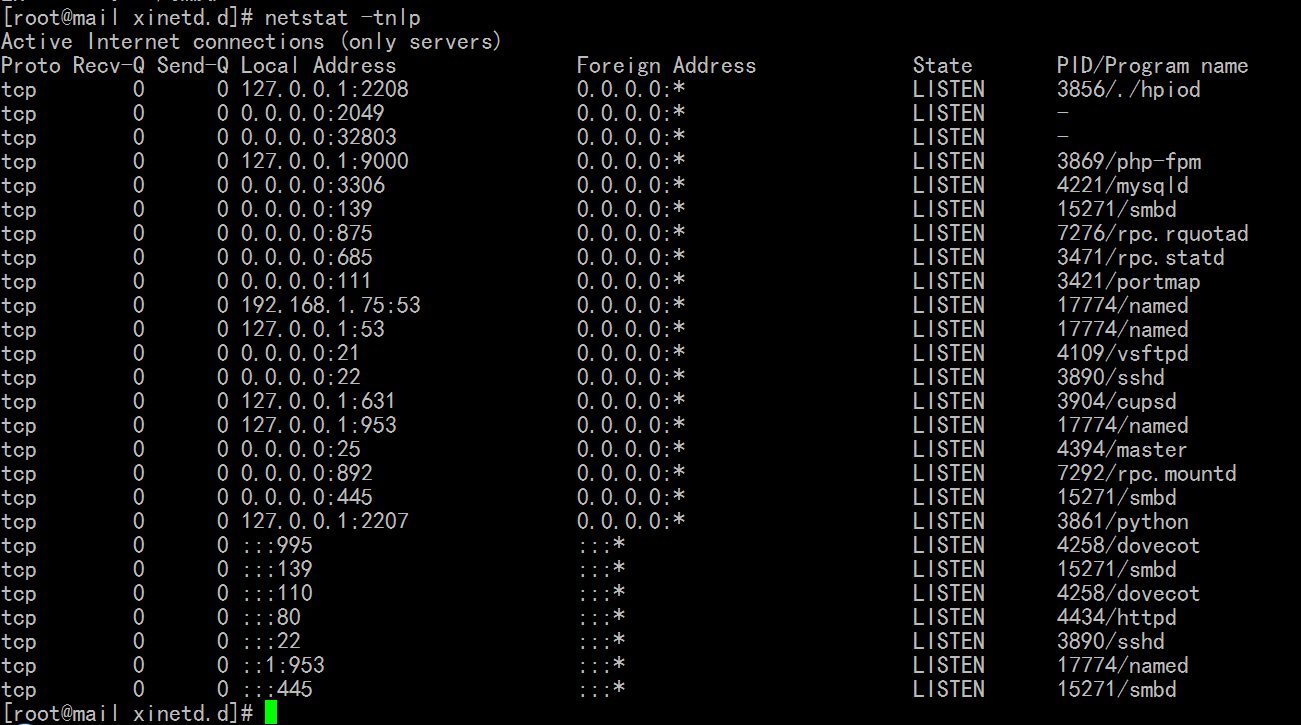
[root@mail xinetd.d]# service xinetd restart
停止 xinetd: [确定]
启动 xinetd: [确定]
[root@mail xinetd.d]#
[root@mail xinetd.d]# netstat -tnlp # 901端口又关掉了
[root@mail xinetd.d]# vim swat
# default: off
# description: SWAT is the Samba Web Admin Tool. Use swat \
# to configure your Samba server. To use SWAT, \
# connect to port 901 with your favorite web browser.
service swat
{
disable = no # 改成 no ,不禁用
port = 901
socket_type = stream
wait = no
only_from = 127.0.0.1
user = root
server = /usr/sbin/swat
log_on_failure += USERID
}
重启 xinetd
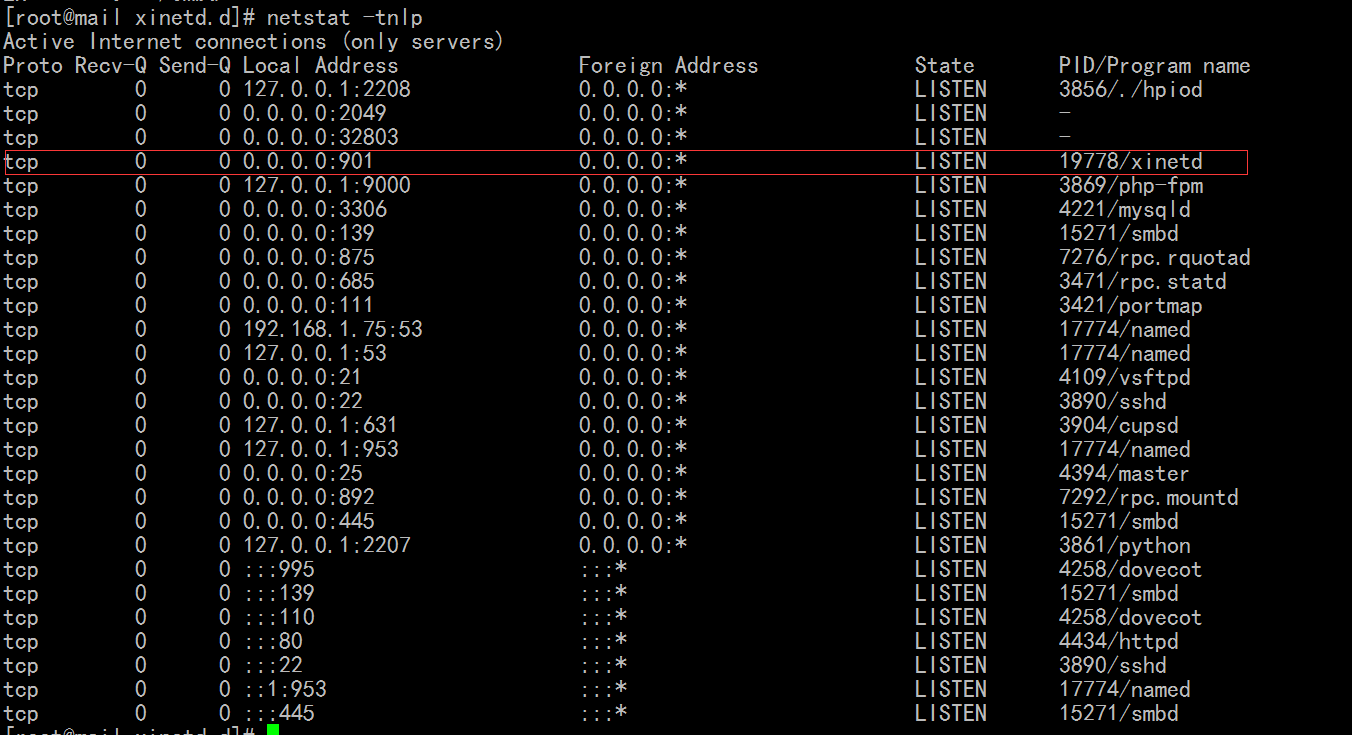
[root@mail xinetd.d]# service xinetd restart
停止 xinetd: [确定]
启动 xinetd: [确定]
[root@mail xinetd.d]#
[root@mail xinetd.d]# netstat -tnlp # 又看到了 901 端口
[root@mail xinetd.d]# vim swat
# default: off
# description: SWAT is the Samba Web Admin Tool. Use swat \
# to configure your Samba server. To use SWAT, \
# connect to port 901 with your favorite web browser.
service swat
{
disable = no #不禁用
port = 901 #监听端口
socket_type = stream # stream流表示tcp协议 ,dgram (data_gram) 数据报文,表示udp协议
wait = no #是不是允许两个以上的用户同时访问swat, 等于no表示,不等待,允许(启动多个进程,响应多个用户的请求);yes表示等待,不允许
only_from = 127.0.0.1 # (可以网段,比如 192.168.1.0/24 有时必须使用 192.168.1.0/255.255.255.0 )做白名单的,仅允许通过 127.0.0.1 来访问 901端口 ,因为swat 能够直接操作samba,还得输账号密码,第一次的时候,是当前系统上账号的管理员的用户名密码,(当然以后可以改),如果远程可以访问,别人嗅探器抓取ip协议报文就可以知道账号密码了
user = root #以root用户的身份来运行这个服务 /usr/sbin/swat
server = /usr/sbin/swat
log_on_failure += USERID #有错误的时候,记录用户id号 +=表示在原有的记录上追加
}
[root@mail xinetd.d]# vim swat
# default: off
# description: SWAT is the Samba Web Admin Tool. Use swat \
# to configure your Samba server. To use SWAT, \
# connect to port 901 with your favorite web browser.
service swat
{
disable = no
port = 901
socket_type = stream
wait = no
only_from = 192.168.1.0/24 #仅仅改的这里
user = root
server = /usr/sbin/swat
log_on_failure += USERID
}
[root@mail xinetd.d]# service xinetd restart
停止 xinetd: [确定]
启动 xinetd: [确定]
[root@mail xinetd.d]#
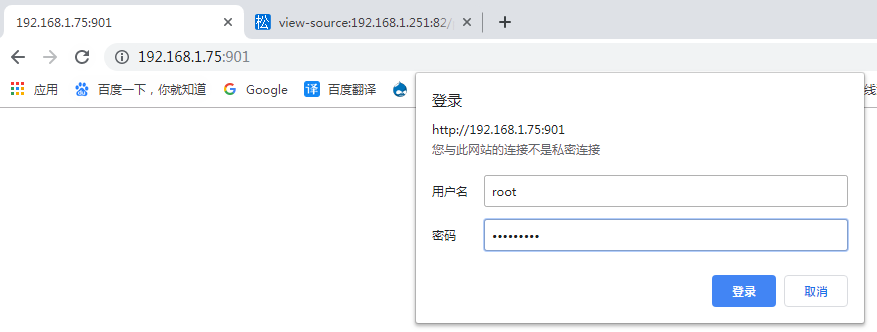
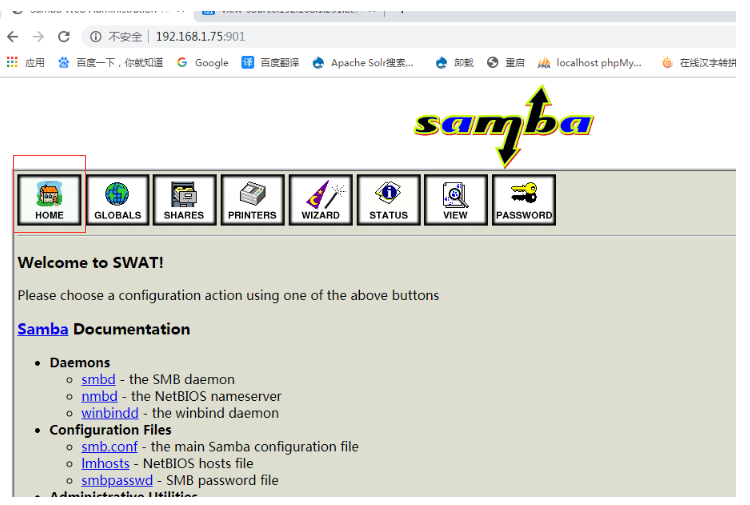
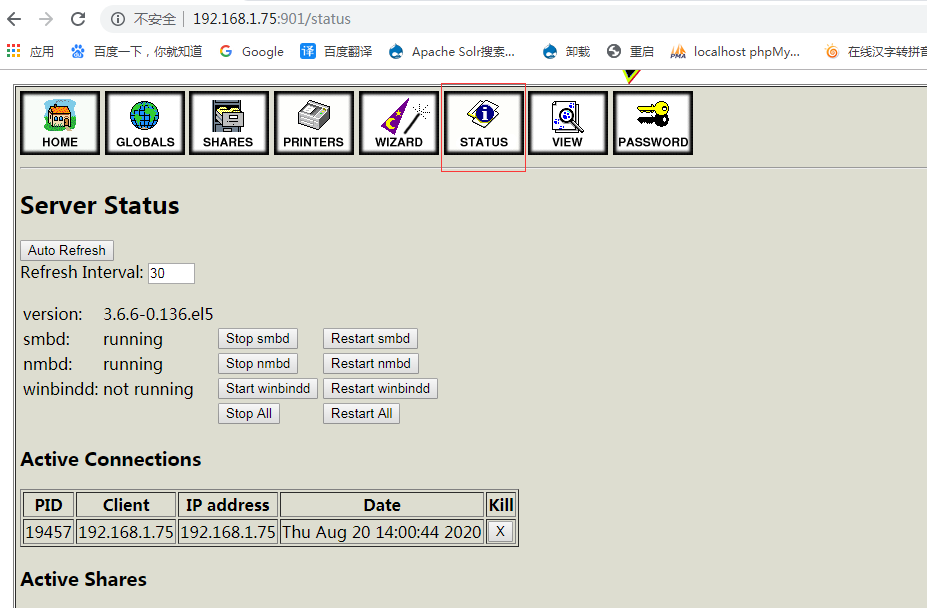
第一次的时候,使用 root 来登录

[root@mail xinetd.d]# service smb restart
关闭 SMB 服务: [确定]
启动 SMB 服务: [确定]
[root@mail xinetd.d]# service nmb restart
关闭 NMB 服务: [确定]
启动 NMB 服务: [确定]
[root@mail xinetd.d]#
[root@mail xinetd.d]# smbclient -L 192.168.1.75
Enter root's password: #这里是匿名用户的密码,是空密码
Anonymous login successful
Domain=[MYGROUP] OS=[Unix] Server=[Samba 3.6.6-0.136.el5]
Sharename Type Comment
--------- ---- -------
tools Disk Share Testing
IPC$ IPC IPC Service (Samba Server Version 3.6.6-0.136.el5)
Anonymous login successful
Domain=[MYGROUP] OS=[Unix] Server=[Samba 3.6.6-0.136.el5]
Server Comment
--------- -------
MAIL Samba Server Version 3.6.6-0.136.el5
Workgroup Master
--------- -------
MYGROUP MAIL
WORKGROUP PC-PC
[root@mail xinetd.d]#
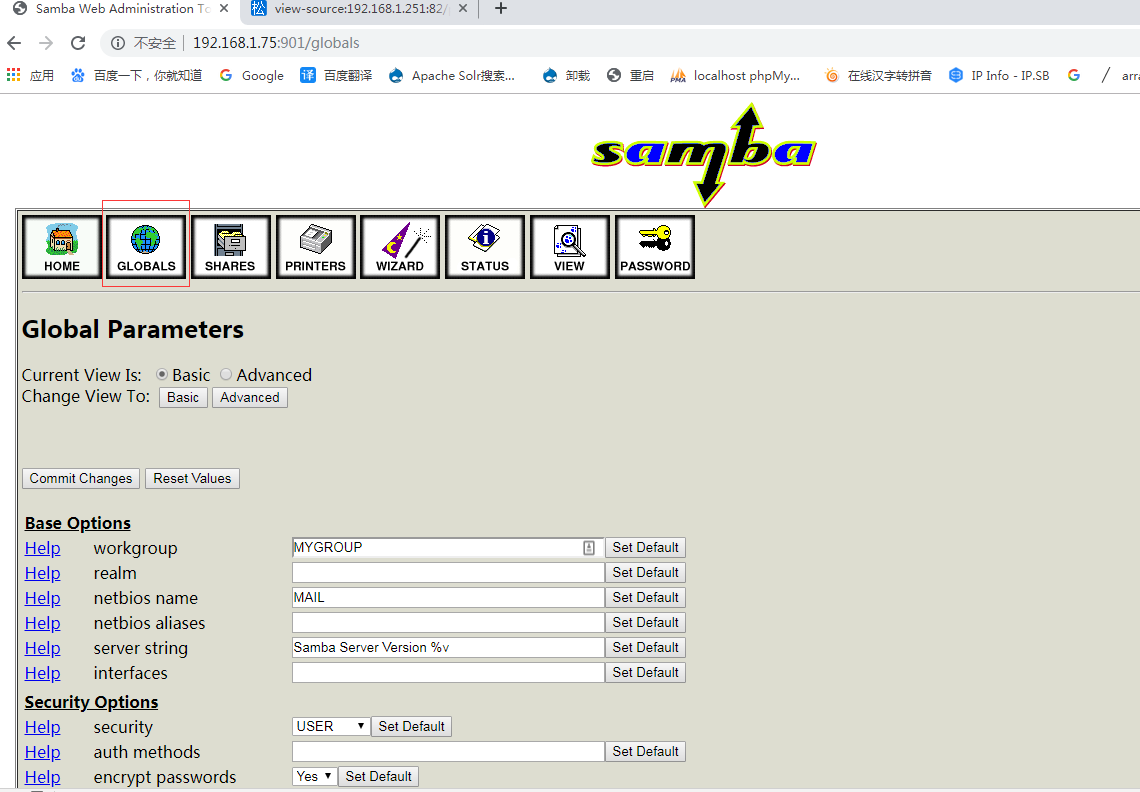
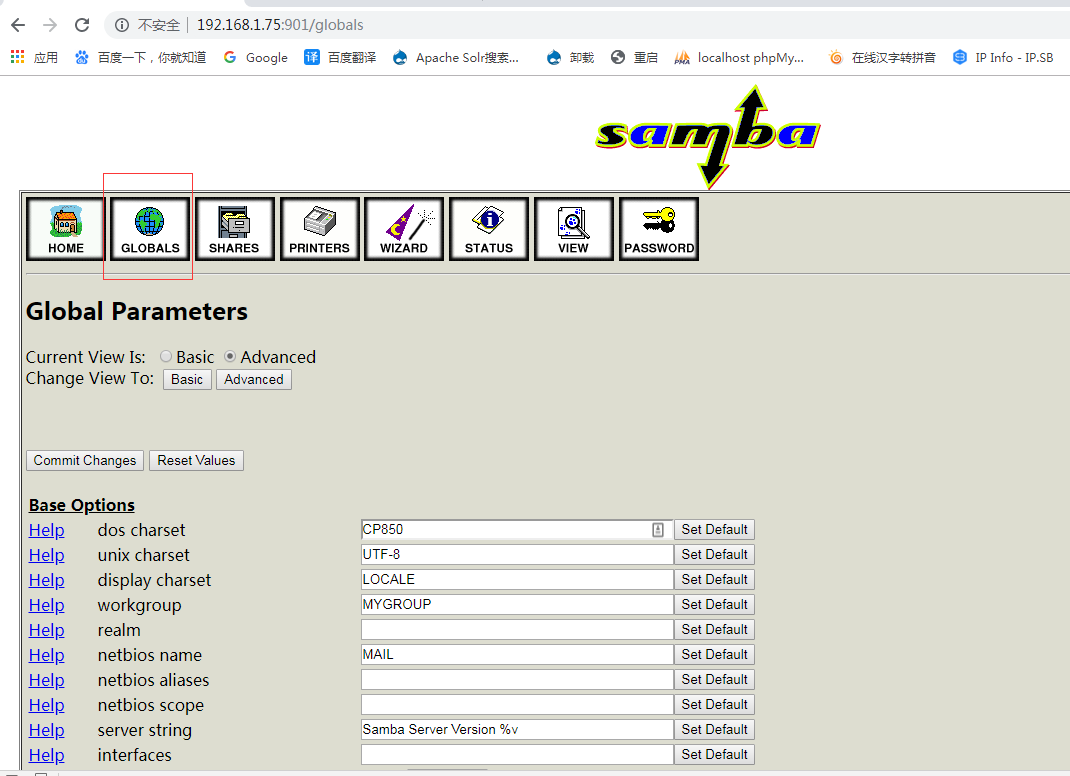
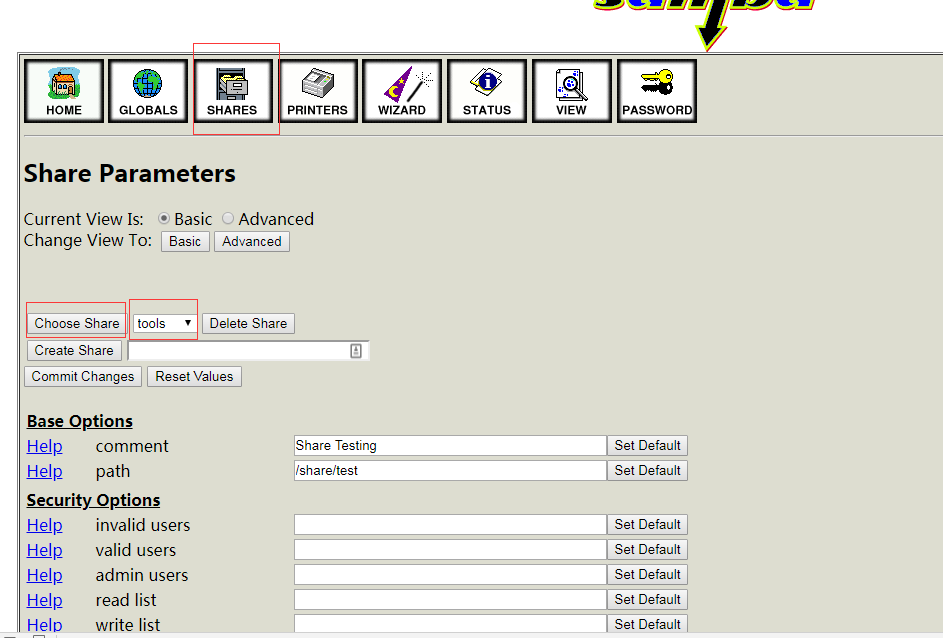
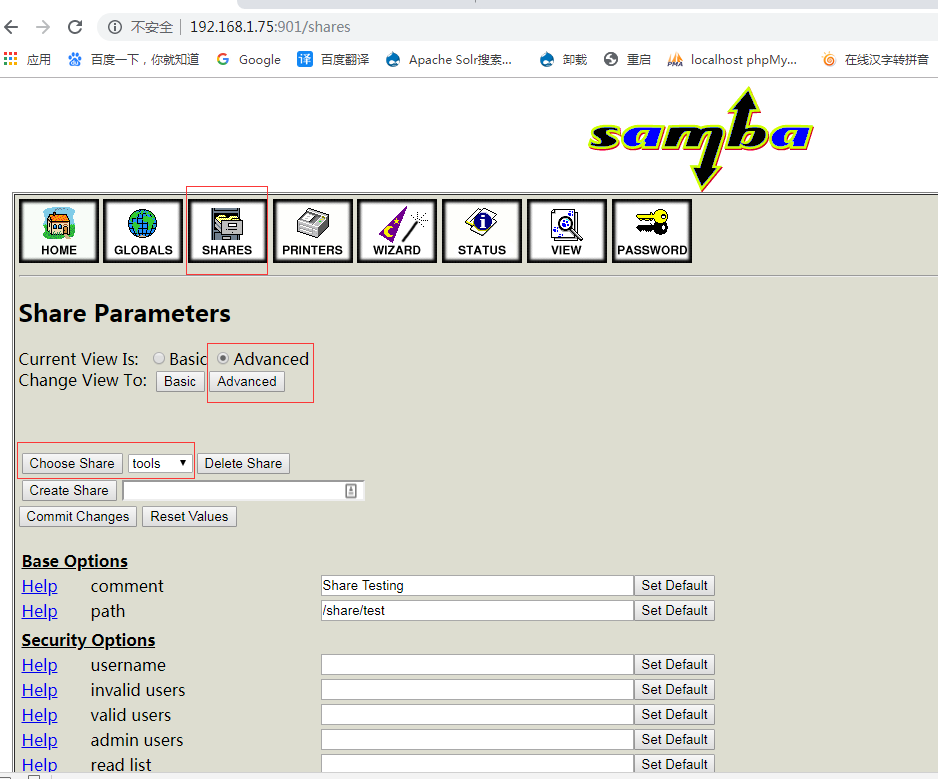
当把上面的 web 页面 swat 保存以后,会直接覆盖 /etc/samba/smb.conf 文件,只保留定义的有效选项 ,所以此前的 /etc/samba/smb.conf 文件最好备份一下
[root@mail xinetd.d]# vim /etc/samba/smb.conf

当把上 面的 web页面 swat 保存以后,会保存配置到 /etc/samba/smb.conf ,同时让swat进程重读配置文件
第一次用了后,最好改用户名 改密码
