You are here
马哥 30_04 _nss&pam 有大用
[root@mail pam.d]# pwd
/etc/pam.d
[root@mail pam.d]#
[root@mail pam.d]# ls
atd newrole sudo-i
authconfig other su-l
authconfig-gtk passwd system-auth
authconfig-tui pirut system-auth-ac
chfn pm-hibernate system-cdinstall-helper
chsh pm-powersave system-config-authentication
config-util pm-suspend system-config-date
cpufreq-selector pm-suspend-hybrid system-config-display
crond poweroff system-config-kdump
cups ppp system-config-keyboard
cvs pup system-config-language
dateconfig reboot system-config-lvm
dovecot remote system-config-netboot
eject rhn_register system-config-network
ekshell run_init system-config-network-cmd
gdm runuser system-config-printer
gdm-autologin runuser-l system-config-rootpassword
gdmsetup sabayon system-config-securitylevel
gnome-screensaver samba system-config-selinux
gnome-system-log serviceconf system-config-services
gssftp setup system-config-soundcard
halt squid system-config-time
kbdrate sshd system-config-users
kshell su system-install-packages
ksu subscription-manager vsftpd
login subscription-manager-gui vsftpd.mysql
neat sudo xserver
[root@mail pam.d]#
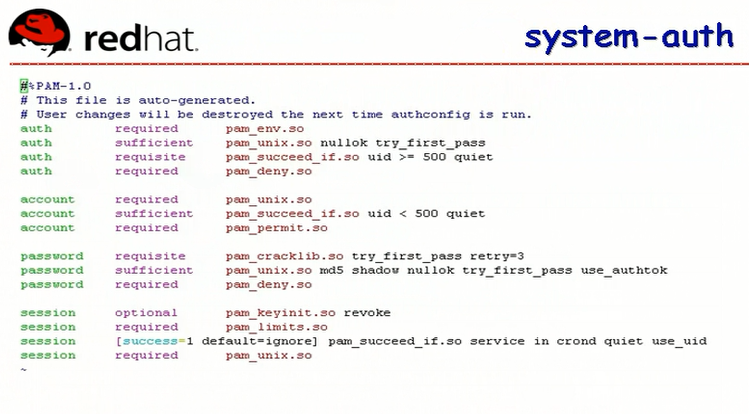
/etc/pam.d/system-auth 链接到 system-auth-ac
[root@mail pam.d]# cat system-auth-ac
#%PAM-1.0
# This file is auto-generated.
# User changes will be destroyed the next time authconfig is run.
auth required pam_env.so # 如果用户登录,要做认证的话,这一项必须得过(这是必要条件),不管过不过,下面三项都得检查
模块没说路径 就到 /lib/security 或者 /lib64/security 中去找,如果模块在别的地方,一定要给它个绝对路径,这里当然也可以使用绝对路径
auth sufficient pam_unix.so nullok try_first_pass # 这一项过了,后面的就不要检查了,直接返回 auth 这一项 ok,没过的话,不会影响最终结果,还会继续检查其它的
auth requisite pam_succeed_if.so uid >= 500 quiet #过了的话,不影响最终结果,后面照样检查,没过的话,就一票否决,直接返回应用程序,告诉它这一关没通过
auth required pam_deny.so #这一项必须得通过
# 第一关没过 ,第二关过了,整个结果还是不过
# 第一关过了,第二关没过,第三关过了,第四关没过,整个结果还是不过
# 要想最终通过 需要第一关过,第三关过,第四关过
# 要想最终通过 第一关过,第二关过,就直接通过了
account required pam_unix.so
account sufficient pam_succeed_if.so uid < 500 quiet
account required pam_permit.so
password requisite pam_cracklib.so try_first_pass retry=3
password sufficient pam_unix.so md5 shadow nullok try_first_pass use_authtok
password required pam_deny.so
session optional pam_keyinit.so revoke
session required pam_limits.so
session [success=1 default=ignore] pam_succeed_if.so service in crond quiet use_uid
session required pam_unix.so
[root@mail pam.d]#
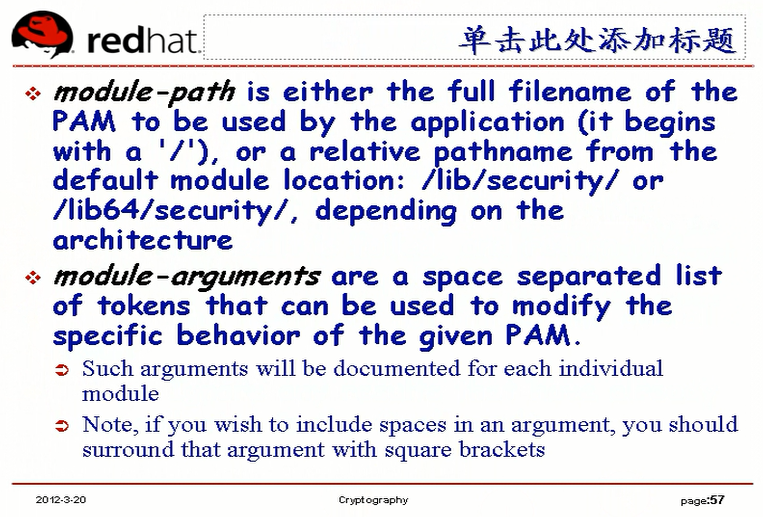
模块 由模块路径 和 模块参数 两部分组成
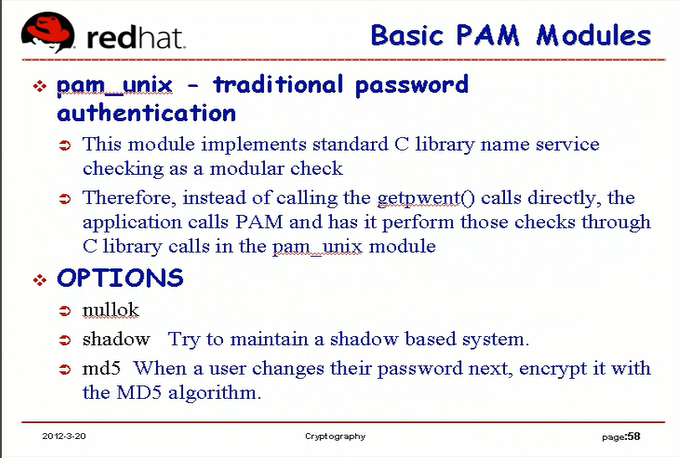
pam_unix 模块 是pam到passwd 的 shell中 (应该是是 /etc/shadow ?) 验证用户的时候用到的,传统的md5验证密码值是否相同的
pam出现之前是login的认证是通过glib的一个标准库来实现验证,pam_unix只是把功能给抽离出来,放在pam中实现了而已
参数(选项):
nullok: 是否允许为空,空的话就OK
shadow: 用户的密码验证要基于 shadow 方式的,或者到 shadow 文件中验证用户密码的方式来进行, 它是一个 shadow格式的密码? (/etc/shadow 中的密码是以 shadow 方式存放的,是 md5的加密方式)
md5: 用户密码的加密方式是使用md5算法,而不是sha1或其它算法
因此我们必须传递这些参数,让pam_unix知道到底验证用户密码使用哪种方式进行加密,加密后进行比对,到哪里获得信息进行比对的
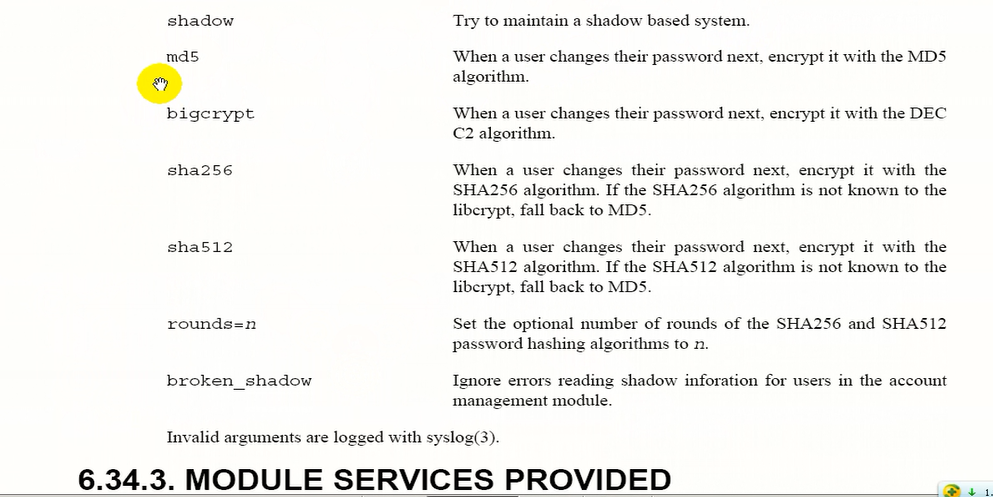
百度网盘上有 "The Linux-Pam System Administrator Guide" ( Linux-PAM-SAG )


nullok : 密码可以为空
try_first_pass: 尝试以前输入的密码
use_first_pass: 直接使用以前输入的密码
shadow: 就是 md5 方式加密并结合 salt 方式加密的
除非明确自己在做什么,否则不要修改,可能修改后系统都登录不了了
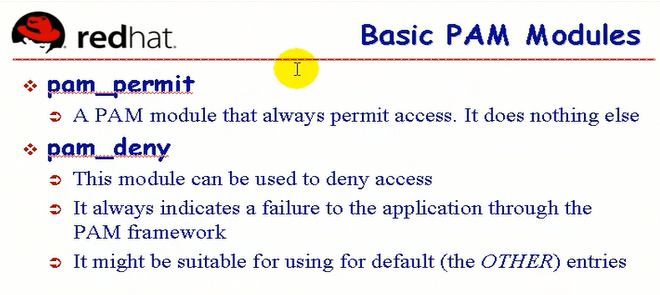
pam_permit 允许,啥也不干
pam_deny 拒绝访问,主要是返回最终结果,告诉应用程序不过,通常用在other当中
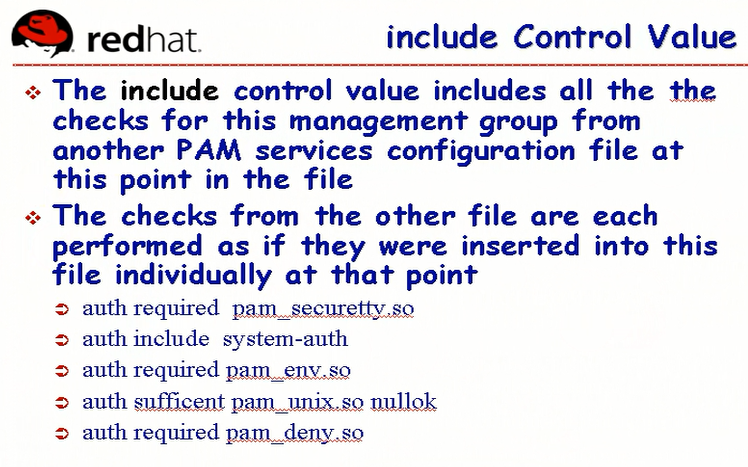
auth required pam_securetty.so # 这一段必须得过
auth include system-auth # 把 system-auth 文件中 auth 开头的段(行)都包含进来
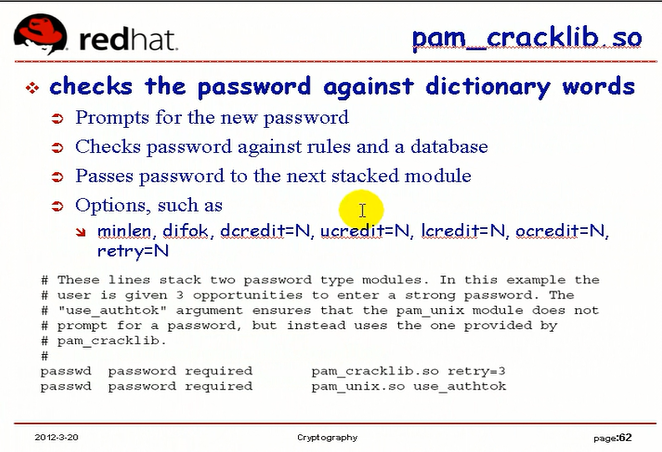
crack 互联网上以破坏为目的的,攻击别人,通常叫crack,害克,破坏,强行打破
pam_cracklib 如果字典中有密码,易被别人破解,(别人穷举法可以破解密码),改密码时,发现字典中有,重新换一个密码
Checks password against rules and a database: 先检查规则,再检查数据库( 字典 dictionary words ) 字典中有的话,照样不通过
rules 规则,通常要求是至少多少位,要包含四类字符,大写,小写,数值,特殊字符
Options(选项,参数):
minlen: 最短长度
difok: different ok ,看两次密码是否相同
dcredit: (d digit)至少要包含几个数字
ucredit: (u upper )至少要包含几个大写字母
lcredit: (l lower)至少要包含几个小写字母
ocredit: (o other)至少要包含几个其它字符(特殊字符)
retry: 最多尝试多少次
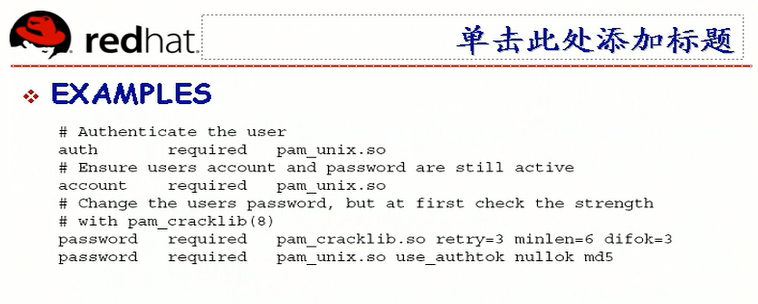
passwd password required pam_cracklib.so retry=3
passwd 是 service ,是写在 /etc/pam.conf 当中的总的配置文件的服务名
password 是 type
required 是 control
pam_cracklib.so retry=3 是模块路径和参数 (改密码时,最多尝试3次,3次不通过,对不起,重新来)
passwd password required pam_unix.so use_authtok
use_authtok 表示 ( pam_unix.so设置密码时 ),设置的密码为 ( pam_cracklib.so retry=3 这一关检查通过的密码 ),所以第一关不过,第二关就不会设置了

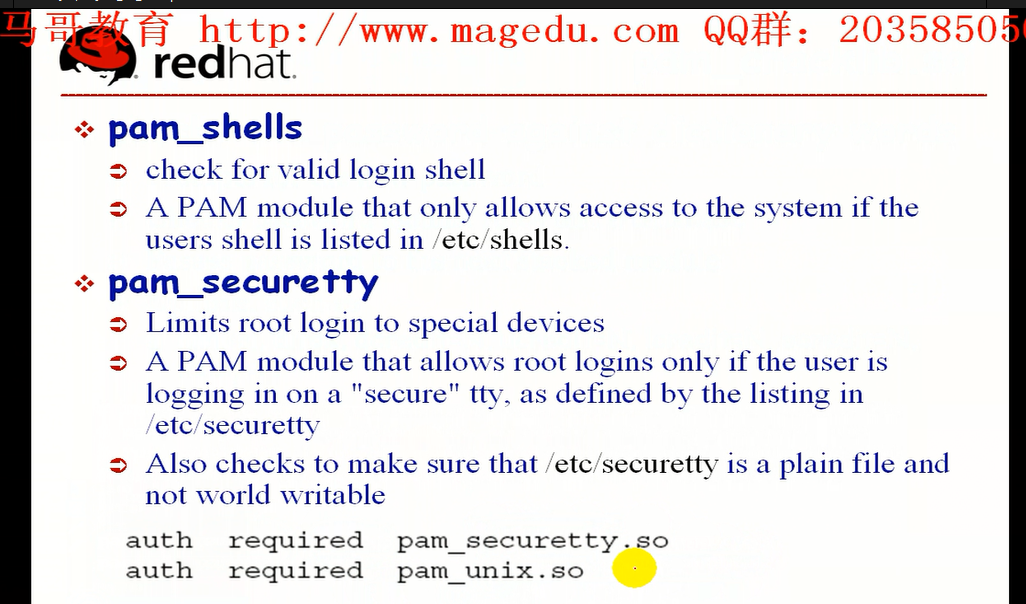
pam_shells: 要求用户登录时,默认使用的 shell 必须是 /etc/shells 当中列出的shell
pam_securetty: 安全的tty,
Limit root login to special devices: 限定 root 用户只能通过特定的设备登录
/etc/securetty 文件里面列出的特定的设备,root 才能登录
[root@mail pam.d]# cat /etc/securetty # tty是虚拟终端 vc (virtual console)是模拟(也叫虚拟,与tty不一样的虚拟)终端(远程ssh登录时使用的) console是真正意义上的控制台(没有终端的情况下,做小linux的时候,从来没有启动过终端,也能登录进去)
console
vc/1
vc/2
vc/3
vc/4
vc/5
vc/6
vc/7
vc/8
vc/9
vc/10
vc/11
tty1
tty2
tty3
tty4
tty5
tty6
tty7
tty8
tty9
tty10
tty11
[root@mail pam.d]#
[root@mail pam.d]# sed -i '/tty2/d' /etc/securetty #把tty2删除了
[root@mail pam.d]#
[root@mail pam.d]# cat /etc/securetty # tty2 没有了
console
vc/1
vc/2
vc/3
vc/4
vc/5
vc/6
vc/7
vc/8
vc/9
vc/10
vc/11
tty1
tty3
tty4
tty5
tty6
tty7
tty8
tty9
tty10
tty11
[root@mail pam.d]#
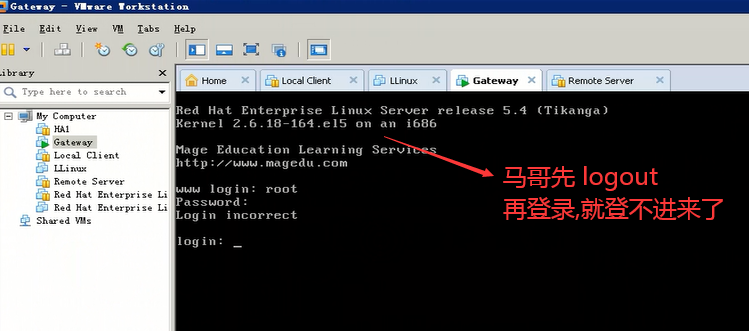
[root@mail pam.d]# sed -i '/tty1/d' /etc/securetty #我这边必须把tty1删除了 ,才登不进来,,马哥的2 与我的 2 难道不是同一个2
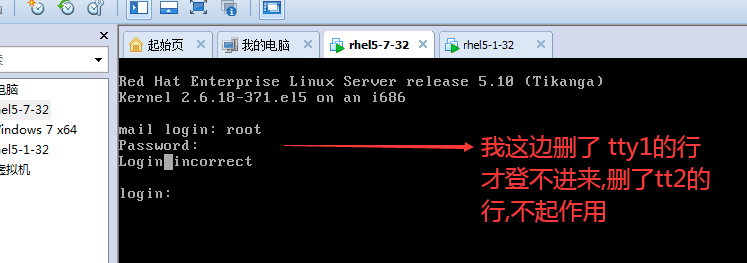
默认 /etc/securetty 一旦修改之后,马上就生效了
/etc/securetty 可以只留两三个,可能会更安全点,当然也可以限定一下 root 用户不能远程登录,只留tty1,tty2
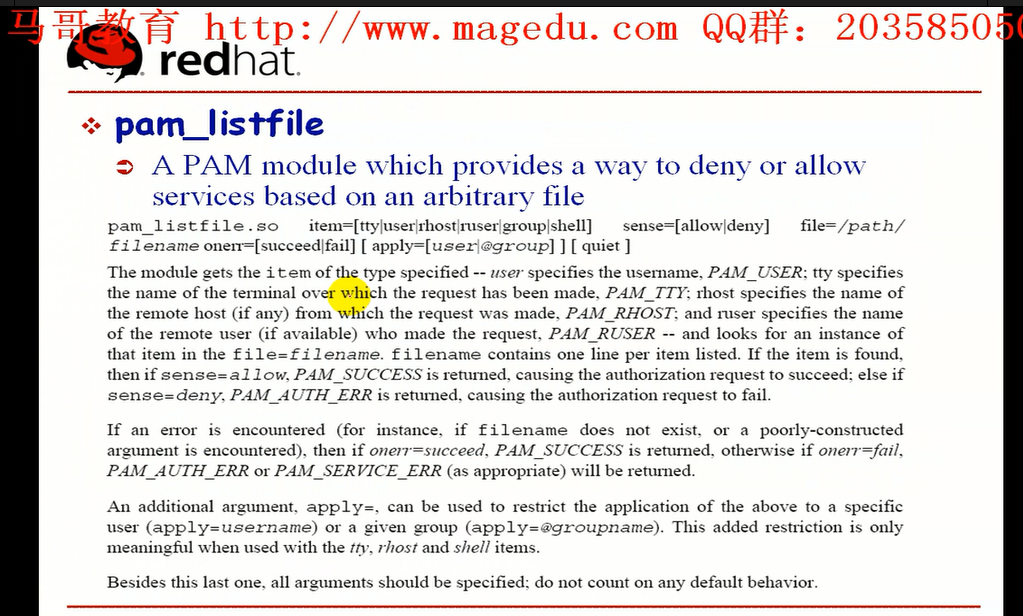
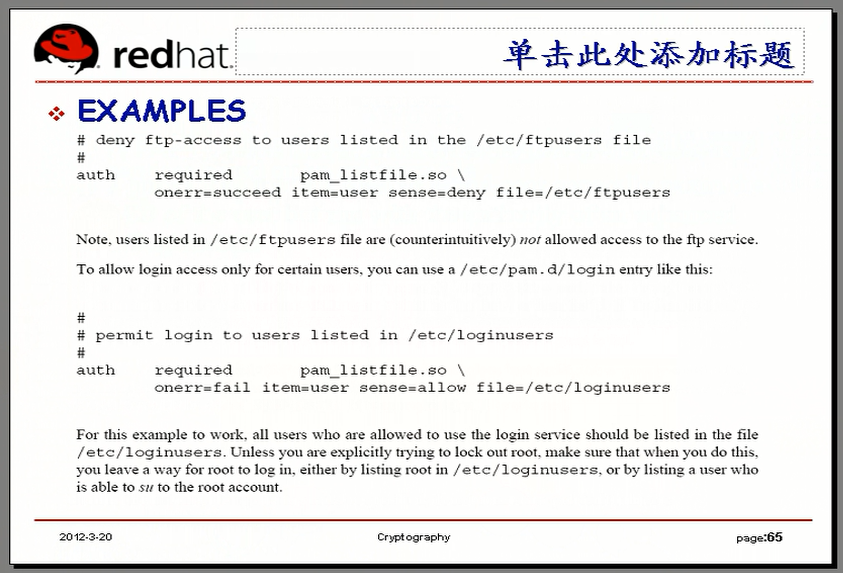
vsftpd 用到了 pam_listfile 的功能
pam_listfile : 要到某一个文件中验证用户的账号是否合法的,可以自己去定义一个文件,来限制哪一类用户能登录系统,哪一类用户不能登录系统
a pam module which provides a way to deny or allow services based on an arbitrary file
an arbitrary file:
一个文本文件
比如 fedora 一个系统用户账号,本来可以登录ftp的,但是我们一旦把它写到 ftp users 里面,就登录不了了,就是靠 pam_listfile 模块去定义的,
item=[tty|user|rhost|ruser|group|shell] 意味着写到这个文件中的是什么的
rhost是远程主机
ruser是远程用户名


比如当前的操作系统,无论是 tty 还是 ssh .必须是某个组的用户才能登录
把允许登录的用户的组写在这个文件里面,然后让这个条目生效就可以了
[root@mail pam.d]# pwd
/etc/pam.d
[root@mail pam.d]# #跟login相关的,看下login
[root@mail pam.d]# cat login
#%PAM-1.0
auth [user_unknown=ignore success=ok ignore=ignore default=bad] pam_securetty.so
auth include system-auth #改改这个文件看看 ( 也就是 system-auth-ac )
account required pam_nologin.so
account include system-auth
password include system-auth
# pam_selinux.so close should be the first session rule
session required pam_selinux.so close
session optional pam_keyinit.so force revoke
session required pam_loginuid.so
session include system-auth
session optional pam_console.so
# pam_selinux.so open should only be followed by sessions to be executed in the user context
session required pam_selinux.so open
[root@mail pam.d]#
[root@mail pam.d]# cp system-auth-ac system-auth-ac.bak # 先备份下
[root@mail pam.d]#
[root@mail pam.d]# vim system-auth-ac
#%PAM-1.0
# This file is auto-generated.
# User changes will be destroyed the next time authconfig is run.
auth required pam_env.so
#一般加在第一行第二行吧,这里加在第二行, pam_env 等会儿再介绍,pam_env一般是用来检查用户的环境的,用户的环境变量必须设置正确才能够登录 所以这里加在第二行吧
auth required pam_listfile.so item=group sense=allow file=/etc/pam_allowgroups ( onerr=success )(一旦失败了,就 onerr=success,不加也成)#就加这一行吧,最好不要登出系统,因为/etc/pam_allowgroups没有,可能会登不进系统的
auth sufficient pam_unix.so nullok try_first_pass
auth requisite pam_succeed_if.so uid >= 500 quiet
auth required pam_deny.so
account required pam_unix.so
account sufficient pam_succeed_if.so uid < 500 quiet
account required pam_permit.so
password requisite pam_cracklib.so try_first_pass retry=3
password sufficient pam_unix.so md5 shadow nullok try_first_pass use_authtok
password required pam_deny.so
session optional pam_keyinit.so revoke
session required pam_limits.so
session [success=1 default=ignore] pam_succeed_if.so service in crond quiet use_uid
session required pam_unix.so
[root@mail pam.d]# vim /etc/securetty # 把 tty1 tty2 加上去吧
console
vc/1
vc/2
vc/3
vc/4
vc/5
vc/6
vc/7
vc/8
vc/9
vc/10
vc/11
tty1
tty2
tty3
tty4
tty5
tty6
tty7
tty8
tty9
[root@mail pam.d]# vim /etc/pam_allowgroups
root
allowgrp
[root@mail pam.d]# groupadd allowgrp # 添加 allowgrp 这个组
[root@mail pam.d]#
建一个用户 redhat
[root@mail pam.d]# useradd redhat
[root@mail pam.d]# passwd redhat
Changing password for user redhat.
New UNIX password:
Retype new UNIX password:
passwd: all authentication tokens updated successfully.
[root@mail pam.d]#
redhat 不能登录

[root@mail pam.d]# usermod -a -G allowgrp fedora #把 fedora 加入到 allowgrp 组中来
[root@mail pam.d]#
fedora 登上去了

[root@mail pam.d]# usermod -a -G allowgrp redhat #把 fedora 加入到 allowgrp 组中来
[root@mail pam.d]#
fedora 此时也登上去了

ubuto fedora 这些操作系统是不允许 root 登录的,其实都是在pam中定义的,改它pam文件就可以了,pam有这一行,root不允许直接登录,把相关的有关root的auth认证的行去掉,root就可以登录了
pam很复杂,但很关键,对于排除认证故障很关键
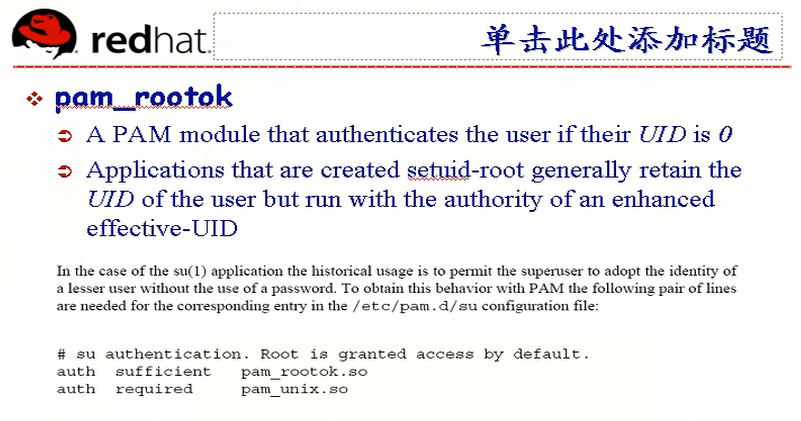
只有 uid 是 0 就 root 用户就通过了
[root@mail pam.d]# pwd
/etc/pam.d
[root@mail pam.d]# vim su
#%PAM-1.0
auth sufficient pam_rootok.so # 只要是root (uid为0 就是充分条件)(管理员su到其它用户就直接通过了)(如果不是管理员,这一关就过不了,过不了不影响最终结果,通过下面的system-auth来认证,那就必须输入用户名和密码了)
# Uncomment the following line to implicitly trust users in the "wheel" group.
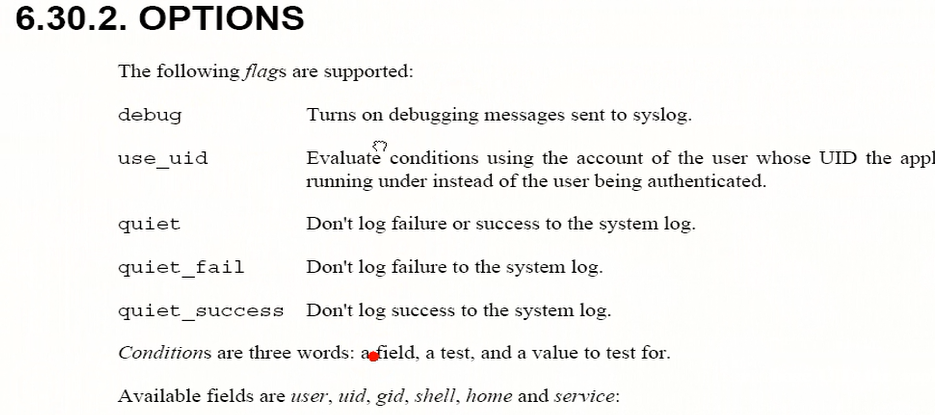
#auth sufficient pam_wheel.so trust use_uid # 让wheel组中的用户,不用输密码,可以su到其它用户
# Uncomment the following line to require a user to be in the "wheel" group.
#auth required pam_wheel.so use_uid # 和上面一行 同时工作,让wheel组中的用户,不用输密码,可以su到其它用户
auth include system-auth # 不是管理员时,就必须输入用户名和密码了
account sufficient pam_succeed_if.so uid = 0 use_uid quiet
account include system-auth
password include system-auth
session include system-auth
session optional pam_xauth.so
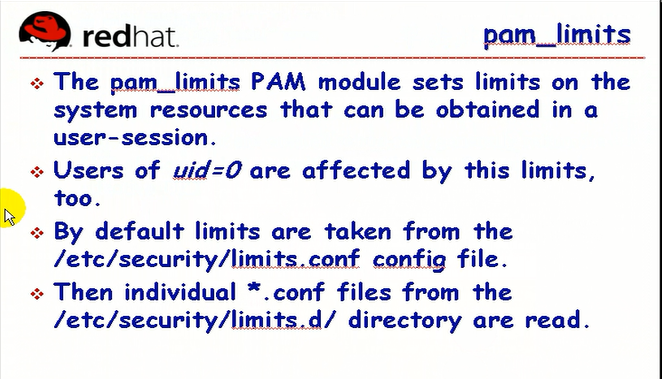
pam_limits:使用ab命令测试web服务器性能的时候 -n 指定并发数过多的情况下,告诉你文件打开的太多了,使用ulimit命令修改打开的文件数的,那些数值是通过pam_limits 模块来限定的,这个模块很复杂,但是一定要知道它的使用方式
就算是root用户,也受此限制 (哪怕是管理员发起ab命令,照样受到限制)
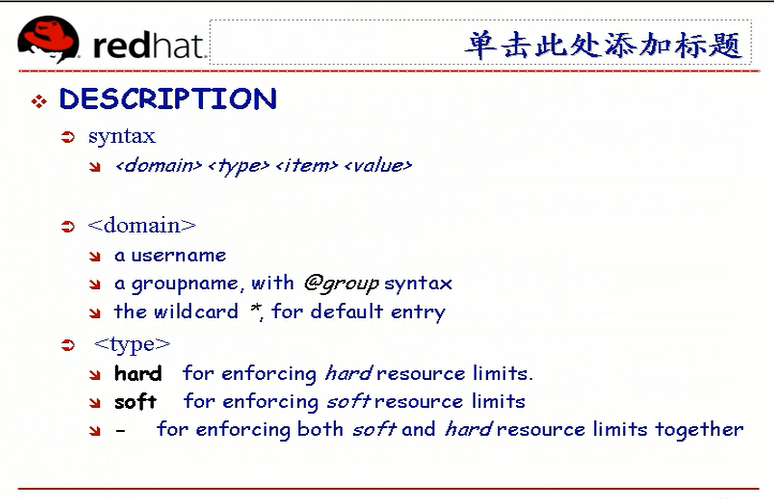
默认限定配置文件 /etc/security/limits.conf
或者 /etc/security/limits.d/*.conf 文件
[root@mail pam.d]# cat /etc/security/limits.conf
# /etc/security/limits.conf
#
#Each line describes a limit for a user in the form:
#
#<domain> <type> <item> <value>
# domain 表示对谁生效的,可能是个用户,也可能是个组
# type 限制它的类型,软限制或硬限制 (或软硬限制都包括了)
# item 对哪一种资源进行限制,cpu时间,内存大小,打开的文件数,一共能够启动的进程数等等,都可以限定(这是一个非常重要的资源限制类的文件)
# value 限制值的上限为多大
#
#
#
#
#
#Where:
#<domain> can be:
# - an user name 用户名
# - a group name, with @group syntax 组名
# - the wildcard *, for default entry 通配符
# - the wildcard %, can be also used with %group syntax,
# for maxlogin limit 限定最大登录次数的,没看懂?
#
#<type> can have the two values:
# - "soft" for enforcing the soft limits # 软限制 普通用户只能软限制 ulimit 命令 软限制可以超出的( 使用ulimit命令把自己的上限往上调一调才可以超出 比如本来10 ,想限制上限为20,那就超出为10 )
# - "hard" for enforcing hard limits # 硬限制 上限值,设定强制上限
#
#<item> can be one of the following:
# - core - limits the core file size (KB) #所能打开的核心文件的大小
# - data - max data size (KB) #
# - fsize - maximum filesize (KB)
# - memlock - max locked-in-memory address space (KB)
# - nofile - max number of open files ( n number o open file ) # 所能够打开的最大文件数
# - rss - max resident set size (KB) # 所能够使用的最大实际内存集,意味着它最多能够使用多少内存,实际物理内存的限制
# - stack - max stack size (KB)
# - cpu - max CPU time (MIN) #所能够使用的最多cpu时间(单位是分钟)(一个用户登录到服务器一直在编译软件,我们可以限定它最多使用50分钟)
# - nproc - max number of processes #用户所能够打开(能够运行)的最大进程个数
# - as - address space limit # 与 rss 一般一块来用, 地址空间限制 虚拟(线性)内存限制
# - maxlogins - max number of logins for this user
# - maxsyslogins - max number of logins on the system
# - priority - the priority to run user process with
# - locks - max number of file locks the user can hold
# - sigpending - max number of pending signals
# - msgqueue - max memory used by POSIX message queues (bytes)
# - nice - max nice priority allowed to raise to
# - rtprio - max realtime priority
#
#<domain> <type> <item> <value>
#
#* soft core 0 # 所有用户 软限制 所能打开的核心文件的大小 为不受限制
#* hard rss 10000 # 所有用户 硬限制 实际物理内存的限制 为 1万K
#@student hard nproc 20 # 学员组 硬限制 最多能打开的进程的个数为 20
#@faculty soft nproc 20
#@faculty hard nproc 50
#ftp hard nproc 0
#@student - maxlogins 4 # 学员组 软硬都限制 最多能登录四次
# End of file
#要想永久有效 得编辑 /etc/security/limits.conf 或 /etc/security/limits.d/ 里面自己随便建一个文件*.conf的文件
[root@mail pam.d]#
在linux 上装 Oracle 软件时,有时需要编辑这个文件 /etc/security/limits.conf
限制某一个用户能够在本地系统上使用资源的时候,就需要编辑这个文件 /etc/security/limits.conf
想临时调整的话,管理员不受限制,而普通用户只能调整自己的软限制
[root@mail pam.d]# help ulimit # ulimit 通常使用 -n 和 -u 这两个选项
ulimit: ulimit [-SHacdfilmnpqstuvx] [limit]
Ulimit provides control over the resources available to processes
started by the shell, on systems that allow such control. If an
option is given, it is interpreted as follows:
-S use the `soft' resource limit
-H use the `hard' resource limit
-a all current limits are reported
-c the maximum size of core files created
-d the maximum size of a process's data segment
-e the maximum scheduling priority (`nice')
-f the maximum size of files written by the shell and its children
-i the maximum number of pending signals
-l the maximum size a process may lock into memory
-m the maximum resident set size (has no effect on Linux)
-n the maximum number of open file descriptors # 修改最大的打开文件数
#如果我们给普通用户限定为1000个,有个普通用户调整自己的上限为1200个,是不可以的
-p the pipe buffer size
-q the maximum number of bytes in POSIX message queues
-r the maximum real-time scheduling priority
-s the maximum stack size
-t the maximum amount of cpu time in seconds
-u the maximum number of user processes #用户所能打开的最大的进程个数
-v the size of virtual memory
-x the maximum number of file locks
If LIMIT is given, it is the new value of the specified resource;
the special LIMIT values `soft', `hard', and `unlimited' stand for
the current soft limit, the current hard limit, and no limit, respectively.
Otherwise, the current value of the specified resource is printed.
If no option is given, then -f is assumed. Values are in 1024-byte
increments, except for -t, which is in seconds, -p, which is in
increments of 512 bytes, and -u, which is an unscaled number of
processes.
[root@mail pam.d]#


pam_env 设置或撤销环境变量的
根据 /etc/security/pam_env.conf 来为用户设置环境变量的
一般要求环境变量设置必须成功,一般为 pam auth required pam_env.so 必须要设置环境变量成功以后,用户才能登录
[root@mail pam.d]# export # 这个命令可以看到很多环境变量 有部分环境变量 应该在/etc/security/pam_env.conf 里面定义
declare -x CVS_RSH="ssh"
declare -x G_BROKEN_FILENAMES="1"
declare -x HISTSIZE="1000"
declare -x HOME="/root"
declare -x HOSTNAME="mail.magedu.com"
declare -x INPUTRC="/etc/inputrc"
declare -x LANG="zh_CN.UTF-8"
declare -x LESSOPEN="|/usr/bin/lesspipe.sh %s"
declare -x LOGNAME="root"
declare -x LS_COLORS="no=00:fi=00:di=00;34:ln=00;36:pi=40;33:so=00;35:bd=40;33;0 1:cd=40;33;01:or=01;05;37;41:mi=01;05;37;41:ex=00;32:*.cmd=00;32:*.exe=00;32:*.c om=00;32:*.btm=00;32:*.bat=00;32:*.sh=00;32:*.csh=00;32:*.tar=00;31:*.tgz=00;31: *.arj=00;31:*.taz=00;31:*.lzh=00;31:*.zip=00;31:*.z=00;31:*.Z=00;31:*.gz=00;31:* .bz2=00;31:*.bz=00;31:*.tz=00;31:*.rpm=00;31:*.cpio=00;31:*.jpg=00;35:*.gif=00;3 5:*.bmp=00;35:*.xbm=00;35:*.xpm=00;35:*.png=00;35:*.tif=00;35:"
declare -x MAIL="/var/spool/mail/root"
declare -x OLDPWD="/root"
declare -x PATH="/usr/kerberos/sbin:/usr/kerberos/bin:/usr/local/sbin:/usr/local /bin:/sbin:/bin:/usr/sbin:/usr/bin:/usr/local/apache/bin:/usr/local/mysql/bin:/r oot/bin"
declare -x PWD="/etc/pam.d"
declare -x SHELL="/bin/bash"
declare -x SHLVL="1"
declare -x SSH_ASKPASS="/usr/libexec/openssh/gnome-ssh-askpass"
declare -x SSH_CLIENT="192.168.1.251 1881 22"
declare -x SSH_CONNECTION="192.168.1.251 1881 192.168.1.75 22"
declare -x SSH_TTY="/dev/pts/1"
declare -x TERM="xterm"
declare -x USER="root"
[root@mail pam.d]#
[root@mail pam.d]# cat /etc/security/pam_env.conf # redhat 系统上好像没有借助于它设置环境变量?都是通用 /etc/profile 来设定的
# $Date: 2005/08/16 12:27:42 $
# $Author: kukuk $
# $Id: pam_env.conf,v 1.1 2005/08/16 12:27:42 kukuk Exp $
#
# This is the configuration file for pam_env, a PAM module to load in
# a configurable list of environment variables for a
#
# The original idea for this came from Andrew G. Morgan ...
#<quote>
# Mmm. Perhaps you might like to write a pam_env module that reads a
# default environment from a file? I can see that as REALLY
# useful... Note it would be an "auth" module that returns PAM_IGNORE
# for the auth part and sets the environment returning PAM_SUCCESS in
# the setcred function...
#</quote>
#
# What I wanted was the REMOTEHOST variable set, purely for selfish
# reasons, and AGM didn't want it added to the SimpleApps login
# program (which is where I added the patch). So, my first concern is
# that variable, from there there are numerous others that might/would
# be useful to be set: NNTPSERVER, LESS, PATH, PAGER, MANPAGER .....
#
# Of course, these are a different kind of variable than REMOTEHOST in
# that they are things that are likely to be configured by
# administrators rather than set by logging in, how to treat them both
# in the same config file?
#
# Here is my idea:
#
# Each line starts with the variable name, there are then two possible
# options for each variable DEFAULT and OVERRIDE.
# DEFAULT allows and administrator to set the value of the
# variable to some default value, if none is supplied then the empty
# string is assumed. The OVERRIDE option tells pam_env that it should
# enter in its value (overriding the default value) if there is one
# to use. OVERRIDE is not used, "" is assumed and no override will be
# done.
#
# VARIABLE [DEFAULT=[value]] [OVERRIDE=[value]]
#
# (Possibly non-existent) environment variables may be used in values
# using the ${string} syntax and (possibly non-existent) PAM_ITEMs may
# be used in values using the @{string} syntax. Both the $ and @
# characters can be backslash escaped to be used as literal values
# values can be delimited with "", escaped " not supported.
# Note that many environment variables that you would like to use
# may not be set by the time the module is called.
# For example, HOME is used below several times, but
# many PAM applications don't make it available by the time you need it.
#
#
# First, some special variables
#
# Set the REMOTEHOST variable for any hosts that are remote, default
# to "localhost" rather than not being set at all
#REMOTEHOST DEFAULT=localhost OVERRIDE=@{PAM_RHOST}
#
# Set the DISPLAY variable if it seems reasonable
#DISPLAY DEFAULT=${REMOTEHOST}:0.0 OVERRIDE=${DISPLAY}
#
#
# Now some simple variables
#
# 下面这些变量都没有启用,都可以启用起来
#PAGER DEFAULT=less
#MANPAGER DEFAULT=less
#LESS DEFAULT="M q e h15 z23 b80"
#NNTPSERVER DEFAULT=localhost
#PATH DEFAULT=${HOME}/bin:/usr/local/bin:/bin\
#:/usr/bin:/usr/local/bin/X11:/usr/bin/X11
#
# silly examples of escaped variables, just to show how they work.
#
#DOLLAR DEFAULT=\$
#DOLLARDOLLAR DEFAULT= OVERRIDE=\$${DOLLAR}
#DOLLARPLUS DEFAULT=\${REMOTEHOST}${REMOTEHOST}
#ATSIGN DEFAULT="" OVERRIDE=\@
[root@mail pam.d]#

pam_wheel 允许 su 到 root 用户的
通常是用来限定谁可以 su 到 root 用户的
我们一般在 redhat 上一般任意用户都可以 su 到 root

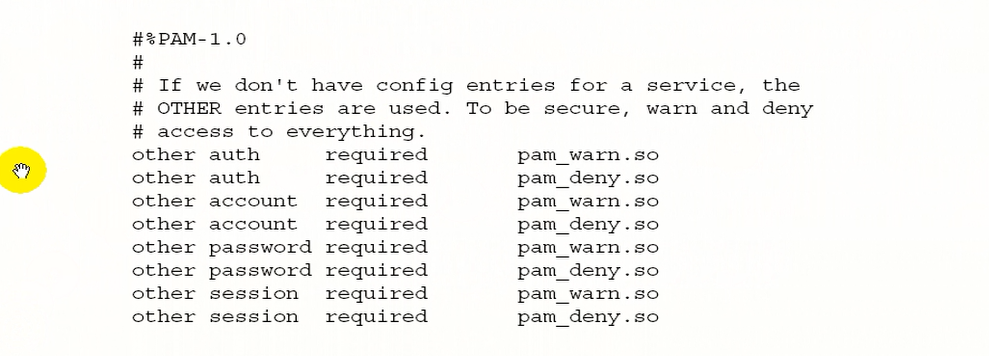

默认情况下没有启用 pam_wheel
可以打开 system_auth 把它启用起来,这样只有 wheel 组中的用户 才能 su 到 root
redhat 一般不太喜欢这么用
wheel 组是存在的,但是redhat 限定没启用,但是有些linux 上 (比如 frobsd 之类的)一般限定了只有 wheel 组中的用户才能 su 到 root
[root@mail pam.d]# cat /etc/shadow
root:$1$CAT8P07u$SlYdIQqyXwUZnw4Ic3pb2.:18089:0:99999:7:::
bin:*:18089:0:99999:7:::
daemon:*:18089:0:99999:7:::
adm:*:18089:0:99999:7:::
lp:*:18089:0:99999:7:::
sync:*:18089:0:99999:7:::
shutdown:*:18089:0:99999:7:::
halt:*:18089:0:99999:7:::
mail:*:18089:0:99999:7:::
news:*:18089:0:99999:7:::
uucp:*:18089:0:99999:7:::
operator:*:18089:0:99999:7:::
games:*:18089:0:99999:7:::
gopher:*:18089:0:99999:7:::
ftp:*:18089:0:99999:7:::
nobody:*:18089:0:99999:7:::
distcache:!!:18089:0:99999:7:::
nscd:!!:18089:0:99999:7:::
vcsa:!!:18089:0:99999:7:::
pcap:!!:18089:0:99999:7:::
ntp:!!:18089:0:99999:7:::
dbus:!!:18089:0:99999:7:::
apache:!!:18089:0:99999:7:::
avahi:!!:18089:0:99999:7:::
rpc:!!:18089:0:99999:7:::
mailnull:!!:18089:0:99999:7:::
smmsp:!!:18089:0:99999:7:::
sshd:!!:18089:0:99999:7:::
webalizer:!!:18089:0:99999:7:::
oprofile:!!:18089:0:99999:7:::
squid:!!:18089:0:99999:7:::
rpcuser:!!:18089:0:99999:7:::
nfsnobody:!!:18089:0:99999:7:::
xfs:!!:18089:0:99999:7:::
haldaemon:!!:18089:0:99999:7:::
avahi-autoipd:!!:18089:0:99999:7:::
gdm:!!:18089:0:99999:7:::
sabayon:!!:18089:0:99999:7:::
shipingzhong:$1$qKpXDLUh$Y5b4mvP0JSLf8Cb7tChB81:18089:0:99999:7:::
mysql:!!:18089::::::
named:!!:18387::::::
postfix:!!:18388:0:99999:7:::
postdrop:!!:18388:0:99999:7:::
hadoop:$1$R8J/KtN3$ttUBoYSyVDbhXnqe.3NmT0:18388:0:99999:7:::
openstack:$1$49ojRWyR$yn4rOghQ1L/K..q4dD2qK0:18392:0:99999:7:::
dovecot:!!:18392::::::
vmail:!!:18458:0:99999:7:::
hbase:$1$Lxgq48vS$ekG0CY5aysI5opLoc0I6t.:18465:0:99999:7:::
redis:$1$5N.Fc3PR$cS09neXAvZYvl.XBK6vl40:18465:0:99999:7:::
vuser:!!:18469:0:99999:7:::
vsftpd:!!:18469:0:99999:7:::
nfstest:!!:18473:0:99999:7:::
eucalyptus:$1$vbvE4RQF$uVJnyVAKeFWM3J3zYhA6m0:18483:0:99999:7:::
fedora:$1$6TbGg1c2$8rpO5GzVrZHnJWIYNa2FQ1:18497:0:99999:7:::
redhat:$1$W4OAOmCL$BU5FACaShcL/qKcbEmJi.0:18501:0:99999:7:::
[root@mail pam.d]#
[root@mail pam.d]# cat /etc/group
root:x:0:root
bin:x:1:root,bin,daemon
daemon:x:2:root,bin,daemon
sys:x:3:root,bin,adm
adm:x:4:root,adm,daemon
tty:x:5:
disk:x:6:root
lp:x:7:daemon,lp
mem:x:8:
kmem:x:9:
wheel:x:10:root
mail:x:12:mail
news:x:13:news
uucp:x:14:uucp
man:x:15:
games:x:20:
gopher:x:30:
dip:x:40:
ftp:x:50:
lock:x:54:
nobody:x:99:
users:x:100:
utmp:x:22:
utempter:x:35:
distcache:x:94:
nscd:x:28:
floppy:x:19:
vcsa:x:69:
pcap:x:77:
slocate:x:21:
ntp:x:38:
dbus:x:81:
audio:x:63:gdm
apache:x:48:
avahi:x:70:
rpc:x:32:
mailnull:x:47:
smmsp:x:51:
sshd:x:74:
webalizer:x:67:
oprofile:x:16:
squid:x:23:
rpcuser:x:29:
nfsnobody:x:65534:
xfs:x:43:
stapusr:x:156:
stapsys:x:157:
stapdev:x:158:
haldaemon:x:68:
avahi-autoipd:x:159:
gdm:x:42:
sabayon:x:86:
shipingzhong:x:500:
mysql:x:306:
named:x:25:
postfix:x:2525:
postdrop:x:2526:
hadoop:x:2527:
openstack:x:2528:
dovecot:x:97:
vmail:x:1001:
hbase:x:2529:
redis:x:2530:
vuser:x:2531:
vsftpd:x:2532:
nfstest:x:510:
wbpriv:x:88:
eucalyptus:x:2533:
fedora:x:2534:
allowgrp:x:2535:fedora,redhat
redhat:x:2536:
[root@mail pam.d]#
[root@mail pam.d]# cat /etc/group | grep wheel
wheel:x:10:root
[root@mail pam.d]#
[root@mail pam.d]# pwd
/etc/pam.d
[root@mail pam.d]# vim su
#%PAM-1.0
auth sufficient pam_rootok.so
# Uncomment the following line to implicitly trust users in the "wheel" group.
#auth sufficient pam_wheel.so trust use_uid #已准备好,启用就可以实现 wheel 组中用户才能 su 到 root, 这一项及下面一项
# Uncomment the following line to require a user to be in the "wheel" group.
#auth required pam_wheel.so use_uid #已准备好,启用就可以实现 wheel 组中用户才能 su 到 root 这一项及上面一项
auth include system-auth
account sufficient pam_succeed_if.so uid = 0 use_uid quiet
account include system-auth
password include system-auth
session include system-auth
session optional pam_xauth.so

pam_lastlog 登录时显示上次登录的时间

pam_issue 登录后显示 /etc/issue 或 /etc/issue.net 文件中的信息,靠它来定义,pam_issue 也能够显示其它额外模块的其它文件

pam_motd 用户登录的时候,是不是显示 motd 这个文件中的内容
[root@mail pam.d]# cat /etc/motd
[root@mail pam.d]#
[root@mail pam.d]# vim /etc/motd
Welcome to
登录后 看到了 Welcome to


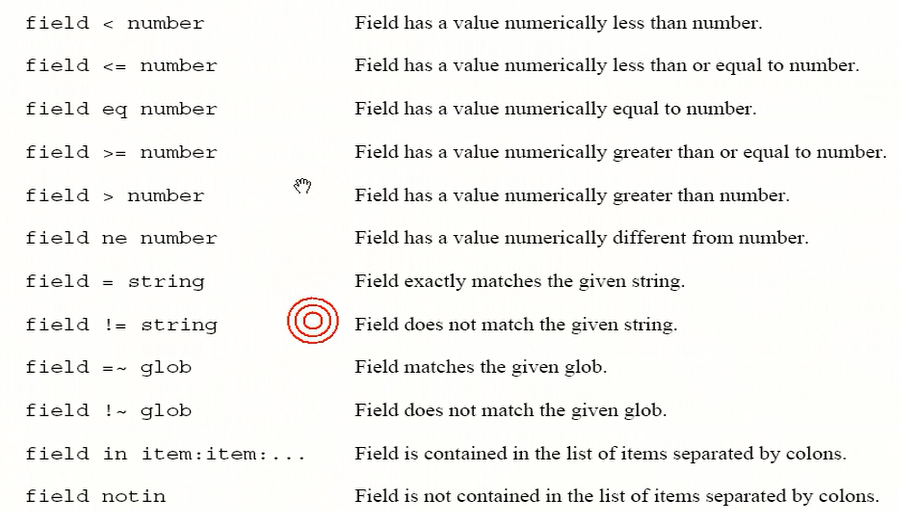
pam_succeed_if 账号具有某些特征字符就成功了
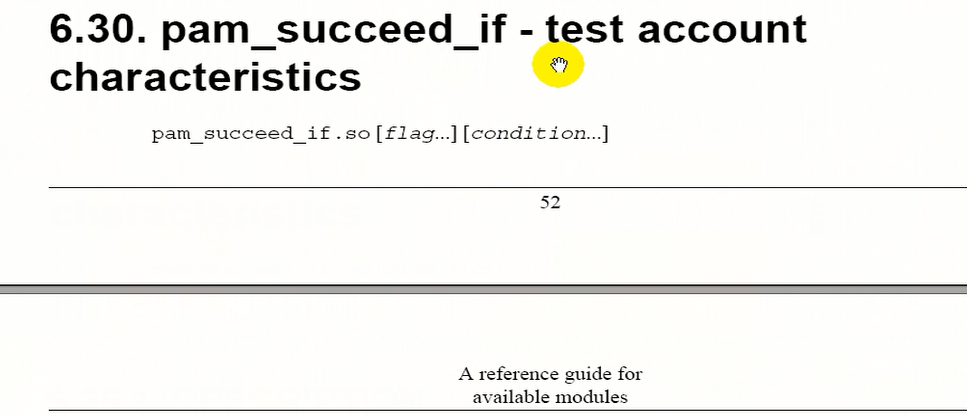

通常用来检查(比如 用户uid>500 就可以登录系统 但是 uid>0 且 uid<500 就不能登录操作系统(这些是系统账号) )


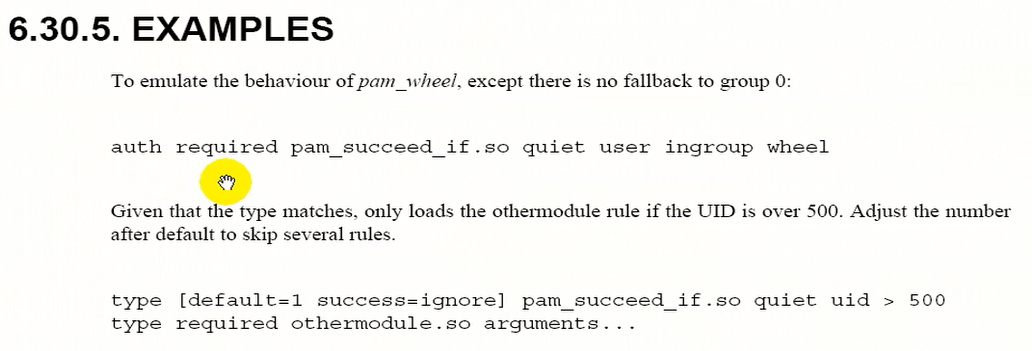
auth required pam_succeed_if.so quiet user ingroup wheel


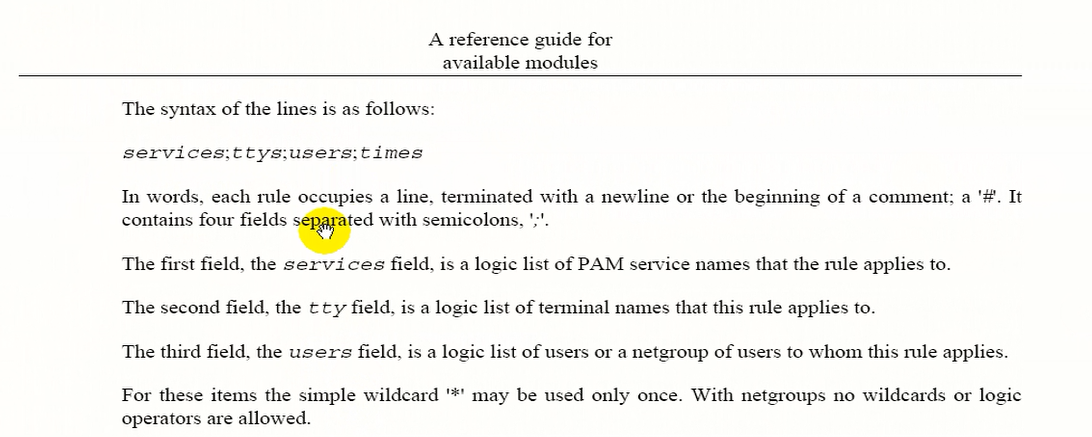
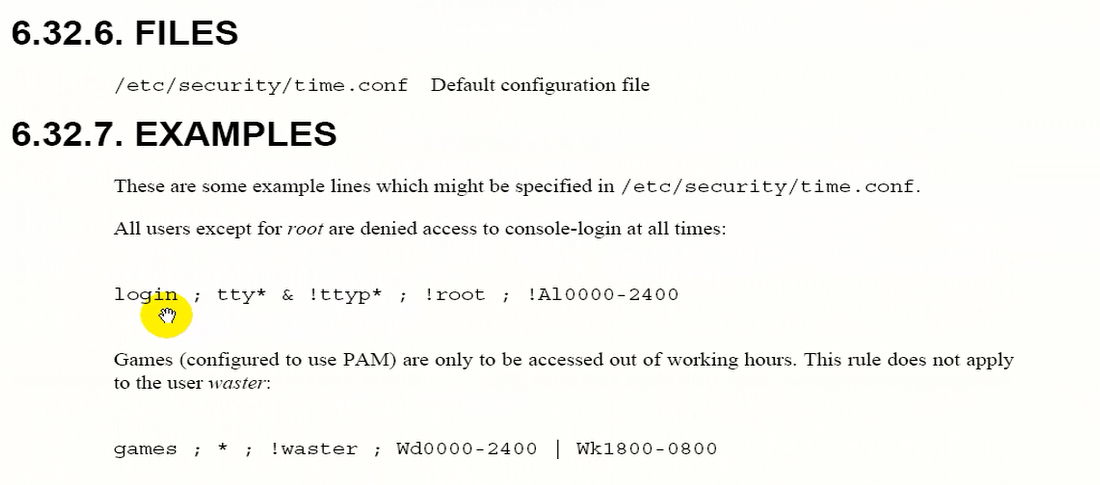
pam_time 根据时间来限定登录的
使用格式 services;ttys;users;times
login ; tty* & !ttyp* ; !root ; !Al0000-2400
login是登录系统的login程序,login是服务
所有tty 和 非 ttyp 的 终端
只要不是root用户
!Al0000-2400 所有时间(从0点到24点) , 前面加非
它的意思是 非root用户 任何时间都不能通过虚拟终端登录了
games ; * ; !water ; !Wd0000-2400 | Wk1800-0800
games 游戏程序
* 任何终端上
!water 只要不是这个用户
Wd (work day) 工作日 Wd0000-2400工作日0点到24点 前面应该加非(感叹号)
Wk ( workend ) 周末 Wk1800-0800周末18点到8点 前面应该加非(感叹号)
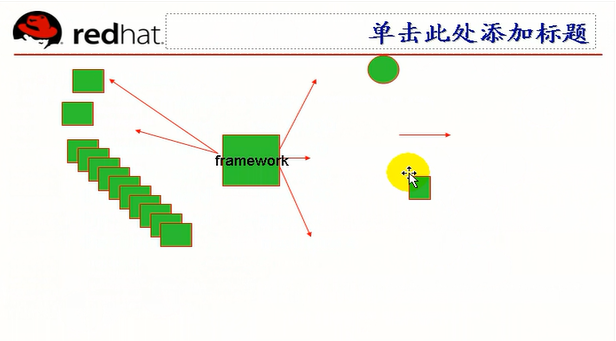
pam是一个认证框架,基于一堆的模块组合起来,可以完成认证,账号审核,会话审核,密码修改时的审核等各种相关功能,每一种类型都可以有多条条目,这些条目如何产生彼此间的联系,靠control来定义
我们要实现只有某个组中的用户才能登录系统,只有wheel组中的用户才能su到管理员
