(证书要从服务器上下载吧 比如阿里云 )
1、下载带有openSSL的apache安装包,我下载的为apache_2.2.11-win32-x86-openssl-0.9.8i.msi,安装后确认一下bin路径下的openssl.exe,ssleay32.dll和libeay32.dll,无误进行下一步。
2、修改两个配置文件,一个为conf/httpd.conf,另一个为conf/extra/httpd-ssl.conf
(a)修改httpd.conf
为了使apache启动的时候调用ssl的服务,我们需要在配置文件中做一些修改。找到以下两句话并去掉注释,则可以开启apache的时候启动ssl服务:
#LoadModule ssl_module modules/mod_ssl.so
#Include conf/extra/httpd-mpm.conf (b)修改httpd-ssl.conf
修改的主要是我们生成的证书的路径(我把路径设置为conf下的key目录,把生成的证书放进这个目录,接下来会说怎么生成)
SSLCertificateFile xxx/conf/key/server.crt (服务器证书的位置)
SSLCertificateKeyFile xxx/conf/key/server.key (服务器私钥的位置)
SSLCACertificateFile xxx/key/conf/ca.crt (CA根证书的位置,进行客户端验证时需要)
#SSLVerifyClient require (去掉前面的‘#’号,进行客户端验证时需要)
#SSLVerifyDepth 1 (去掉前面的‘#’号,把10改为1,进行客户端验证时需要)
打开httpd-ssl.conf,ctrl+f 搜关键字修改就可以了。
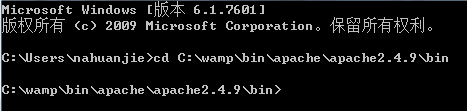
3、生成服务端和客户端的证书win+R:cmd进入命令行,进去apache安装目录的bin文件夹,执行命令设置一下openssl的配置:
set OPENSSL_CONF=..\conf\openssl.cnf
(a)生成服务端的私匙执行命令:openssl genrsa -out server.key 1024,在目录bin下生成server.key文件
(b)生成签署申请
执行命令:openssl req -new -out server.csr -key server.key -config ..\conf\openssl.cnf,在目录bin下生成server.csr文件,这个过程中要填入一些信息,按照提示要求填就可以了,但是要记住Common Name必须和httpd.conf中的serverName一致,不然apache启动的时候会报错。之后就会要求输入一系列的参数:
Country Name (2 letter code) [AU]:CN ISO 国家代码(只支持两位字符)
State or Province Name (full name) [Some-State]:ZJ 所在省份
Locality Name (eg, city) []:HZ 所在城市
Organization Name (eg, company): yiban公司名称
Organizational Unit Name (eg, section) []:yiban 组织名称
Common Name (eg, YOUR name) []: localhost:80申请证书的域名(建议和httpd.conf中serverName必须一致)
Email Address []:admin@admin.com 管理员邮箱
Please enter the following 'extra' attributes to be sent with your certificate request A challenge password []: 1234 交换密钥
An optional company name []:CD
注:Common Name建议和httpd.conf中serverName必须一致,否则有可能导致apache不能启动
(启动 apache 时错误提示为:server RSA certificate CommonName (CN) `Kedou' does NOT match server name!?)完成签署的server.csr配置。
(c)生成CA私匙执行命令:openssl genrsa -out ca.key 1024,在目录bin下生成ca.key文件
(d)生成CA生成自签署证书执行命令:openssl req -new -x509 -days 365 -key ca.key -out ca.crt -config ..\conf\openssl.cnf,在目录bin下生成ca.crt文件
(e)生成CA的服务器签署证书
执行命令:openssl ca -in server.csr -out server.crt -cert ca.crt -keyfile ca.key -config ..\conf\openssl.cnf 我在这里报错了,按照网上的说法,在当前目录下建立一个demoCA目录,在里面创建一个index.txt空文件,一个名为serial,内容为01的文件,以及一个文件夹newcerts,再执行一次就可以了
4、把当前文件夹中的server.crt,server.key和ca.crt文件复制到步骤2所说的目录conf/key下
5、为了方便,我把httpd.conf和httpd-ssl.conf文件中的ServerName分别改为
127.0.0.1:8080 (有些软件会占用80这个端口,所以改成8080)
127.0.0.1:443
6、重启apache,执行两个命令net stop Apache2.2和net start Apache2.2,假如遇到apache无法启动的时候,可以选我的电脑-》管理-》事件检查器-》应用程序日志,
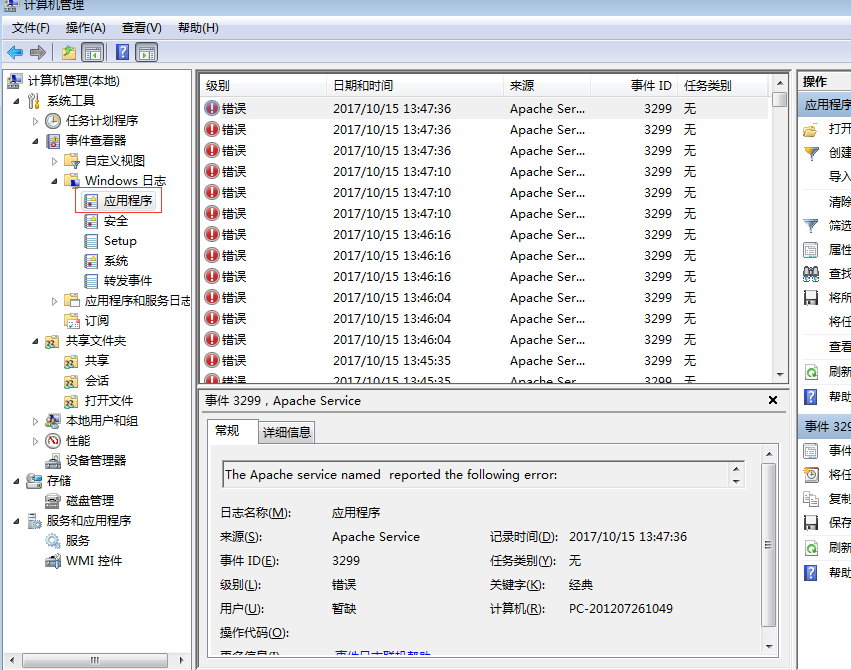
打开apache的错误报告,
(还要看看 D:\xampp\apache\logs\error.log (httpd.conf里配置)吧 还要看看 D:/xampp/apache/logs/ssl_request.log (httpd-ssl.conf 里的配置))
会有提示哪里出错了,一般都可以找到原因。
7、打开IE,输入127.0.0.1:8080出现It works。输入https://127.0.0.1:443的时候会弹出一个验证证书的地方,点击取消发现没能成功。上网查了一下,原来还要生成一个 .pfx 的证书并导入到IE中去。
打开刚才的命令行,执行命令openssl pkcs12 -export -in ca.crt -inkey ca.key -out ca.pfx,
输入密码 1234
在bin下面生成一个ca.pfx的文件,中间有个输入密码的过程,要记住这个密码。打开IE浏览器-》工具-》Internet选项-》内容-》证书,按照提示导入,这里要输入刚才生成 .pfx 过程中输入的密码。导入之后,打开浏览器输入https://127.0.0.1:443出现 It works。搞掂!!!
(注:本文为我在搭建环境中的大概过程,纯粹记录一下工作过程,并不深入理解各个点) 版权声明:本文为博主原创文章,未经博主允许不得转载。
windows Apache 环境下配置支持HTTPS的SSL证书
1.准备工作
1)在设置Apache + SSL之前, 需要做:
安装Apache, 下载安装Apache时请下载带有SSL版本的Apache安装程序.
并且ssl需要的文件在如下的位置:
[Apache安装目录]/modules/ mod_ssl.so
[Apache安装目录]/bin/ openssl.exe, libeay32.dll, ssleay32.dll, openssl.cnf
[Apache安装目录]/conf/ openssl.cnf
创建SSL证书(注意,有的集成环境里面自带了openssl,但是bin目录下没有openssl.cnf,需要将conf下的openssl.cnf拷贝一份到bin目录下,但总体原理一样)
2)在windows环境下需先设置Openssl环境变量:
执行命令 set OPENSSL_CONF=..\conf\openssl.cnf
打开CMD,进入到Apache安装目录下的bin目录下:
步骤一:执行命令 openssl genrsa 1024 >server.key
说明:RSA密钥对的默认长度是1024,取值是2的整数次方,并且密钥长度约长,安全性相对会高点。
完成密钥server.key生产完毕后进行步骤二操作。
步骤二:生产为签署的server.csr,继续在bin目录下执行命令:
openssl req -new -config openssl.cnf -key server.key >server.csr
说明:如果不加-config .openssl.cnf参数的话,常会报Unable to load config info from .../ssl/openssl.cnf
之后就会要求输入一系列的参数:
Country Name (2 letter code) [AU]:CN ISO 国家代码(只支持两位字符)
State or Province Name (full name) [Some-State]:ZJ 所在省份
Locality Name (eg, city) []:HZ 所在城市
Organization Name (eg, company): yiban公司名称
Organizational Unit Name (eg, section) []:yiban 组织名称
Common Name (eg, YOUR name) []: localhost:80申请证书的域名(建议和httpd.conf中serverName必须一致)
Email Address []:admin@admin.com 管理员邮箱
Please enter the following 'extra' attributes to be sent with your certificate request A challenge password []: 1234交换密钥
An optional company name []:CD
注:Common Name建议和httpd.conf中serverName必须一致,否则有可能导致apache不能启动
(启动 apache 时错误提示为:server RSA certificate CommonName (CN) `Kedou' does NOT match server name!?)完成签署的server.csr配置。
步骤三:
签署服务器证书文件 server.crt
在 bin/目录下执行命令:
openssl req -x509 -days 5000 -config openssl.cnf -key server.key -in server.csr >server.crt
说明:这是用步骤 1,2 的的密钥和证书请求生成证书 server.crt,-days 参数 指明证书有效期,单位为天,x509 表示生成的为 X.509 证书。
步骤四:
在bin 目录下,找到server.crt、server.csr、server.key三个文件,将此三个文件剪切到Apache的conf目录下。
步骤五:
配置 httpd.conf. 在Apache的conf\extra目录下的 httpd_ssl.conf 文件是关于 ssl 的配置,是httpd.conf的一部分。
在httpd.conf 中添加下列两行(有的话把文件前面的注释“#”符号去掉):
LoadModule ssl_module modules/mod_ssl.so
Include conf/extra/httpd-ssl.conf
步骤六:
(注意:相同部分被省略掉)
在conf\extra目录下,编辑 httpd_ssl.conf
Listen 443
SSLPassPhraseDialog builtin
SSLSessionCache "dbm:c:/Apache24/logs/ssl_scache"
#SSLSessionCache "shmcb:c:/Apache24/logs/ssl_scache(512000)"
(以上2种请自行监测,如有一种导致服务器启动不了,就换成另一种)
SSLSessionCacheTimeout 300
<VirtualHost www.my.com:443>
#DocumentRoot "D:/wamp/bin/apache/apache2.4.9/htdocs"
DocumentRoot "C:/wamp/www/hxq"
ServerName www.my.com:443
ServerAlias my.com:443
ServerAdmin webmaster@chinancce.com
DirectoryIndex index.html index.htm index.php default.php app.php u.php
ErrorLog logs/example_error.log
CustomLog logs/example_access.log \
"%t %h %{SSL_PROTOCOL}x %{SSL_CIPHER}x \"%r\" %b"
SSLEngine On
SSLCertificateFile "C:/wamp/bin/apache/apache2.4.9/conf/server.crt"
SSLCertificateKeyFile "C:/wamp/bin/apache/apache2.4.9/conf/server.key"
#SSLCertificateChainFile "C:/upupw/Apache2/conf/1_root_bundle.crt"
<FilesMatch "\.(shtml|phtml|php)$">
SSLOptions +StdEnvVars
</FilesMatch>
BrowserMatch "MSIE [2-5]" \
nokeepalive ssl-unclean-shutdown \
downgrade-1.0 force-response-1.0
<Directory "C:/wamp/www/hxq">
Options FollowSymLinks
AllowOverride All
Order allow,deny
Allow from all
</Directory>
</VirtualHost>
以上最容易出问题的地方是http_ssl.conf中的日志等路径问题,建议按照物理路径进行设置
步骤七:
调试运行Apache,对于Apache。如果是集成板的如xampp,wampserver,或者phpstudy启动Apache Server,可能我们不知道我们的服务器出现了什么问题,建议查看 Apache/logs下的日志,在此基础上,配合cmd命令行在bin目录下运行httpd命令,如果不报错,说明服务器运行没问题,否则更具提示修改问题
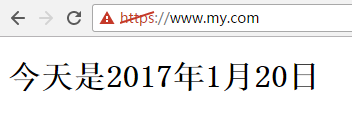
2.测试运行
重启apahce服务,访问https://www.my.com/,完工!
===========出现错误汇集==========
1、"Syntax error on line 80 of c:/apache/conf/extra/httpd-ssl.conf:ErrorLog takes one argument,The filename of the error log"或者"Syntax error on line 99 of c:/apache/conf/extra/httpd-ssl.conf:SSLCertificateFile takes one argument,SSL Server Certificate file ('/path/to/file' -PEM or DER encoded)"
解决方法:文件路径加双引号
2、"Syntax error on line 76 of C:/apache/conf/extra/httpd-ssl.conf:SSLSessionCache: 'shmcb' session cache not supported (known names: ). Maybe you need to load the appropriate socache module (mod_socache_shmcb?)."
解决办法:
打开httpd.conf,
找到LoadModule socache_shmcb_module modules/mod_socache_shmcb.so
把前面的注释去掉。
来自 http://www.cnblogs.com/hld123/p/6343437.html

