You are here
马哥 24_02 _编译安装LAMP之MySQL-5.5.28(通用二进制格式) 有大用

http 2.4新特性
1,MPM可于运行时装载
--enable-mpms-shared-all --with-mpm=event 提供多个可以切换,默认是 event
如果没有 --enable-mpms-shared-all ,只有 --with-mpm=event 表示只提供 event,只使用event
2,Event MPM
3,异步读写
4,在每模块及每目录上指定日志级别
5,每请求配置: <If> <ElseIf> <Else>:
6,增强的表达式分析器
7,毫秒级的KeepAlive Timeout;
8,基于域名的虚拟主机不再需要NameVirtualHost指令
9,降低了内存占用
10,支持此配置文件中使用自定义变量
异步读写可以大大提升 httpd的 工作性能的,
基于域名的虚拟主机不再需要NameVirtualHost指令
2.4中新增加的模块 (2.2中没有):
mod_proxy_fcgi fastcgi,在2.2中需要额外安装第三方模块fastcgi;;;2.4中直接启用mod_proxy_fcgi这个模块就可以了
(--enable-modules=most 这个模块mod_proxy_fcgi就会被启用起来了,就会被装载,被编译的,当然编译完并没有启用,你想启用它的话,给它启用起来即可)
mod_proxy_fcgi是 mod_proxy 的子模块,mod_proxy不是新增的,早期就有,mod_proxy是核心模块,mod_proxy_fcgi是核心模块的功能的补充
mod_proxy_scgi 也是功能的补充
mod_proxy_express 也是功能的补充
mod_remoteip
mod_session
mod_ratelimit
mod_request
等等
2.2中对于基于IP的访问控制
Order allow,deny
allow from all
2.4中不再支持此方法
2.4使用 Require user
Require user USERNAME 允许这个用户访问
Require not user USERNAME 不允许这个用户访问
Require group GROUPNAME 允许这个组中的用户访问
Require not group GROUPNAME 不允许这个组中的用户访问
Require ip IPADDR 允许这个IP访问
Require not ip IPADDR 不允许这个IP访问
IP
NETWORK/NETMASK
NETWORK/LENGTH
NET
172.16.0.0/255.255.0.0 = 172.16.0.0/16 = 172.16
Require host HOSNAME 允许这个主机名访问
Require not host HOSNAME 不允许这个主机名访问
HOSNAME
DOMAIN
www.magedu.com 就这个主机名的一个主机
.magedu.com 就这个域名内的所有主机
.com 就这个域名内(com域名内)的所有主机
允许所有主机访问
Require all granted 这表示所有主机都得到授权
拒绝所有主机访问
Require all denied
最佳匹配,精确匹配,谁的匹配范围小,精确谁生效,
还要注意自上而下的匹配次序,
一般来讲是结合次序和最佳匹配来完成的
从 php5.4以后,mysql不装,也能单独安装配置php5.4了,只是必须要在编译的时候,明确使用 --with-mysql=mysqlnd 的方式,让它实现在本地进行加载,我们暂时不使用这种方式,我们使用完整的规定的方式,该怎么去编译安装
apr--->apr-util --->httpd--->MySQL
MySQL 的配置文件 : 配置文件格式,集中式配置文件,可以为多个程序提供配置 (5.6中与 5.5有点区别 先说5.5吧)
片断式
[mysql]
一大堆指令(客户端配置)(应该是它作为别的服务器的客户端吧)
[mysqld]
一大堆指令(服务端配置)
[client]
一大堆指令(对于所有的客户端程序都生效,比如phpmyadmin ,navicat )
配置文件路径 $BASEDIR就是mysql进程 (mysql实例)的运行目录 (安装目录) $DATADIR是数据目录 ~表示用户家目录(用户默认运行mysql的是mysql用户,没有家,所以找不到)
/etc/my.cnf (找完第一个) --> /etc/mysql/my.cnf (再找第二个) --> $BASEDIR/my.cnf (再找第三个) --> $DATADIR/my.cnf (有可能再找第三个) --> ~/.my.cnf (再找第四个,没有家,所以找不着)
找完这四个中,有可能配置冲突,冲突怎么办?以最后一个为准
就算没有配置文件,mysql也能,因为它的很多配置都有默认定义的
MySQL服务器维护了两类变量,
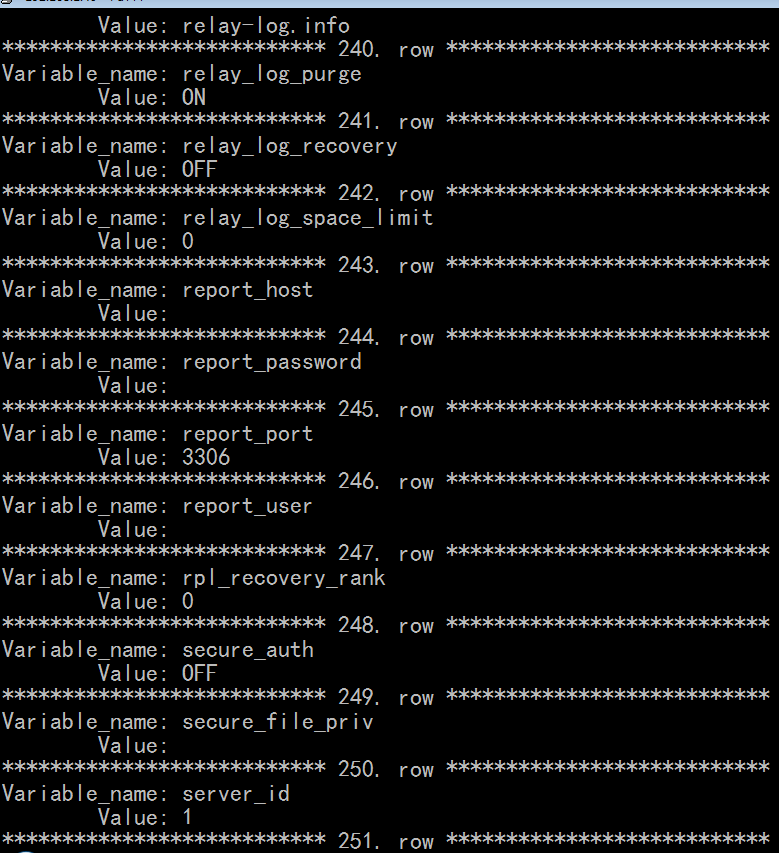
服务器变量: (调整mysql的运行特性(工作特性),调优mysql,就要调 variables, ) 使用参数可以定义,改变mysql服务器的工作状态的(运行属性的)(运行特性的) ,也就是配置文件中的指令
show global variables;
show global variables like '某个参数'; 比如 show global variables like 'datadir'; #查某一个参数的定义
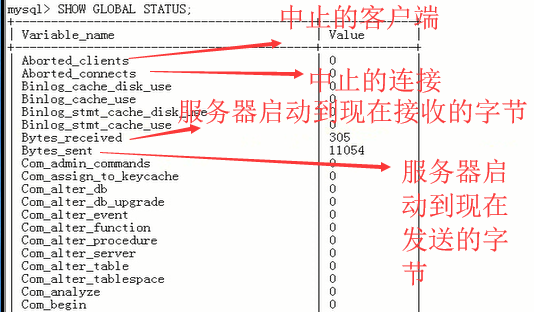
状态变量: (调整之后,是不是性能提升了,就要看 status 数据 ) 不是自己定义的,保存了MySQL服务器运行的统计数据的
show global status;
show global status like '某个参数'; 比如 show global status like 'datadir'; #查某一个参数的定义
MySQL通配符
_ : 任意单个字符
%: 任意长度的任意字符
马哥 下载 Mysql 5.5

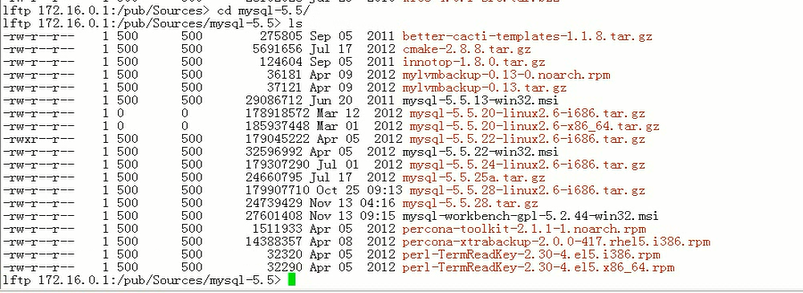


通用二进制格式是编译好的,直接解压就能使用的,但是官方要求解压的包要在 /usr/local 目录下,并且目录名称要是 mysql
解压后最好创建链接,不要改变它的原有名称, 这样子通过mysql 或 原有名称都能找到它,(为什么要保留原有名称,因为平台版本号都保留着,容易识别正在使用的是什么版本的)
https://downloads.mysql.com/archives/ mysql历史版本下载
[root@localhost ~]# wget https://cdn.mysql.com/archives/mysql-5.5/mysql-5.5.28-linux2.6-i686.tar.gz
--2019-04-03 20:49:36-- https://cdn.mysql.com/archives/mysql-5.5/mysql-5.5.28-linux2.6-i686.tar.gz
正在解析主机 cdn.mysql.com... 23.45.157.167
Connecting to cdn.mysql.com|23.45.157.167|:443... 已连接。
已发出 HTTP 请求,正在等待回应... 200 OK
长度:179907710 (172M) [application/x-tar-gz]
Saving to: `mysql-5.5.28-linux2.6-i686.tar.gz'
100%[======================================>] 179,907,710 1.95M/s in 1m 53s
2019-04-03 20:51:30 (1.52 MB/s) - `mysql-5.5.28-linux2.6-i686.tar.gz' saved [179907710/179907710]
[root@localhost ~]# tar xf mysql-5.5.28-linux2.6-i686.tar.gz -C
[root@localhost ~]# man tar
[root@localhost ~]# tar xf mysql-5.5.28-linux2.6-i686.tar.gz -C /usr/local
[root@localhost ~]# cd /usr/local/
[root@localhost local]# ls
apache apr-util etc include libexec sbin src
apr bin games lib mysql-5.5.28-linux2.6-i686 share
[root@localhost local]#
[root@localhost local]# ln -sv mysql-5.5.28-linux2.6-i686 mysql
创建指向“mysql-5.5.28-linux2.6-i686”的符号链接“mysql”
[root@localhost local]# ll
总计 88
drwxr-xr-x 13 root root 4096 04-02 21:07 apache
drwxr-xr-x 6 root root 4096 04-02 17:36 apr
drwxr-xr-x 5 root root 4096 04-02 17:51 apr-util
drwxr-xr-x 2 root root 4096 12-19 16:40 bin
drwxr-xr-x 2 root root 4096 2009-10-01 etc
drwxr-xr-x 2 root root 4096 2009-10-01 games
drwxr-xr-x 2 root root 4096 2009-10-01 include
drwxr-xr-x 2 root root 4096 2009-10-01 lib
drwxr-xr-x 2 root root 4096 2009-10-01 libexec
lrwxrwxrwx 1 root root 26 04-03 21:01 mysql -> mysql-5.5.28-linux2.6-i686
drwxr-xr-x 13 root root 4096 04-03 21:00 mysql-5.5.28-linux2.6-i686
drwxr-xr-x 2 root root 4096 12-19 16:40 sbin
drwxr-xr-x 4 root root 4096 11-10 14:05 share
drwxr-xr-x 2 root root 4096 2009-10-01 src
[root@localhost local]#
[root@localhost local]# cd mysql
[root@localhost mysql]# pwd
/usr/local/mysql
[root@localhost mysql]#
[root@localhost mysql]# ll
总计 76
drwxr-xr-x 2 root root 4096 04-03 21:00 bin
-rw-r--r-- 1 7161 wheel 17987 2012-08-29 COPYING
drwxr-xr-x 4 root root 4096 04-03 20:59 data
drwxr-xr-x 2 root root 4096 04-03 21:00 docs
drwxr-xr-x 3 root root 4096 04-03 21:00 include
-rw-r--r-- 1 7161 wheel 7604 2012-08-29 INSTALL-BINARY
drwxr-xr-x 3 root root 4096 04-03 21:00 lib
drwxr-xr-x 4 root root 4096 04-03 21:00 man
drwxr-xr-x 10 root root 4096 04-03 21:00 mysql-test
-rw-r--r-- 1 7161 wheel 2552 2012-08-29 README
drwxr-xr-x 2 root root 4096 04-03 21:00 scripts
drwxr-xr-x 27 root root 4096 04-03 21:00 share
drwxr-xr-x 4 root root 4096 04-03 21:00 sql-bench
drwxr-xr-x 2 root root 4096 04-03 21:00 support-files
[root@localhost mysql]#
要想初始化安装mysql,需要使用mysql用户,mysql组
下面开始创建mysql用户 mysql组
卸载原来的 rpm 包安装的mysql
[root@localhost mysql]# yum remove mysql
................................
Removed:
mysql.i386 0:5.0.95-5.el5_9
Dependency Removed:
mysql-server.i386 0:5.0.95-5.el5_9 perl-DBD-MySQL.i386 0:3.0007-2.el5
Complete!
[root@localhost mysql]# groupadd -r -g 306 mysql #-r表示建立系统账号组 ,不能登录系统,只是为了运行某个服务的 -g 表示gid值 (其实应该是小于500吧,,大于500的就是不系统用户了)
groupadd:mysql 组已存在
[root@localhost mysql]#
mysql 组已存在 的gid是 27
[root@localhost ~]# useradd -g 27 -r -u 306 mysql
useradd:用户 mysql 已存在
[root@localhost ~]#
[root@localhost mysql]# userdel mysql
[root@localhost mysql]# groupdel mysql
[root@localhost mysql]#
[root@localhost mysql]# groupadd -r -g 306 mysql
[root@localhost mysql]#
[root@localhost mysql]# useradd -g 306 -r -u 306 mysql
[root@localhost mysql]# id mysql
uid=306(mysql) gid=306(mysql) groups=306(mysql)
[root@localhost mysql]#
[root@localhost ~]#
下面是马哥执行的代码 马哥的为什么跟我的不一样呢

[root@localhost ~]# ls /home #没有家目录,说明是系统用户,不允许它登录的
hadoop jerry shipingzhong tom
[root@localhost ~]#
[root@localhost ~]# grep mysql /etc/passwd # 可以改成 /sbin/nologin
mysql:x:27:27:MySQL Server:/var/lib/mysql:/bin/bash
[root@localhost ~]#
[root@localhost mysql]# pwd
/usr/local/mysql
[root@localhost mysql]#
[root@localhost mysql]# ll
总计 76
drwxr-xr-x 2 root root 4096 04-03 21:00 bin
-rw-r--r-- 1 7161 wheel 17987 2012-08-29 COPYING
drwxr-xr-x 4 root root 4096 04-03 20:59 data
drwxr-xr-x 2 root root 4096 04-03 21:00 docs
drwxr-xr-x 3 root root 4096 04-03 21:00 include
-rw-r--r-- 1 7161 wheel 7604 2012-08-29 INSTALL-BINARY #这个文件里有安装步骤
drwxr-xr-x 3 root root 4096 04-03 21:00 lib
drwxr-xr-x 4 root root 4096 04-03 21:00 man
drwxr-xr-x 10 root root 4096 04-03 21:00 mysql-test
-rw-r--r-- 1 7161 wheel 2552 2012-08-29 README
drwxr-xr-x 2 root root 4096 04-03 21:00 scripts
drwxr-xr-x 27 root root 4096 04-03 21:00 share
drwxr-xr-x 4 root root 4096 04-03 21:00 sql-bench
drwxr-xr-x 2 root root 4096 04-03 21:00 support-files
[root@localhost mysql]# less INSTALL-BINARY #里面有怎么装的步骤
........................
shell> groupadd mysql
shell> useradd -r -g mysql mysql
shell> cd /usr/local
shell> tar zxvf /path/to/mysql-VERSION-OS.tar.gz
shell> ln -s full-path-to-mysql-VERSION-OS mysql
shell> cd mysql
shell> chown -R mysql .
shell> chgrp -R mysql .
shell> scripts/mysql_install_db --user=mysql
shell> chown -R root .
shell> chown -R mysql data
# Next command is optional
shell> cp support-files/my-medium.cnf /etc/my.cnf
shell> bin/mysqld_safe --user=mysql &
# Next command is optional
shell> cp support-files/mysql.server /etc/init.d/mysql.server
........................
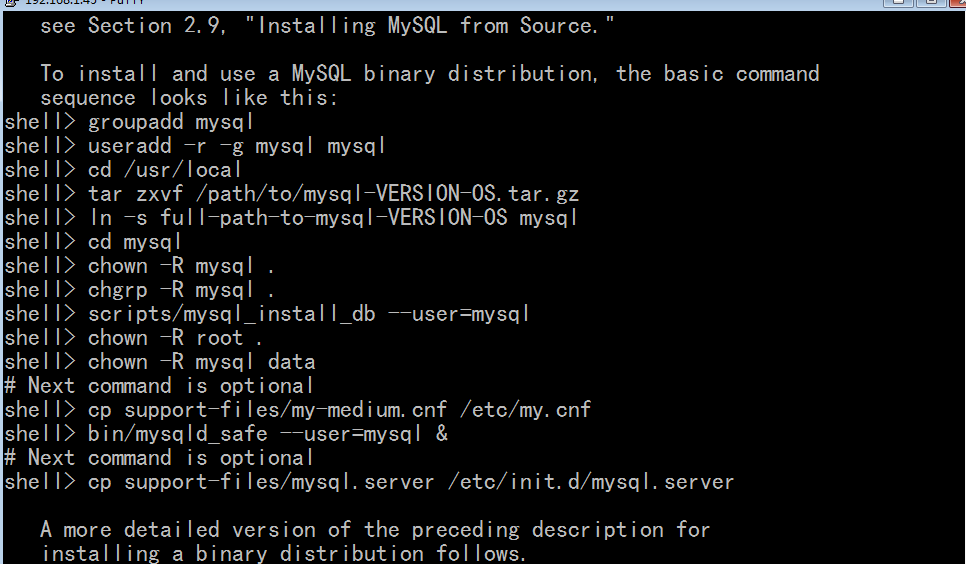
[root@localhost mysql]# chown -R mysql.mysql /usr/local/mysql/* # mysql是个链接,所以后面要加*,所以mysql文件夹里面的所以 否则的话就是改的这个链接文件
(为什么先要改成 mysql, 然后初始化后 又要改成 root ....难道是因为用mysql用户初始化的时候,没有权限对 这个目录 进行初始化?)
[root@localhost mysql]#
[root@localhost mysql]# ll
total 76
-rw-r--r-- 1 mysql mysql 17987 Aug 29 2012 COPYING
-rw-r--r-- 1 mysql mysql 7604 Aug 29 2012 INSTALL-BINARY
-rw-r--r-- 1 mysql mysql 2552 Aug 29 2012 README
drwxr-xr-x 2 mysql mysql 4096 Apr 3 21:00 bin
drwxr-xr-x 4 mysql mysql 4096 Apr 3 20:59 data
drwxr-xr-x 2 mysql mysql 4096 Apr 3 21:00 docs
drwxr-xr-x 3 mysql mysql 4096 Apr 3 21:00 include
drwxr-xr-x 3 mysql mysql 4096 Apr 3 21:00 lib
drwxr-xr-x 4 mysql mysql 4096 Apr 3 21:00 man
drwxr-xr-x 10 mysql mysql 4096 Apr 3 21:00 mysql-test
drwxr-xr-x 2 mysql mysql 4096 Apr 3 21:00 scripts
drwxr-xr-x 27 mysql mysql 4096 Apr 3 21:00 share
drwxr-xr-x 4 mysql mysql 4096 Apr 3 21:00 sql-bench
drwxr-xr-x 2 mysql mysql 4096 Apr 3 21:00 support-files
[root@localhost mysql]#
[root@localhost mysql]# ls scripts/
mysql_install_db # mysql启动的时候,要初始化,它就是做初始化的,只不过,这时我们要手动执行
[root@localhost mysql]#
[root@localhost mysql]# scripts/mysql_install_db --help
Usage: scripts/mysql_install_db [OPTIONS]
--basedir=path The path to the MySQL installation directory.
--builddir=path If using --srcdir with out-of-directory builds, you
will need to set this to the location of the build
directory where built files reside.
--cross-bootstrap For internal use. Used when building the MySQL system
tables on a different host than the target.
--datadir=path The path to the MySQL data directory. # 数据目录放的是数据库和表 (rpm包安装时放在/var/lib/mysql)
#我们解压安装时,是放在当前目录下有个子目录叫 data,就放在里面, 把数据放在软件安装目录下不太好,应另找路径,mysql数据可能会非常大,建议放在一个独立的分区上,而且是独立的逻辑卷上,将来数据增大时,可以方便的扩展它的边界,不用改变数据的,逻辑卷可能不会挂载到这个子目录data下,可能挂载到另外的一个位置,所以我们要用 --datadir 告诉程序另外的位置在哪里 我们初始化的结果保存在对应的数据目录下的
--defaults-extra-file=name
Read this file after the global files are read.
--defaults-file=name Only read default options from the given file name.
--force Causes mysql_install_db to run even if DNS does not
work. In that case, grant table entries that normally
use hostnames will use IP addresses.
--help Display this help and exit.
--ldata=path The path to the MySQL data directory. Same as --datadir.
--no-defaults Don't read default options from any option file.
--rpm For internal use. This option is used by RPM files
during the MySQL installation process.
--skip-name-resolve Use IP addresses rather than hostnames when creating
grant table entries. This option can be useful if
your DNS does not work.
--srcdir=path The path to the MySQL source directory. This option
uses the compiled binaries and support files within the
source tree, useful for if you don't want to install
MySQL yet and just want to create the system tables.
--user=user_name The login username to use for running mysqld. Files
and directories created by mysqld will be owned by this
user. You must be root to use this option. By default
mysqld runs using your current login name and files and
directories that it creates will be owned by you. #表示以哪个用户的身份进行初始化
All other options are passed to the mysqld program
[root@localhost mysql]#
[root@localhost mysql]# fdisk -l
Disk /dev/hda: 21.4 GB, 21474836480 bytes
15 heads, 63 sectors/track, 44384 cylinders
Units = cylinders of 945 * 512 = 483840 bytes
Device Boot Start End Blocks Id System
/dev/hda1 1 104 49108+ 83 Linux
/dev/hda2 105 2172 977130 83 Linux
Disk /dev/hdd: 21.4 GB, 21474836480 bytes
15 heads, 63 sectors/track, 44384 cylinders
Units = cylinders of 945 * 512 = 483840 bytes
Device Boot Start End Blocks Id System
/dev/hdd1 1 63 29736 83 Linux
/dev/hdd2 64 684 293422+ 83 Linux
Disk /dev/sda: 128.8 GB, 128849018880 bytes
255 heads, 63 sectors/track, 15665 cylinders
Units = cylinders of 16065 * 512 = 8225280 bytes
Device Boot Start End Blocks Id System
/dev/sda1 * 1 13 104391 83 Linux
/dev/sda2 14 15665 125724690 8e Linux LVM
[root@localhost mysql]#
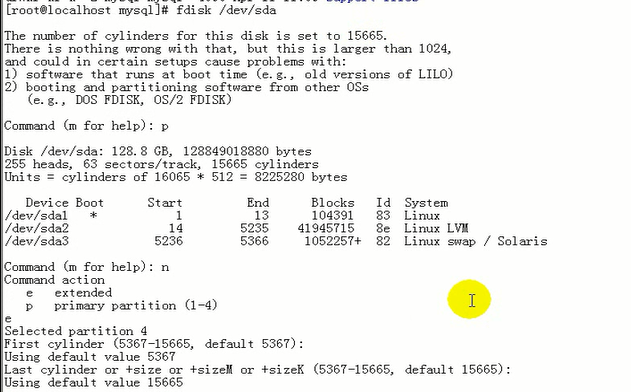
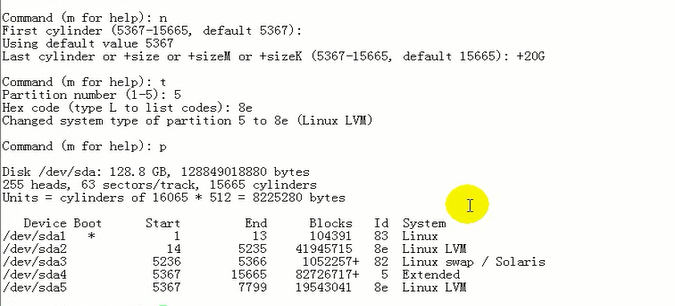
[root@localhost mysql]# fdisk /dev/sda
The number of cylinders for this disk is set to 15665.
There is nothing wrong with that, but this is larger than 1024,
and could in certain setups cause problems with:
1) software that runs at boot time (e.g., old versions of LILO)
2) booting and partitioning software from other OSs
(e.g., DOS FDISK, OS/2 FDISK)
Command (m for help): n
Command action
e extended
p primary partition (1-4)
e
Partition number (1-4):
Value out of range.
Partition number (1-4): 4
No free sectors available #没有空闲分区了
Command (m for help):


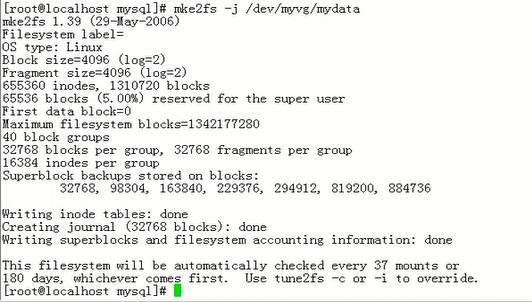


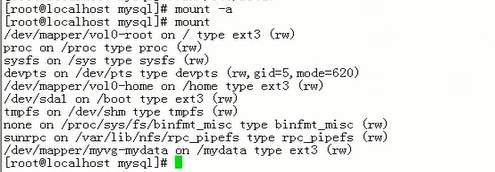
[root@localhost mysql]# mkdir /mydata/data -p
[root@localhost mysql]#
[root@localhost mysql]# ll /mydata/
总计 4
drwxr-xr-x 2 root root 4096 04-04 04:15 data
[root@localhost mysql]#
[root@localhost mysql]# chown -R mysql:mysql /mydata/data/
########## chown -R mysql.mysql /mydata/data/ 这个也可以(把冒号:改成点号.也行)
[root@localhost mysql]#
[root@localhost mysql]# ll /mydata/
总计 4
drwxr-xr-x 2 mysql mysql 4096 04-04 04:15 data
[root@localhost mysql]#
[root@localhost mysql]# ls -ld /mydata/data
drwxr-x--- 2 mysql mysql 4096 04-04 04:15 /mydata/data
[root@localhost mysql]#
[root@localhost mysql]# scripts/mysql_install_db --user=mysql --datadir=/mydata/data
#跟第一次启动mysql时,显示的信息是一样的
Installing MySQL system tables...
OK
Filling help tables...
OK
To start mysqld at boot time you have to copy
support-files/mysql.server to the right place for your system
PLEASE REMEMBER TO SET A PASSWORD FOR THE MySQL root USER !
To do so, start the server, then issue the following commands:
./bin/mysqladmin -u root password 'new-password'
./bin/mysqladmin -u root -h localhost.localdomain password 'new-password'
Alternatively you can run:
./bin/mysql_secure_installation
which will also give you the option of removing the test
databases and anonymous user created by default. This is
strongly recommended for production servers.
See the manual for more instructions.
You can start the MySQL daemon with:
cd . ; ./bin/mysqld_safe &
You can test the MySQL daemon with mysql-test-run.pl
cd ./mysql-test ; perl mysql-test-run.pl
Please report any problems with the ./bin/mysqlbug script!
[root@localhost mysql]#
[root@localhost mysql]# pwd
/usr/local/mysql
[root@localhost mysql]# ll
总计 76
drwxr-xr-x 2 mysql mysql 4096 04-03 21:00 bin
-rw-r--r-- 1 mysql mysql 17987 2012-08-29 COPYING
drwxr-xr-x 4 mysql mysql 4096 04-03 20:59 data
drwxr-xr-x 2 mysql mysql 4096 04-03 21:00 docs
drwxr-xr-x 3 mysql mysql 4096 04-03 21:00 include
-rw-r--r-- 1 mysql mysql 7604 2012-08-29 INSTALL-BINARY
drwxr-xr-x 3 mysql mysql 4096 04-03 21:00 lib
drwxr-xr-x 4 mysql mysql 4096 04-03 21:00 man
drwxr-xr-x 10 mysql mysql 4096 04-03 21:00 mysql-test
-rw-r--r-- 1 mysql mysql 2552 2012-08-29 README
drwxr-xr-x 2 mysql mysql 4096 04-03 21:00 scripts
drwxr-xr-x 27 mysql mysql 4096 04-03 21:00 share
drwxr-xr-x 4 mysql mysql 4096 04-03 21:00 sql-bench
drwxr-xr-x 2 mysql mysql 4096 04-03 21:00 support-files
此时要把这个路径下的属主属组改成 root ,防止有人攻破mysql, 对这里有权限
[root@localhost mysql]# chown -R root /usr/local/mysql/*
[root@localhost mysql]# ll
总计 76
drwxr-xr-x 2 root mysql 4096 04-03 21:00 bin
-rw-r--r-- 1 root mysql 17987 2012-08-29 COPYING
drwxr-xr-x 4 root mysql 4096 04-03 20:59 data (如果数据真放在这里的话,root用户还要改成mysql,因为mysql用户对这个数据的目录要有写权限 但是我们的数据现在放在了 /mydata/data )
drwxr-xr-x 2 root mysql 4096 04-03 21:00 docs
drwxr-xr-x 3 root mysql 4096 04-03 21:00 include
-rw-r--r-- 1 root mysql 7604 2012-08-29 INSTALL-BINARY
drwxr-xr-x 3 root mysql 4096 04-03 21:00 lib
drwxr-xr-x 4 root mysql 4096 04-03 21:00 man
drwxr-xr-x 10 root mysql 4096 04-03 21:00 mysql-test
-rw-r--r-- 1 root mysql 2552 2012-08-29 README
drwxr-xr-x 2 root mysql 4096 04-03 21:00 scripts
drwxr-xr-x 27 root mysql 4096 04-03 21:00 share
drwxr-xr-x 4 root mysql 4096 04-03 21:00 sql-bench
drwxr-xr-x 2 root mysql 4096 04-03 21:00 support-files
[root@localhost mysql]#
[root@localhost mysql]# pwd
/usr/local/mysql
[root@localhost mysql]#
[root@localhost mysql]# ls
bin data include lib mysql-test scripts sql-bench
COPYING docs INSTALL-BINARY man README share support-files
[root@localhost mysql]# ls support-files/
binary-configure my-huge.cnf mysqld_multi.server
config.huge.ini my-innodb-heavy-4G.cnf mysql-log-rotate
config.medium.ini my-large.cnf mysql.server
config.small.ini my-medium.cnf ndb-config-2-node.ini
magic my-small.cnf
[root@localhost mysql]#
[root@localhost mysql]# cp support-files/mysql.server /etc/init.d/mysqld
[root@localhost mysql]#
[root@localhost mysql]# ls -l /etc/init.d/mysqld #有执行权限
-rwxr-xr-x 1 root root 10650 04-04 04:36 /etc/init.d/mysqld
[root@localhost mysql]#
[root@localhost mysql]# chkconfig --add mysqld #加到服务列表中去
[root@localhost mysql]#
[root@localhost mysql]# chkconfig --list mysqld # 2 3 4 5 默认就是 on 了
mysqld 0:关闭 1:关闭 2:启用 3:启用 4:启用 5:启用 6:关闭
[root@localhost mysql]#
[root@localhost mysql]# pwd
/usr/local/mysql
[root@localhost mysql]#
[root@localhost mysql]# ls support-files/ #里面配置文件
binary-configure my-huge.cnf(巨大级别的) mysqld_multi.server
config.huge.ini my-innodb-heavy-4G.cnf(innodb是一种mysql的存储引擎) mysql-log-rotate
config.medium.ini my-large.cnf(大级别的) mysql.server
config.small.ini my-medium.cnf(中等的) ndb-config-2-node.ini
magic my-small.cnf(小的)
[root@localhost mysql]#
大小是内存区别
[root@localhost mysql]# head support-files/my-medium.cnf
# Example MySQL config file for medium systems.
# (32兆-64兆) (128兆也成)
# This is for a system with little memory (32M - 64M) where MySQL plays
# an important part, or systems up to 128M where MySQL is used together with
# other programs (such as a web server)
#
# MySQL programs look for option files in a set of
# locations which depend on the deployment platform.
# You can copy this option file to one of those
# locations. For information about these locations, see:
[root@localhost mysql]#
[root@localhost mysql]# head support-files/my-small.cnf
# Example MySQL config file for small systems.
# 小于64M
# This is for a system with little memory (<= 64M) where MySQL is only used
# from time to time and it's important that the mysqld daemon
# doesn't use much resources.
#
# MySQL programs look for option files in a set of
# locations which depend on the deployment platform.
# You can copy this option file to one of those
# locations. For information about these locations, see:
[root@localhost mysql]#
[root@localhost mysql]# free -m
total used free shared buffers cached
Mem: 1010 978 32 0 159 705
-/+ buffers/cache: 113 897
Swap: 1023 0 1023
[root@localhost mysql]#
[root@localhost mysql]# head support-files/my-large.cnf
# Example MySQL config file for large systems.
# 内存等于512兆 512兆算大的了,说明mysql对于资源的要求量很小
# This is for a large system with memory = 512M where the system runs mainly
# MySQL.
#
# MySQL programs look for option files in a set of
# locations which depend on the deployment platform.
# You can copy this option file to one of those
# locations. For information about these locations, see:
# http://dev.mysql.com/doc/mysql/en/option-files.html
[root@localhost mysql]#
[root@localhost mysql]# head support-files/my-huge.cnf
# Example MySQL config file for very large systems.
# 内存如果1G-2G
# This is for a large system with memory of 1G-2G where the system runs mainly
# MySQL.
#
# MySQL programs look for option files in a set of
# locations which depend on the deployment platform.
# You can copy this option file to one of those
# locations. For information about these locations, see:
# http://dev.mysql.com/doc/mysql/en/option-files.html
[root@localhost mysql]#
现在mysql动辄用个32G的内存就很正常了,现在的mysql运行的量特别的大,
mysql早期的估计或衡量都是很小的
[root@localhost mysql]# cp support-files/my-large.cnf /etc/my.cnf
[root@localhost mysql]#
[root@localhost mysql]# vim /etc/my.cnf
# MySQL programs look for option files in a set of
# locations which depend on the deployment platform.
# You can copy this option file to one of those
# locations. For information about these locations, see:
# http://dev.mysql.com/doc/mysql/en/option-files.html
#
# In this file, you can use all long options that a program supports.
# If you want to know which options a program supports, run the program
# with the "--help" option.
# The following options will be passed to all MySQL clients
[client] #修改客户端程序 这应该是本mysql服务器对应的客户端?
#password = your_password
port = 3306
socket = /tmp/mysql.sock
# Here follows entries for some specific programs
# The MySQL server
[mysqld] #修改服务器端的
port = 3306 #端口
socket = /tmp/mysql.sock #客户端和服务端都在本机用sock ,使用rpm包安装的时候,这个文件在 /var/lib/mysql ,在它的数据文件目录下 当你使用不同的方式安装mysql的时候,要确保socket文件路径要对
skip-external-locking
key_buffer_size = 256M
max_allowed_packet = 1M
table_open_cache = 256
sort_buffer_size = 1M
read_buffer_size = 1M
read_rnd_buffer_size = 4M
myisam_sort_buffer_size = 64M
thread_cache_size = 8
query_cache_size= 16M
# Try number of CPU's*2 for thread_concurrency
thread_concurrency = 8 #线程并发量,最多启动8个mysql线程,太多没有意义 cpu的个数乘以2
#线程_连接当前 第一个线程要占一个cpu,线程多了(像httpd一样,每一个用户请求用一个进程来响应,假如只有一个cpu,同时运行的进程只有一个,让每一个用户进程都能运行起来,只能在进程间切换,进程切换是要消耗资源的,所以太多进程没有意义) (这一项其实改不改,其实影响并不是特别的大)
#下面这一项是加上去的 如果这一项不加的话,mysql是启动不了的, #如果没有改变mysql的数据目录,下面这一项是不用加的
datadir = /mydata/data
# Don't listen on a TCP/IP port at all. This can be a security enhancement,
# if all processes that need to connect to mysqld run on the same host.
# All interaction with mysqld must be made via Unix sockets or named pipes.
# Note that using this option without enabling named pipes on Windows
# (via the "enable-named-pipe" option) will render mysqld useless!
#
#skip-networking
# Replication Master Server (default)
# binary logging is required for replication
log-bin=mysql-bin
# binary logging format - mixed recommended
binlog_format=mixed
# required unique id between 1 and 2^32 - 1
# defaults to 1 if master-host is not set
# but will not function as a master if omitted
server-id = 1
# Replication Slave (comment out master section to use this)
#
# To configure this host as a replication slave, you can choose between
# two methods :
#
# 1) Use the CHANGE MASTER TO command (fully described in our manual) -
# the syntax is:
#
# CHANGE MASTER TO MASTER_HOST=<host>, MASTER_PORT=<port>,
# MASTER_USER=<user>, MASTER_PASSWORD=<password> ;
#
# where you replace <host>, <user>, <password> by quoted strings and
# <port> by the master's port number (3306 by default).
#
# Example:
#
# CHANGE MASTER TO MASTER_HOST='125.564.12.1', MASTER_PORT=3306,
# MASTER_USER='joe', MASTER_PASSWORD='secret';
#
# OR
#
# 2) Set the variables below. However, in case you choose this method, then
# start replication for the first time (even unsuccessfully, for example
# if you mistyped the password in master-password and the slave fails to
# connect), the slave will create a master.info file, and any later
# change in this file to the variables' values below will be ignored and
# overridden by the content of the master.info file, unless you shutdown
# the slave server, delete master.info and restart the slaver server.
# For that reason, you may want to leave the lines below untouched
# (commented) and instead use CHANGE MASTER TO (see above)
#
# required unique id between 2 and 2^32 - 1
# (and different from the master)
# defaults to 2 if master-host is set
# but will not function as a slave if omitted
#server-id = 2
#
# The replication master for this slave - required
#master-host = <hostname>
#
# The username the slave will use for authentication when connecting
# to the master - required
#master-user = <username>
#
# The password the slave will authenticate with when connecting to
# the master - required
#master-password = <password>
#
# The port the master is listening on.
# optional - defaults to 3306
#master-port = <port>
#
# binary logging - not required for slaves, but recommended
#log-bin=mysql-bin
# Uncomment the following if you are using InnoDB tables
#innodb_data_home_dir = /usr/local/mysql/data
#innodb_data_file_path = ibdata1:10M:autoextend
#innodb_log_group_home_dir = /usr/local/mysql/data
# You can set .._buffer_pool_size up to 50 - 80 %
# of RAM but beware of setting memory usage too high
#innodb_buffer_pool_size = 256M
#innodb_additional_mem_pool_size = 20M
# Set .._log_file_size to 25 % of buffer pool size
#innodb_log_file_size = 64M
#innodb_log_buffer_size = 8M
#innodb_flush_log_at_trx_commit = 1
#innodb_lock_wait_timeout = 50
[mysqldump]
quick
max_allowed_packet = 16M
[mysql] #修改客户端的( 应该是它作为别的服务器的客户端)
no-auto-rehash
# Remove the next comment character if you are not familiar with SQL
#safe-updates
[myisamchk]
key_buffer_size = 128M
sort_buffer_size = 128M
read_buffer = 2M
write_buffer = 2M
[mysqlhotcopy]
interactive-timeout
[root@localhost ~]# cat /proc/cpuinfo # 有4个processor,cpu的个数为4
processor : 0
vendor_id : GenuineIntel
cpu family : 6
model : 158
model name : Intel(R) Core(TM) i7-7700 CPU @ 3.60GHz
stepping : 9
cpu MHz : 3600.250
cache size : 8192 KB
physical id : 0
siblings : 2
core id : 0
cpu cores : 2
apicid : 0
fdiv_bug : no
hlt_bug : no
f00f_bug : no
coma_bug : no
fpu : yes
fpu_exception : yes
cpuid level : 22
wp : yes
flags : fpu vme de pse tsc msr pae mce cx8 apic mtrr pge mca cmov pat pse36 clflush dts acpi mmx fxsr sse sse2 ss ht nx rdtscp lm constant_tsc ida nonstop_tsc arat pni ssse3 cx16 sse4_1 sse4_2 popcnt lahf_lm [8]
bogomips : 7200.50
processor : 1
vendor_id : GenuineIntel
cpu family : 6
model : 158
model name : Intel(R) Core(TM) i7-7700 CPU @ 3.60GHz
stepping : 9
cpu MHz : 3600.250
cache size : 8192 KB
physical id : 0
siblings : 2
core id : 1
cpu cores : 2
apicid : 1
fdiv_bug : no
hlt_bug : no
f00f_bug : no
coma_bug : no
fpu : yes
fpu_exception : yes
cpuid level : 22
wp : yes
flags : fpu vme de pse tsc msr pae mce cx8 apic mtrr pge mca cmov pat pse36 clflush dts acpi mmx fxsr sse sse2 ss ht nx rdtscp lm constant_tsc ida nonstop_tsc arat pni ssse3 cx16 sse4_1 sse4_2 popcnt lahf_lm [8]
bogomips : 7200.50
processor : 2
vendor_id : GenuineIntel
cpu family : 6
model : 158
model name : Intel(R) Core(TM) i7-7700 CPU @ 3.60GHz
stepping : 9
cpu MHz : 3600.250
cache size : 8192 KB
physical id : 1
siblings : 2
core id : 0
cpu cores : 2
apicid : 2
fdiv_bug : no
hlt_bug : no
f00f_bug : no
coma_bug : no
fpu : yes
fpu_exception : yes
cpuid level : 22
wp : yes
flags : fpu vme de pse tsc msr pae mce cx8 apic mtrr pge mca cmov pat pse36 clflush dts acpi mmx fxsr sse sse2 ss ht nx rdtscp lm constant_tsc ida nonstop_tsc arat pni ssse3 cx16 sse4_1 sse4_2 popcnt lahf_lm [8]
bogomips : 7200.50
processor : 3
vendor_id : GenuineIntel
cpu family : 6
model : 158
model name : Intel(R) Core(TM) i7-7700 CPU @ 3.60GHz
stepping : 9
cpu MHz : 3600.250
cache size : 8192 KB
physical id : 1
siblings : 2
core id : 1
cpu cores : 2
apicid : 3
fdiv_bug : no
hlt_bug : no
f00f_bug : no
coma_bug : no
fpu : yes
fpu_exception : yes
cpuid level : 22
wp : yes
flags : fpu vme de pse tsc msr pae mce cx8 apic mtrr pge mca cmov pat pse36 clflush dts acpi mmx fxsr sse sse2 ss ht nx rdtscp lm constant_tsc ida nonstop_tsc arat pni ssse3 cx16 sse4_1 sse4_2 popcnt lahf_lm [8]
bogomips : 7200.50
[root@localhost ~]#
[root@localhost mysql]# service mysqld start #可以启动了
Starting MySQL... [确定]
[root@localhost mysql]#
[root@localhost mysql]# netstat -tnlp
Active Internet connections (only servers)
Proto Recv-Q Send-Q Local Address Foreign Address State PID/Program name
tcp 0 0 127.0.0.1:2208 0.0.0.0:* LISTEN 3785/./hpiod
tcp 0 0 0.0.0.0:3306 0.0.0.0:* LISTEN 8515/mysqld
tcp 0 0 0.0.0.0:654 0.0.0.0:* LISTEN 3440/rpc.statd
tcp 0 0 0.0.0.0:111 0.0.0.0:* LISTEN 3390/portmap
tcp 0 0 0.0.0.0:22 0.0.0.0:* LISTEN 3808/sshd
tcp 0 0 127.0.0.1:631 0.0.0.0:* LISTEN 3822/cupsd
tcp 0 0 127.0.0.1:25 0.0.0.0:* LISTEN 3863/sendmail
tcp 0 0 127.0.0.1:2207 0.0.0.0:* LISTEN 3790/python
tcp 0 0 :::80 :::* LISTEN 3901/httpd
tcp 0 0 :::22 :::* LISTEN 3808/sshd
[root@localhost mysql]#
[root@localhost mysql]# mysql
-bash: mysql: command not found
[root@localhost mysql]#
[root@localhost mysql]# ls /usr/local/mysql/bin
innochecksum mysql_client_test_embedded mysql_secure_installation
msql2mysql mysql_config mysql_setpermission
myisamchk mysql_convert_table_format mysqlshow
myisam_ftdump mysqld mysqlslap
myisamlog mysqld-debug mysqltest
myisampack mysqld_multi mysqltest_embedded
my_print_defaults mysqld_safe mysql_tzinfo_to_sql
mysql mysqldump mysql_upgrade
mysqlaccess mysqldumpslow mysql_waitpid
mysqlaccess.conf mysql_embedded mysql_zap
mysqladmin mysql_find_rows perror
mysqlbinlog mysql_fix_extensions replace
mysqlbug mysqlhotcopy resolveip
mysqlcheck mysqlimport resolve_stack_dump
mysql_client_test mysql_plugin
[root@localhost mysql]#
编译安装的时候 mysql客户端 服务端都装了 它会把所有东西都装好了,只有红帽在制作rpm包的候,它才有必要把mysql分成各个包 子包 什么之类的 我们这里不用分,
[root@localhost ~]# vim /etc/profile.d/mysql.sh
export PATH=$PATH:/usr/local/mysql/bin
~
打开一个新窗口,就可以重读path路径变量,就可以登录了
[root@localhost ~]# mysql
Welcome to the MySQL monitor. Commands end with ; or \g.
Your MySQL connection id is 1
Server version: 5.5.28-log MySQL Community Server (GPL)
Copyright (c) 2000, 2012, Oracle and/or its affiliates. All rights reserved.
Oracle is a registered trademark of Oracle Corporation and/or its
affiliates. Other names may be trademarks of their respective
owners.
Type 'help;' or '\h' for help. Type '\c' to clear the current input statement.
mysql>
mysql> show databases;
+--------------------+
| Database |
+--------------------+
| information_schema |
| mysql |
| performance_schema | #系统状态信息收集库 已经接受过多少个用户请求,多少个用户曾经连进来过,某个用户连进来后,发送了多少数据量过去 放在 performance_schema 里面
| test |
+--------------------+
4 rows in set (0.00 sec)
mysql>
mysql> show global variables;
mysql> show global variables like 'datadir';
+---------------+---------------+
| Variable_name | Value |
+---------------+---------------+
| datadir | /mydata/data/ |
+---------------+---------------+
1 row in set (0.00 sec)
mysql>
mysql> show global variables like 'data%';
+---------------+---------------+
| Variable_name | Value |
+---------------+---------------+
| datadir | /mydata/data/ |
+---------------+---------------+
1 row in set (0.01 sec)
mysql>
mysql> show global variables like '%data%';
+----------------------------+------------------------+
| Variable_name | Value |
+----------------------------+------------------------+
| character_set_database | latin1 |
| collation_database | latin1_swedish_ci |
| datadir | /mydata/data/ |
| innodb_data_file_path | ibdata1:10M:autoextend |
| innodb_data_home_dir | |
| innodb_stats_on_metadata | ON |
| max_length_for_sort_data | 1024 |
| max_long_data_size | 1048576 |
| metadata_locks_cache_size | 1024 |
| myisam_data_pointer_size | 6 |
| skip_show_database | OFF |
| updatable_views_with_limit | YES |
+----------------------------+------------------------+
12 rows in set (0.00 sec)
mysql>
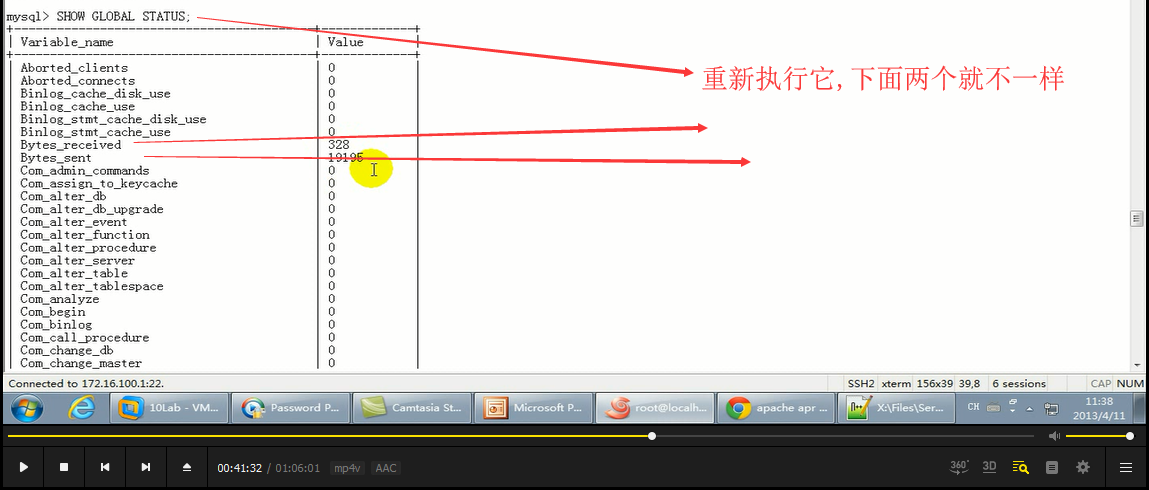
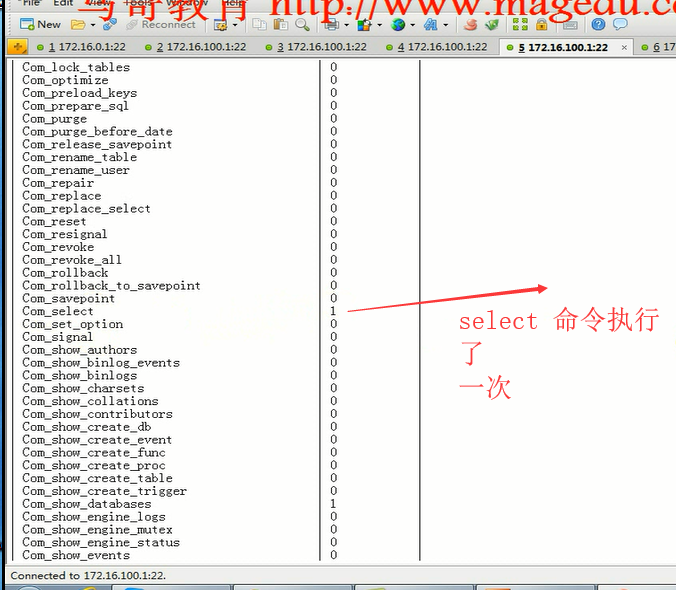
mysql> show global status;

mysql> select version(); # version 是mysql的内置函数 ,是显示当前mysql的版本号的
+------------+
| version() |
+------------+
| 5.5.28-log |
+------------+
1 row in set (0.00 sec)
mysql>
mysql> use mysql;
Database changed
mysql> select database(); #显示默认所进入的数据库
+------------+
| database() |
+------------+
| mysql |
+------------+
1 row in set (0.00 sec)
mysql> #上百个函数 不可能记得住的 查官方文档 有函数索引列表
mysql> select user(); #当前登录的用户
+----------------+
| user() |
+----------------+
| root@localhost |
+----------------+
1 row in set (0.00 sec)
mysql>
mysql> select now();
+---------------------+
| now() |
+---------------------+
| 2019-04-04 14:19:24 |
+---------------------+
1 row in set (0.00 sec)
mysql>
mysql> show global status like '%select%';
+------------------------+-------+
| Variable_name | Value |
+------------------------+-------+
| Com_insert_select | 0 |
| Com_replace_select | 0 |
| Com_select | 9 |
| Select_full_join | 0 |
| Select_full_range_join | 0 |
| Select_range | 0 |
| Select_range_check | 0 |
| Select_scan | 11 |
+------------------------+-------+
8 rows in set (0.00 sec)
mysql>
[root@localhost ~]# man mysql
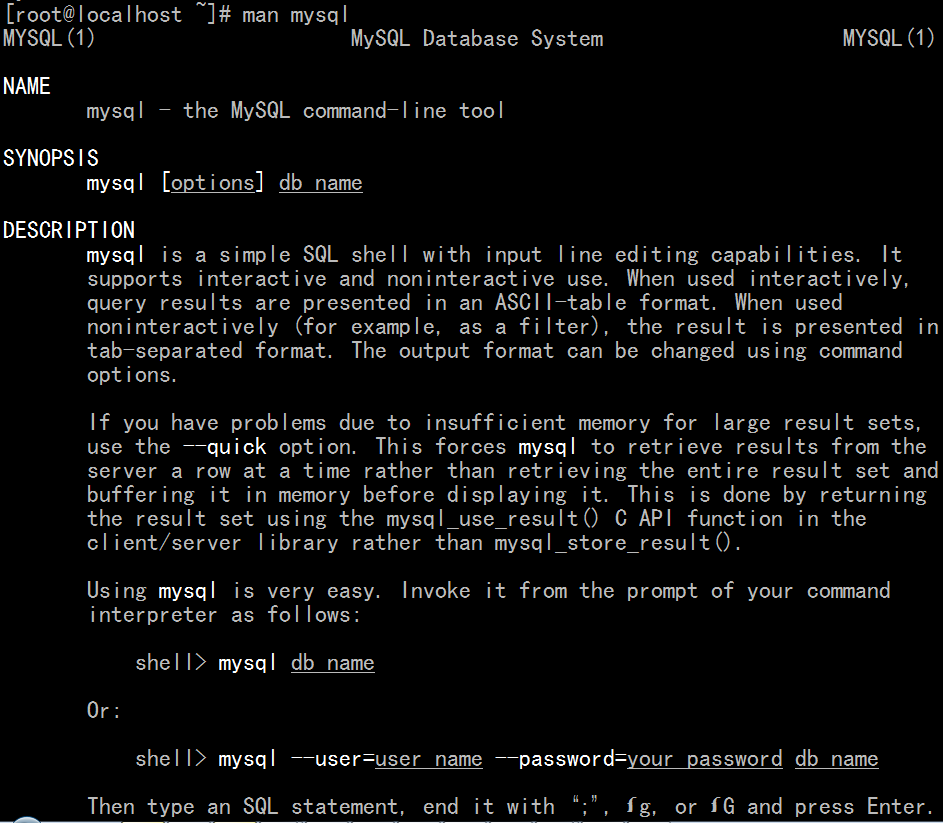
能够直接 找到 man mysql,是因为 我们输出了 mysql的命令路径?
[root@localhost ~]# echo $PATH:
/usr/kerberos/sbin:/usr/kerberos/bin:/usr/local/sbin:/usr/local/bin:/sbin:/bin:/usr/sbin:/usr/bin:/usr/local/apache/bin:/usr/local/mysql/bin:/root/bin:
[root@localhost ~]#
[root@localhost ~]# which mysql
/usr/local/mysql/bin/mysql
[root@localhost ~]#
万一 man mysql 找不到mysql呢?
[root@localhost ~]# vim /etc/man.config
...........................................
MANPATH /usr/man
MANPATH /usr/share/man
MANPATH /usr/local/man
MANPATH /usr/local/share/man
MANPATH /usr/X11R6/man
MANPATH /usr/local/mysql/man # 就是这里增加一行

...........................................
[root@localhost ~]# ls /usr/local/mysql/man #由此可见这就是mysql的 man路径
man1 man8
下面是关于库文件的设置的
[root@localhost ~]# vim /etc/ld.so.conf.d/mysql.conf #在 /etc/ld.so.conf.d/ 目录下创建 .conf 结尾的文件 /usr/local/mysql/lib 就是库文件的路径
/usr/local/mysql/lib
[root@localhost mysql]# pwd
/usr/local/mysql
[root@localhost mysql]# ls lib #由此可见,这是库文件的位置
libmysqlclient.a libmysqlclient.so libmysqlservices.a
libmysqlclient_r.a libmysqlclient.so.18 libtcmalloc_minimal.so
libmysqlclient_r.so libmysqlclient.so.18.0.0 plugin
libmysqlclient_r.so.18 libmysqld.a
libmysqlclient_r.so.18.0.0 libmysqld-debug.a
[root@localhost mysql]#
[root@localhost mysql]# ldconfig -v ( 不带-v不显示,加-v显示过程的,让我们的系统重新读取库文件)
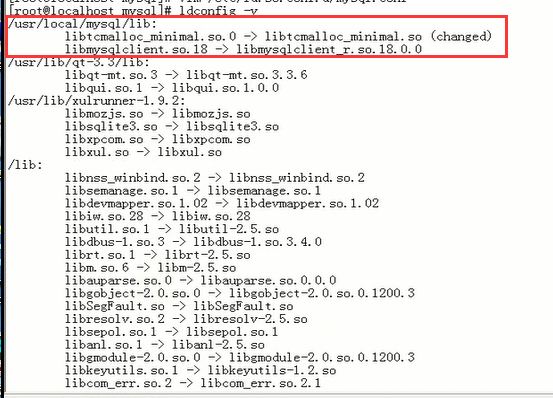
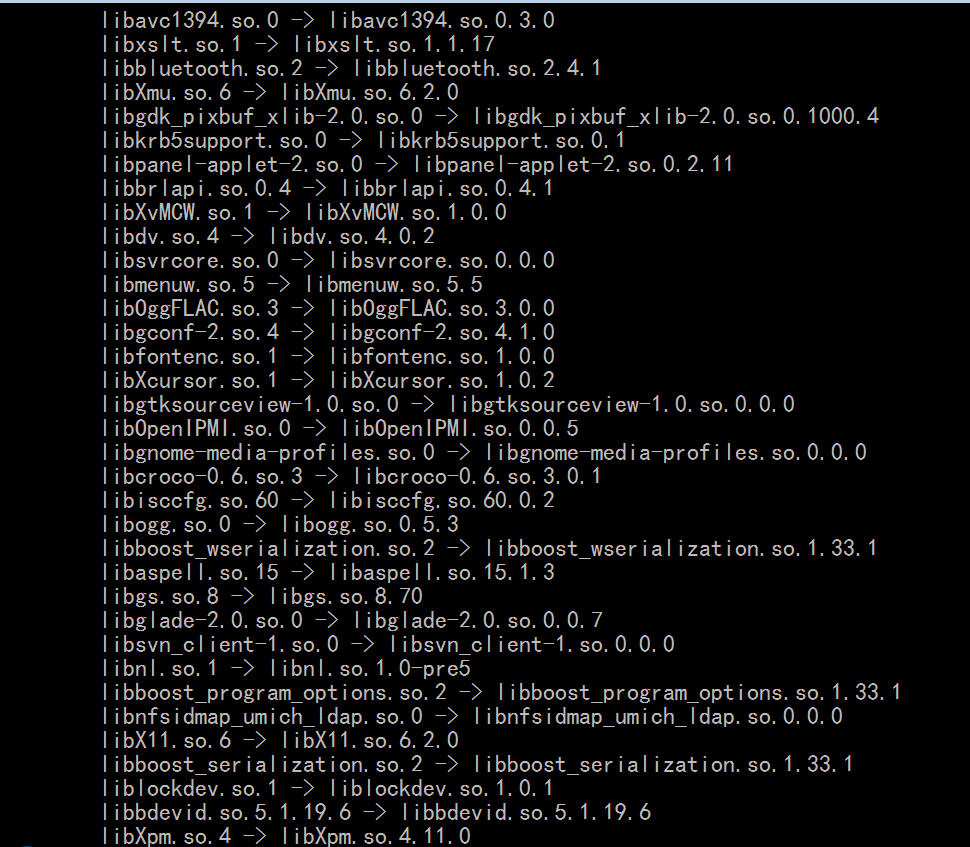
我们的操作系统,我们的内核到哪里去找库文件
开机的时候,会自动的把库文件找出来,然后缓存在一个路径下
刚刚新的库文件路径是没有缓存的,这个命令 ( ldconfig )就是让你的操作系统重新建立库文件缓存的,
缓存文件就是 /etc/ld.so.cache
[root@localhost ~]# ls -l /etc/ld.so.cache
-rw-r--r-- 1 root root 58850 04-04 14:45 /etc/ld.so.cache
[root@localhost ~]#
输出头文件
[root@localhost mysql]# pwd
/usr/local/mysql
[root@localhost mysql]# ls
bin data include lib mysql-test scripts sql-bench
COPYING docs INSTALL-BINARY man README share support-files
[root@localhost mysql]#
[root@localhost mysql]# ln -sv /usr/local/mysql/include /usr/include/mysql
创建指向“/usr/local/mysql/include”的符号链接“/usr/include/mysql”
[root@localhost mysql]#
[root@localhost mysql]# ls /usr/include/mysql # 此时可以看到一大堆的头文件
decimal.h my_dbug.h mysqld_ername.h plugin_ftparser.h
errmsg.h my_dir.h mysqld_error.h plugin.h
keycache.h my_getopt.h mysql_embed.h sql_common.h
m_ctype.h my_global.h mysql.h sql_state.h
m_string.h my_list.h mysql_time.h sslopt-case.h
my_alloc.h my_net.h mysql_version.h sslopt-longopts.h
my_attribute.h my_pthread.h my_sys.h sslopt-vars.h
my_compiler.h mysql my_xml.h typelib.h
my_config.h mysql_com.h plugin_audit.h
[root@localhost mysql]#
导出二进制文件
导出库文件
导出头文件
导出帮助手册
这四步不是必须的,不做的话,可能某些功能实现不了而已
怎么把php安装为apache的模块


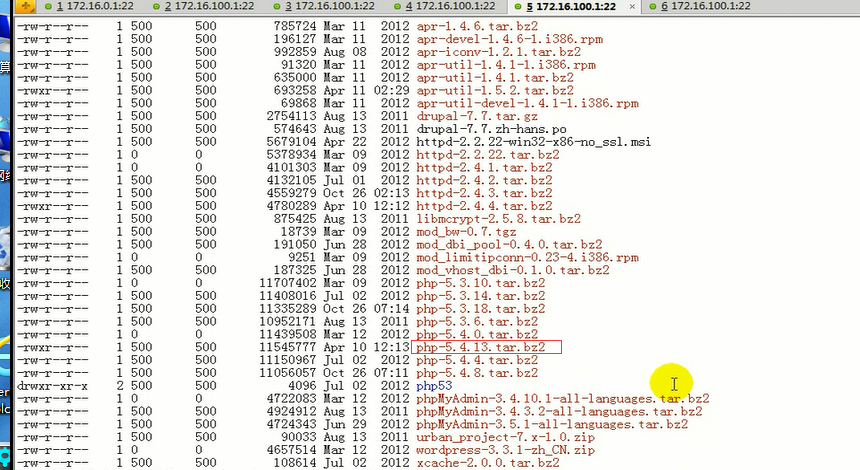

https://www.php.net/downloads.php 官方下载
https://www.php.net/releases/ 官方历史下载 可以通过wget 或者
[root@www ~]# wget http://museum.php.net/php5/php-5.4.13.tar.bz2 --no-check-certificate
[root@localhost ~]# tar xf php-5.4.13.tar.bz2
[root@localhost ~]# cd php-5.4.13
[root@localhost php-5.4.13]#
php的许多功能依赖于系统的某些功能,
比如php要想生成图片,要依赖于图片库,(如果当前系统上没有图片库,就没法使用这个功能)
php53-mbstring 这个multi bytes string 多字节string ,用来支持中文或非一个字节所能表示的语言的
这项功能启不启用,也是需要选项来定义的
[root@localhost php-5.4.13]# ./configure --help | less
`configure' configures this package to adapt to many kinds of systems.
Usage: ./configure [OPTION]... [VAR=VALUE]...
To assign environment variables (e.g., CC, CFLAGS...), specify them as
VAR=VALUE. See below for descriptions of some of the useful variables.
Defaults for the options are specified in brackets.
Configuration:
-h, --help display this help and exit
--help=short display options specific to this package
--help=recursive display the short help of all the included packages
-V, --version display version information and exit
-q, --quiet, --silent do not print `checking...' messages
--cache-file=FILE cache test results in FILE [disabled]
-C, --config-cache alias for `--cache-file=config.cache'
-n, --no-create do not create output files
--srcdir=DIR find the sources in DIR [configure dir or `..']
Installation directories:
--prefix=PREFIX install architecture-independent files in PREFIX
:
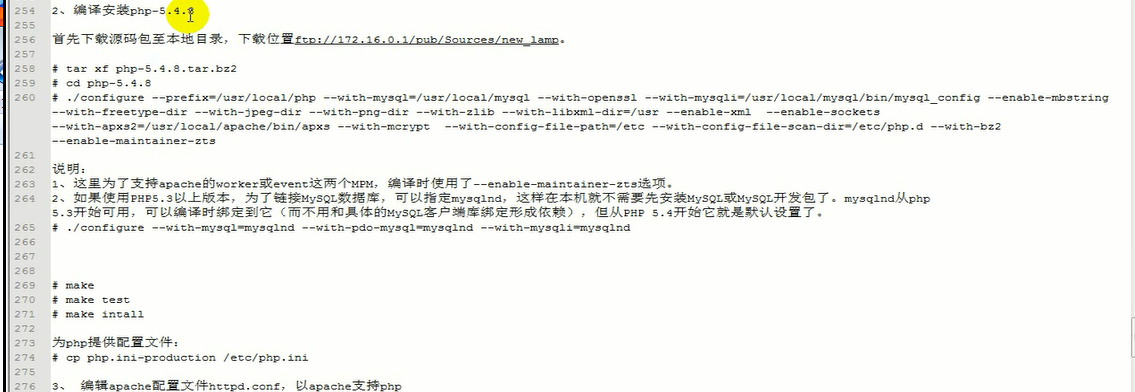
--prefix=/usr/local/php 程序的安装路径
--with-mysql=/usr/local/mysql 指定下mysql的路径
--with-openssl 支持ssl的功能
--with-mysqli=/usr/local/mysql/bin/mysql_config 表示mysql的另外一种接口,php访问mysql,交互mysql的另外一种接口,这是一个二进制程序
--enable-mbstring 这个multi bytes string 多字节string ,用来支持中文或非一个字节所能表示的语言的
这项功能启不启用,也是需要选项来定义的
--with-freetype-dir 表示支持freetype的功能(支持各种字体的功能) 要加载freetype的库文件,头文件
--with-jpeg-dir 表示支持jpeg图片
--with-png-dir 表示支持png图片
--with-zlib 互联网上常用的通用格式的压缩库,让我们的数据文件先压缩再传送,节约带宽的
--with-libxml-dir=/usr 表示xml库路径在哪里 xml就是扩展标记语言 众多系统实现数据交互的时候,都要基于xml来实现,
--enable-xml 支持xml
--enable-sockets 支持基于套接字的通信
--with-apxs2=/usr/local/apache/bin/apxs 表示基于apxs勾子,让php能够编译成apache的模块
--with-mcrypt 有个rpm包叫 php53-mcrypt 支持额外的加密功能的加密库
--with-config-file-path=/etc 表示php的配置文件的路径在哪里 主配置文件叫php.ini
--with-config-file-scan-dir=/etc/php.d
--with-bz2 表示压缩库
--enable-maintainer-zts 线程安全,要不要用,取决于apache的MPM是什么类型的(使用prefork 就不需要这一项;;;;event或者worker就需要加这一项,) (以线程方式工作,必须要编译成这种格式)
php的配置文件与许多其它的php配置文件一样,由两段组成,
/etc/php.ini 是配置文件 主配置文件
/etc/php.d/*.ini 所有的.ini文件也是配置文件 一些片断放在这些配置文件里
[root@localhost php-5.4.13]# rpm -qi freetype
Name : freetype Relocations: (not relocatable)
Version : 2.2.1 Vendor: Red Hat, Inc.
Release : 32.el5_9.1 Build Date: 2013年01月24日 星期四 21时15分56秒
Install Date: 2018年11月10日 星期六 14时06分13秒 Build Host: x86-012.build.bos.redhat.com
Group : System Environment/Libraries Source RPM: freetype-2.2.1-32.el5_9.1.src.rpm
Size : 626801 License: BSD/GPL dual license
Signature : DSA/SHA1, 2013年01月30日 星期三 21时31分45秒, Key ID 5326810137017186
Packager : Red Hat, Inc. <http://bugzilla.redhat.com/bugzilla>
URL : http://www.freetype.org
Summary : A free and portable font rendering engine
Description :
The FreeType engine is a free and portable font rendering # freetyp是有关字体的
engine, developed to provide advanced font support for a variety of
platforms and environments. FreeType is a library which can open and
manages font files as well as efficiently load, hint and render
individual glyphs. FreeType is not a font server or a complete
text-rendering library.
[root@localhost php-5.4.13]#
[root@localhost php-5.4.13]# httpd -M
Loaded Modules:
core_module (static)
so_module (static)
http_module (static)
authn_file_module (shared)
authn_core_module (shared)
authz_host_module (shared)
authz_groupfile_module (shared)
authz_user_module (shared)
authz_core_module (shared)
access_compat_module (shared)
auth_basic_module (shared)
reqtimeout_module (shared)
filter_module (shared)
mime_module (shared)
log_config_module (shared)
env_module (shared)
headers_module (shared)
setenvif_module (shared)
version_module (shared)
mpm_prefork_module (shared) #(prefork 类型 不需要使用 --enable-maintainer-zts )
unixd_module (shared)
status_module (shared)
autoindex_module (shared)
dir_module (shared)
alias_module (shared)
[root@localhost php-5.4.13]#
[root@localhost php-5.4.13]# vim /etc/httpd/httpd.conf #改成event吧
................
LoadModule mpm_event_module modules/mod_mpm_event.so
#LoadModule mpm_prefork_module modules/mod_mpm_prefork.so
................
[root@localhost php-5.4.13]# service httpd restart
停止 httpd: [确定]
启动 httpd: [确定]
[root@localhost php-5.4.13]#
[root@localhost php-5.4.13]# httpd -M
Loaded Modules:
core_module (static)
so_module (static)
http_module (static)
authn_file_module (shared)
authn_core_module (shared)
authz_host_module (shared)
authz_groupfile_module (shared)
authz_user_module (shared)
authz_core_module (shared)
access_compat_module (shared)
auth_basic_module (shared)
reqtimeout_module (shared)
filter_module (shared)
mime_module (shared)
log_config_module (shared)
env_module (shared)
headers_module (shared)
setenvif_module (shared)
version_module (shared)
mpm_event_module (shared) # 现在是event了 ( 需要使用 --enable-maintainer-zts )
unixd_module (shared)
status_module (shared)
autoindex_module (shared)
dir_module (shared)
alias_module (shared)
[root@localhost php-5.4.13]# ./configure
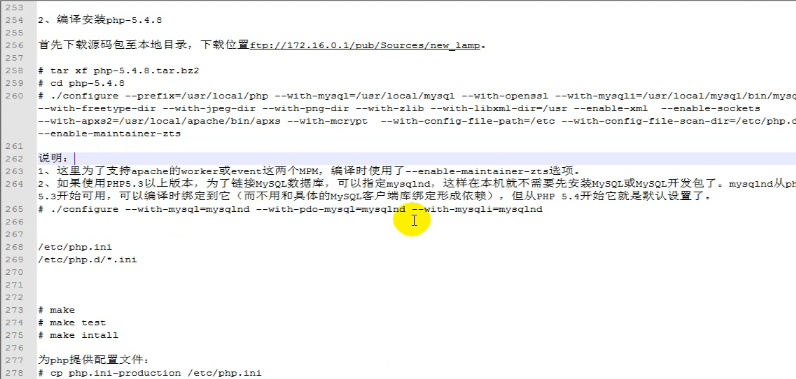
[root@localhost php-5.4.13]# ./configure --prefix=/usr/local/php --with-mysql=/usr/local/mysql --with-openssl --with-mysqli=/usr/local/mysql/bin/mysql_config --enable-mbstring --with-freetype-dir --with-jpeg-dir --with-png-dir --with-zlib --with-libxml-dir=/usr --enable-xml --enable-sockets --with-apxs2=/usr/local/apache/bin/apxs --with-mcrypt --with-config-file-path=/etc --with-config-file-scan-dir=/etc/php.d --with-bz2 --enable-maintainer-zts
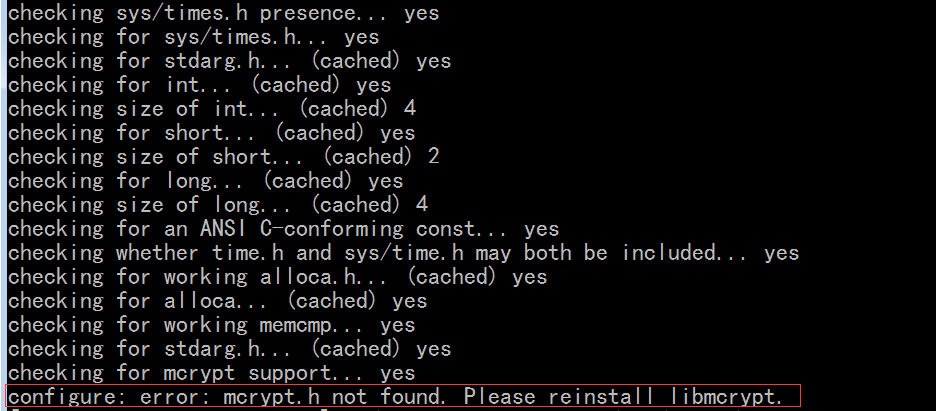
没有加密功能的头文件 mcrypt.h,所以配置时,可以去掉 --with-mcrypt,也可以
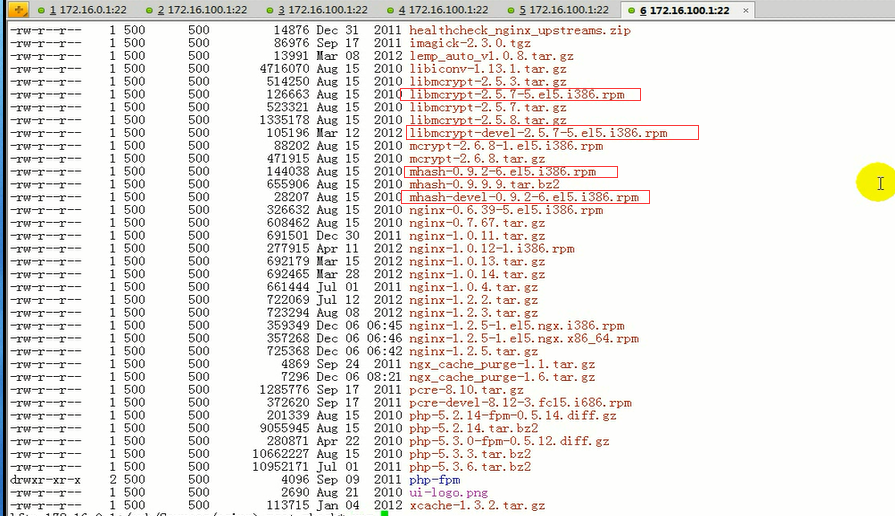
安装libmcrypt libmcrypt-devel mhash mhash-devel
这些都不是光盘自带的,必须要到网上去找 (在我的百度网盘里面有 在里面搜 "libmcrypt" "libmcrypt-devel" "mhash" "mhash-devel" 就可以了)
[root@localhost ~]# rpm -ivh libmcrypt-2.5.7-5.el5.i386.rpm
warning: libmcrypt-2.5.7-5.el5.i386.rpm: Header V3 DSA signature: NOKEY, key ID 217521f6
Preparing... ########################################### [100%]
1:libmcrypt ########################################### [100%]
[root@localhost ~]# rpm -ivh libmcrypt-
libmcrypt-2.5.7-5.el5.i386.rpm libmcrypt-devel-2.5.7-5.el5.i386.rpm
[root@localhost ~]# rpm -ivh libmcrypt-devel-2.5.7-5.el5.i386.rpm
warning: libmcrypt-devel-2.5.7-5.el5.i386.rpm: Header V3 DSA signature: NOKEY, key ID 217521f6
Preparing... ########################################### [100%]
1:libmcrypt-devel ########################################### [100%]
[root@localhost ~]#
[root@localhost ~]# rpm -ivh mhash-0.9.2-6.el5.remi.i386.rpm
warning: mhash-0.9.2-6.el5.remi.i386.rpm: Header V3 DSA signature: NOKEY, key ID 00f97f56
Preparing... ########################################### [100%]
1:mhash ########################################### [100%]
[root@localhost ~]# rpm -ivh mhash-devel-0.9.2-6.el5.remi.i386.rpm
warning: mhash-devel-0.9.2-6.el5.remi.i386.rpm: Header V3 DSA signature: NOKEY, key ID 00f97f56
Preparing... ########################################### [100%]
1:mhash-devel ########################################### [100%]
[root@localhost ~]#



https://sourceforge.net/projects/mcrypt/files/Libmcrypt/
http://rpmfind.net/linux/rpm2html/search.php?query=libmcrypt-devel(x86-64)
http://rpmfind.net/linux/rpm2html/search.php?query=libmcrypt-devel&submit=Search+...&system=&arch=
https://download.csdn.net/download/geqiandebei/9634942
https://download.csdn.net/download/geqiandebei/9634941
https://sourceforge.net/projects/mhash/files/mhash/
http://rpmfind.net/ 马哥说到这个网站上去搜
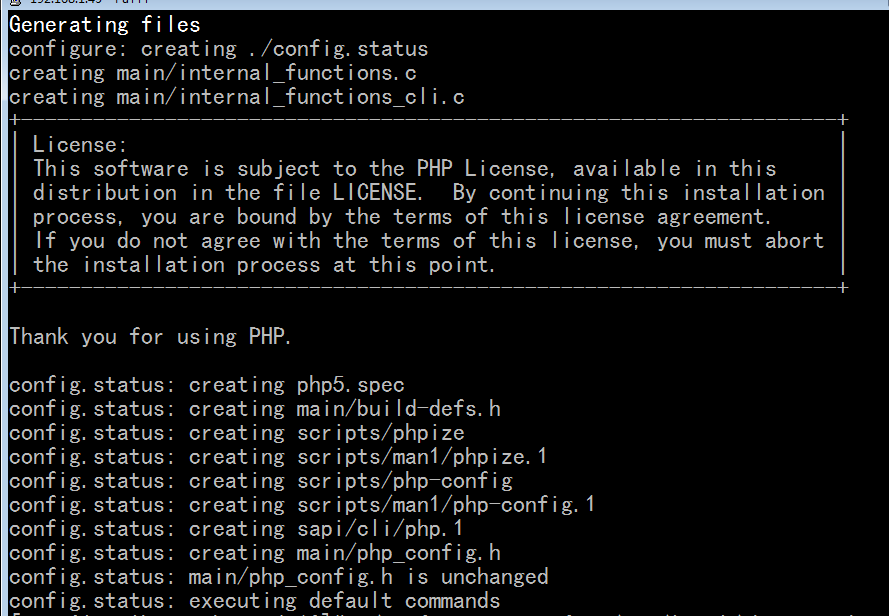
[root@localhost php-5.4.13]# ./configure --prefix=/usr/local/php --with-mysql=/usr/local/mysql --with-openssl --with-mysqli=/usr/local/mysql/bin/mysql_config --enable-mbstring --with-freetype-dir --with-jpeg-dir --with-png-dir --with-zlib --with-libxml-dir=/usr --enable-xml --enable-sockets --with-apxs2=/usr/local/apache/bin/apxs --with-mcrypt --with-config-file-path=/etc --with-config-file-scan-dir=/etc/php.d --with-bz2 --enable-maintainer-zts
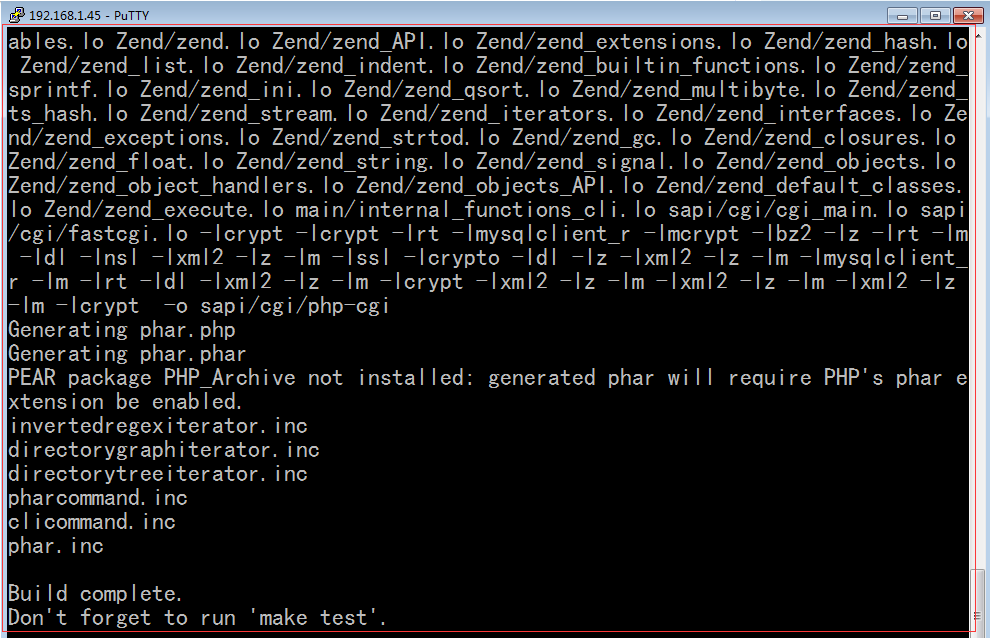
[root@localhost php-5.4.13]# make
编译 编译的界面内容太多
[root@localhost php-5.4.13]# make install
Installing PHP SAPI module: apache2handler # SAPI (就是server api)模块,为apache2添加了一个处理器,让apache2直接以模块化的方式调用php
/usr/local/apache/build/instdso.sh SH_LIBTOOL='/usr/local/apr/build-1/libtool' libphp5.la /usr/local/apache/modules
/usr/local/apr/build-1/libtool --mode=install install libphp5.la /usr/local/apache/modules/
libtool: install: install .libs/libphp5.so /usr/local/apache/modules/libphp5.so #这是php的模块
libtool: install: install .libs/libphp5.lai /usr/local/apache/modules/libphp5.la
libtool: install: warning: remember to run `libtool --finish /root/php-5.4.13/libs'
chmod 755 /usr/local/apache/modules/libphp5.so #这里权限是755
[activating module `php5' in /etc/httpd/httpd.conf]
Installing PHP CLI binary: /usr/local/php/bin/
Installing PHP CLI man page: /usr/local/php/php/man/man1/
Installing PHP CGI binary: /usr/local/php/bin/
Installing build environment: /usr/local/php/lib/php/build/
Installing header files: /usr/local/php/include/php/
Installing helper programs: /usr/local/php/bin/
program: phpize
program: php-config
Installing man pages: /usr/local/php/php/man/man1/
page: phpize.1
page: php-config.1
Installing PEAR environment: /usr/local/php/lib/php/
[PEAR] Archive_Tar - installed: 1.3.7
[PEAR] Console_Getopt - installed: 1.3.0
[PEAR] Structures_Graph- installed: 1.0.4
[PEAR] XML_Util - installed: 1.2.1
[PEAR] PEAR - installed: 1.9.4
Wrote PEAR system config file at: /usr/local/php/etc/pear.conf
You may want to add: /usr/local/php/lib/php to your php.ini include_path
/root/php-5.4.13/build/shtool install -c ext/phar/phar.phar /usr/local/php/bin
ln -s -f /usr/local/php/bin/phar.phar /usr/local/php/bin/phar
Installing PDO headers: /usr/local/php/include/php/ext/pdo/
安装
安装后,因为是apache的二进制模块,所以不用启动服务 (做成fastcgi才要启动服务)
(fastcgi模式 把 --with-apxs2=/usr/local/apache/bin/apxs 去掉,改成 --enable-fpm 这样子,就改成了fastcgi即fpm的工作模型了 这种工作模型下apache与php的结合机制有很大不同,配置过程也有很大不同)
[root@localhost php-5.4.13]# pwd
/root/php-5.4.13
[root@localhost php-5.4.13]# ls
acinclude.m4 generated_lists Makefile.objects README.input_filter scripts
aclocal.m4 genfiles makerpm README.MAILINGLIST_RULES server-tests-config.php
build header meta_ccld README.namespaces server-tests.php
buildconf include missing README.NEW-OUTPUT-API snapshot
buildconf.bat INSTALL mkinstalldirs README.PARAMETER_PARSING_API stamp-h.in
CODING_STANDARDS install-sh modules README.PHP4-TO-PHP5-THIN-CHANGES stub.c
config.guess libs netware README.REDIST.BINS svnclean.bat
config.log libtool NEWS README.RELEASE_PROCESS tests
config.nice LICENSE pear README.SELF-CONTAINED-EXTENSIONS TSRM
config.status ltmain.sh php5.spec README.STREAMS UPGRADING
config.sub main php5.spec.in README.SUBMITTING_PATCH UPGRADING.INTERNALS
configure makedist php.gif README.TESTING vcsclean
configure.in Makefile php.ini-development # 开发环境 README.TESTING2 win32
CREDITS Makefile.frag php.ini-production # 生产环境 README.UNIX-BUILD-SYSTEM Zend
ext Makefile.fragments README.EXTENSIONS README.WIN32-BUILD-SYSTEM
EXTENSIONS Makefile.gcov README.EXT_SKEL run-tests.php
footer Makefile.global README.GIT-RULES sapi
[root@localhost php-5.4.13]#
