You are here
马哥 43_03 _配置Ngnix作为Web Server详解 有大用

keepalived+nginx: 实现高可用
corosync + nginx
keepalived+nginx 主要是用来实现前端(很可能是nginx反向代理来实现的),它绝对有可能会成为我们的单点故障所在,所以我们需要给它实现高可用,keepalived是非常轻量级的高可用实现方案,nginx是非常轻量的web服务器反向代理,所以它们彼此结合起来才算是珠连碧合,
IO: 模型
nginx比apache的性能强在哪里?

Nginx:
File AIO:文件级别上,磁盘IO上,它是基于异步IO来实现的
Asynchronous:异步通信
Event-driven edge trigger:基于事件驱动加上边缘触发来完成一个线程处理多个请求的,这对我们的传统模型以及我们现代的web服务器面对c10k问题的时候是非常有效的解决方案
Web服务器
Alias, virtual host, location, authentication, ssl, LEMP
Web reverse proxy
Mail reverse proxy
nginx:
web服务器,具有web服务器的基本功能,所以在有些场景当中,如果用不到一些apache才会提供的特殊功能的话,nginx应该是首选的
反向代理,轻量级的反向代理,能反向代理两种应用
web
mail:这个功能很少被人提到
模块化设计
nginx也具有基本的web服务器所具备的绝大多数功能,
马哥有简体中文,我这边看不到,,马哥说这是淘宝早期为nginx提供的中文页面,这里有对nginx的介绍,


nginx默认只能处理静态页面,需要额外的模块才能处理动态功能的, 索引页面:就是返回一个主页面给用户的(这是web服务器应该具备的基本功能,httpd也有),,自动索引?????打开文件描述符缓存(所有用户访问到的文件,文件由数据和元数据两种组成,nginx可以缓存元数据,还可以缓存它的文件描述符,所以下一次找同一个文件的时候,直接从缓存中就能找到文件的路径,而且直接可以通过磁盘块进行装载了,这样,速度会很快)
使用缓存加速反向代理;简单负载均衡以及容错,,,,,,在反向代理时,能够实现后端服务器的健康状态检查,一旦发现后端服务器出现故障,能够自动将其剔除,这跟我们的keepalived提供的一种后端状况监测的功能是类似的,但是容错功能需要安装第三方模块才能实现,更重要的是,这个第三方模块不支持nginx1.2的版本,(只支持1.0的版本),好在淘宝官方在nginx原有的代码的基础上对nginx作了好多扩充,直接将第三方很多插件(或者叫第三方模块)整合进了nginx,并对其作出了大量改进,由此在nginx上所做出的第二次包装发行的版本被称为tengine,,将来实现选择的时候,可以选择tengine,tengine也是开源的,tengine被淘宝加入了自己的很多改进,包括bug的修复等.淘宝也不断的给nginx官方反馈着它们所提供的代码,有些代码也被nginx官方所吸纳,并且溶入进了nginx后面的发行版本当中,
支持远程FastCGI,(nginx也可以通过支持FastCGI的方式支持php的,当然它不支持像apache那样直接支持模块的方式来支持php,必须要支持FastCGI的方式来实现,),,,,,,支持uwsgi来支持python的web框架(不是php的web框架),而且比FastCGI这种方式要高效得多,,,,,,,支持SCGI,,,nginx现在原生支持memcached了,nginx自身作反向代理的时候,它可以提供缓存功能,,,,,,,
(varnish是一个专门级别的缓存服务器,),,,,,,优先可以选择内存缓存,对于内存当中实现数据结构的创建,和回收销毁等,引入的很好的算法,,在专业级别上来讲,varnish具有更好的特性,,,,,,,,,,,,,
squid也是缓存服务器?squid与varnish的关系,相当于httpd与nginx的关系,squid诞生时间非常早,几乎与httpd诞生时间差不多,所以它的特色,开发特色,更注重的是早期计算机的发展技术,varnish是新出现的项目,更多考虑的是现代计算机的结构
其实nginx自身也具有缓存能力的,只不过nginx默认在缓存数据的时候,在缓存页面的时候,是缓存在磁盘上的,但是它却可以实现在内存中缓存打开的文件描述符,现在nginx可以直接联系memcached的,由nginx管理缓存的时候,它自己将数据,将页面将静态内容缓存到memcached当中,,现在nginx自己已经附带了memcached模块,nginx本身就是模块化设计的,,,,,,,
httpd也支持缓存,apache也是一个反向代理???也能够缓存,它的缓存性能更独特,既可以支持磁盘缓存,也可以支持内存缓存,,,,,,,,,
将来我们要看需不需要用到重量级产品(apache)的特性,用不用到更稳定(apache)的特性,,,新生事物采用新技术,老事物(apache)更稳定,,,,httpd还占据着那么大的市场份额,肯定是有道理的
nginx支持很多过滤器,包括gzip支持,ranges支持,chunked响应,XSLT,SSI以及图像缩放等功能,可以直接基于某些模块实现图像缩放的,比如淘宝站,一个商品显示给我们之后,点击可以看大图,显示小图片的时候,应该显示多大呢?直接把原始图片显示给我们,流量会非常大,因此,可以进行图像缩放,显示给我们的是小图,只有在点开之后才显示大图片,节约网络带宽,提高用户体验,等等,,,,,,,,,,,,,,,,,SSI指的是服务器端包含,这是一种非常独特的技术,它可以实现将一个页面当中某些内容做成静态的,而某些内容做成动态的,我们可以缓存静态的部分,而动态生成动态的部分等等
支持SSL, 支持TLS SNI,

支持基于名字和IP的虚拟主机,端口不支持????不支持吗
支持keep-alived和pipelined连接支持,即支持长连接和支持pipelined(在反向代理的时候,可以直接将用户的请求从前端打通,接上后端,)
支持灵活的配置
重新加载配置以及在线升级时,不需要中断正在处理的请求;这是nginx在架构体系上非常先进特性的体现,它跟我们的apache差不多,也是有个主进程生成很多的子进程,,,而子进程本身有worker进程(专门负责响应用户请求的,一个进程(线程)响应n个请求,),,,,还有很多其它进程,比如管理缓存的进程,管理其它会话的进程等,, 有了这样的架构设计,我们将来重新加载配置以后,它可以将这些新的连接,都使用新配置,而已经建立的连接,都使用原有的配置,,,,当这些已经建立的连接,将来慢慢退出以后,新的配置将取代旧的配置,所以在线升级的时候,不需要中断正在处理的请求.这就叫热部署
nginx热布署:平滑升级,平滑更新,,,不需要中断服务就能将我们的配置升级了,
支持自定义访问日志格式,带缓存的日志写操作(我们的web服务器访问非常大的时候,每一个用户连接都要记入日志的,通过IO直接记录入磁盘上固然能够保证每一个用户的访问都能够记录下来,但是会极大的拖慢我们的系统速度,所以它实现了将日志通过缓冲区先保存在内存当中,每隔一段时间或者过一段时间再往磁盘上进行刷写,即进行flush)以及快速日志轮转(即日志滚动)
支持3xx-5xx错误代码重定向,,(当用户访问的页面不存在的时候,返回一个自定义页面,或者有时服务器告诉你服务器正在维护当中)(有时出现用户访问的页面不存在时,请重新访问主页面,如果不访问,3或5秒钟后,将自动跳到主页上去)
重写(rewrite)模块:使用正则表达式改变URI;对于任何一个web服务器来讲,这一项都很关键,httpd甚至有一本书,专门介绍它的重写,web服务器当中,httpd的重写异常强大,也比较复杂,,,,,nginx非常简单,只有几条简单的指令,但我们只要会正则表达式,实现其模块或者叫url重写,非常简单,,,,对于任何web服务器来讲,url重写是个非常重要的功能,尤其是反向代理的web服务器,
根据客户端地址执行不同的功能: 其实是做重写或其它相关功能做判断的时候,来实现其相关功能的,比如说我们可以根据客户端来源的浏览器类型,判断一下浏览器,如果发现是一个智能手机上的浏览器,就返回一个wap页面,
基于客户端IP地址和HTTP基本认证机制的访问控制;;;;;web服务器的httpd这方面的功能非常强大,基于ip的认证,基于用户的基本认证basic,基于基本认证的时候,可以把用户放在文件中或mysql中或idap中,甚至还支持md5的认证,当然nginx不支持md5的认证?
支持验证HTTP referer; ngx_http_referer_module模块允许拦截refer请求头中含有非法字符的请求,referer是什么?用户打开页面的时候有两种方式,直接在浏览器输入地址,或通过点击链接来访问,referer指的是通过哪个链接过来的,正是referer这种机制的存在,使得很多站点可以盗链我们的网站,(比如发个图片,过两天发现web服务器非常繁忙,就是打不开,有人在你的web服务器上上传一堆图片,然后作为他的web服务器上的链接,通通指向你的服务器,只是消耗你的流量和带宽,他提供的是自己的html页面,,,所以互联网盗链是非常严重的,我们完全可以判断别人盗链的时候,链接所在,我们只允许自己站内链接,凡是来自于外部链接的,通通都拒绝)(有时打开一个图片,此图片仅限于某某网站使用,你这里不允许打开)这里nginx支持验证 referer
支持PUT、DELETE、MKCOL、COPY以及MOVE方法;这些都是后来新引进的方法
支持FLV流和MP4流;视频流,能够实现基于TCP中的http协议将我们的视频信息共享给客户端,让客户端能够边加载边播放的,,,这是最重要的,,,有些视频不下载完是没法播放的,,,,,这种视频流,,,之所以称为流,是因为可以从头开始,下载着,播放着,下载着,播放着,,,,,,,,,,,,,,,,因此可以创建视频站点的,
支持速度限制,支持带宽限制,支持对来自于同一个ip地址的最多可以给你分配多少带宽
来自同一地址的同时连接数或请求数限制;
嵌入Perl语言。但是nginx嵌入Perl语言的方式仍然处于测试状态

架构和扩展性
一个主进程和多个工作进程,工作进程以非特权用户运行;跟apache很近似
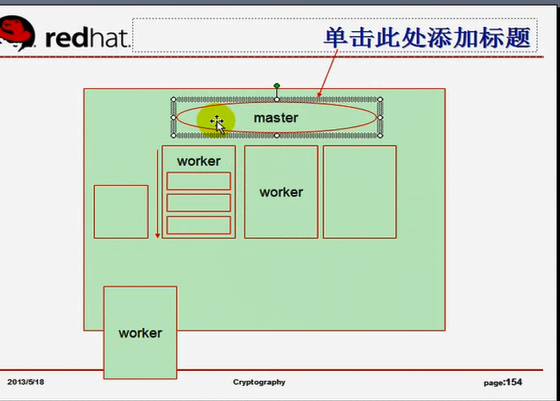
如下图,在nginx服务器启动的时候,它的内部会生成一个叫做master的主进程,主进程本身有它的功用,master会启动很多个叫做worker的进程,之所以把它叫做worker,是因为它真正负责工作的,虽然说nginx一个进程可以响应多个请求,但是一个进程响应太多的话,也会很繁忙的,(跟一个进程实现多个线程,每个线程响应多个请求是一个道理),一个进程内部或一个线程内部不能响应请求太多,,,,这里的worker我们通常称为worker线程,(也有人称为worker进程),我们这里不加区别的称呼它们,称呼它们时,指的是一个意思,,,,,,,启动多个worker进程,真正负责处理用户请求的,都是这些worker进程,而master主要就是监控这些worker进程是否启动的够数目的,以及它们是否运行正常等等,,,,,,,,它还有额外的其它进程,比如说cache loader,装载缓存的,清理缓存的,跟缓存管理相关的(在反向代理的时候),等其它进程,,,,,,,,master是管理员启动的,因为我们知道,nginx要启动为web服务器或者反向代理的时候,它应该工作在80端口上,只有管理员才有权限启用小于1024的端口,所以启动主进程的时候?,必须以管理员的身份,,,,启动worker进程,其实就是master的子进程了,由master负责启动,而master负责启动运行它们的时候,完全以一个普通用户的身份运行, 所以我们系统的安全性得到了提升,,,,nginx是严重或者是高度模块化的,所以nginx核心模块,像master进程, worker进程,它们所负责处理的web应用非常简单,最多就是个web服务器,而额外的任何功能,像刚才我们所说的SSL,FLV流,gzip压缩,FastCGI等等,其实都不是worker进程自己提供的,是由额外的模块提供,所以在每一个worker进程内部,它可能调用很多个模块,这些模块并不是所有的时候都需要加载的,用到哪个模块,就装载哪个模块,,,,,,更重要的是,nginx是高度模块化的,它的甚至很多基本功能都是由它的模块提供的,所以在接进来之后,我们到底该怎么分析这个请求是get方法,还是put方法,它要请求哪些内容,worker不负责,转交给模块, 所以说核心功能,除了基本最最核心的功能之外,它的所有功能都是模块负责完成的,而这些模块以流水线的方式在工作,也就是说一个模块只负责一个功能,第一个模块分析头部,第二个模块帮助取得数据,第三个模块创建响应等等,,,,,,,我们不同的请求,它所提供的请求内容不一样,第一个用户请求的是静态的内容,而且它要求压缩再返回给用户,,,第二个用户请求的是动态内容,那就意味着要调用FastCGI模块了,,,所以每一个请求,它的内部响应的时候,所串联起来的模块不一样,,,, 所以每一个请求到来了,worker一分析,到底要使用几个模块, 这几个模块组合成流水线,随时等待,各就各位,随时等待响应了,,,,,,,,所以我们说,正是由于这种机制的存在,由master负责装载主配置文件,(我们假如改了nginx配置文件的话,由master负责分析下,配置文件有没有语法错误,就算你去重新装载配置文件,有语法错误,它不会影响worker进程的,最多master返回错误,告诉我,有语法错误,需要重新装载),一旦装载成功了,master不会立即让这些worker都使用配置文件的,让已经建立的连接继续使用老旧配置,当某一个worker上此前已经建立的连接都退出了,把这个worker挂了,再重新启动一个新worker,而这个新worker响应新请求,而这个新worker就使用新的配置,很显然,我们的用户连接,继续的无论怎么请求,对于已经建立的连接和新连接是没有影响的,,,,,,另外一个服务器也是类似的处理机制,varnish,我们的设计哲学其实都是相通的,软件上设计也是一样的,这种设计方式就是拿来我们处理任何生活中的事情,思路都是可以借鉴的,,,,,,在任何一种技术当中,都可以相当充分的体现它的哲学思想的,,,,这种架构,将来拿来当作公司的管理体系结构也是可以借鉴的.,,,, 这就是我们的nginx基本工作框架,基本工作模型
nginx支持事件机制,关键是支持epoll,还支持kqueue,支持rt signals(linux 2.2.19+所提供的),/dev/poll(solaris 1 11/99+所提供的类似于epoll的机制,具有事件驱动功能的),,,,,(目前来讲,三个具有事件驱动功能的IO模型,IO框架 epoll,kqueue,/dev/poll,编程的时候,只要基于这些IO框架来实现,就支持异步和事件驱动),支持event ports ,支持select以及poll(放到最后,最不可取的,,所以如果不支持epoll,又得在linux上运行nginx,退而求其次,选择select或者poll,)
支持sendfile(属于linux),sendfile64(属于linux),sendfilev(solaris)
sendfile是什么?原理很重要,如下图图一,看web服务器的工作机制,内核和用户空间,nginx的worker进程工作在用户空间,任何跟硬件打交道的都要通过内核空间,假设有个用户连接进来了,现在它请求的是一个静态页面,而这个静态页面默认情况下,就在我们的磁盘的某个分区的某个文件系统上,,,,用户请求进来了,先到达网卡,由内核处理了一下,交给80套接字上的应用程序,也就是交给某个worker进程了,这个worker通过连接建立,接入请求,通过分析,发现用户请求的是一个静态文件,接下来进行内核的系统调用,进行IO了,,,内核给分配一个缓冲空间,而且内核通过磁盘加载这个文件到缓冲当中,然后从缓冲复制给这个进程自己的地址空间,然后这个程序自己就能封装起来,封装成一个响应报文(首先得封装httpd请求首部,然后交给内核,由内核封装TCP首部,IP首部,最终响应给客户端,),,,,,,,,,,这个文件怎么走的,从硬盘到内核,从内核到用户空间,从用户空间又到内核空间,好像是白绕了一圈,,,,如果说这个请求直接在内核中,就给你封装好,(把httpd协议封装好,)(httpd协议的封装本质上也是在内核中完成的??),现在用户一请求,我们内核一准备好,直接一封装就响应了,不要白白绕一次,只要告诉你,我这边已经替你响应过去了,这样子这避免了两次复制(第一次从内核空间复制到用户空间,第二次交给内核的时候,从用户空间复制到内核空间,,,这可不是传来传去的,而是复制过去的,内核任何时刻与进程交互,都是复制来实现数据交互的,除非共享内存,,,两次复制要花好长时间,比如0.0几秒,问题是数量太多了,并发进来2万个请求,一天下来几千万个请求,所以还是花太多时间了,),所以sendfile就是这样一种机制,sendfile就是直接在内核中读过来就直接响应了,如下图图二,sendfile本身只支持很小的文件,sendfile64可以支持更大文件,完成在内核当中,完成将文件直接封装响应给客户端的
图一

图二

nginx支持文件AIO,在linux2.6.22以后才支持,在红帽6上是没有问题
nginx支持文件DIRECTIO,直接IO,这个意义并不大,DIRECTIO其实我们在访问的时候并不能加速访问,它只是一种特性而已,
支持Accept-filters,连接过滤器,我可以有限定的只接受有限个连接,支持TCP_DEFER_ACCEPT,可以拒绝某些连接的,
nginx 中 10000个非活跃的HTTP keep-alive连接(即长连接)仅占用约2.5M内存,,因为我们的事件驱动机制本身只扫描那些活动连接,对于非活动连接,它是不作管理的,因此nginx自身只需要很小的内存就能为每一个连接维持一个文件描述符即可,
nginx尽可能避免数据拷贝操作,sendfile其实就是这个特性的
nginx,varnish很轻量级,专业化,精细化,越来越使用采用新技术,当然主要是面对越来越多的上网用户的,如果有一天网速可以大到非常大,吞吐海量数据的时候,这些服务器仍然不能满足需求了,仍然需要再进一步扩展,到那个时候,nginx有可能会并行运行在多个平台上,完全使用分布式架构,
传统上基于进程或线程模型架构的web服务通过每进程或每线程处理并发连接请求,这势必会在网络和I/O操作时产生阻塞,其另一个必然结果则是对内存或CPU的利用率低下。生成一个新的进程/线程需要事先备好其运行时环境,这包括为其分配堆内存和栈内存,以及为其创建新的执行上下文等。这些操作都需要占用CPU,而且过多的进程/线程还会带来线程抖动或频繁的上下文切换,系统性能也会由此进一步下降。
在设计的最初阶段,nginx的主要着眼点就是其高性能以及对物理计算资源的高密度利用,因此其采用了不同的架构模型。受启发于多种操作系统设计中基于“事件”的高级处理机制,nginx采用了模块化、事件驱动、异步、单线程及非阻塞的架构,并大量采用了多路复用及事件通知机制。在nginx中,连接请求由为数不多的几个仅包含一个线程的进程worker以高效的回环(run-loop)机制进行处理,而每个worker可以并行处理数千个的并发连接及请求。
如果负载以CPU密集型应用为主,如SSL或压缩应用,则worker数应与CPU数相同;如果负载以IO密集型为主,如响应大量内容给客户端,则worker数应该为CPU个数的1.5或2倍。
Nginx会按需同时运行多个进程:一个主进程(master)和几个工作进程(worker),配置了缓存时还会有缓存加载器进程(cache loader)和缓存管理器进程(cache manager)等。所有进程均是仅含有一个线程,并主要通过“共享内存”的机制实现进程间通信。主进程以root用户身份运行,而worker、cache loader和cache manager均应以非特权用户身份运行。
主进程主要完成如下工作:
1. 读取并验证配置信息;
2. 创建、绑定及关闭套接字;
3. 启动、终止及维护worker进程的个数;
4. 无须中止服务而重新配置工作特性;
5. 控制非中断式程序升级,启用新的二进制程序并在需要时回滚至老版本;;;;;;;;;;;不光支持配置文件的修改,还支持程序升级的,支持一步步的升级,一步步的取代老版本,让master先换,新版本的master兼容老版本的worker,当老版本的worker都退出了,才启用新版本的worker,
6. 重新打开日志文件,实现日志滚动;
7. 编译嵌入式perl脚本;
worker进程主要完成的任务包括:
1. 接收、传入并处理来自客户端的连接;
2. 提供反向代理及过滤功能;
3. nginx任何能完成的其它任务;
cache loader进程和cache manager进程在启用了反向代理并使用了缓存功能的时候才启动,不是所有的时候都运行的
cache loader进程主要完成的任务包括:
1. 检查缓存存储中的缓存对象;检查缓存对象是不是过期了,过期是要清理的,
2. 使用缓存元数据建立内存数据库;要把我们打开的文件句柄,文件相关的元数据要建立缓存的,
cache manager进程的主要任务:
1. 缓存的失效及过期检验;
Nginx的配置有着几个不同的上下文:main、http、server、upstream和location(还有实现邮件服务反向代理的mail)。配置语法的格式和定义方式遵循所谓的C风格,因此支持嵌套,还有着逻辑清晰并易于创建、阅读和维护等优势。Nginx的配置是分段的,每一个段当中它所支持的指令和要完成的功能是不尽相同的,比如main段,是核心配置,(Nginx是支持web服务器,还支持web服务器的反向代理,还支持mail的反向代理,放在main段当中,对于任何功能都生效的配置) http段(只是对web服务器是有效的,在http段当中又支持server,upstream,location等字段,这些段与段之间可能嵌套方式不一样,server一般必须要属于http,当然server有时也属于mail,upstream是用来定义反向代理的,只有在反向代理的时候才用得到,location,我们定义任何一个虚拟主机,在httpd(apache)当中任何一个虚拟主机都要定义document,而location就是类似的功能)(httpd(apache)中,定义document当中,我们还可以定义这一个目录中的文件来自于哪个ip的有访问权限,哪些没有,是不是需要认证,都可以定义,在nginx中使用的是location) ,,,,,,mail段(对邮件服务器是有效的),,,,,,,,,如下图,配置大概是这样子的,配置文件是严重模块化(或高度模块化的)

组配置(核心配置),不属于任何段
user:运行nginx的用户
group:运行nginx的组
worker:启动多少个worker
http { #这只是对于web服务器生效的
server {
location { # 当然 location 未必都属于 server, location里面可能还有其它的子段
}
}
}
mail { #这只是对于mail服务器生效的
}
Nginx的代码是由一个核心和一系列的模块组成, 核心主要用于提供Web Server的基本功能,以及Web和Mail反向代理的功能;还用于启用网络协议,创建必要的运行时环境以及确保不同的模块之间平滑地进行交互。不过,大多跟协议相关的功能和某应用特有的功能都是由nginx的模块实现的。这些功能模块大致可以分为事件模块、阶段性处理器、输出过滤器、变量处理器、协议、upstream和负载均衡几个类别,这些共同组成了nginx的http功能。事件模块主要用于提供OS独立的(不同操作系统的事件机制有所不同)事件通知机制如kqueue或epoll等。协议模块则负责实现nginx通过http、tls/ssl、smtp、pop3以及imap与对应的客户端建立会话。
在nginx内部,进程间的通信是通过模块的pipeline或chain实现的;换句话说,每一个功能或操作都由一个模块来实现。例如,压缩、通过FastCGI或uwsgi协议与upstream服务器通信,以及与memcached建立会话等。
一、安装Nginx:
1、解决依赖关系
编译安装nginx需要事先需要安装开发包组"Development Tools"和 "Development Libraries"。同时,还需要专门安装pcre-devel包:
# yum -y install pcre-devel
2、安装
首先添加用户nginx,实现以之运行nginx服务进程:
# groupadd -r nginx
# useradd -r -g nginx nginx
接着开始编译和安装:
# ./configure \
--prefix=/usr \
--sbin-path=/usr/sbin/nginx \
--conf-path=/etc/nginx/nginx.conf \
--error-log-path=/var/log/nginx/error.log \
--http-log-path=/var/log/nginx/access.log \
--pid-path=/var/run/nginx/nginx.pid \
--lock-path=/var/lock/nginx.lock \
--user=nginx \
--group=nginx \
--with-http_ssl_module \
--with-http_flv_module \
--with-http_stub_status_module \
--with-http_gzip_static_module \
--http-client-body-temp-path=/var/tmp/nginx/client/ \
--http-proxy-temp-path=/var/tmp/nginx/proxy/ \
--http-fastcgi-temp-path=/var/tmp/nginx/fcgi/ \
--http-uwsgi-temp-path=/var/tmp/nginx/uwsgi \
--http-scgi-temp-path=/var/tmp/nginx/scgi \
--with-pcre #这里去掉了=/usr
# make && make install
说明:如果想使用nginx的perl模块,可以通过为configure脚本添加--with-http_perl_module选项来实现,但目前此模块仍处于实验性使用阶段,可能会在运行中出现意外,因此,其实现方式这里不再介绍。如果想使用基于nginx的cgi功能,也可以基于FCGI来实现,具体实现方法请参照网上的文档。
3、为nginx提供SysV init脚本:
新建文件/etc/rc.d/init.d/nginx,内容如下:
#!/bin/sh
#
# nginx - this script starts and stops the nginx daemon
#
# chkconfig: - 85 15
# description: Nginx is an HTTP(S) server, HTTP(S) reverse \
# proxy and IMAP/POP3 proxy server
# processname: nginx
# config: /etc/nginx/nginx.conf
# config: /etc/sysconfig/nginx
# pidfile: /var/run/nginx.pid
# Source function library.
. /etc/rc.d/init.d/functions
# Source networking configuration.
. /etc/sysconfig/network
# Check that networking is up.
[ "$NETWORKING" = "no" ] && exit 0
nginx="/usr/sbin/nginx"
prog=$(basename $nginx)
NGINX_CONF_FILE="/etc/nginx/nginx.conf"
[ -f /etc/sysconfig/nginx ] && . /etc/sysconfig/nginx
lockfile=/var/lock/subsys/nginx
make_dirs() {
# make required directories
user=`nginx -V 2>&1 | grep "configure arguments:" | sed 's/[^*]*--user=\([^ ]*\).*/\1/g' -`
options=`$nginx -V 2>&1 | grep 'configure arguments:'`
for opt in $options; do
if [ `echo $opt | grep '.*-temp-path'` ]; then
value=`echo $opt | cut -d "=" -f 2`
if [ ! -d "$value" ]; then
# echo "creating" $value
mkdir -p $value && chown -R $user $value
fi
fi
done
}
start() {
[ -x $nginx ] || exit 5
[ -f $NGINX_CONF_FILE ] || exit 6
make_dirs
echo -n $"Starting $prog: "
daemon $nginx -c $NGINX_CONF_FILE
retval=$?
echo
[ $retval -eq 0 ] && touch $lockfile
return $retval
}
stop() {
echo -n $"Stopping $prog: "
killproc $prog -QUIT
retval=$?
echo
[ $retval -eq 0 ] && rm -f $lockfile
return $retval
}
restart() {
configtest || return $?
stop
sleep 1
start
}
reload() {
configtest || return $?
echo -n $"Reloading $prog: "
killproc $nginx -HUP
RETVAL=$?
echo
}
force_reload() {
restart
}
configtest() {
$nginx -t -c $NGINX_CONF_FILE
}
rh_status() {
status $prog
}
rh_status_q() {
rh_status >/dev/null 2>&1
}
case "$1" in
start)
rh_status_q && exit 0
$1
;;
stop)
rh_status_q || exit 0
$1
;;
restart|configtest)
$1
;;
reload)
rh_status_q || exit 7
$1
;;
force-reload)
force_reload
;;
status)
rh_status
;;
condrestart|try-restart)
rh_status_q || exit 0
;;
*)
echo $"Usage: $0 {start|stop|status|restart|condrestart|try-restart|reload|force-reload|configtest}"
exit 2
esac
而后为此脚本赋予执行权限:
# chmod +x /etc/rc.d/init.d/nginx
添加至服务管理列表,并让其开机自动启动:
# chkconfig --add nginx
# chkconfig nginx on
而后就可以启动服务并测试了:
# service nginx start
二、安装mysql-5.5.28
1、准备数据存放的文件系统
新建一个逻辑卷,并将其挂载至特定目录即可。这里不再给出过程。
这里假设其逻辑卷的挂载目录为/mydata,而后需要创建/mydata/data目录做为mysql数据的存放目录。
2、新建用户以安全方式运行进程:
# groupadd -r mysql
# useradd -g mysql -r -s /sbin/nologin -M -d /mydata/data mysql
# chown -R mysql:mysql /mydata/data
3、安装并初始化mysql-5.5.28
首先下载平台对应的mysql版本至本地,这里是32位平台,因此,选择的为mysql-5.5.28-linux2.6-i686.tar.gz,其下载位置为ftp://172.16.0.1/pub/Sources/mysql-5.5。
# tar xf mysql-5.5.28-linux2.6-i686.tar.gz -C /usr/local
# cd /usr/local/
# ln -sv mysql-5.5.24-linux2.6-i686 mysql
# cd mysql
# chown -R mysql:mysql .
# scripts/mysql_install_db --user=mysql --datadir=/mydata/data
# chown -R root .
4、为mysql提供主配置文件:
# cd /usr/local/mysql
# cp support-files/my-large.cnf /etc/my.cnf
并修改此文件中thread_concurrency的值为你的CPU个数乘以2,比如这里使用如下行:
thread_concurrency = 2
另外还需要添加如下行指定mysql数据文件的存放位置:
datadir = /mydata/data
5、为mysql提供sysv服务脚本:
# cd /usr/local/mysql
# cp support-files/mysql.server /etc/rc.d/init.d/mysqld
添加至服务列表:
# chkconfig --add mysqld
# chkconfig mysqld on
而后就可以启动服务测试使用了。
为了使用mysql的安装符合系统使用规范,并将其开发组件导出给系统使用,这里还需要进行如下步骤:
6、输出mysql的man手册至man命令的查找路径:
编辑/etc/man.config,添加如下行即可:
MANPATH /usr/local/mysql/man
7、输出mysql的头文件至系统头文件路径/usr/include:
这可以通过简单的创建链接实现:
# ln -sv /usr/local/mysql/include /usr/include/mysql
8、输出mysql的库文件给系统库查找路径:
# echo '/usr/local/mysql/lib' > /etc/ld.so.conf.d/mysql.conf
而后让系统重新载入系统库:
# ldconfig
9、修改PATH环境变量,让系统可以直接使用mysql的相关命令。具体实现过程这里不再给出。
三、编译安装php-5.4.4
1、解决依赖关系:
请配置好yum源(可以是本地系统光盘)后执行如下命令:
# yum -y groupinstall "X Software Development"
如果想让编译的php支持mcrypt、mhash扩展和libevent,此处还需要下载ftp://172.16.0.1/pub/Sources/ngnix目录中的如下几个rpm包并安装之:
libmcrypt-2.5.8-4.el5.centos.i386.rpm
libmcrypt-devel-2.5.8-4.el5.centos.i386.rpm
mhash-0.9.9-1.el5.centos.i386.rpm
mhash-devel-0.9.9-1.el5.centos.i386.rpm
mcrypt-2.6.8-1.el5.i386.rpm
最好使用升级的方式安装上面的rpm包,命令格式如下:
# rpm -Uvh
另外,也可以根据需要安装libevent,系统一般会自带libevent,但版本有些低。因此可以升级安装之,它包含如下两个rpm包。
libevent-2.0.17-2.i386.rpm
libevent-devel-2.0.17-2.i386.rpm
说明:libevent是一个异步事件通知库文件,其API提供了在某文件描述上发生某事件时或其超时时执行回调函数的机制,它主要用来替换事件驱动的网络服务器上的event loop机制。目前来说, libevent支持/dev/poll、kqueue、select、poll、epoll及Solaris的event ports。
2、编译安装php-5.4.4
首先下载源码包至本地目录,下载位置 ftp://172.16.0.1/pub/Sources/new_lamp。
# tar xf php-5.4.4.tar.bz2
# cd php-5.4.4
# ./configure --prefix=/usr/local/php --with-mysql=/usr/local/mysql --with-openssl --enable-fpm --enable-sockets --enable-sysvshm --with-mysqli=/usr/local/mysql/bin/mysql_config --enable-mbstring --with-freetype-dir --with-jpeg-dir --with-png-dir --with-zlib-dir --with-libxml-dir=/usr --enable-xml --with-mhash --with-mcrypt --with-config-file-path=/etc --with-config-file-scan-dir=/etc/php.d --with-bz2 --with-curl
说明:如果前面第1步解决依赖关系时安装mcrypt相关的两个rpm包,此./configure命令还可以带上--with-mcrypt选项以让php支持mycrpt扩展。--with-snmp选项则用于实现php的SNMP扩展,但此功能要求提前安装net-snmp相关软件包。
# make
# make test
# make install
为php提供配置文件:
# cp php.ini-production /etc/php.ini
为php-fpm提供Sysv init脚本,并将其添加至服务列表:
# cp sapi/fpm/init.d.php-fpm /etc/rc.d/init.d/php-fpm
# chmod +x /etc/rc.d/init.d/php-fpm
# chkconfig --add php-fpm
# chkconfig php-fpm on
为php-fpm提供配置文件:
# cp /usr/local/php/etc/php-fpm.conf.default /usr/local/php/etc/php-fpm.conf
编辑php-fpm的配置文件:
# vim /usr/local/php/etc/php-fpm.conf
配置fpm的相关选项为你所需要的值,并启用pid文件(如下最后一行):
pm.max_children = 150
pm.start_servers = 8
pm.min_spare_servers = 5
pm.max_spare_servers = 10
pid = /usr/local/php/var/run/php-fpm.pid
接下来就可以启动php-fpm了:
# service php-fpm start
使用如下命令来验正(如果此命令输出有中几个php-fpm进程就说明启动成功了):
# ps aux | grep php-fpm
四、整合nginx和php5
1、编辑/etc/nginx/nginx.conf,启用如下选项:
location ~ \.php$ {
root html;
fastcgi_pass 127.0.0.1:9000;
fastcgi_index index.php;
fastcgi_param SCRIPT_FILENAME /scripts$fastcgi_script_name;
include fastcgi_params;
}
2、编辑/etc/nginx/fastcgi_params,将其内容更改为如下内容:
fastcgi_param GATEWAY_INTERFACE CGI/1.1;
fastcgi_param SERVER_SOFTWARE nginx;
fastcgi_param QUERY_STRING $query_string;
fastcgi_param REQUEST_METHOD $request_method;
fastcgi_param CONTENT_TYPE $content_type;
fastcgi_param CONTENT_LENGTH $content_length;
fastcgi_param SCRIPT_FILENAME $document_root$fastcgi_script_name;
fastcgi_param SCRIPT_NAME $fastcgi_script_name;
fastcgi_param REQUEST_URI $request_uri;
fastcgi_param DOCUMENT_URI $document_uri;
fastcgi_param DOCUMENT_ROOT $document_root;
fastcgi_param SERVER_PROTOCOL $server_protocol;
fastcgi_param REMOTE_ADDR $remote_addr;
fastcgi_param REMOTE_PORT $remote_port;
fastcgi_param SERVER_ADDR $server_addr;
fastcgi_param SERVER_PORT $server_port;
fastcgi_param SERVER_NAME $server_name;
并在所支持的主页面格式中(在 /etc/nginx/nginx.conf 中)添加 php 格式的主页,类似如下:
location / {
root html;
index index.php index.html index.htm;
}
而后重新载入nginx的配置文件:
# service nginx reload
3、在/usr/html新建index.php的测试页面,测试php是否能正常工作:
# cat > /usr/html/index.php << EOF
<?php
phpinfo();
?>
接着就可以通过浏览器访问此测试页面了。
五、安装xcache,为php加速:
1、安装
# tar xf xcache-2.0.0.tar.gz
# cd xcache-2.0.0
# /usr/local/php/bin/phpize
# ./configure --enable-xcache --with-php-config=/usr/local/php/bin/php-config
# make && make install
安装结束时,会出现类似如下行:
Installing shared extensions: /usr/local/php/lib/php/extensions/no-debug-zts-20100525/
2、编辑php.ini,整合php和xcache:
首先将xcache提供的样例配置导入php.ini
# mkdir /etc/php.d
# cp xcache.ini /etc/php.d
说明:xcache.ini文件在xcache的源码目录中。
接下来编辑/etc/php.d/xcache.ini,找到zend_extension开头的行,修改为如下行:
zend_extension = /usr/local/php/lib/php/extensions/no-debug-zts-20100525/xcache.so
注意:如果php.ini文件中有多条zend_extension指令行,要确保此新增的行排在第一位。
3、重新启动php-fpm
# service php-fpm restart
六、补充说明
如果要在SSL中使用php,需要在php的location中添加此选项:
fastcgi_param HTTPS on;
补充阅读材料:
Events is one of paradigms to achieve asynchronous execution. But not all asynchronous systems use events. That is about semantic meaning of these two - one is super-entity of another.
epoll and aio use different metaphors:
epoll is a blocking operation (epoll_wait()) - you block the thread until some event happens and then you dispatch the event to different procedures/functions/branches in your code.
In AIO you pass address of you callback function (completion routine) to the system and the system calls your function when something happens.
Problem with AIO is that your callback function code runs from system thread and so on top of system stack. A few problems with that as you can imagine.
我们下载安装nginx,进行配置安装,当然我们要下载源代码,我们的红帽5好像是没有自带nginx,nginx很轻量级,所以它的编译安装过程很简单,如果实在不想每次都编译的话,将来我们要大批量布署的话,可以把它做成rpm包,做成rpm包也很简单,
http://nginx.org/en/download.html
http://nginx.org/en/linux_packages.html 看到已经做好的rpm包
http://nginx.org/en/linux_packages.html#RHEL-CentOS

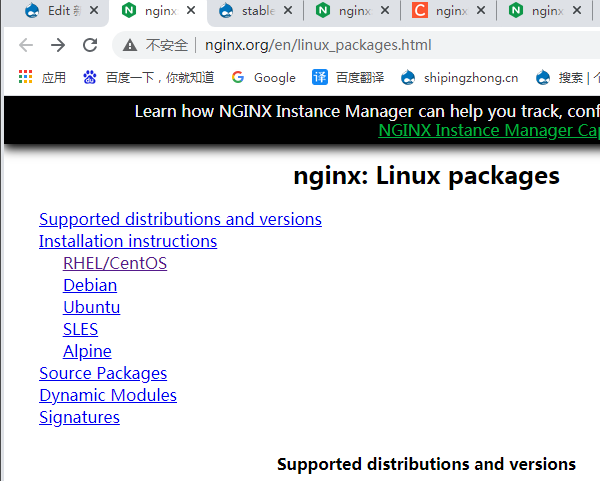
下图,是yum源,进行安装rpm包
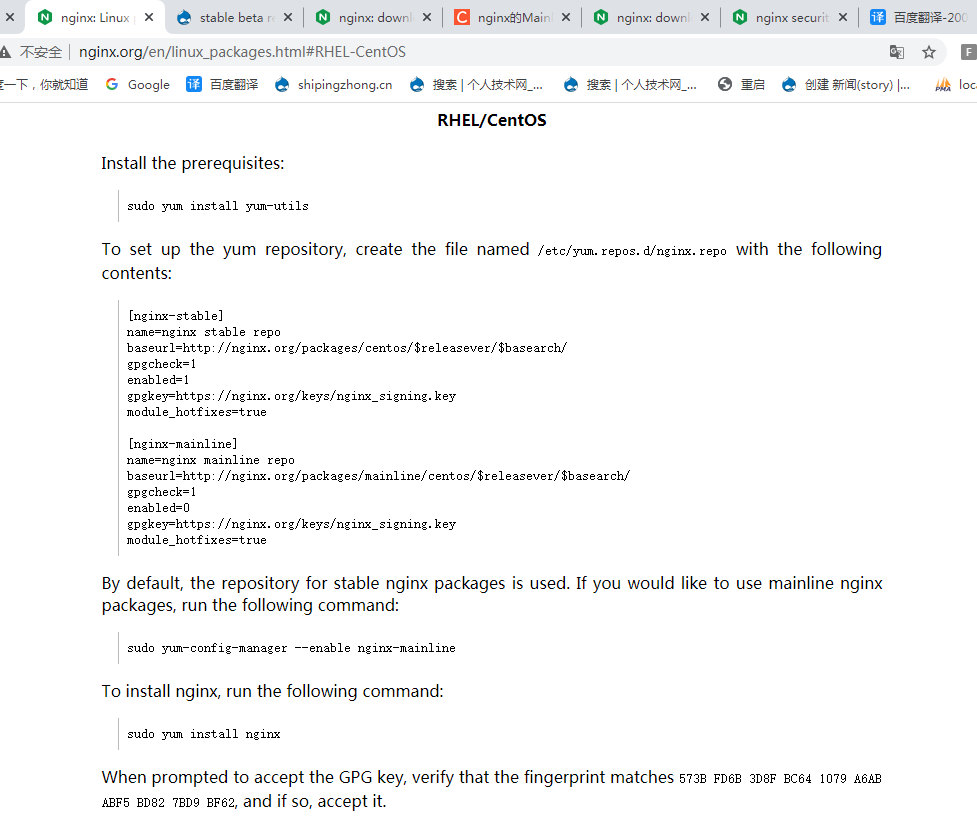
rpm包安装很简单,所以我们使用源码编译安装
我们下载1.4的吧
如果官方已经提供了rpm包,我们要不要自己去做rpm包呢?官方提供的rpm,里面提供的功能,我们需要的,它可能没有,就只能编译了,,,,,,如果又不想每次编译,可以自己去做rpm包,像我们此前做的keepalived一样,如果我们把我们自己用的配置文件直接做进去,更好了,以后装上去以后,压根儿就不用配置了,干脆直接配置好了,更合用,,自制rpm包,应该也是我们应该具备的一种能力,
http://nginx.org/en/CHANGES-1.4 看看更新,
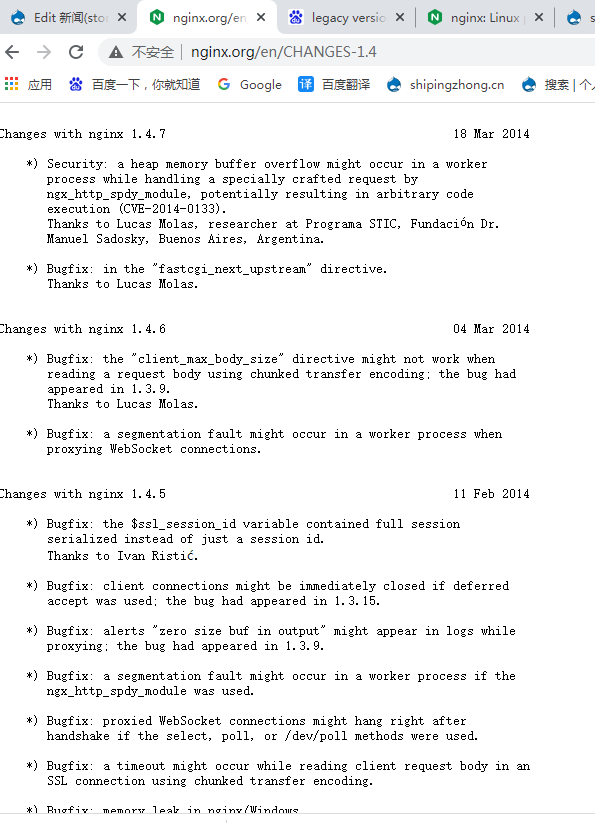
我们在红帽6 32位的版本上安装nginx
[root@master ~]# yum grouplist
已加载插件:product-id, search-disabled-repos, security, subscription-manager
This system is not registered with an entitlement server. You can use subscription-manager to register.
设置组进程
Base | 4.1 kB 00:00 ...
Base/primary_db | 2.5 MB 00:00 ...
Base/group_gz | 233 kB 00:00 ...
已安装的组:
Java 平台
NFS 文件服务器
Perl 支持
兼容程序库 #需要装它,,,,提供的是32位???的一些老的系统上的库(我本来就是32位啊)
图形管理工具
基本
大系统性能
字体
安全性工具
性能工具
控制台互联网工具
服务器平台 #需要装它
桌面平台
电子邮件服务器
目录客户端
硬件监控工具
科学记数法支持
继承 UNIX 兼容性
继承 X Windows 系统的兼容性
网络文件系统客户端
联网工具
调试工具
输入法
通用桌面
附加开发
Installed Language Groups: #已经安装的跟语言相关的组
中文支持 [zh]
亚美尼亚语支持 [hy]
伊努伊特语支持 [iu]
塔吉克语支持 [tg]
希伯来语支持 [he]
日语支持 [ja]
格鲁吉亚语支持 [ka]
老挝语支持 [lo]
阿拉伯语支持 [ar]
韩文支持 [ko]
有效的组: #可以安装的组
CIFS 文件服务器
Eclipse
Emacs
FCoE 存储客户端
FTP 服务器
Infiniband 支持
KDE 桌面
MySQL 数据库客户端
MySQL 数据库服务器
PHP 支持
PostgreSQL 数据库客户端
PostgreSQL 数据库服务器
Ruby 支持
SNMP 支持
TeX 支持
TurboGear 应用程序框架
Web 服务器程序引擎
X 窗口系统
iSCSI 存储客户端
万维网服务器
主框架访问
互联网浏览器
图形生成工具
基于网页的企业级管理
备份客户端
备份服务器
存储可用性工具
客户端管理工具
开发工具 #需要装它
打印客户端
打印服务器
拨号网络支持
智能卡支持
服务器平台开发 #需要装它
桌面
桌面平台开发 #需要装它
桌面调试和运行工具
目录服务器
短信客户端支持
科技写作
系统管理
系统管理工具
网络基础设施服务器
网络存储服务器
虚拟化
虚拟化客户端
虚拟化工具
虚拟化平台
虚拟机代理
身份管理服务器
远程桌面客户端
Available Language Groups:
上索布语支持 [hsb]
不丹语支持 [dz]
世界语支持 [eo]
丹麦语支持 [da]
乌克兰语支持 [uk]
乌兹别克语支持 [uz]
乌尔都语支持 [ur]
低地撒克逊语支持 [nds]
佛里乌里语支持 [fur]
俄语支持 [ru]
保加利亚语支持 [bg]
信德语支持 [sd]
克什米尔语支持 [ks]
克罗地亚语支持 [hr]
冰岛语支持 [is]
加利西亚语支持 [gl]
加泰隆语支持 [ca]
匈牙利语支持 [hu]
华隆语支持 [wa]
南 Ndebele 语支持 [nr]
南索托语支持 [st]
南非荷兰语支持 [af]
卡舒比语支持 [csb]
卢旺达语支持 [rw]
卢森堡语支持 [lb]
印地语支持 [hi]
印度尼西亚语支持 [id]
叙利亚语支持 [or]
古吉拉特语支持 [gu]
古吉拉特语支持 [mr]
史瓦希里语支持 [sw]
哈萨克语支持 [kk]
国际语支持 [ia]
土库曼语支持 [tk]
土耳其语支持 [tr]
坎纳达语支持 [kn]
埃及古语支持 [cop]
埃塞俄比亚语支持 [am]
塔加洛语支持 [tl]
塞尔维亚语支持 [sr]
夫里斯兰语支持 [fy]
奇卡瓦语支持 [ny]
奥克西唐语支持 [oc]
威尔士语支持 [cy]
孟加拉语支持 [bn]
宗加语支持 [ts]
尼泊尔语支持 [ne]
巴斯克语支持 [eu]
巴西葡萄牙语支持 [pt_BR]
布尔吞语支持 [br]
布尔吞语支持 [nso]
希利盖农语支持 [hil]
希腊语支持 [el]
库德语支持 [ku]
康干语支持 [kok]
德语支持 [de]
德顿语支持 [tet]
恰蒂斯加尔语支持 [hne]
意大利语支持 [it]
拉丁语支持 [la]
拉脱维亚语支持 [lv]
挪威语支持 [nb]
捷克语支持 [cs]
文达语支持 [ve]
斐济语支持 [fj]
斯洛伐克语支持 [sk]
斯洛文尼亚语支持 [sl]
斯瓦蒂语支持 [ss]
新哈拉语支持 [si]
旁遮普语支持 [pa]
曼岛语支持 [gv]
梵语支持 [sa]
比哈尔语支持 [mai]
毛利语支持 [mi]
法罗语支持 [fo]
法语支持 [fr]
波兰语支持 [pl]
波斯语支持 [fa]
泰卢固语支持 [te]
泰斯文那语支持 [tn]
泰米尔语支持 [ta]
泰语支持 [th]
爱尔兰语支持 [ga]
爱沙尼亚语支持 [et]
瑞典语支持 [sv]
白俄罗斯语支持 [be]
盖尔语支持 [gd]
祖鲁语支持 [zu]
科萨语支持 [xh]
立陶宛语支持 [lt]
索马里语支持 [so]
缅甸语支持 [my]
罗马尼亚语支持 [ro]
芬兰语支持 [fi]
英国英语支持 [en_GB]
荷兰语支持 [nl]
菲律宾语支持 [fil]
萨丁尼亚语支持 [sc]
葡萄牙语支持 [pt]
蒙古语支持 [mn]
藏语支持 [bo]
西班牙语支持 [es]
越南语支持 [vi]
阿塞拜疆语支持 [az]
阿尔巴尼亚语支持 [sq]
阿萨姆语支持 [as]
阿马兹格语支持 [ber]
马其顿语支持 [mk]
马尔他语支持 [mt]
马来语支持 [ms]
马来语支持 [ml]
马达加斯加语支持 [mg]
高棉语支持 [km]
完成
[root@master ~]#
[root@master ~]# echo $LANG
zh_CN.UTF-8
[root@master ~]# export LANG=C
[root@master ~]# yum grouplist
Loaded plugins: product-id, search-disabled-repos, security, subscription-
: manager
This system is not registered with an entitlement server. You can use subscription-manager to register.
Setting up Group Process
Installed Groups:
Additional Development
Base
Compatibility libraries
Console internet tools
Debugging Tools
Desktop Platform
Directory Client
E-mail server
Fonts
General Purpose Desktop
Graphical Administration Tools
Hardware monitoring utilities
Input Methods
Java Platform
Large Systems Performance
Legacy UNIX compatibility
Legacy X Window System compatibility
NFS file server
Network file system client
Networking Tools
Performance Tools
Perl Support
Scientific support
Security Tools
Server Platform
Installed Language Groups:
Arabic Support [ar]
Armenian Support [hy]
Chinese Support [zh]
Georgian Support [ka]
Hebrew Support [he]
Inuktitut Support [iu]
Japanese Support [ja]
Korean Support [ko]
Lao Support [lo]
Tajik Support [tg]
Available Groups:
Backup Client
Backup Server
CIFS file server
Client management tools
Desktop
Desktop Debugging and Performance Tools
Desktop Platform Development
Development tools
Dial-up Networking Support
Directory Server
Eclipse
Emacs
FCoE Storage Client
FTP server
Graphics Creation Tools
Guest Agents
Identity Management Server
Infiniband Support
Internet Browser
KDE Desktop
Mainframe Access
Messaging Client Support
MySQL Database client
MySQL Database server
Network Infrastructure Server
Network Storage Server
PHP Support
PostgreSQL Database client
PostgreSQL Database server
Print Server
Printing client
Remote Desktop Clients
Ruby Support
SNMP Support
Server Platform Development
Smart card support
Storage Availability Tools
System Management
System administration tools
TeX support
Technical Writing
TurboGears application framework
Virtualization
Virtualization Client
Virtualization Platform
Virtualization Tools
Web Server
Web Servlet Engine
Web-Based Enterprise Management
X Window System
iSCSI Storage Client
Available Language Groups:
Afrikaans Support [af]
Albanian Support [sq]
Amazigh Support [ber]
Assamese Support [as]
Azerbaijani Support [az]
Basque Support [eu]
Belarusian Support [be]
Bengali Support [bn]
Bhutanese Support [dz]
Brazilian Portuguese Support [pt_BR]
Breton Support [br]
Bulgarian Support [bg]
Catalan Support [ca]
Chhattisgarhi Support [hne]
Chichewa Support [ny]
Coptic Support [cop]
Croatian Support [hr]
Czech Support [cs]
Danish Support [da]
Dutch Support [nl]
English (UK) Support [en_GB]
Esperanto Support [eo]
Estonian Support [et]
Ethiopic Support [am]
Faroese Support [fo]
Fijian Support [fj]
Filipino Support [fil]
Finnish Support [fi]
French Support [fr]
Frisian Support [fy]
Friulian Support [fur]
Gaelic Support [gd]
Galician Support [gl]
German Support [de]
Greek Support [el]
Gujarati Support [gu]
Hiligaynon Support [hil]
Hindi Support [hi]
Hungarian Support [hu]
Icelandic Support [is]
Indonesian Support [id]
Interlingua Support [ia]
Irish Support [ga]
Italian Support [it]
Kannada Support [kn]
Kashmiri Support [ks]
Kashubian Support [csb]
Kazakh Support [kk]
Khmer Support [km]
Kinyarwanda Support [rw]
Konkani Support [kok]
Kurdish Support [ku]
Latin Support [la]
Latvian Support [lv]
Lithuanian Support [lt]
Low Saxon Support [nds]
Luxembourgish Support [lb]
Macedonian Support [mk]
Maithili Support [mai]
Malagasy Support [mg]
Malay Support [ms]
Malayalam Support [ml]
Maltese Support [mt]
Manx Support [gv]
Maori Support [mi]
Marathi Support [mr]
Mongolian Support [mn]
Myanmar (Burmese) Support [my]
Nepali Support [ne]
Northern Sotho Support [nso]
Norwegian Support [nb]
Occitan Support [oc]
Oriya Support [or]
Persian Support [fa]
Polish Support [pl]
Portuguese Support [pt]
Punjabi Support [pa]
Romanian Support [ro]
Russian Support [ru]
Sanskrit Support [sa]
Sardinian Support [sc]
Serbian Support [sr]
Sindhi Support [sd]
Sinhala Support [si]
Slovak Support [sk]
Slovenian Support [sl]
Somali Support [so]
Southern Ndebele Support [nr]
Southern Sotho Support [st]
Spanish Support [es]
Swahili Support [sw]
Swati Support [ss]
Swedish Support [sv]
Tagalog Support [tl]
Tamil Support [ta]
Telugu Support [te]
Tetum Support [tet]
Thai Support [th]
Tibetan Support [bo]
Tsonga Support [ts]
Tswana Support [tn]
Turkish Support [tr]
Turkmen Support [tk]
Ukrainian Support [uk]
Upper Sorbian Support [hsb]
Urdu Support [ur]
Uzbek Support [uz]
Venda Support [ve]
Vietnamese Support [vi]
Walloon Support [wa]
Welsh Support [cy]
Xhosa Support [xh]
Zulu Support [zu]
Done
[root@master ~]#
[root@master ~]# yum -y groupinstall "Development tools" "Server Platform Development"
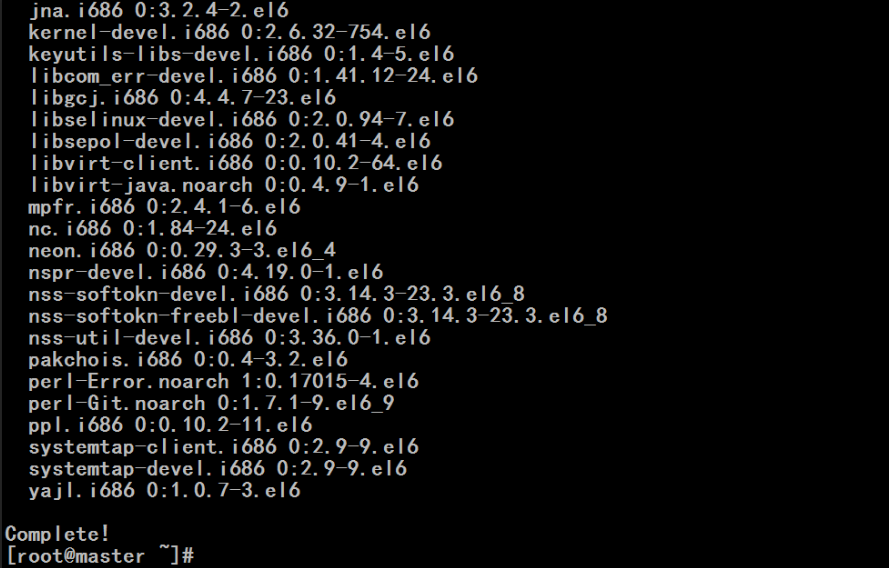

#lftps是马哥自己亲自做的别名


[root@master ~]# wget http://nginx.org/download/nginx-1.4.7.tar.gz
--2021-04-09 15:04:53-- http://nginx.org/download/nginx-1.4.7.tar.gz
Resolving nginx.org... 52.58.199.22, 3.125.197.172, 2a05:d014:edb:5704::6, ...
Connecting to nginx.org|52.58.199.22|:80... connected.
HTTP request sent, awaiting response... 200 OK
Length: 769153 (751K) [application/octet-stream]
Saving to: `nginx-1.4.7.tar.gz'
100%[======================================>] 769,153 475K/s in 1.6s
2021-04-09 15:04:55 (475 KB/s) - `nginx-1.4.7.tar.gz' saved [769153/769153]
[root@master ~]#
[root@master ~]# date #确保时间,如果比nginx-1.4.7.tar.gz靠前,它会认为软件包是来自于未来的,是没法使用的
Fri Apr 9 15:05:34 CST 2021
[root@master ~]#
[root@master ~]# tar xf nginx-1.4.7.tar.gz
[root@master ~]#
[root@master ~]# ll -h
total 283M
-rw-------. 1 root root 1.4K Mar 18 23:32 anaconda-ks.cfg
-rw-r--r--. 1 root root 28K Mar 18 23:32 install.log
-rw-r--r--. 1 root root 9.2K Mar 18 23:31 install.log.syslog
-rw-r--r--. 1 root root 475 Mar 20 00:56 iptables.20210319
-rw-r--r--. 1 root root 282M Jan 23 2013 mysql-5.6.10-linux-glibc2.5-i686.tar.gz
drwxr-xr-x. 8 1001 1001 4.0K Mar 18 2014 nginx-1.4.7
-rw-r--r--. 1 root root 752K Mar 19 2014 nginx-1.4.7.tar.gz #很小
-rw-r--r--. 1 root root 0 Mar 19 02:59 test.txt
[root@master ~]#
[root@master ~]# du -sh nginx-1.4.7
5.2M nginx-1.4.7
[root@master ~]#
[root@master ~]# cd nginx-1.4.7
[root@master nginx-1.4.7]#
[root@master nginx-1.4.7]# ls
CHANGES LICENSE auto configure html src
CHANGES.ru README conf contrib man
[root@master nginx-1.4.7]#
一、安装Nginx:
1、解决依赖关系
编译安装nginx需要事先需要安装开发包组"Development Tools"和 "Development Libraries"。同时,还需要专门安装pcre-devel包: #nginx某些功能需要安装pcre,所以要装上 pcre-devel
# yum -y install pcre-devel
2、安装
首先添加用户nginx,实现以之运行nginx服务进程:
# groupadd -r nginx
# useradd -r -g nginx nginx
接着开始编译和安装:
# ./configure \
--prefix=/usr \ #默认安装路径,这里装在/usr下,没有单独安装,因为nginx安装生成的文件很少
--sbin-path=/usr/sbin/nginx \ #nginx自身的可执行程序的路径,放在 /usr/sbin 目录下
--conf-path=/etc/nginx/nginx.conf \ #主配置文件的路径,这个目录不存在,它会自动创建的,在这个目录下,它还会额外提供其它几个配置文件
--error-log-path=/var/log/nginx/error.log \ #错误日志
--http-log-path=/var/log/nginx/access.log \ #访问日志
--pid-path=/var/run/nginx/nginx.pid \ #pid文件
--lock-path=/var/lock/nginx.lock \ #锁文件
--user=nginx \ #用户
--group=nginx \ #组
--with-http_ssl_module \ #ssl模块 #使用此模块,你可以明确指明使用哪些模块,如果用不上,可以不用加的 --without------表示不使用这个模块,
--with-http_flv_module \ #flv模块
--with-http_stub_status_module \ #httpd (apache)可以通过一个web页面,给我们输出一个当前服务器的状态信息,比如开启了多少个进程,哪些进程正在服务,哪些进程没有服务,已经响应了多少个用户请求了,提供了多大多少的流量,提供了多少次的响应,这里也是类似的功能
--with-http_gzip_static_module \ #支持gzip压缩的一个工具
--http-client-body-temp-path=/var/tmp/nginx/client/ \ #用户的请求报文到达之后,我们有时需要缓存一下,包括封装的时候也是一个道理,请求报文的主体,除了首部以后的那些内容,所缓存的目录 目录得存在,不存在的话(如果指定的话),可能启动不了的
--http-proxy-temp-path=/var/tmp/nginx/proxy/ \ #代理时用到的
--http-fastcgi-temp-path=/var/tmp/nginx/fcgi/ \ #fastcgi用到的临时目录
--http-uwsgi-temp-path=/var/tmp/nginx/uwsgi \ #uwsgi用到的临时目录,此时就是已经用到了uwsgi的功能,如果我们不打算支持python的web框架的话,可以不用启用的
--http-scgi-temp-path=/var/tmp/nginx/scgi \ #scgi用到的临时目录,scgi是类似于fastcgi的另外一种机制,
--with-pcre=/usr #看看pcre装在哪儿了,如果位置不一样的放,可能需要修改 #好像有时这里应该去掉了=/usr ,否则make时会报错
# make && make install
说明:如果想使用nginx的perl模块,可以通过为configure脚本添加--with-http_perl_module选项来实现,但目前此模块仍处于实验性使用阶段,可能会在运行中出现意外,因此,其实现方式这里不再介绍。如果想使用基于nginx的cgi功能,也可以基于FCGI来实现,具体实现方法请参照网上的文档。
3、为nginx提供SysV init脚本:
新建文件/etc/rc.d/init.d/nginx,内容如下:
#!/bin/sh
#
# nginx - this script starts and stops the nginx daemon
#
# chkconfig: - 85 15
# description: Nginx is an HTTP(S) server, HTTP(S) reverse \
# proxy and IMAP/POP3 proxy server
# processname: nginx
# config: /etc/nginx/nginx.conf
# config: /etc/sysconfig/nginx
# pidfile: /var/run/nginx.pid
# Source function library.
. /etc/rc.d/init.d/functions
# Source networking configuration.
. /etc/sysconfig/network
# Check that networking is up.
[ "$NETWORKING" = "no" ] && exit 0
nginx="/usr/sbin/nginx"
prog=$(basename $nginx)
NGINX_CONF_FILE="/etc/nginx/nginx.conf"
[ -f /etc/sysconfig/nginx ] && . /etc/sysconfig/nginx
lockfile=/var/lock/subsys/nginx
make_dirs() {
# make required directories
user=`nginx -V 2>&1 | grep "configure arguments:" | sed 's/[^*]*--user=\([^ ]*\).*/\1/g' -`
options=`$nginx -V 2>&1 | grep 'configure arguments:'`
for opt in $options; do
if [ `echo $opt | grep '.*-temp-path'` ]; then
value=`echo $opt | cut -d "=" -f 2`
if [ ! -d "$value" ]; then
# echo "creating" $value
mkdir -p $value && chown -R $user $value
fi
fi
done
}
start() {
[ -x $nginx ] || exit 5
[ -f $NGINX_CONF_FILE ] || exit 6
make_dirs
echo -n $"Starting $prog: "
daemon $nginx -c $NGINX_CONF_FILE
retval=$?
echo
[ $retval -eq 0 ] && touch $lockfile
return $retval
}
stop() {
echo -n $"Stopping $prog: "
killproc $prog -QUIT
retval=$?
echo
[ $retval -eq 0 ] && rm -f $lockfile
return $retval
}
restart() {
configtest || return $?
stop
sleep 1
start
}
reload() {
configtest || return $?
echo -n $"Reloading $prog: "
killproc $nginx -HUP
RETVAL=$?
echo
}
force_reload() {
restart
}
configtest() {
$nginx -t -c $NGINX_CONF_FILE
}
rh_status() {
status $prog
}
rh_status_q() {
rh_status >/dev/null 2>&1
}
case "$1" in
start)
rh_status_q && exit 0
$1
;;
stop)
rh_status_q || exit 0
$1
;;
restart|configtest)
$1
;;
reload)
rh_status_q || exit 7
$1
;;
force-reload)
force_reload
;;
status)
rh_status
;;
condrestart|try-restart)
rh_status_q || exit 0
;;
*)
echo $"Usage: $0 {start|stop|status|restart|condrestart|try-restart|reload|force-reload|configtest}"
exit 2
esac
而后为此脚本赋予执行权限:
# chmod +x /etc/rc.d/init.d/nginx
添加至服务管理列表,并让其开机自动启动:
# chkconfig --add nginx
# chkconfig nginx on
而后就可以启动服务并测试了:
# service nginx start
二、安装mysql-5.5.28
1、准备数据存放的文件系统
新建一个逻辑卷,并将其挂载至特定目录即可。这里不再给出过程。
这里假设其逻辑卷的挂载目录为/mydata,而后需要创建/mydata/data目录做为mysql数据的存放目录。
2、新建用户以安全方式运行进程:
# groupadd -r mysql
# useradd -g mysql -r -s /sbin/nologin -M -d /mydata/data mysql
# chown -R mysql:mysql /mydata/data
3、安装并初始化mysql-5.5.28
首先下载平台对应的mysql版本至本地,这里是32位平台,因此,选择的为mysql-5.5.28-linux2.6-i686.tar.gz,其下载位置为ftp://172.16.0.1/pub/Sources/mysql-5.5。
# tar xf mysql-5.5.28-linux2.6-i686.tar.gz -C /usr/local
# cd /usr/local/
# ln -sv mysql-5.5.24-linux2.6-i686 mysql
# cd mysql
# chown -R mysql:mysql .
# scripts/mysql_install_db --user=mysql --datadir=/mydata/data
# chown -R root .
4、为mysql提供主配置文件:
# cd /usr/local/mysql
# cp support-files/my-large.cnf /etc/my.cnf
并修改此文件中thread_concurrency的值为你的CPU个数乘以2,比如这里使用如下行:
thread_concurrency = 2
另外还需要添加如下行指定mysql数据文件的存放位置:
datadir = /mydata/data
5、为mysql提供sysv服务脚本:
# cd /usr/local/mysql
# cp support-files/mysql.server /etc/rc.d/init.d/mysqld
添加至服务列表:
# chkconfig --add mysqld
# chkconfig mysqld on
而后就可以启动服务测试使用了。
为了使用mysql的安装符合系统使用规范,并将其开发组件导出给系统使用,这里还需要进行如下步骤:
6、输出mysql的man手册至man命令的查找路径:
编辑/etc/man.config,添加如下行即可:
MANPATH /usr/local/mysql/man
7、输出mysql的头文件至系统头文件路径/usr/include:
这可以通过简单的创建链接实现:
# ln -sv /usr/local/mysql/include /usr/include/mysql
8、输出mysql的库文件给系统库查找路径:
# echo '/usr/local/mysql/lib' > /etc/ld.so.conf.d/mysql.conf
而后让系统重新载入系统库:
# ldconfig
9、修改PATH环境变量,让系统可以直接使用mysql的相关命令。具体实现过程这里不再给出。
三、编译安装php-5.4.4
1、解决依赖关系:
请配置好yum源(可以是本地系统光盘)后执行如下命令:
# yum -y groupinstall "X Software Development"
如果想让编译的php支持mcrypt、mhash扩展和libevent,此处还需要下载ftp://172.16.0.1/pub/Sources/ngnix目录中的如下几个rpm包并安装之:
libmcrypt-2.5.8-4.el5.centos.i386.rpm
libmcrypt-devel-2.5.8-4.el5.centos.i386.rpm
mhash-0.9.9-1.el5.centos.i386.rpm
mhash-devel-0.9.9-1.el5.centos.i386.rpm
mcrypt-2.6.8-1.el5.i386.rpm
最好使用升级的方式安装上面的rpm包,命令格式如下:
# rpm -Uvh
另外,也可以根据需要安装libevent,系统一般会自带libevent,但版本有些低。因此可以升级安装之,它包含如下两个rpm包。
libevent-2.0.17-2.i386.rpm
libevent-devel-2.0.17-2.i386.rpm
说明:libevent是一个异步事件通知库文件,其API提供了在某文件描述上发生某事件时或其超时时执行回调函数的机制,它主要用来替换事件驱动的网络服务器上的event loop机制。目前来说, libevent支持/dev/poll、kqueue、select、poll、epoll及Solaris的event ports。
2、编译安装php-5.4.4
首先下载源码包至本地目录,下载位置ftp://172.16.0.1/pub/Sources/new_lamp。
# tar xf php-5.4.4.tar.bz2
# cd php-5.4.4
# ./configure --prefix=/usr/local/php --with-mysql=/usr/local/mysql --with-openssl --enable-fpm --enable-sockets --enable-sysvshm --with-mysqli=/usr/local/mysql/bin/mysql_config --enable-mbstring --with-freetype-dir --with-jpeg-dir --with-png-dir --with-zlib-dir --with-libxml-dir=/usr --enable-xml --with-mhash --with-mcrypt --with-config-file-path=/etc --with-config-file-scan-dir=/etc/php.d --with-bz2 --with-curl
说明:如果前面第1步解决依赖关系时安装mcrypt相关的两个rpm包,此./configure命令还可以带上--with-mcrypt选项以让php支持mycrpt扩展。--with-snmp选项则用于实现php的SNMP扩展,但此功能要求提前安装net-snmp相关软件包。
# make
# make test
# make intall
为php提供配置文件:
# cp php.ini-production /etc/php.ini
为php-fpm提供Sysv init脚本,并将其添加至服务列表:
# cp sapi/fpm/init.d.php-fpm /etc/rc.d/init.d/php-fpm
# chmod +x /etc/rc.d/init.d/php-fpm
# chkconfig --add php-fpm
# chkconfig php-fpm on
为php-fpm提供配置文件:
# cp /usr/local/php/etc/php-fpm.conf.default /usr/local/php/etc/php-fpm.conf
编辑php-fpm的配置文件:
# vim /usr/local/php/etc/php-fpm.conf
配置fpm的相关选项为你所需要的值,并启用pid文件(如下最后一行):
pm.max_children = 150
pm.start_servers = 8
pm.min_spare_servers = 5
pm.max_spare_servers = 10
pid = /usr/local/php/var/run/php-fpm.pid
接下来就可以启动php-fpm了:
# service php-fpm start
使用如下命令来验正(如果此命令输出有中几个php-fpm进程就说明启动成功了):
# ps aux | grep php-fpm
四、整合nginx和php5
1、编辑/etc/nginx/nginx.conf,启用如下选项:
location ~ \.php$ {
root html;
fastcgi_pass 127.0.0.1:9000;
fastcgi_index index.php;
fastcgi_param SCRIPT_FILENAME /scripts$fastcgi_script_name;
include fastcgi_params;
}
2、编辑/etc/nginx/fastcgi_params,将其内容更改为如下内容:
fastcgi_param GATEWAY_INTERFACE CGI/1.1;
fastcgi_param SERVER_SOFTWARE nginx;
fastcgi_param QUERY_STRING $query_string;
fastcgi_param REQUEST_METHOD $request_method;
fastcgi_param CONTENT_TYPE $content_type;
fastcgi_param CONTENT_LENGTH $content_length;
fastcgi_param SCRIPT_FILENAME $document_root$fastcgi_script_name;
fastcgi_param SCRIPT_NAME $fastcgi_script_name;
fastcgi_param REQUEST_URI $request_uri;
fastcgi_param DOCUMENT_URI $document_uri;
fastcgi_param DOCUMENT_ROOT $document_root;
fastcgi_param SERVER_PROTOCOL $server_protocol;
fastcgi_param REMOTE_ADDR $remote_addr;
fastcgi_param REMOTE_PORT $remote_port;
fastcgi_param SERVER_ADDR $server_addr;
fastcgi_param SERVER_PORT $server_port;
fastcgi_param SERVER_NAME $server_name;
并在所支持的主页面格式中添加php格式的主页,类似如下:
location / {
root html;
index index.php index.html index.htm;
}
而后重新载入nginx的配置文件:
# service nginx reload
3、在/usr/html新建index.php的测试页面,测试php是否能正常工作:
# cat > /usr/html/index.php << EOF
<?php
phpinfo();
?>
接着就可以通过浏览器访问此测试页面了。
五、安装xcache,为php加速:
1、安装
# tar xf xcache-2.0.0.tar.gz
# cd xcache-2.0.0
# /usr/local/php/bin/phpize
# ./configure --enable-xcache --with-php-config=/usr/local/php/bin/php-config
# make && make install
安装结束时,会出现类似如下行:
Installing shared extensions: /usr/local/php/lib/php/extensions/no-debug-zts-20100525/
2、编辑php.ini,整合php和xcache:
首先将xcache提供的样例配置导入php.ini
# mkdir /etc/php.d
# cp xcache.ini /etc/php.d
说明:xcache.ini文件在xcache的源码目录中。
接下来编辑/etc/php.d/xcache.ini,找到zend_extension开头的行,修改为如下行:
zend_extension = /usr/local/php/lib/php/extensions/no-debug-zts-20100525/xcache.so
注意:如果php.ini文件中有多条zend_extension指令行,要确保此新增的行排在第一位。
3、重新启动php-fpm
# service php-fpm restart
六、补充说明
如果要在SSL中使用php,需要在php的location中添加此选项:
fastcgi_param HTTPS on;
补充阅读材料:
Events is one of paradigms to achieve asynchronous execution. But not all asynchronous systems use events. That is about semantic meaning of these two - one is super-entity of another.
epoll and aio use different metaphors:
epoll is a blocking operation (epoll_wait()) - you block the thread until some event happens and then you dispatch the event to different procedures/functions/branches in your code.
In AIO you pass address of you callback function (completion routine) to the system and the system calls your function when something happens.
Problem with AIO is that your callback function code runs from system thread and so on top of system stack. A few problems with that as you can imagine.
nginx应该以一个普通用户的身份运行,应该建个普通用户,编译的时候应该使用这个普通用户
[root@master nginx-1.4.7]# groupadd -r -g 108 nginx #-r表示系统组,-g表示组id, nginx是组名
[root@master nginx-1.4.7]#
[root@master nginx-1.4.7]# useradd -r -g 108 -u 108 nginx #-r表示系统用户,-g表示组id,-u表示uid,nginx是用户名 不用使用-M了(不创建家目录),-s 也不用指(指定shell)
[root@master nginx-1.4.7]#
[root@master nginx-1.4.7]# rpm -q pcre-devel
package pcre-devel is not installed
[root@master nginx-1.4.7]#
[root@master nginx-1.4.7]# yum -y install pcre-devel #pcre是perl扩展的正则表达式
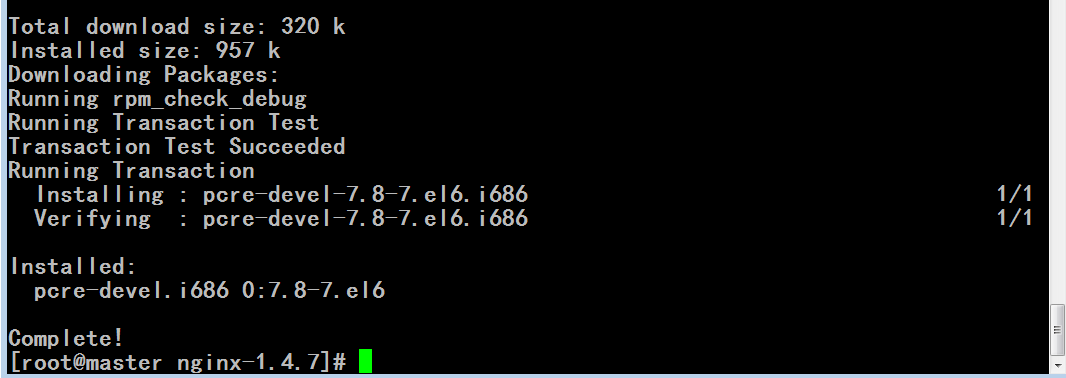
[root@master nginx-1.4.7]# pwd
/root/nginx-1.4.7
[root@master nginx-1.4.7]# ls
CHANGES LICENSE auto configure html src
CHANGES.ru README conf contrib man
[root@master nginx-1.4.7]# ./conf
conf/ configure
[root@master nginx-1.4.7]# ./conf
conf/ configure
[root@master nginx-1.4.7]#
[root@master nginx-1.4.7]# ./configure --help | less
--help print this message
--prefix=PATH set installation prefix
--sbin-path=PATH set nginx binary pathname
--conf-path=PATH set nginx.conf pathname
--error-log-path=PATH set error log pathname
--pid-path=PATH set nginx.pid pathname
--lock-path=PATH set nginx.lock pathname
--user=USER set non-privileged user for
worker processes
--group=GROUP set non-privileged group for
worker processes
--builddir=DIR set build directory
#with模块,明确使用with,说明默认没有启用,需要明确启用的
--with-rtsig_module enable rtsig module #这是支持信号模块 Real-Time Singal
--with-select_module enable select module #这是支持select模块,想支持,手动加进来
--without-select_module disable select module
--with-poll_module enable poll module #这是支持poll模块 ,没说到epoll,说明是自动检测的?如果有epoll模块,是自动启用epoll吗?
--without-poll_module disable poll module
--with-file-aio enable file AIO support #支持 file AIO
--with-ipv6 enable IPv6 support #支持ipv6
--with-http_ssl_module enable ngx_http_ssl_module #ssl默认没有加
--with-http_spdy_module enable ngx_http_spdy_module #这是一个新的模块?,是为了加速web网页用的 speedy快速,飞速的,迅捷的意思
--with-http_realip_module enable ngx_http_realip_module #realip啥意思?
--with-http_addition_module enable ngx_http_addition_module #addition啥意思?
--with-http_xslt_module enable ngx_http_xslt_module
--with-http_image_filter_module enable ngx_http_image_filter_module #这是一个新的模块?可以实现图片过滤
--with-http_geoip_module enable ngx_http_geoip_module #根据用户的地址位置信息来做一些额外的相应的处理的
--with-http_sub_module enable ngx_http_sub_module
--with-http_dav_module enable ngx_http_dav_module
--with-http_flv_module enable ngx_http_flv_module #默认也不支持flv模块
--with-http_mp4_module enable ngx_http_mp4_module #默认也不支持mp4模块
--with-http_gunzip_module enable ngx_http_gunzip_module
--with-http_gzip_static_module enable ngx_http_gzip_static_module
--with-http_random_index_module enable ngx_http_random_index_module
--with-http_secure_link_module enable ngx_http_secure_link_module
--with-http_degradation_module enable ngx_http_degradation_module
--with-http_stub_status_module enable ngx_http_stub_status_module
#without模块,表示把某个模块去掉了,,,,,这里显示without,说明通常情况下,默认是启用的
--without-http_charset_module disable ngx_http_charset_module
--without-http_gzip_module disable ngx_http_gzip_module
--without-http_ssi_module disable ngx_http_ssi_module
--without-http_userid_module disable ngx_http_userid_module
--without-http_access_module disable ngx_http_access_module
--without-http_auth_basic_module disable ngx_http_auth_basic_module
--without-http_autoindex_module disable ngx_http_autoindex_module
--without-http_geo_module disable ngx_http_geo_module
--without-http_map_module disable ngx_http_map_module
--without-http_split_clients_module disable ngx_http_split_clients_module
--without-http_referer_module disable ngx_http_referer_module #这些默认启用的
--without-http_rewrite_module disable ngx_http_rewrite_module #这些默认启用的
--without-http_proxy_module disable ngx_http_proxy_module #这些默认启用的
--without-http_fastcgi_module disable ngx_http_fastcgi_module #这些默认启用的
--without-http_uwsgi_module disable ngx_http_uwsgi_module #这些默认启用的
--without-http_scgi_module disable ngx_http_scgi_module #这些默认启用的
--without-http_memcached_module disable ngx_http_memcached_module #默认memcached也带的
--without-http_limit_conn_module disable ngx_http_limit_conn_module #默认连接数限制也带的
--without-http_limit_req_module disable ngx_http_limit_req_module
--without-http_empty_gif_module disable ngx_http_empty_gif_module
--without-http_browser_module disable ngx_http_browser_module
--without-http_upstream_ip_hash_module
disable ngx_http_upstream_ip_hash_module
--without-http_upstream_least_conn_module
disable ngx_http_upstream_least_conn_module
--without-http_upstream_keepalive_module
disable ngx_http_upstream_keepalive_module
--with-http_perl_module enable ngx_http_perl_module #默认没加,要想使用perl模块,想让nginx自动支持解析perl脚本的话,得使用它
--with-perl_modules_path=PATH set Perl modules path #perl模块路径,要自己安装perl模块,想让nginx自动支持解析perl脚本的话,得使用它
--with-perl=PATH set perl binary pathname #perl路径,要自己安装perl模块,想让nginx自动支持解析perl脚本的话,得使用它
[root@master nginx-1.4.7]# ./configure \ #反斜线是续行的作用
> --prefix=/usr \
> --sbin-path=/usr/sbin/nginx \
> --conf-path=/etc/nginx/nginx.conf \
> --error-log-path=/var/log/nginx/error.log \
> --http-log-path=/var/log/nginx/access.log \
> --pid-path=/var/run/nginx/nginx.pid \
> --lock-path=/var/lock/nginx.lock \
> --user=nginx \
> --group=nginx \
> --with-http_ssl_module \
> --with-http_flv_module \
> --with-http_stub_status_module \
> --with-http_gzip_static_module \
> --http-client-body-temp-path=/var/tmp/nginx/client/ \
> --http-proxy-temp-path=/var/tmp/nginx/proxy/ \
> --http-fastcgi-temp-path=/var/tmp/nginx/fcgi/ \
> --http-uwsgi-temp-path=/var/tmp/nginx/uwsgi \
> --http-scgi-temp-path=/var/tmp/nginx/scgi \
> --with-pcre=/usr \ #好像有时这里应该去掉了=/usr ,否则make时会报错
> --with-http_image_filter_module
#看到一大堆的 not found
checking for OS
+ Linux 2.6.32-754.el6.i686 i686
checking for C compiler ... found
+ using GNU C compiler
+ gcc version: 4.4.7 20120313 (Red Hat 4.4.7-23) (GCC)
checking for gcc -pipe switch ... found #有
checking for gcc builtin atomic operations ... found #有
checking for C99 variadic macros ... found #有
checking for gcc variadic macros ... found #有
checking for unistd.h ... found
checking for inttypes.h ... found
checking for limits.h ... found
checking for sys/filio.h ... not found #没有
checking for sys/param.h ... found
checking for sys/mount.h ... found
checking for sys/statvfs.h ... found
checking for crypt.h ... found
checking for Linux specific features
checking for epoll ... found #有
checking for sendfile() ... found #有
checking for sendfile64() ... found #有
checking for sys/prctl.h ... found
checking for prctl(PR_SET_DUMPABLE) ... found
checking for sched_setaffinity() ... found
checking for crypt_r() ... found
checking for sys/vfs.h ... found
checking for poll() ... found #有
checking for /dev/poll ... not found #没找到,很显然我们不是solaris,也不是freebsd,所以找不到
checking for kqueue ... not found
checking for crypt() ... not found
checking for crypt() in libcrypt ... found
checking for F_READAHEAD ... not found
checking for posix_fadvise() ... found
checking for O_DIRECT ... found #找到了,标志位找到了
checking for F_NOCACHE ... not found
checking for directio() ... not found #直接io函数没找到
checking for statfs() ... found
checking for statvfs() ... found
checking for dlopen() ... not found
checking for dlopen() in libdl ... found
checking for sched_yield() ... found
checking for SO_SETFIB ... not found
checking for SO_ACCEPTFILTER ... not found
checking for TCP_DEFER_ACCEPT ... found #找到了
checking for TCP_KEEPIDLE, TCP_KEEPINTVL, TCP_KEEPCNT ... found #TCP_KEEPIDLE,保持空闲状态等等????,找到了
checking for TCP_INFO ... found
checking for accept4() ... found
checking for int size ... 4 bytes
checking for long size ... 4 bytes
checking for long long size ... 8 bytes
checking for void * size ... 4 bytes
checking for uint64_t ... found
checking for sig_atomic_t ... found
checking for sig_atomic_t size ... 4 bytes
checking for socklen_t ... found
checking for in_addr_t ... found
checking for in_port_t ... found
checking for rlim_t ... found
checking for uintptr_t ... uintptr_t found
checking for system byte ordering ... little endian
checking for size_t size ... 4 bytes
checking for off_t size ... 8 bytes
checking for time_t size ... 4 bytes
checking for setproctitle() ... not found
checking for pread() ... found
checking for pwrite() ... found
checking for sys_nerr ... found
checking for localtime_r() ... found
checking for posix_memalign() ... found
checking for memalign() ... found
checking for mmap(MAP_ANON|MAP_SHARED) ... found #也找到了
checking for mmap("/dev/zero", MAP_SHARED) ... found #也找到了
checking for System V shared memory ... found
checking for POSIX semaphores ... not found
checking for POSIX semaphores in libpthread ... found
checking for struct msghdr.msg_control ... found
checking for ioctl(FIONBIO) ... found
checking for struct tm.tm_gmtoff ... found
checking for struct dirent.d_namlen ... not found
checking for struct dirent.d_type ... found
checking for sysconf(_SC_NPROCESSORS_ONLN) ... found
checking for openat(), fstatat() ... found
checking for getaddrinfo() ... found
checking for OpenSSL library ... found
checking for zlib library ... found
checking for GD library ... not found
checking for GD library in /usr/local/ ... not found
checking for GD library in /usr/pkg/ ... not found
checking for GD library in /opt/local/ ... not found
./configure: error: the HTTP image filter module requires the GD library. #缺少 GD库模块?
You can either do not enable the module or install the libraries.
[root@master nginx-1.4.7]#
马哥那边是缺少 OpenSSL 模块

马哥看openssl 缺哪些模块 可能openssl-devel没装,都在base当中
# yum list all | grep openssl

马哥看 openssl-devel的信息,没看到属于哪个组 #yum info openssl-devel

# yum -y install openssl-devel
#装了一大堆东西,其实都是基本需要的开发库


#rpm -qi openssl-devel #看到了属于Development/Libraries组,Development/Libraries应该已经装过了,马哥说openssl-devel 可能属于额外包,属于这个组以外,默认不是安装的包,??????
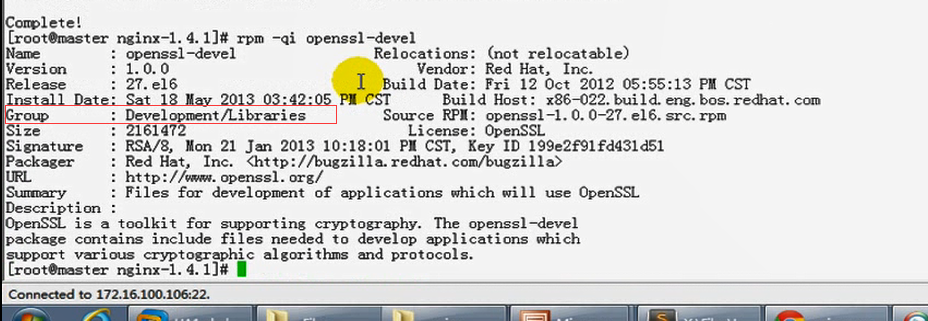
[root@master nginx-1.4.7]# yum -y install gd #安装gd看看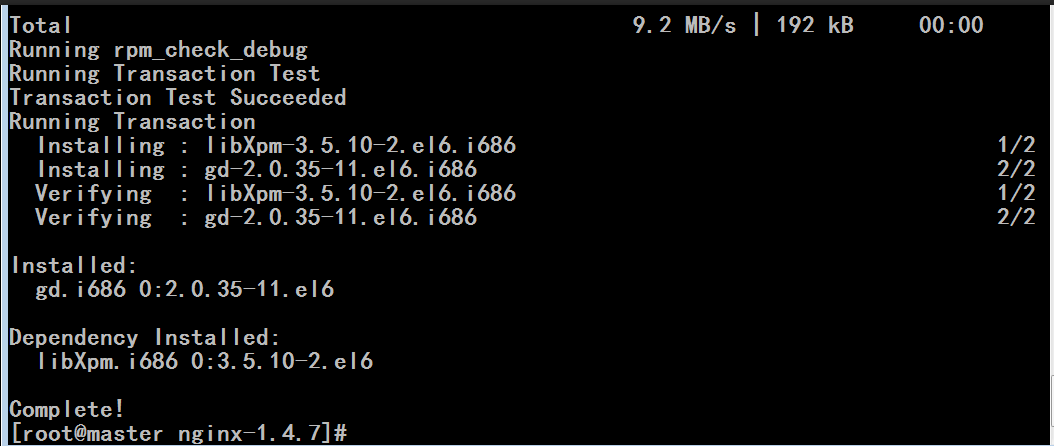
[root@master nginx-1.4.7]# ./configure --prefix=/usr --sbin-path=/usr/sbin/nginx --conf-path=/etc/nginx/nginx.conf --error-log-path=/var/log/nginx/error.log --http-log-path=/var/log/nginx/access.log --pid-path=/var/run/nginx/nginx.pid --lock-path=/var/lock/nginx.lock --user=nginx --group=nginx --with-http_ssl_module --with-http_flv_module --with-http_stub_status_module --with-http_gzip_static_module --http-client-body-temp-path=/var/tmp/nginx/client/ --http-proxy-temp-path=/var/tmp/nginx/proxy/ --http-fastcgi-temp-path=/var/tmp/nginx/fcgi/ --http-uwsgi-temp-path=/var/tmp/nginx/uwsgi --http-scgi-temp-path=/var/tmp/nginx/scgi --with-pcre=/usr --with-http_image_filter_module
#仍报缺少gd的错 #./configure --with-pcre=/usr 好像有时这里应该去掉了=/usr ,否则make时会报错
马哥重新执行

#发觉也缺少GD库
[root@master ~]# yum list all | grep gd
eggdbus.i686 0.6-3.el6 @anac onda-RedHatEnterpriseLinux-201805250237.i386/6.10
gd.i686 2.0.35-11.el6 @Base
gdb.i686 7.2-92.el6 @anac onda-RedHatEnterpriseLinux-201805250237.i386/6.10
gdbm.i686 1.8.0-39.el6 @anac onda-RedHatEnterpriseLinux-201805250237.i386/6.10
gdbm-devel.i686 1.8.0-39.el6 @anac onda-RedHatEnterpriseLinux-201805250237.i386/6.10
gdk-pixbuf2.i686 2.24.1-6.el6_7 @anac onda-RedHatEnterpriseLinux-201805250237.i386/6.10
cgdcbxd.i686 1.0.1-2.el6 Base
gdb-gdbserver.i686 7.2-92.el6 Base
gdisk.i686 0.8.10-1.el6 Base
gdk-pixbuf2-devel.i686 2.24.1-6.el6_7 Base
gdm.i686 1:2.30.4-69.el6 Base
gdm-libs.i686 1:2.30.4-69.el6 Base
gdm-plugin-fingerprint.i686 1:2.30.4-69.el6 Base
gdm-plugin-smartcard.i686 1:2.30.4-69.el6 Base
gdm-user-switch-applet.i686 1:2.30.4-69.el6 Base
hunspell-gd.noarch 1.0.0-0.3.rc.2.el6 Base
libgdata.i686 0.6.4-2.el6 Base
libgdata-devel.i686 0.6.4-2.el6 Base
php-gd.i686 5.3.3-49.el6 Base
plymouth-gdm-hooks.i686 0.8.3-29.el6 Base
pulseaudio-gdm-hooks.i686 0.9.21-26.el6 Base
[root@master ~]#
马哥 # yum -y install gd

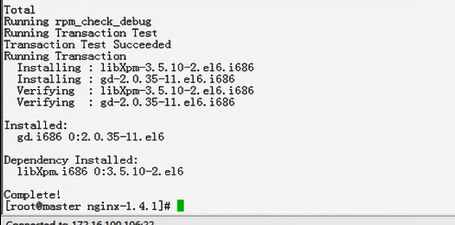
马哥继续配置 nginx

#马哥仍报缺少gd的错

[root@master nginx-1.4.7]# rpm -qi gd #查一下gd库的安装信息
Name : gd Relocations: (not relocatable)
Version : 2.0.35 Vendor: Red Hat, Inc.
Release : 11.el6 Build Date: 2012年09月10日 星期一 14时49分27秒
Install Date: 2021年04月09日 星期五 18时00分15秒 Build Host: x86-001.build.bos.redhat.com
Group : System Environment/Libraries Source RPM: gd-2.0.35-11.el6.src.rpm #这里
Size : 536520 License: MIT
Signature : RSA/8, 2012年09月13日 星期四 21时20分21秒, Key ID 199e2f91fd431d51
Packager : Red Hat, Inc. <http://bugzilla.redhat.com/bugzilla>
URL : http://www.libgd.org/Main_Page
Summary : A graphics library for quick creation of PNG or JPEG images #这里
Description :
The gd graphics library allows your code to quickly draw images
complete with lines, arcs, text, multiple colors, cut and paste from
other images, and flood fills, and to write out the result as a PNG or
JPEG file. This is particularly useful in Web applications, where PNG
and JPEG are two of the formats accepted for inline images by most
browsers. Note that gd is not a paint program.
[root@master nginx-1.4.7]#
[root@master nginx-1.4.7]# ldconfig #通知系统重新搜索库文件 ldconfig是一个动态链接库管理命令,为了让动态链接库为系统所共享,还需运行动态链接库的管理命令--ldconfig。 ldconfig 命令的用途,主要是在默认搜寻目录(/lib和/usr/lib)以及动态库配置文件/etc/ld.so.conf内所列的目录下,搜索出可共享的动态链接库(格式如前介绍,lib*.so*),进而创建出动态装入程序(ld.so)所需的连接和缓存文件,缓存文件默认为 /etc/ld.so.cache,此文件保存已排好序的动态链接库名字列表。
[root@master nginx-1.4.7]#
马哥再继续配置 nginx

#马哥仍报缺少gd的错

仍然不行,去掉 http image filter module 这个模块吧
[root@master nginx-1.4.7]# ./configure \
> --prefix=/usr \
> --sbin-path=/usr/sbin/nginx \
> --conf-path=/etc/nginx/nginx.conf \
> --error-log-path=/var/log/nginx/error.log \
> --http-log-path=/var/log/nginx/access.log \
> --pid-path=/var/run/nginx/nginx.pid \
> --lock-path=/var/lock/nginx.lock \
> --user=nginx \
> --group=nginx \
> --with-http_ssl_module \
> --with-http_flv_module \
> --with-http_stub_status_module \
> --with-http_gzip_static_module \
> --http-client-body-temp-path=/var/tmp/nginx/client/ \
> --http-proxy-temp-path=/var/tmp/nginx/proxy/ \
> --http-fastcgi-temp-path=/var/tmp/nginx/fcgi/ \
> --http-uwsgi-temp-path=/var/tmp/nginx/uwsgi \
> --http-scgi-temp-path=/var/tmp/nginx/scgi \
> --with-pcre=/usr #好像有时这里应该去掉了=/usr ,否则make时会报错
#由下图配置成功
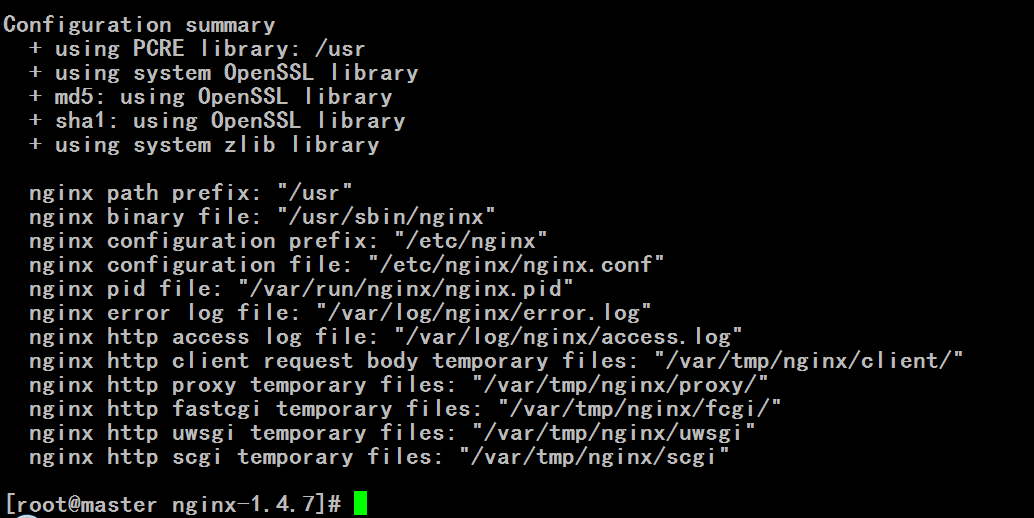
[root@master nginx-1.4.7]# pwd
/root/nginx-1.4.7
[root@master nginx-1.4.7]# make #这里make出了问题
make -f objs/Makefile
make[1]: Entering directory `/root/nginx-1.4.7'
cd /usr \
&& if [ -f Makefile ]; then make distclean; fi \
&& CC="cc" CFLAGS="-O2 -fomit-frame-pointer -pipe " \
./configure --disable-shared
/bin/sh: line 2: ./configure: 没有那个文件或目录
make[1]: *** [/usr/Makefile] 错误 127
make[1]: Leaving directory `/root/nginx-1.4.7'
make: *** [build] 错误 2
[root@master nginx-1.4.7]#
在红帽5上试一下
红帽5上
[root@node1 ~]# wget http://nginx.org/download/nginx-1.4.7.tar.gz
--2021-04-10 09:24:06-- http://nginx.org/download/nginx-1.4.7.tar.gz
正在解析主机 nginx.org... 52.58.199.22, 3.125.197.172, 2a05:d014:edb:5704::6, ...
Connecting to nginx.org|52.58.199.22|:80... 已连接。
已发出 HTTP 请求,正在等待回应... 200 OK
长度:769153 (751K) [application/octet-stream]
Saving to: `nginx-1.4.7.tar.gz'
100%[======================================>] 769,153 372K/s in 2.0s
2021-04-10 09:24:08 (372 KB/s) - `nginx-1.4.7.tar.gz' saved [769153/769153]
[root@node1 ~]#
在红帽6上
[root@master nginx-1.4.7]# yum groupinfo "Compatibility libraries" #兼容库,某个组的相关软件包
已加载插件:product-id, search-disabled-repos, security, subscription-manager
This system is not registered with an entitlement server. You can use subscription-manager to register.
设置组进程
组:兼容程序库
描述:用于在红帽企业版 Linux 的之前版本中构建的应用程序的兼容程序库。
默认的软件包:
compat-db #
compat-expat1
compat-glibc #
compat-libcap1
compat-libf2c-34
compat-libgcc-296 #
compat-libgfortran-41
compat-libstdc++-295
compat-libstdc++-296
compat-libstdc++-33
compat-libtermcap
compat-openldap
compat-openmpi
compat-openmpi-psm
compat-opensm-libs
compat-readline5
compat-xcb-util
openssl098e #
[root@master nginx-1.4.7]#
[root@master nginx-1.4.7]# yum groupinfo "Debugging Tools"
Loaded plugins: product-id, search-disabled-repos, security, subscription-
: manager
This system is not registered with an entitlement server. You can use subscription-manager to register.
Setting up Group Process
Group: Debugging Tools
Description: Tools for debugging misbehaving applications and diagnosing performance problems.
Mandatory Packages:
gdb
kexec-tools
latrace
libreport-python
strace
systemtap-runtime
Default Packages:
abrt-addon-ccpp
abrt-addon-python
abrt-cli
cas
crash
crash-gcore-command
crash-trace-command
elfutils
ltrace
trace-cmd
valgrind
Optional Packages:
flightrecorder
gdb-gdbserver
glibc-utils
lslk
memtest86+
ps_mem
systemtap-client
systemtap-initscript
[root@master nginx-1.4.7]#
[root@master nginx-1.4.7]# yum grouplist
Loaded plugins: product-id, search-disabled-repos, security, subscription-
: manager
This system is not registered with an entitlement server. You can use subscription-manager to register.
Setting up Group Process
Installed Groups:
Additional Development
Base
Compatibility libraries
Console internet tools
Debugging Tools
Desktop Platform
Development tools
Directory Client
E-mail server
Fonts
General Purpose Desktop
Graphical Administration Tools
Hardware monitoring utilities
Input Methods
Java Platform #这个用不上吧
Large Systems Performance
Legacy UNIX compatibility
Legacy X Window System compatibility
NFS file server
Network file system client
Networking Tools
Performance Tools
Perl Support
Scientific support
Security Tools
Server Platform
Server Platform Development
Installed Language Groups:
Arabic Support [ar]
Armenian Support [hy]
Chinese Support [zh]
Georgian Support [ka]
Hebrew Support [he]
Inuktitut Support [iu]
Japanese Support [ja]
Korean Support [ko]
Lao Support [lo]
Tajik Support [tg]
Available Groups:
Backup Client
Backup Server
CIFS file server
Client management tools
Desktop
Desktop Debugging and Performance Tools
Desktop Platform Development
Dial-up Networking Support
Directory Server
Eclipse
Emacs
FCoE Storage Client
FTP server
Graphics Creation Tools
Guest Agents
Identity Management Server
Infiniband Support
Internet Browser
KDE Desktop
Mainframe Access
Messaging Client Support
MySQL Database client
MySQL Database server
Network Infrastructure Server
Network Storage Server
PHP Support
PostgreSQL Database client
PostgreSQL Database server
Print Server
Printing client
Remote Desktop Clients
Ruby Support
SNMP Support
Smart card support
Storage Availability Tools
System Management
System administration tools
TeX support
Technical Writing
TurboGears application framework
Virtualization
Virtualization Client
Virtualization Platform
Virtualization Tools
Web Server
Web Servlet Engine
Web-Based Enterprise Management
X Window System
iSCSI Storage Client
Available Language Groups:
Afrikaans Support [af]
Albanian Support [sq]
Amazigh Support [ber]
Assamese Support [as]
Azerbaijani Support [az]
Basque Support [eu]
Belarusian Support [be]
Bengali Support [bn]
Bhutanese Support [dz]
Brazilian Portuguese Support [pt_BR]
Breton Support [br]
Bulgarian Support [bg]
Catalan Support [ca]
Chhattisgarhi Support [hne]
Chichewa Support [ny]
Coptic Support [cop]
Croatian Support [hr]
Czech Support [cs]
Danish Support [da]
Dutch Support [nl]
English (UK) Support [en_GB]
Esperanto Support [eo]
Estonian Support [et]
Ethiopic Support [am]
Faroese Support [fo]
Fijian Support [fj]
Filipino Support [fil]
Finnish Support [fi]
French Support [fr]
Frisian Support [fy]
Friulian Support [fur]
Gaelic Support [gd]
Galician Support [gl]
German Support [de]
Greek Support [el]
Gujarati Support [gu]
Hiligaynon Support [hil]
Hindi Support [hi]
Hungarian Support [hu]
Icelandic Support [is]
Indonesian Support [id]
Interlingua Support [ia]
Irish Support [ga]
Italian Support [it]
Kannada Support [kn]
Kashmiri Support [ks]
Kashubian Support [csb]
Kazakh Support [kk]
Khmer Support [km]
Kinyarwanda Support [rw]
Konkani Support [kok]
Kurdish Support [ku]
Latin Support [la]
Latvian Support [lv]
Lithuanian Support [lt]
Low Saxon Support [nds]
Luxembourgish Support [lb]
Macedonian Support [mk]
Maithili Support [mai]
Malagasy Support [mg]
Malay Support [ms]
Malayalam Support [ml]
Maltese Support [mt]
Manx Support [gv]
Maori Support [mi]
Marathi Support [mr]
Mongolian Support [mn]
Myanmar (Burmese) Support [my]
Nepali Support [ne]
Northern Sotho Support [nso]
Norwegian Support [nb]
Occitan Support [oc]
Oriya Support [or]
Persian Support [fa]
Polish Support [pl]
Portuguese Support [pt]
Punjabi Support [pa]
Romanian Support [ro]
Russian Support [ru]
Sanskrit Support [sa]
Sardinian Support [sc]
Serbian Support [sr]
Sindhi Support [sd]
Sinhala Support [si]
Slovak Support [sk]
Slovenian Support [sl]
Somali Support [so]
Southern Ndebele Support [nr]
Southern Sotho Support [st]
Spanish Support [es]
Swahili Support [sw]
Swati Support [ss]
Swedish Support [sv]
Tagalog Support [tl]
Tamil Support [ta]
Telugu Support [te]
Tetum Support [tet]
Thai Support [th]
Tibetan Support [bo]
Tsonga Support [ts]
Tswana Support [tn]
Turkish Support [tr]
Turkmen Support [tk]
Ukrainian Support [uk]
Upper Sorbian Support [hsb]
Urdu Support [ur]
Uzbek Support [uz]
Venda Support [ve]
Vietnamese Support [vi]
Walloon Support [wa]
Welsh Support [cy]
Xhosa Support [xh]
Zulu Support [zu]
Done
[root@master nginx-1.4.7]#
在红帽5上
[root@node1 ~]# groupadd -r -g 108 nginx
[root@node1 ~]# useradd -r -g 108 -u 108 nginx
[root@node1 ~]#

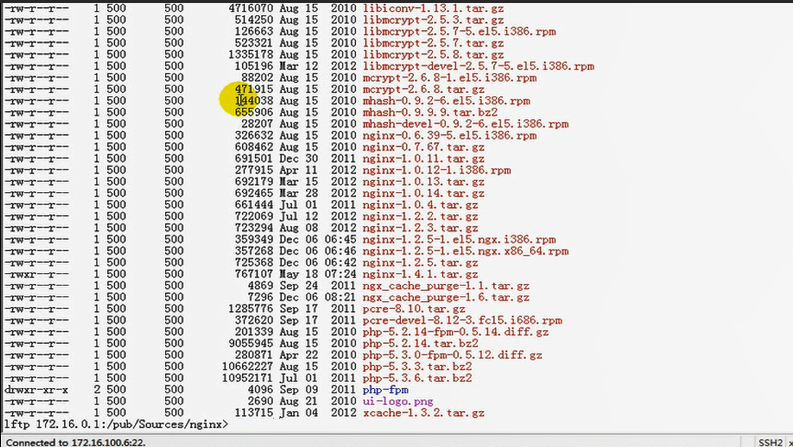

[root@node1 ~]# date
2021年 04月 10日 星期六 10:08:16 CST
[root@node1 ~]#
[root@node1 ~]# tar xf nginx-1.4.7.tar.gz
[root@node1 ~]#
[root@node1 ~]# yum -y install pcre-devel
Loaded plugins: product-id, security, subscription-manager
This system is not registered to Red Hat Subscription Management. You can use subscription-manager to register.
Setting up Install Process
Package pcre-devel-6.6-9.el5.i386 already installed and latest version
Nothing to do
[root@node1 ~]#
[root@node1 ~]# cd nginx-1.4.7
[root@node1 nginx-1.4.7]# ./configure \
> --prefix=/usr \
> --sbin-path=/usr/sbin/nginx \
> --conf-path=/etc/nginx/nginx.conf \
--http-log-path=/var/log/nginx/access.log \
> --error-log-path=/var/log/nginx/error.log \
> --http-log-path=/var/log/nginx/access.log \
> --pid-path=/var/run/nginx/nginx.pid \
> --lock-path=/var/lock/nginx.lock \
--http-client-body-temp-path=/var/tmp/nginx/client/ \
> --user=nginx \
> --group=nginx \
> --with-http_ssl_module \
> --with-http_flv_module \
> --with-http_stub_status_module \
> --with-http_gzip_static_module \
> --http-client-body-temp-path=/var/tmp/nginx/client/ \
> --http-proxy-temp-path=/var/tmp/nginx/proxy/ \
> --http-fastcgi-temp-path=/var/tmp/nginx/fcgi/ \
> --http-uwsgi-temp-path=/var/tmp/nginx/uwsgi \
> --http-scgi-temp-path=/var/tmp/nginx/scgi \
> --with-pcre=/usr #好像有时这里应该去掉了=/usr ,否则make时会报错
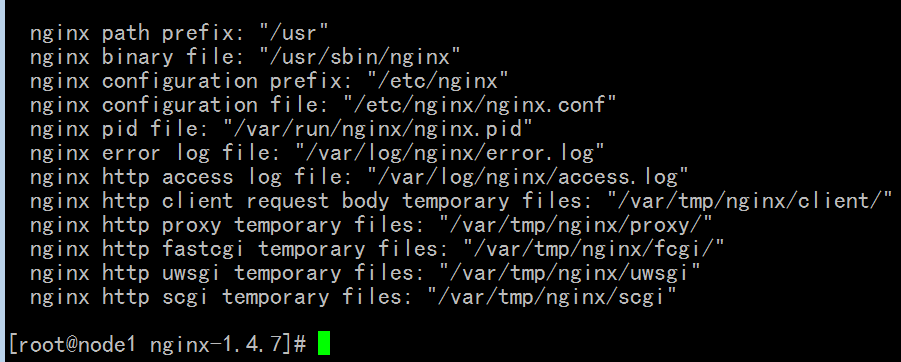
[root@node1 nginx-1.4.7]# make #红帽5上依然报同样的错
make -f objs/Makefile
make[1]: Entering directory `/root/nginx-1.4.7'
cd /usr \
&& if [ -f Makefile ]; then make distclean; fi \
&& CC="cc" CFLAGS="-O2 -fomit-frame-pointer -pipe " \
./configure --disable-shared
/bin/sh: line 2: ./configure: 没有那个文件或目录
make[1]: *** [/usr/Makefile] 错误 127
make[1]: Leaving directory `/root/nginx-1.4.7'
make: *** [build] 错误 2
[root@node1 nginx-1.4.7]#
http://nginx.org/en/linux_packages.html
http://nginx.org/en/linux_packages.html#sourcepackages
http://hg.nginx.org/pkg-oss?_ga=2.132278734.1725422646.1617944379-1844407664.1616654774
(根据上面三个网址找不到下载的地方)
http://nginx.org/packages/mainline/centos/5/SRPMS/
http://nginx.org/packages/mainline/rhel/5/SRPMS/
(根据上面两个网址可以找到下载的地方)
下载下面这个吧源码的rpm包
http://nginx.org/packages/mainline/rhel/5/SRPMS/nginx-1.5.0-1.el5.ngx.src.rpm
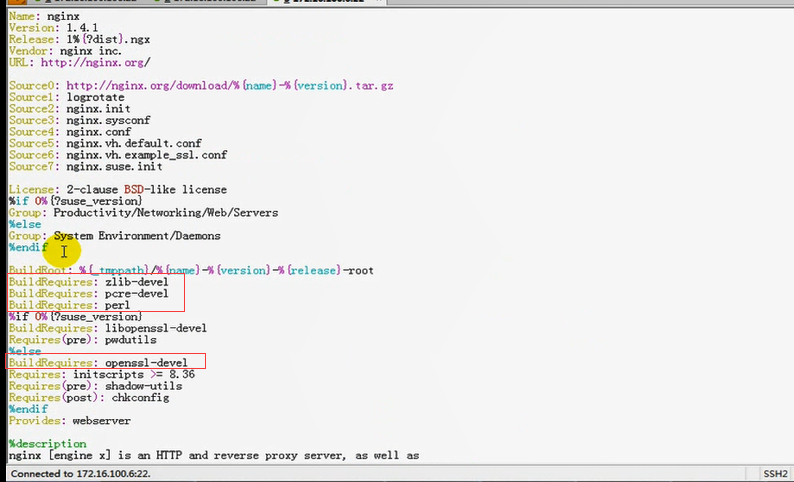
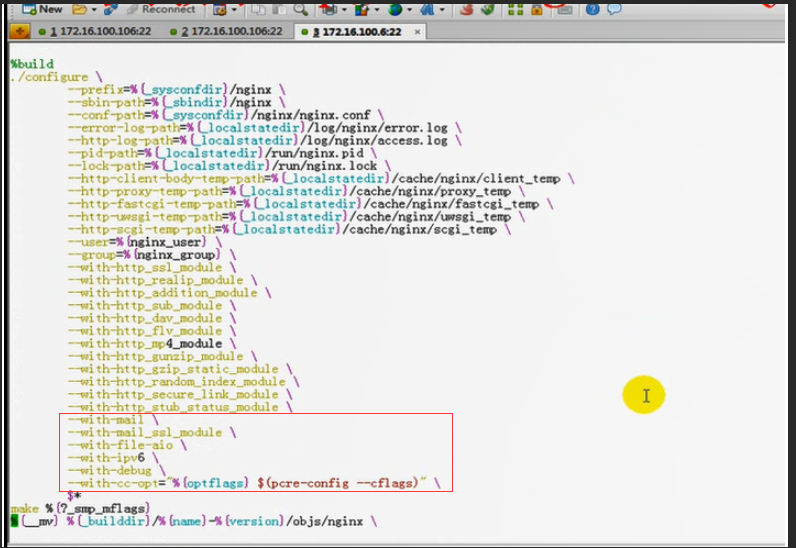
这个rpm包里面有个叫做spec的文档(rpm包安装后生成的文档),也就是说,官方制作rpm包的时候,它里面一定会加进去一些编译时使用的配置选项,我们看看编译选项是不是哪里有问题,所以下载这个src格式的rpm包

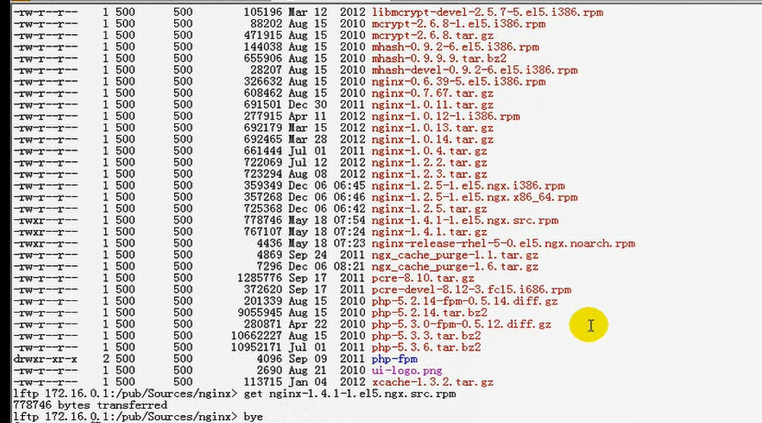


看看到底依赖了什么,配置时倒底使用了什么,
在红帽5上
[root@node1 ~]# wget http://nginx.org/packages/mainline/rhel/5/SRPMS/nginx-1.5.0-1.el5.ngx.src.rpm
--2021-04-10 10:40:40-- http://nginx.org/packages/mainline/rhel/5/SRPMS/nginx-1.5.0-1.el5.ngx.src.rpm
正在解析主机 nginx.org... 52.58.199.22, 3.125.197.172, 2a05:d014:edb:5702::6, ...
Connecting to nginx.org|52.58.199.22|:80... 已连接。
已发出 HTTP 请求,正在等待回应... 200 OK
长度:778815 (761K) [application/x-redhat-package-manager]
Saving to: `nginx-1.5.0-1.el5.ngx.src.rpm'
100%[======================================>] 778,815 372K/s in 2.0s
2021-04-10 10:40:43 (372 KB/s) - `nginx-1.5.0-1.el5.ngx.src.rpm' saved [778815/778815]
[root@node1 ~]# rpm -ivh nginx-1.5.0-1.el5.ngx.src.rpm
warning: nginx-1.5.0-1.el5.ngx.src.rpm: Header V3 RSA/SHA1 signature: NOKEY, key ID 7bd9bf62
1:nginx warning: user fabler does not exist - using root
warning: group staff does not exist - using root
warning: user fabler does not exist - using root
warning: group staff does not exist - using root
warning: user fabler does not exist - using root%)
warning: group staff does not exist - using root
warning: user fabler does not exist - using root
warning: group staff does not exist - using root
warning: user fabler does not exist - using root
warning: group staff does not exist - using root
########################################### [100%]
warning: user fabler does not exist - using root
warning: group staff does not exist - using root
warning: user fabler does not exist - using root
warning: group staff does not exist - using root
warning: user fabler does not exist - using root
warning: group staff does not exist - using root
warning: user fabler does not exist - using root
warning: group staff does not exist - using root
[root@node1 ~]#
[root@node1 ~]# updatedb
[root@node1 ~]#
[root@node1 ~]# cd /usr/src/redhat/SPECS/
[root@node1 SPECS]#
[root@node1 SPECS]# ls
nginx.spec
[root@node1 SPECS]#
......................................................
29 BuildRoot: %{_tmppath}/%{name}-%{version}-%{release}-root
30 BuildRequires: zlib-devel
31 BuildRequires: pcre-devel
32 BuildRequires: perl
33 %if 0%{?suse_version}
34 BuildRequires: libopenssl-devel
35 Requires(pre): pwdutils
36 %else
37 BuildRequires: openssl-devel
38 Requires: initscripts >= 8.36
39 Requires(pre): shadow-utils
40 Requires(post): chkconfig
41 %endif
42 Provides: webserver
.............................................
57
58 %build
59 ./configure \
60 --prefix=%{_sysconfdir}/nginx \
61 --sbin-path=%{_sbindir}/nginx \
62 --conf-path=%{_sysconfdir}/nginx/nginx.conf \
63 --error-log-path=%{_localstatedir}/log/nginx/error.log \
64 --http-log-path=%{_localstatedir}/log/nginx/access.log \
65 --pid-path=%{_localstatedir}/run/nginx.pid \
66 --lock-path=%{_localstatedir}/run/nginx.lock \
67 --http-client-body-temp-path=%{_localstatedir}/cache/nginx/client_temp \
68 --http-proxy-temp-path=%{_localstatedir}/cache/nginx/proxy_temp \
69 --http-fastcgi-temp-path=%{_localstatedir}/cache/nginx/fastcgi_temp \
70 --http-uwsgi-temp-path=%{_localstatedir}/cache/nginx/uwsgi_temp \
71 --http-scgi-temp-path=%{_localstatedir}/cache/nginx/scgi_temp \
72 --user=%{nginx_user} \
73 --group=%{nginx_group} \
74 --with-http_ssl_module \
75 --with-http_realip_module \
76 --with-http_addition_module \
77 --with-http_sub_module \
78 --with-http_dav_module \
79 --with-http_flv_module \
80 --with-http_mp4_module \
81 --with-http_gunzip_module \
82 --with-http_gzip_static_module \
83 --with-http_random_index_module \
84 --with-http_secure_link_module \
85 --with-http_stub_status_module \
86 --with-mail \
87 --with-mail_ssl_module \
88 --with-file-aio \
89 --with-ipv6 \
90 --with-debug \
91 --with-cc-opt="%{optflags} $(pcre-config --cflags)" \
92 $*
.............................................
[root@node1 SPECS]# rpmbuild -ba nginx.spec #好像也有问题
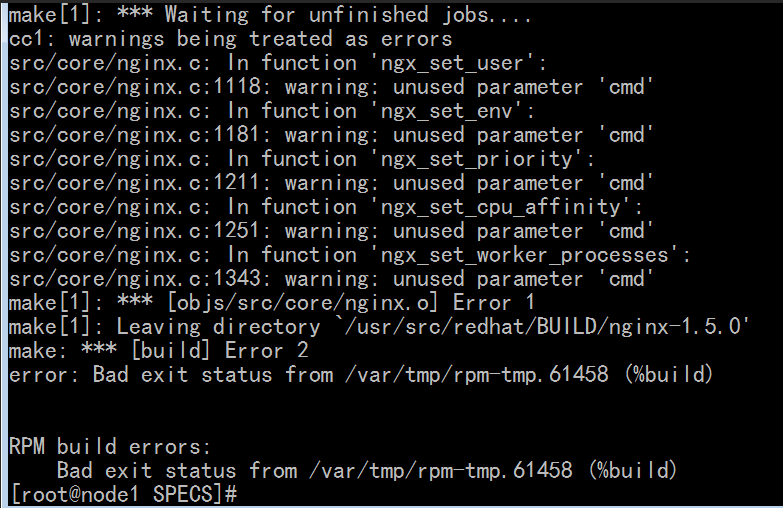
马哥重新下载试试nginx-1.2.5的版本,看这个版本有没有问题

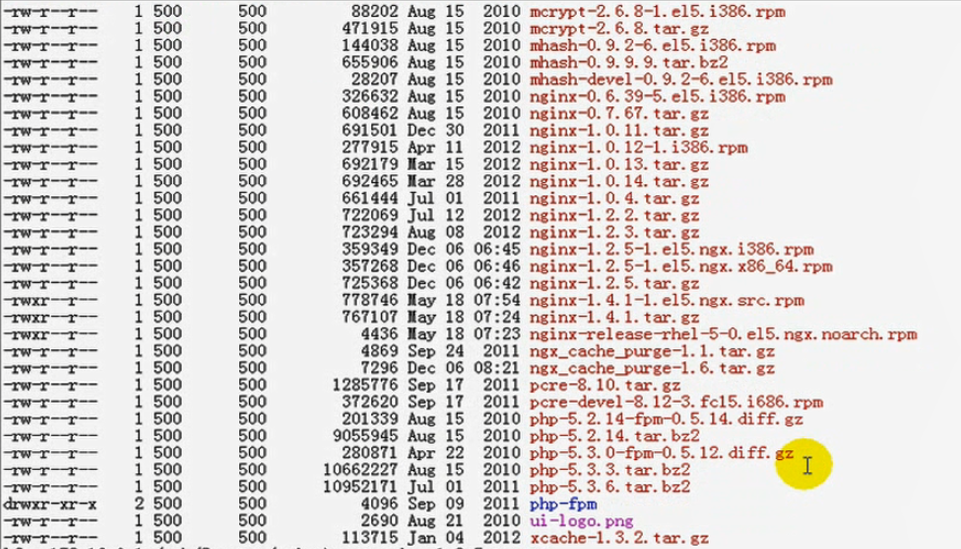


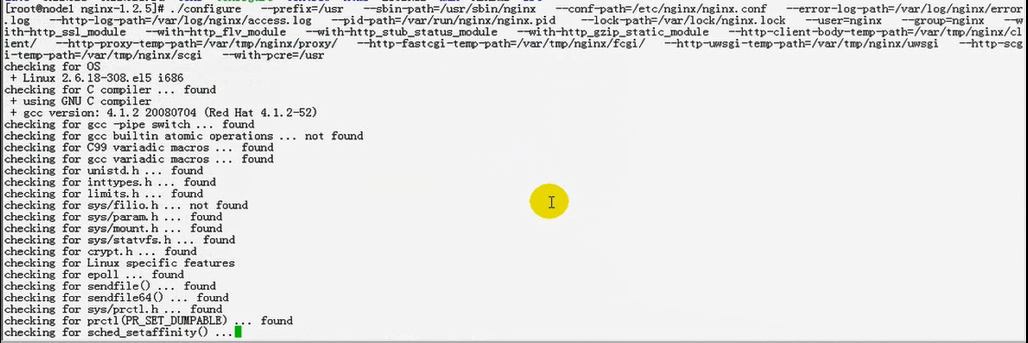
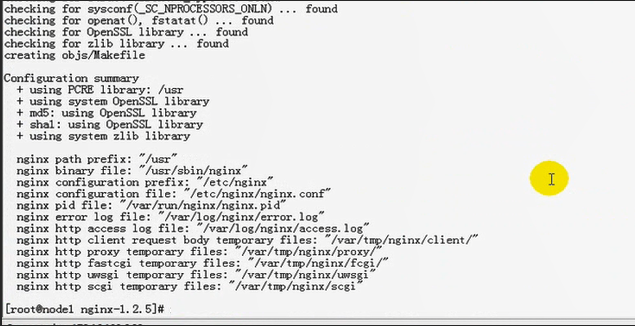
# make 依然有问题

马哥再试 nginx1.2.2,他想确保什么问题,是版本的问题,还是什么问题?

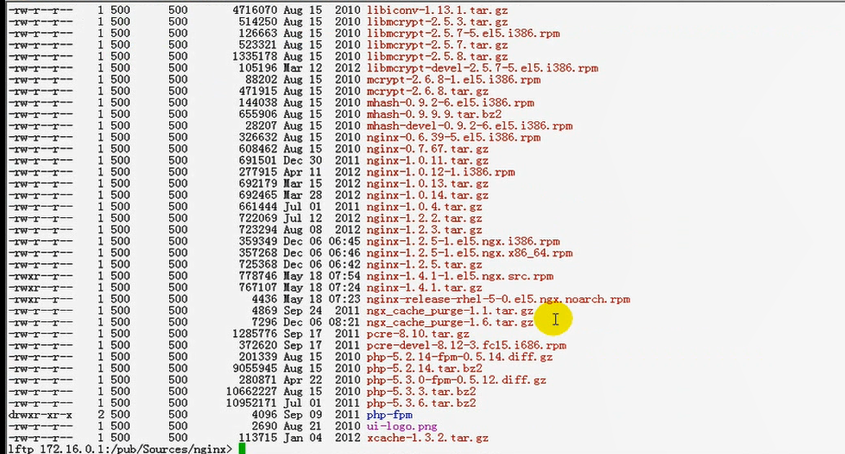


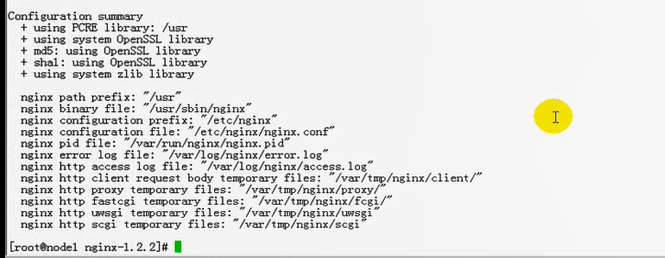
# make 依然报错

--with-pcre 后面的=路径去掉就可以了,
马哥说,此前曾做过一次,不指定路径是不可以的,
而又有一次,不指定路径是可以的
这里我们就不要加路径了

现在在红帽6上
[root@master nginx-1.4.7]# make clean #清理一下编译
rm -rf Makefile objs
[root@master nginx-1.4.7]#
[root@master nginx-1.4.7]# ./configure \
> --prefix=/usr \
> --sbin-path=/usr/sbin/nginx \
> --conf-path=/etc/nginx/nginx.conf \
> --error-log-path=/var/log/nginx/error.log \
> --http-log-path=/var/log/nginx/access.log \
> --pid-path=/var/run/nginx/nginx.pid \
> --lock-path=/var/lock/nginx.lock \
> --user=nginx \
> --group=nginx \
> --with-http_ssl_module \
> --with-http_flv_module \
> --with-http_stub_status_module \
> --with-http_gzip_static_module \
> --http-client-body-temp-path=/var/tmp/nginx/client/ \
> --http-proxy-temp-path=/var/tmp/nginx/proxy/ \
> --http-fastcgi-temp-path=/var/tmp/nginx/fcgi/ \
> --http-uwsgi-temp-path=/var/tmp/nginx/uwsgi \
> --http-scgi-temp-path=/var/tmp/nginx/scgi \
> --with-pcre \ #这里去掉了=/usr 好像有时这里应该去掉了=/usr ,否则make时会报错
> --with-file-aio
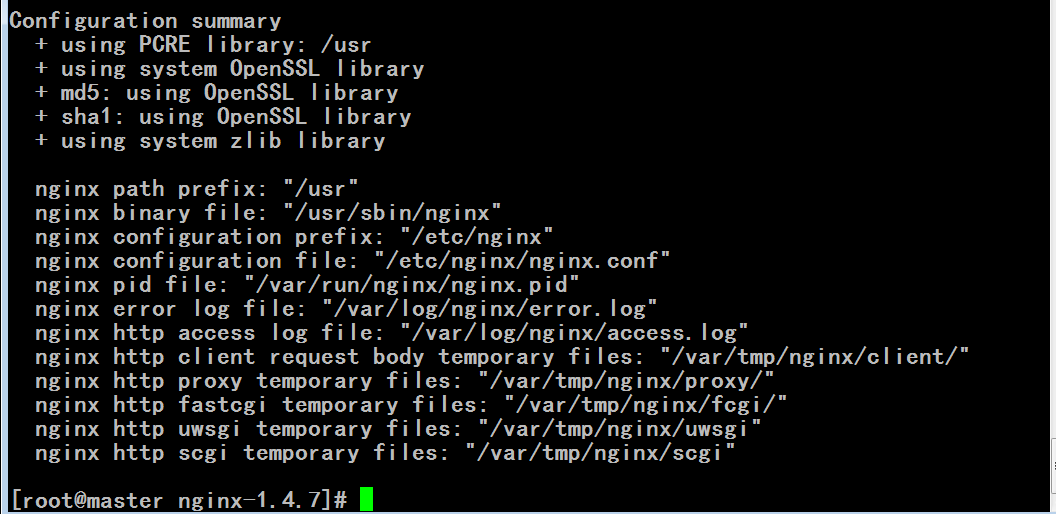
[root@master nginx-1.4.7]# make
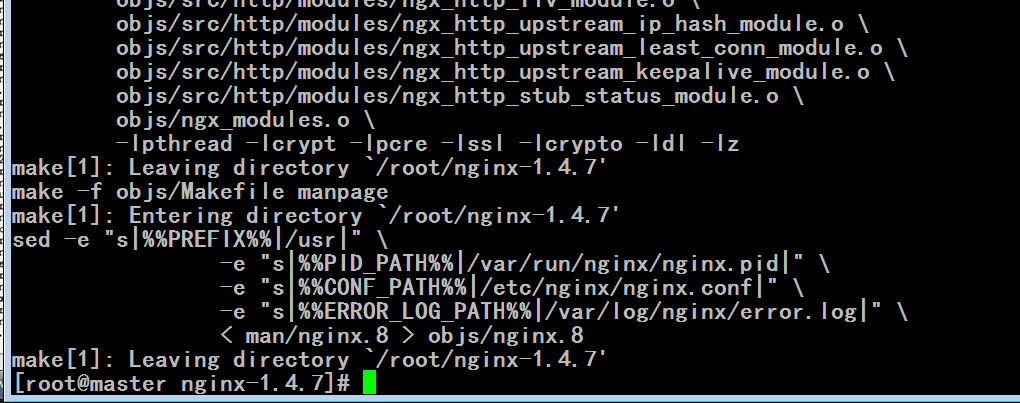
[root@master nginx-1.4.7]# make install #安装的时候就是创建了几个目录,复制了几个配置文件
make -f objs/Makefile install
make[1]: Entering directory `/root/nginx-1.4.7'
test -d '/usr' || mkdir -p '/usr'
test -d '/usr/sbin' || mkdir -p '/usr/sbin'
test ! -f '/usr/sbin/nginx' || mv '/usr/sbin/nginx' '/usr/sbin/nginx.old'
cp objs/nginx '/usr/sbin/nginx'
test -d '/etc/nginx' || mkdir -p '/etc/nginx'
cp conf/koi-win '/etc/nginx'
cp conf/koi-utf '/etc/nginx'
cp conf/win-utf '/etc/nginx'
test -f '/etc/nginx/mime.types' || cp conf/mime.types '/etc/nginx'
cp conf/mime.types '/etc/nginx/mime.types.default'
test -f '/etc/nginx/fastcgi_params' || cp conf/fastcgi_params '/etc/nginx'
cp conf/fastcgi_params '/etc/nginx/fastcgi_params.default'
test -f '/etc/nginx/fastcgi.conf' || cp conf/fastcgi.conf '/etc/nginx'
cp conf/fastcgi.conf '/etc/nginx/fastcgi.conf.default'
test -f '/etc/nginx/uwsgi_params' || cp conf/uwsgi_params '/etc/nginx'
cp conf/uwsgi_params '/etc/nginx/uwsgi_params.default'
test -f '/etc/nginx/scgi_params' || cp conf/scgi_params '/etc/nginx'
cp conf/scgi_params '/etc/nginx/scgi_params.default'
test -f '/etc/nginx/nginx.conf' || cp conf/nginx.conf '/etc/nginx/nginx.conf'
cp conf/nginx.conf '/etc/nginx/nginx.conf.default'
test -d '/var/run/nginx' || mkdir -p '/var/run/nginx'
test -d '/var/log/nginx' || mkdir -p '/var/log/nginx'
test -d '/usr/html' || cp -R html '/usr'
test -d '/var/log/nginx' || mkdir -p '/var/log/nginx'
make[1]: Leaving directory `/root/nginx-1.4.7'
[root@master nginx-1.4.7]#
启动脚本,(根据马哥的复制过来的) 这是修改好了,适合我们编译的时候,按照我们编译所指定的选项这种方式来进行这样写的一种结果,只要编译选项没改,应该都是可以用的
[root@master nginx-1.4.7]# vim /etc/rc.d/init.d/nginx
#!/bin/sh
#
# nginx - this script starts and stops the nginx daemon
#
# chkconfig: - 85 15
# description: Nginx is an HTTP(S) server, HTTP(S) reverse \
# proxy and IMAP/POP3 proxy server
# processname: nginx
# config: /etc/nginx/nginx.conf
# config: /etc/sysconfig/nginx
# pidfile: /var/run/nginx.pid
# Source function library.
. /etc/rc.d/init.d/functions
# Source networking configuration.
. /etc/sysconfig/network
# Check that networking is up.
[ "$NETWORKING" = "no" ] && exit 0
nginx="/usr/sbin/nginx"
prog=$(basename $nginx)
NGINX_CONF_FILE="/etc/nginx/nginx.conf"
[ -f /etc/sysconfig/nginx ] && . /etc/sysconfig/nginx
lockfile=/var/lock/subsys/nginx
make_dirs() {
# make required directories
user=`nginx -V 2>&1 | grep "configure arguments:" | sed 's/[^*]*--user=\([^ ]*\).*/\1/g' -`
options=`$nginx -V 2>&1 | grep 'configure arguments:'`
for opt in $options; do
if [ `echo $opt | grep '.*-temp-path'` ]; then
value=`echo $opt | cut -d "=" -f 2`
if [ ! -d "$value" ]; then
# echo "creating" $value
mkdir -p $value && chown -R $user $value
fi
fi
done
}
start() {
[ -x $nginx ] || exit 5
[ -f $NGINX_CONF_FILE ] || exit 6
make_dirs
echo -n $"Starting $prog: "
daemon $nginx -c $NGINX_CONF_FILE
retval=$?
echo
[ $retval -eq 0 ] && touch $lockfile
return $retval
}
stop() {
echo -n $"Stopping $prog: "
killproc $prog -QUIT
retval=$?
echo
[ $retval -eq 0 ] && rm -f $lockfile
return $retval
}
restart() {
configtest || return $?
stop
sleep 1
start
}
reload() {
configtest || return $?
echo -n $"Reloading $prog: "
killproc $nginx -HUP
RETVAL=$?
echo
}
force_reload() {
restart
}
configtest() {
$nginx -t -c $NGINX_CONF_FILE
}
rh_status() {
status $prog
}
rh_status_q() {
rh_status >/dev/null 2>&1
}
case "$1" in
start)
rh_status_q && exit 0
$1
;;
stop)
rh_status_q || exit 0
$1
;;
restart|configtest)
$1
;;
reload)
rh_status_q || exit 7
$1
;;
force-reload)
force_reload
;;
status)
rh_status
;;
condrestart|try-restart)
rh_status_q || exit 0
;;
*)
echo $"Usage: $0 {start|stop|status|restart|condrestart|try-restart|reload|force-reload|configtest}"
exit 2
esac
[root@master nginx-1.4.7]# chmod +x /etc/rc.d/init.d/nginx #给它一个执行权限
[root@master nginx-1.4.7]#
[root@master nginx-1.4.7]# chkconfig --add nginx #加到服务列表中去
[root@master nginx-1.4.7]#
[root@master nginx-1.4.7]# chkconfig --list nginx #检查一下默认是启动还是关闭的
nginx 0:off 1:off 2:off 3:off 4:off 5:off 6:off
[root@master nginx-1.4.7]#
[root@master nginx-1.4.7]# service nginx start #启动 有可能会报错,有可能不报错,因为有可能在不同的系统上有可能相关的路径尤其是/var/tmp指定的那些路径,依赖的东西不存在的时候,不会自动创建的时候,它可能会报错,,如果报错,告诉我们没有这些文件,自己手动建相应的目录就可以了
正在启动 nginx: [确定]
[root@master nginx-1.4.7]#
[root@master nginx-1.4.7]# ls /var/tmp/
nginx
[root@master nginx-1.4.7]# ls /var/tmp/nginx/
client fcgi proxy scgi uwsgi
[root@master nginx-1.4.7]#
http://192.168.0.60/ 正常访问了

[root@master nginx-1.4.7]# cd /usr/html
[root@master html]#
[root@master html]# ls
50x.html index.html
[root@master html]#
[root@master html]# less index.html
<!DOCTYPE html>
<html>
<head>
<title>Welcome to nginx!</title>
<style>
body {
width: 35em;
margin: 0 auto;
font-family: Tahoma, Verdana, Arial, sans-serif;
}
</style>
</head>
<body>
<h1>Welcome to nginx!</h1>
<p>If you see this page, the nginx web server is successfully installed and
working. Further configuration is required.</p>
<p>For online documentation and support please refer to
<a href="http://nginx.org/">nginx.org</a>.<br/>
Commercial support is available at
<a href="http://nginx.com/">nginx.com</a>.</p>
<p><em>Thank you for using nginx.</em></p>
index.html
[root@master html]# pwd #主页面就是在这个目录下,事实上就是在默认安装目录下(./configure 指定的 --prefix 吧 即 /usr)给我们创建了一个html
/usr/html
[root@master html]#
[root@master html]# cd /etc/nginx/ #看配置文件 ((./configure 时指定的吧)
[root@master nginx]# ls #含.default的都是nginx安装包当中系统默认提供的配置文件,其它的配置文件都是根据我们自己所执行的编译选项修改以后的版本,对我们而言将来我们需要关心的,,,一个web服务器要想能够接受,能够传输各种非文本文件,主要靠mime定义的,MIME: multiple Internet Mail Extension 多用途互联网邮件扩展,我们的nginx或者web服务器主要就是靠这个识别非文本文档的,,,,,fastcgi.conf和fastcgi_params 用来配置实现fastcgi功能的,这两个文件通常用一个就可以,,,,,,,uwsgi_params偶尔会用到,如果将来跟python结合的话,用uwsgi_params,,,,,,,,做简单配置,只需要关心nginx.conf
fastcgi.conf koi-win scgi_params
fastcgi.conf.default mime.types(mime.types的配置文件) scgi_params.default
fastcgi_params mime.types.default uwsgi_params
fastcgi_params.default nginx.conf(主配置文件) uwsgi_params.default
koi-utf nginx.conf.default win-utf
[root@master nginx]#
[root@master nginx]# cp nginx.conf nginx.conf.bak #备份一下
[root@master nginx]# vim nginx.conf
#user nobody; #user group都给禁用掉了,说明使用了我们自己所指定的user为nginx,group也为nginx????
worker_processes 8; #启动的worker线程数,通常与cpu个数相关,,,如果当前系统是cpu密集型的(本地你所执行的程序在本地有可能会执行更多的,要占据更多的cpu时间去处理,比如ssl或压缩应用),那么与cpu个数相同,,,,,,,,如果是IO密集型的,如响应大量内容给客户端,比如做一个基于web服务的下载站或者图片服务器,worker个数是我们真正的cpu个数的1.5倍或2倍,如果我们不绑定每一个线程在某个cpu上的话;;;;;;我们这里8个cpu,就指8个吧,,,,,,,,不管它什么应用的,一般来讲每一个核心可以绑定一个线程,
#error_log logs/error.log; #错误日志禁用掉了,没指,禁用掉了,说明默认指定的选项生效了???难道默认指定的选项就是禁用?为什么错误日志定义在主段当中,因为无论你是mail服务,还是http服务,都有可能产生错误的,所以单独进行定义
#error_log logs/error.log notice; #notice 是级别???是不是可以自定义级别?
#error_log logs/error.log info; #info 是级别???
#pid logs/nginx.pid; #定义pid文件,没指,禁用掉了,说明默认指定的选项生效了?默认指定的选项是什么
#以前的都是全局选项,称为main段
events { #用来定义事件驱动当中,每一个worker,它所能够支持的连接数的
worker_connections 1024; #最多支持1024*8个连接(8是worker_processes数) 作为我们网站的前端,是个大并发的服务器,我们经过优化以后,我们的worker_processes应该增大(只要cpu个数多),而且worker_connections也应该相应的增大,当然不能太大,太大没有意义,有可能还会压垮服务器,这需要我们做过测试以后,给出一个具体的合理的值,,我们最终所能接受的连接数是worker_connections 乘以 worker_processes
}
http { #里面还是后面(mail应该与http是平行的关系,所以说是后面)没有mail,说明里面的服务没有启动mail功能,
include mime.types; # 指定包含的文件
default_type application/octet-stream; #默认支持的类型
#log_format main '$remote_addr - $remote_user [$time_local] "$request" ' #定义日志格式的
# '$status $body_bytes_sent "$http_referer" '
# '"$http_user_agent" "$http_x_forwarded_for"';
#access_log logs/access.log main; #这是访问日志,是与mail分别定义的,虽然禁用,但是默认是启用了的,我们在编译(应该是 ./configure )的时候,已经指定了其位置 ( /var/log 下的位置 ) 这里的main指的是上面使用的main格式
sendfile on; #打开sendfile功能了
#tcp_nopush on; #tcp_nopush与tcp_nodelay其实对应的问题是相应的, nopush 表示不作推送的,对于nginx来讲 tcp_nodelay其实有时也需要开放的,它只不过这里没写,没写这个指令,其实这个指令也有
#keepalive_timeout 0;
keepalive_timeout 65; #使用长连接,并指定超时时间的
#gzip on; #对于我们响应给用户的内容是不是先压缩,再发送的,,,,,,可以节约带宽,,,,如果我们的网络带宽很小,用户访问量很大的话,就可以实现这种方式,,,,,,,也可以使用defered其它算法??????
# 每一个server用来定义一个虚拟主机
server {
listen 80; #监听的端口
server_name localhost; #虚拟名称,ip地址相同,基于名称的虚拟主机,,,,,,,ip不同,就是基于地址的虚拟主机
#charset koi8-r;
#access_log logs/host.access.log main;
location / { #根表示直接访问服务器的时候,表示URI
root html; #相对于URI来讲,它的网页位置路径,这里使用了相对路径,表示相对于nginx默认安装目录而言的,我们安装,配置 --prefix 时,指向 /usr,所以它找到网页文件在/usr/html下面
index index.html index.htm; #主页,如果没有明确说明给出一个url资源路径(只指定目录,或仅仅网址),那我们返回的默认页面是谁
}
#error_page 404 /404.html;
# redirect server error pages to the static page /50x.html
#
error_page 500 502 503 504 /50x.html; #如果返回的错误代码是500 502 503 504 ,就返回 /50x.html 页面给用户,很显然是相对于 /usr/html 的路径
location = /50x.html { #/50x.html 表示如果访问的是这个页面本身,我们要求你这个页面位于/usr/html 目录下,好像有点重复定义的意思
root html;
}
# proxy the PHP scripts to Apache listening on 127.0.0.1:80
#
#location ~ \.php$ { #这里波浪线符号
# proxy_pass http://127.0.0.1;
#}
# pass the PHP scripts to FastCGI server listening on 127.0.0.1:9000
#
#location ~ \.php$ {
# root html;
# fastcgi_pass 127.0.0.1:9000;
# fastcgi_index index.php;
# fastcgi_param SCRIPT_FILENAME /scripts$fastcgi_script_name;
# include fastcgi_params;
#}
# deny access to .htaccess files, if Apache's document root
# concurs with nginx's one
#
#location ~ /\.ht {
# deny all;
#}
}
# another virtual host using mix of IP-, name-, and port-based configuration
#
#server {
# listen 8000;
# listen somename:8080;
# server_name somename alias another.alias;
# location / {
# root html;
# index index.html index.htm;
# }
#}
# HTTPS server
#
#server {
# listen 443;
# server_name localhost;
# ssl on;
# ssl_certificate cert.pem;
# ssl_certificate_key cert.key;
# ssl_session_timeout 5m;
# ssl_protocols SSLv2 SSLv3 TLSv1;
# ssl_ciphers HIGH:!aNULL:!MD5;
# ssl_prefer_server_ciphers on;
# location / {
# root html;
# index index.html index.htm;
# }
#}
}
Paxos算法
在网络拥塞控制领域,我们知道有一个非常有名的算法叫做Nagle算法(Nagle algorithm),这是使用它的发明人John Nagle的名字来命名的,John Nagle在1984年首次用这个算法来尝试解决福特汽车公司的网络拥塞问题(RFC 896),该问题的具体描述是:如果我们的应用程序一次产生1个字节的数据,而这个1个字节数据又以网络数据包的形式发送到远端服务器 ( 为了这一个字节要增加好多首部,IP首部,TCP首部,帧首部,但是有效数据只有1个字节,整个网络发送的报文里面大多数都是浪费的,如果我们的网络很拥塞,又通过这种方式来发送,使得本来就拥挤不堪的网络更加拥挤,,,这种情况对于轻负载的网络来说,可能还可以接受,但是对于重负载的网络而言,我们一般不允许这么做),那么就很容易导致网络由于太多的数据包而过载。比如,当用户使用Telnet连接到远程服务器时,每一次击键操作就会产生1个字节数据,进而发送出去一个数据包,所以,在典型情况下,传送一个只拥有1个字节有效数据的数据包,却要发费40个字节长包头(即ip头20字节+tcp头20字节)的额外开销,这种有效载荷(payload)利用率极其低下的情况被统称之为愚蠢窗口症候群(Silly Window Syndrome)。可以看到,这种情况对于轻负载的网络来说,可能还可以接受,但是对于重负载的网络而言,就极有可能承载不了而轻易的发生拥塞瘫痪。
针对上面提到的这个状况,Nagle算法的改进在于:如果发送端欲多次发送包含少量字符的数据包(一般情况下,后面统一称长度小于MSS的数据包为小包,与此相对,称长度等于MSS的数据包为大包,为了某些对比说明,还有中包,即长度比小包长,但又不足一个MSS的包),则发送端会先将第一个小包发送出去 (如果对方说到达了,说明是正常到达的),而将后面到达的少量字符数据都缓存起来而不立即发送,直到收到接收端对前一个数据包报文段的ACK确认、或当前字符属于紧急数据,或者积攒到了一定数量的数据(比如缓存的字符数据已经达到数据包报文段的最大长度)等多种情况才将其组成一个较大的数据包发送出去。
Negale算法的确可以降低网络拥塞的,但是它有额外的副作用,
TCP中的Nagle算法默认是启用的,但是它并不是适合任何情况,对于telnet或rlogin这样的远程登录应用的确比较适合(原本就是为此而设计,它们是长时间在线的,用户明确退出以后才会断开的),但是(像http协议,尤其是没有使用长连接的http协议,它就不太适合了)在某些应用场景下我们却又需要关闭它。
尤其是http连接的时候,用户建立完成连接之后,最后一次送FIN报文的时候,有可能会导致我们的服务器端或客户端等待过长时间,这样一来会导致我们的客户端应用程序非常慢的
Negale算法是指发送方发送的数据不会立即发出, 而是先放在缓冲区, 等缓存区满了再发出. 发送完一批数据后, 会等待接收方对这批数据的回应, 然后再发送下一批数据。Negale 算法适用于发送方需要发送大批量数据, 并且接收方会及时作出回应的场合, 这种算法通过减少传输数据的次数来提高通信效率。如果发送方持续地发送小批量的数据, 并且接收方不一定会立即发送响应数据, 那么Negale算法会使发送方运行很慢. 对于GUI 程序, 如网络游戏程序(服务器需要实时跟踪客户端鼠标的移动), 这个问题尤其突出. 客户端鼠标位置改动的信息需要实时发送到服务器上(如果不发送,半天卡一下,而且挪了好几下,最后发现鼠标转了几圈,到最后一下才响应,http协议中也有这样的问题), 由于Negale 算法采用缓冲, 大大减低了实时响应速度, 导致客户程序运行很慢。这个时候就需要使用TCP_NODELAY选项。
nginx的配置文件:
server{}:每一个server定义一个虚拟主机,它是纯虚拟主机配置的,就算只有一个主机,也照样得定义在server中,
location{}:溶合了httpd的 DocumentRoot 和 Location 两种功能,
定义一个location /URI { # 先说明是哪个URI 明确说明URI映射哪个路径的
root "/web/htdocs" ; #说明这个URI对应在哪个目录下,使用root说明放在哪个目录下
#还可以定义谁有什么访问权限等等
}
在httpd当中,有个定义网页页面所在的位置,基于本地文件系统路径来定义它的访问属性的
<DocumentRoot "">
</DocumentRoot>
基于URI路径来定义访问属性的 比如http://www.magedu.com/ (这里最后要用斜线吧???) ,从这里开始往后的路径都是URI路径, 下面/bbs称为URI路径,所以 Location 这种方式是基于/bbs来定义访问控制的,它对应在DocumentRoot目录下的网页里面????如果没有定义Location这种方式来访问,不管你通过哪个路径来访问,只要映射到DocumentRoot这个文件系统上,都会受到DocumentRoot文件系统属性的控制,
<Location "/bbs">
</Location>
[root@master nginx]# cd /usr/html
[root@master html]#
[root@master html]# ls
50x.html index.html
[root@master html]#
https://wiki.archlinux.org/index.php/Nginx_(%E7%AE%80%E4%BD%93%E4%B8%AD%E6%96%87)
https://www.nginx.com/resources/wiki/
我没找到,下面是马哥的载图

我找的两个帮助文档 有这里
http://www.treelib.com/book-detail-id-5-aid-99.html
http://nginx.org/en/docs/http/ngx_http_core_module.html#location 有大用
http://tengine.taobao.org/nginx_docs/cn/docs/http/ngx_http_core_module.html#location 有大用
| 语法: | location [ location |
| 默认值: | — |
| 上下文: | server, location # 表示可以用在 server中, location也可以嵌套在location中 |
为某个请求URI(路径)建立配置。
路径匹配在URI规范化以后进行。所谓规范化,就是先将URI中形如“%XX”的编码字符进行解码, 再解析URI中的相对路径“.”和“..”部分, 另外还可能会压缩相邻的两个或多个斜线成为一个斜线。
可以使用前缀字符串或者正则表达式定义路径。使用正则表达式需要在路径开始添加“~*”前缀 (不区分大小写),或者“~”前缀(区分大小写)。为了根据请求URI查找路径,nginx先检查前缀字符串定义的路径 (前缀路径),在这些路径中找到能最精确匹配请求URI的路径。然后nginx按在配置文件中的出现顺序检查正则表达式路径, 匹配上某个路径后即停止匹配并使用该路径的配置,否则使用最大前缀匹配的路径的配置。
路径可以嵌套,但有例外,后面将提到。
在不区分大小写的操作系统(诸如Mac OS X和Cygwin)上,前缀匹配忽略大小写(0.7.7)。但是,比较仅限于单字节的编码区域(one-byte locale)。
正则表达式中可以包含匹配组(0.7.40),结果可以被后面的其他指令使用。
如果最大前缀匹配的路径以“^~”开始,那么nginx不再检查正则表达式。
而且,使用“=”前缀可以定义URI和路径的精确匹配。如果发现匹配,则终止路径查找。 比如,如果请求“/”出现频繁,定义“location = /”可以提高这些请求的处理速度, 因为查找过程在第一次比较以后即结束。这样的路径明显不可能包含嵌套路径。
在0.7.1到0.8.41的所有nginx中,如果请求匹配的前缀字符串路径并没有“=”或“^~”前缀, 路径查找过程仍然会停止,而不进行正则表达式匹配。
让我们用一个例子解释上面的说法:
location = / {
    [ configuration A ]
}

location / {
    [ configuration B ]
}

location /documents/ {
    [ configuration C ]
}

location ^~ /images/ {
    [ configuration D ]
}

location ~* \.(gif|jpg|jpeg)$ {
    [ configuration E ]
}
请求“/”匹配配置A, 请求“/index.html”匹配配置B, 请求“/documents/document.html”匹配配置C, 请求“/images/1.gif”匹配配置D, 请求“/documents/1.jpg”匹配配置E。
如果 /a/3.gif 匹配配置E
前缀“@”定义了命名路径。这种路径不在一般的请求处理中使用, 而是用在请求重定向中。这些路径不能嵌套,也不能包含嵌套路径。
| 语法: | log_not_found |
| 默认值: | log_not_found on; |
| 上下文: | http, server, location |
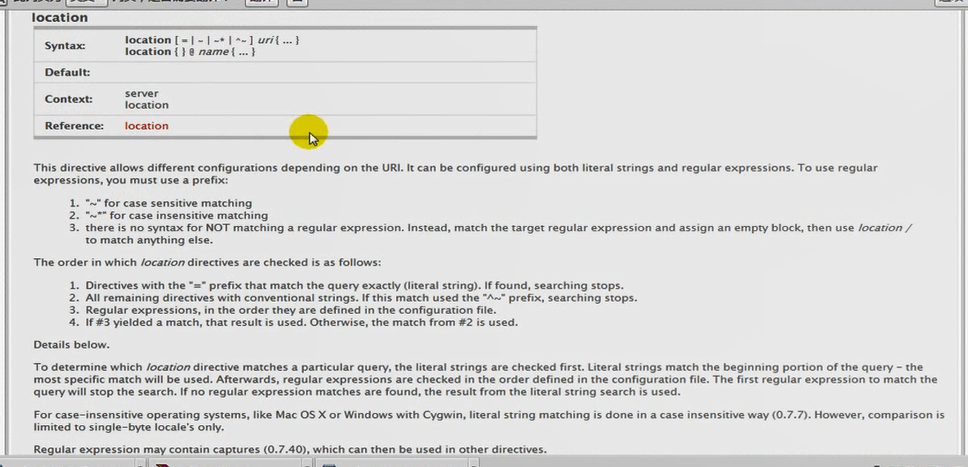
location [ = | ~ | ~* | ^~ ] uri { ... }
这表示location在实现这个uri匹配的时候,支持4种方式,这4种方式都是可省的
location uri {}
表示花括号所定义的属性,对这个uri起始路径下的所有资源(也可叫做所有对象)都生效,就算是子路径也会生效的,,,匹配范围广
location = uri {}
仅对当前路径(或叫做当前资源)生效,,不包括子路径,如果uri只是个目录,对目录下的文件的访问是不生效的,如果uri只是个文件,则只对这个文件生效,,,精确匹配
location ~ uri {}
location ~* uri {}
可以实现模式匹配的,模式匹配uri,,此处的uri可使用正则表达式,,只要用户访问的路径能匹配到这个正则表达式,都生效
~ 波浪号表示区分字符大小写
~* 波浪号星号表示不区分字符大小写
location ^~ uri {}
表示禁用正则表达式检查,用来作逐字符匹配的,^尖括号表示取反,意味着中间使用了一些元字符也无所谓了,不作元字符解释了,
1)location 匹配是有次序和优先级的,"="等于号是精确匹配,所以优先级最高,,,,所以就算被n个地方匹配到,只要带等于号的,优先级最高
2)^~ 第二优先级是非正则表达式匹配到的
3)正则表达式(无论区分大小写还是不区分大小写) 排在第三优先级
4)最后一个优先级是没加任何符号的
我们可以在一个server中使用多个location分别用来定义不同路径下的,不同uri下的文件所对应的位置及不同路径下的文件访问位置(或者访问权限,访问属性等等)
[root@master ~]# cd /etc/nginx/
[root@master nginx]# vim nginx.conf
#user nobody;
worker_processes 1;
#error_log logs/error.log;
#error_log logs/error.log notice;
#error_log logs/error.log info;
#pid logs/nginx.pid;
events {
worker_connections 1024;
}
http {
include mime.types;
default_type application/octet-stream;
#log_format main '$remote_addr - $remote_user [$time_local] "$request" '
# '$status $body_bytes_sent "$http_referer" '
# '"$http_user_agent" "$http_x_forwarded_for"';
#access_log logs/access.log main;
sendfile on;
#tcp_nopush on;
#keepalive_timeout 0;
keepalive_timeout 65;
#gzip on;
server {
listen 80;
server_name localhost;
#charset koi8-r;
#access_log logs/host.access.log main;
location / {
#root html;#每一个语句都用分号结尾
root /web/htdocs; #把主页面根指向 /web/htdocs
index index.html index.htm;
}
#error_page 404 /404.html;
# redirect server error pages to the static page /50x.html
#
error_page 500 502 503 504 /50x.html;
location = /50x.html {
root html;
}
# proxy the PHP scripts to Apache listening on 127.0.0.1:80
#
#location ~ \.php$ {
# proxy_pass http://127.0.0.1;
#}
# pass the PHP scripts to FastCGI server listening on 127.0.0.1:9000
#
#location ~ \.php$ { #匹配url当中以.php结尾的文件
# root html;
# fastcgi_pass 127.0.0.1:9000;
# fastcgi_index index.php;
# fastcgi_param SCRIPT_FILENAME /scripts$fastcgi_script_name;
# include fastcgi_params;
#}
# deny access to .htaccess files, if Apache's document root
# concurs with nginx's one
#
#location ~ /\.ht {
# deny all;
#}
}
# another virtual host using mix of IP-, name-, and port-based configuration
#
#server {
# listen 8000;
# listen somename:8080;
# server_name somename alias another.alias;
# location / {
# root html;
# index index.html index.htm;
# }
#}
# HTTPS server
#
#server {
# listen 443;
# server_name localhost;
# ssl on;
# ssl_certificate cert.pem;
# ssl_certificate_key cert.key;
# ssl_session_timeout 5m;
# ssl_protocols SSLv2 SSLv3 TLSv1;
# ssl_ciphers HIGH:!aNULL:!MD5;
# ssl_prefer_server_ciphers on;
# location / {
# root html;
# index index.html index.htm;
# }
#}
}
[root@master nginx]# service nginx reload #重新载入,不用重启
[root@master nginx]#
[root@master nginx]# mkdir -pv /web/htdocs
mkdir: 已创建目录 "/web"
mkdir: 已创建目录 "/web/htdocs"
[root@master nginx]#
[root@master nginx]# vim /web/htdocs/index.html
<h1>Test Page </h1>

[root@master nginx]# vim nginx.conf
................................................................
location /bbs {
root /web/bbs;
}
................................................................
[root@master nginx]# mkdir /web/bbs
[root@master nginx]# vim /web/bbs/index.html
<h1>BBS</h1>
[root@master nginx]# service nginx reload
nginx: the configuration file /etc/nginx/nginx.conf syntax is ok
nginx: configuration file /etc/nginx/nginx.conf test is successful
重新载入 nginx: [确定]
[root@master nginx]#

http://192.168.0.60/bbs/index.html 还是不能访问

[root@master nginx]# vim nginx.conf
................................................................
location /bbs/ { #后面加个斜线
root /web/bbs/; #后面加个斜线
}
................................................................
[root@master nginx]# service nginx reload
nginx: the configuration file /etc/nginx/nginx.conf syntax is ok
nginx: configuration file /etc/nginx/nginx.conf test is successful
重新载入 nginx: [确定]
[root@master nginx]#
[root@master nginx]# tail /var/log/nginx/error.log
2021/04/10 14:38:57 [error] 23692#0: *1 open() "/usr/html/favicon.ico" failed (2: No such file or directory), client: 192.168.0.103, server: localhost, request: "GET /favicon.ico HTTP/1.1", host: "192.168.0.60", referrer: "http://192.168.0.60/"
2021/04/15 14:58:04 [error] 3418#0: *1 open() "/web/htdocs/favicon.ico" failed (2: No such file or directory), client: 192.168.0.103, server: localhost, request: "GET /favicon.ico HTTP/1.1", host: "192.168.0.60", referrer: "http://192.168.0.60/"
2021/04/15 15:03:57 [error] 3473#0: *3 open() "/web/htdocs/s" failed (2: No such file or directory), client: 192.168.0.103, server: localhost, request: "GET //s HTTP/1.1", host: "192.168.0.60"
2021/04/15 15:04:00 [error] 3473#0: *3 open() "/web/bbs/bbs" failed (2: No such file or directory), client: 192.168.0.103, server: localhost, request: "GET /bbs HTTP/1.1", host: "192.168.0.60"
2021/04/15 15:04:31 [error] 3473#0: *3 open() "/web/bbs/bbs/index.html" failed (2: No such file or directory), client: 192.168.0.103, server: localhost, request: "GET /bbs/index.html HTTP/1.1", host: "192.168.0.60"
2021/04/15 15:07:05 [error] 3500#0: *5 open() "/web/bbs/bbs/index.html" failed (2: No such file or directory), client: 192.168.0.103, server: localhost, request: "GET /bbs/index.html HTTP/1.1", host: "192.168.0.60"
2021/04/15 15:07:06 [error] 3500#0: *5 open() "/web/bbs/bbs/index.html" failed (2: No such file or directory), client: 192.168.0.103, server: localhost, request: "GET /bbs/index.html HTTP/1.1", host: "192.168.0.60"
2021/04/15 15:07:08 [error] 3500#0: *5 "/web/bbs/bbs/index.html" is not found (2: No such file or directory), client: 192.168.0.103, server: localhost, request: "GET /bbs/ HTTP/1.1", host: "192.168.0.60"
2021/04/15 15:07:11 [error] 3500#0: *5 open() "/web/htdocs/bbs" failed (2: No such file or directory), client: 192.168.0.103, server: localhost, request: "GET /bbs HTTP/1.1", host: "192.168.0.60"
[root@master nginx]#
[root@master nginx]# vim nginx.conf #改一下
................................................................
location /bbs/ {
root /web; #表示它是找web下面的bbs的,意味着bbs目录是位于web下的,所以应该把 /web/bbs 改成 /web,,,,,,,这里指的是在 /web下面找 bbs 目录,所以这里的/bbs既是目录又是uri,,,这两个路径需要合并起来去理解,我们以/web以root,当我们指定 location 为 /bbs/ 的时候,它就会找到 /web下面的/bbs/,(如果指定为 /web/bbs/ 的话,就会在 /web/bbs/ 下面再找bbs了,)
}
................................................................
[root@master nginx]# service nginx reload
nginx: the configuration file /etc/nginx/nginx.conf syntax is ok
nginx: configuration file /etc/nginx/nginx.conf test is successful
重新载入 nginx: [确定]
[root@master nginx]#
http://192.168.0.60/bbs/ 这里bbs后面的斜杠不能少????真的吗?

[root@master nginx]# vim nginx.conf
................................................................
error_page 404 /404.html;
................................................................
[root@master nginx]# vim /web/htdocs/404.html
<h1>404 page</h1>
[root@master nginx]# service nginx reload
nginx: the configuration file /etc/nginx/nginx.conf syntax is ok
nginx: configuration file /etc/nginx/nginx.conf test is successful
重新载入 nginx: [确定]
[root@master nginx]#
http://192.168.0.60/6.html 404这里可以自定义放出错了,页面不存在等等


可以明确定义location 404 页面放在哪里?怎么定义?马哥没讲
定义访问控制法则,
比如基于ip地址来实现访问控制,,,哪些ip能访问,哪些不能访问,使用 allow,deny指令
https://www.nginx.cn/doc/standard/httpaccess.html
| Nginx中文文档 | 目录首页 |
| Nginx中文站 › 文档首页 › HttpAccess模块 |
HttpAccess模块
此模块提供了一个简易的基于主机的访问控制.
ngx_http_access_module 模块使有可能对特定IP客户端进行控制. 规则检查按照第一次匹配的顺序
__配置样例__
location / {
: deny    192.168.1.1;
: allow   192.168.1.0/24;
: allow   10.1.1.0/16;
: deny    all;
}
在上面的例子中,仅允许网段 10.1.1.0/16 和 192.168.1.0/24中除 192.168.1.1之外的ip访问.
当执行很多规则时,最好使用 ngx_http_geo_module 模块.
指导
[#放行 放行]
[#禁止 禁止]
放行
syntax: allow [ address | CIDR | all ]
default: no
context: http, server, location, limit_except
以上描述的网络地址有权直接访问
禁止
syntax: deny [ address | CIDR | all ]
default: no
context: http, server, location, limit_except
以上描述的网络地址拒绝访问
References
http://tengine.taobao.org/nginx_docs/cn/docs/http/ngx_http_access_module.html
| 配置范例 指令 allow deny |
模块 ngx_http_access_module 允许限制某些IP地址的客户端访问。
也可以通过 密码来限制访问。 使用 satisfy 指令就能同时通过IP地址和密码来限制访问。
配置范例
location / {
    deny  192.168.1.1; #拒绝这个地址
    allow 192.168.1.0/24;#允许这个网段
    allow 10.1.1.0/16;#允许这个网段
    allow 2001:0db8::/32;#允许这个ipv6
    deny  all;  #拒绝所有
}
规则按照顺序依次检测,直到匹配到第一条规则。 在这个例子里,IPv4的网络中只有 10.1.1.0/16 和 192.168.1.0/24允许访问,但 192.168.1.1除外, 对于IPv6的网络,只有2001:0db8::/32允许访问。 在规则很多的情况下,使用 ngx_http_geo_module 模块变量更合适。
指令
| 语法: | allow |
| 默认值: | — |
| 上下文: | http, server, location, limit_except |
允许指定的网络地址访问。
| 语法: | deny |
| 默认值: | — |
| 上下文: | http, server, location, limit_except |
拒绝指定的网络地址访问。
location / {
deny all;
deny 192.168.1.1;
allow 192.168.1.0/24;
allow 10.1.1.0/1;
}
好像顺序问题不大,但是我们一般按次序来,把规则范围适应小的放在上面,没有次序法则的就并列写,
[root@master nginx]# vim nginx.conf #改一下
................................................................
location /bbs {
root /web;
index index.html index.htm;
deny 192.168.0.103; #拒绝访问
}
................................................................
[root@master nginx]# service nginx reload
nginx: the configuration file /etc/nginx/nginx.conf syntax is ok
nginx: configuration file /etc/nginx/nginx.conf test is successful
重新载入 nginx: [确定]
[root@master nginx]#
http://192.168.0.60/bbs/ 无法访问了

另一台linux上,可以访问的
[root@slave ~]# curl http://192.168.0.60/bbs/index.html
<h1>BBS</h1>
[root@slave ~]#
[root@slave ~]# curl http://192.168.0.60/bbs #定向定义到了location,永久重定向的
<html>
<head><title>301 Moved Permanently</title></head>
<body bgcolor="white">
<center><h1>301 Moved Permanently</h1></center>
<hr><center>nginx/1.4.7</center>
</body>
</html>
[root@slave ~]#
我们在 location中一般不用allow,因为默认我们是允许所有主机访问的,如果想拒绝所有人访问,只开放给某一个网段(某一个主机)
[root@master nginx]# vim nginx.conf #改一下
................................................................
location /bbs {
root /web;
index index.html index.htm;
allow 192.168.0.103; #允许访问
}
................................................................
[root@master nginx]# service nginx reload
nginx: the configuration file /etc/nginx/nginx.conf syntax is ok
nginx: configuration file /etc/nginx/nginx.conf test is successful
重新载入 nginx: [确定]
[root@master nginx]#

在另一台linux上,也是可以访问的,,所以说默认是允许所有访问的
[root@slave ~]# curl http://192.168.0.60/bbs/index.html
<h1>BBS</h1>
[root@slave ~]#
[root@master nginx]# vim nginx.conf #改一下
................................................................
location /bbs {
root /web;
index index.html index.htm;
allow 192.168.0.103; #允许访问
deny all; #拒绝所有,必须要显式声明
}
................................................................
[root@master nginx]# service nginx reload #重新载入
nginx: the configuration file /etc/nginx/nginx.conf syntax is ok
nginx: configuration file /etc/nginx/nginx.conf test is successful
重新载入 nginx: [确定]
[root@master nginx]#

在另一台linux上,
[root@slave ~]# curl http://192.168.0.60/bbs/index.html #禁止了
<html>
<head><title>403 Forbidden</title></head>
<body bgcolor="white">
<center><h1>403 Forbidden</h1></center>
<hr><center>nginx/1.4.7</center>
</body>
</html>
[root@slave ~]#
基于用户的访问控制,使用auth basic模块来实现httpd认证 (这些模块都是被我们的nginx自动装入的,只要你编译的时候启用了这个模块,它的相关功能都可以使用)
https://www.nginx.cn/doc/standard/httpauthbasic.html
HttpAuthBasic模块
该模块可以使你使用用户名和密码基于 HTTP 基本认证方法来保护你的站点或其部分内容。
__实例配置__
location  /  {
: auth_basic            "Restricted";    #相当于apache上的authbasic的authname,显示给用户的名称,
这里为什么要限制,一段字符串
: auth_basic_user_file  conf/htpasswd;  #说明这是跟组相关的文件,里面保存的是用户的帐户和密码,
这个文件怎么建立?在httpd上用htpasswd命令,在nginx也是用这个命令,nginx没有提供任何配置这个文件
的命令,得借助于apache来实现,因此我们要安装httpd
}
指令
[#auth_basic auth_basic]
[#auth_basic_user_file auth_basic_user_file]
auth_basic
语法: auth_basic [ text|off ]
默认值: auth_basic off
作用域: http, server, location, limit_except
该指令包含用于 HTTP 基本认证 的测试名和密码。分配的参数用于认证领域。值 "off" 可以使其覆盖来自上层指令的继承性。
auth_basic_user_file
语法: auth_basic_user_file the_file
默认值: no
作用域: http, server, location, limit_except
该指令为某认证领域指定 htpasswd 文件名。
文件格式类似于下面的内容:
用户名:密码
用户名2:密码2:注释
用户名3:密码3
密码必须使用函数 crypt(3) 加密。 你可以使用来自 Apache 的 htpasswd 工具来创建密码文件。
你也可以使用perl 创建密码文件,pw.pl 的内容:
#!/usr/bin/perl
use strict;

my $pw=$ARGV[0] ;
print crypt($pw,$pw)."\n";
然後執行
chmod +x pw.pl
./pw.pl password
papAq5PwY/QQM
papAq5PwY/QQM 就是password 的crypt()密码
[root@master nginx]# mount /dev/cdrom /media/cdrom/
mount: block device /dev/sr0 is write-protected, mounting read-only
[root@master nginx]# yum -y install httpd
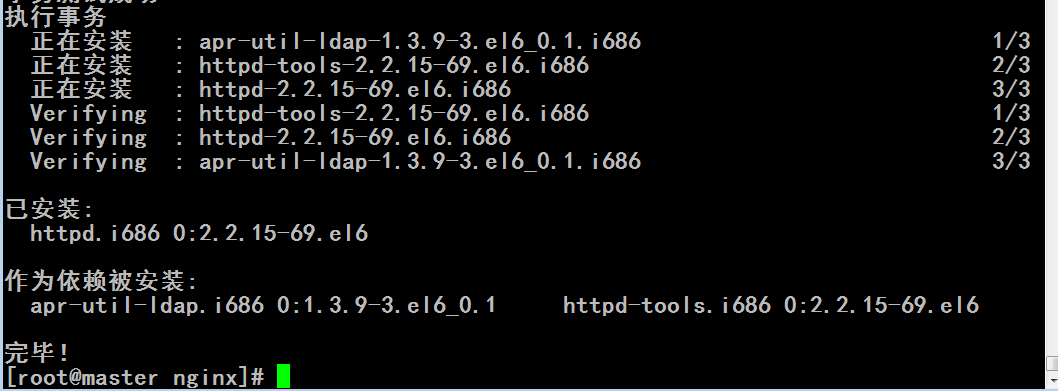
装上去之后不要开机启动httpd,不然会与nginx争用一个套接字了
[root@master nginx]# chkconfig --list httpd
httpd 0:关闭 1:关闭 2:关闭 3:关闭 4:关闭 5:关闭 6:关闭
[root@master nginx]#
[root@master nginx]# htpasswd --help
Usage:
htpasswd [-cmdpsD] passwordfile username
htpasswd -b[cmdpsD] passwordfile username password
htpasswd -n[mdps] username
htpasswd -nb[mdps] username password
-c Create a new file. #新建一个文件
-n Don't update file; display results on stdout.
-m Force MD5 encryption of the password. #由md5加密
-d Force CRYPT encryption of the password (default).
-p Do not encrypt the password (plaintext).
-s Force SHA encryption of the password.
-b Use the password from the command line rather than prompting for it.
-D Delete the specified user.
On Windows, NetWare and TPF systems the '-m' flag is used by default.
On all other systems, the '-p' flag will probably not work.
[root@master nginx]#
[root@master nginx]# htpasswd -c -m /etc/nginx/.users tom # .users 前面是点表示隐藏文件
New password:123456
Re-type new password:123456
Adding password for user tom
[root@master nginx]#
[root@master nginx]# htpasswd -c -m /etc/nginx/.users jerry
New password:123456
Re-type new password:123456
Adding password for user jerry
[root@master nginx]#
[root@master nginx]# pwd
/etc/nginx
[root@master nginx]# vim nginx.conf
............................................................
location /bbs {
root /web;
index index.html index.htm;
#allow 192.168.0.103;
#deny all;
auth_basic "Restricted Area ...";
auth_basic_user_file /etc/nginx/.users;
}
............................................................
[root@master nginx]# service nginx reload
nginx: the configuration file /etc/nginx/nginx.conf syntax is ok
nginx: configuration file /etc/nginx/nginx.conf test is successful
重新载入 nginx: [确定]
[root@master nginx]#

http://192.168.0.60/bbs/ 要输入密码了

htpasswd:
第二次不能使用-c选项,否则就是覆盖了
[root@master nginx]# cat /etc/nginx/.users #由于第二次用了 -c ,就把第一次的tom的数据覆盖掉了
jerry:$apr1$vOy/2QSd$X651w186NZvhJYlFdTHqk/
[root@master nginx]#
https://www.nginx.cn/doc/index.html
https://www.nginx.cn/doc/standard/httpindex.html
| Nginx中文站 › 文档首页 › HttpIndex模块 |
HttpIndex模块
语法: index file [file...] #设置主页是谁
默认值: index index.html
作用域: http, server, location #可以放在这三个当中,放在server中可以被所有location继承,放在http中,可以被所有的server继承
该指令用来指定用来做默认文档的文件名,可以在文件名处使用变量。 如果您指定了多个文件,那么将按照您指定的顺序逐个查找。 可以在列表末尾加上一个绝对路径名的文件。
示例:
index index.$geo.html index.0.html /index.html; #这里斜线表示什么意思?
参见
https://www.nginx.cn/doc/standard/httpautoindex.html
HttpAutoindex模块 自动索引
此模块用于自动生成目录列表.
ngx_http_autoindex_module只在 ngx_http_index_module 模块未找到索引文件时发出请求.
__配置实例__
location  /  {
: autoindex  on;    #表示如果没有主页面的话,把所有文件列出来
}
指导
[#autoindex autoindex]
[#autoindex_exact_size autoindex_exact_size]
[#autoindex_localtime autoindex_localtime]
autoindex
syntax: autoindex [ on|off ]
default: autoindex off #默认是关闭的
context: http, server, location
激活/关闭自动索引
autoindex_exact_size #显示每个文件的大小的精确值
syntax: autoindex_exact_size [ on|off ]
default: autoindex_exact_size on
context: http, server, location
设定索引时文件大小的单位(B,KB, MB 或 GB)
autoindex_localtime #显示每个文件的本地时间
syntax: autoindex_localtime [ on|off ]
default: autoindex_localtime off
context: http, server, location
开启以本地时间来显示文件时间的功能。默认为关(GMT时间)
参考
当我们的主页不存在的时候
[root@master nginx]# vim nginx.conf
............................................................................
location / {
#root html;
root /web/htdocs;
#index index.html index.htm;
index home.html; #我们没有提供主页home.html
}
............................................................................
[root@master nginx]# service nginx reload
nginx: the configuration file /etc/nginx/nginx.conf syntax is ok
nginx: configuration file /etc/nginx/nginx.conf test is successful
重新载入 nginx: [确定]
[root@master nginx]#
http://192.168.0.60/ 不能访问了

当我们的主页不存在的时候
[root@master nginx]# vim nginx.conf
............................................................................
location / {
#root html;
root /web/htdocs;
#index index.html index.htm;
index home.html; #我们没的提供主页home.html
autoindex on; #能访问目录内的列表文件了
}
............................................................................
[root@master nginx]# service nginx reload
nginx: the configuration file /etc/nginx/nginx.conf syntax is ok
nginx: configuration file /etc/nginx/nginx.conf test is successful
重新载入 nginx: [确定]
[root@master nginx]#
http://192.168.0.60 列出来了

https://www.nginx.cn/doc/standard/httplimitrequest.html
HttpLimitReqest模块 限制请求时所能够使用的缓存空间的,讲到缓存时再说
This module allows you to limit the number of requests for a given session, or as a special case, with one address.
Restriction done using leaky bucket.
Example Configuration
http {
    limit_req_zone  $binary_remote_addr  zone=one:10m   rate=1r/s;


    ...

    server {

        ...

        location /search/ {

            limit_req   zone=one  burst=5;
        }
指令
Syntax: limit_req_zone $session_variable zone=name_of_zone:size rate=rate
Default: none
Context: http
The directive describes the area, which stores the state of the sessions. The values of the sessions is determined by the given variable. Example of usage:
limit_req_zone $binary_remote_addr zone=one:10m rate=1r/s;
In this case, the session state is allocated 10MB as a zone called "one", and the average speed of queries for this zone is limited to 1 request per second.
The sessions are tracked per-user in this case, but note that instead of the variable $remote_addr, we've used the variable $binary_remote_addr, reducing the size of the state to 64 bytes. A 1 MB zone can hold approximately 16000 states of this size.
The speed is set in requests per second or requests per minute. The rate must be an integer, so if you need to specify less than one request per second, say, one request every two seconds, you would specify it as "30r/m".
Syntax: limit_req zone=zone burst=burst [nodelay]
Default: none
Context: http, server, location
The directive specifies the zone (zone) and the maximum possible bursts of requests (burst). If the rate exceeds the demands outlined in the zone, the request is delayed, so that queries are processed at a given speed. Excess requests are delayed until their number does not exceed a specified number of bursts. In this case the request is completed the code "Service unavailable" (503). By default, the burst is zero.
For example, the directive
limit_req_zone  $binary_remote_addr  zone=one:10m   rate=1r/s;


    server {
        location /search/ {
            limit_req   zone=one  burst=5;
        }
allows a user no more than 1 request per second on average, with bursts of no more than 5 queries. If the excess requests within the limit burst delay are not necessary, you should use the nodelay:
limit_req zone=one burst=5 nodelay;
http://tengine.taobao.org/nginx_docs/cn/docs/http/ngx_http_limit_req_module.html
| 配置示例 指令 limit_req limit_req_log_level limit_req_zone |
ngx_http_limit_req_module模块(0.7.21)可以通过定义的 键值来限制请求处理的频率。特别的,它可以限制来自单个IP地址的请求处理频率。 限制的方法是通过一种“漏桶”的方法——固定每秒处理的请求数,推迟过多的请求处理。
配置示例
http {
    limit_req_zone $binary_remote_addr zone=one:10m rate=1r/s;

    ...

    server {

        ...

        location /search/ {
            limit_req zone=one burst=5;
        }
指令
| 语法: | limit_req |
| 默认值: | — |
| 上下文: | http, server, location |
设置对应的共享内存限制域和允许被处理的最大请求数阈值。 如果请求的频率超过了限制域配置的值,请求处理会被延迟,所以 所有的请求都是以定义的频率被处理的。 超过频率限制的请求会被延迟,直到被延迟的请求数超过了定义的阈值 这时,这个请求会被终止,并返回503 (Service Temporarily Unavailable) 错误。这个阈值的默认值等于0。 比如这些指令:
limit_req_zone $binary_remote_addr zone=one:10m rate=1r/s;

server {
    location /search/ {
        limit_req zone=one burst=5;
    }
限制平均每秒不超过一个请求,同时允许超过频率限制的请求数不多于5个。
如果不希望超过的请求被延迟,可以用nodelay参数:
limit_req zone=one burst=5 nodelay;
| 语法: | limit_req_log_level |
| 默认值: | limit_req_log_level error; |
| 上下文: | http, server, location |
这个指令出现在版本 0.8.18.
设置你所希望的日志级别,当服务器因为频率过高拒绝或者延迟处理请求时可以记下相应级别的日志。 延迟记录的日志级别比拒绝的低一个级别;比如, 如果设置“limit_req_log_level notice”, 延迟的日志就是info级别。
| 语法: | limit_req_zone |
| 默认值: | — |
| 上下文: | http |
设置一块共享内存限制域的参数,它可以用来保存键值的状态。 它特别保存了当前超出请求的数量。 键的值就是指定的变量(空值不会被计算)。 示例用法:
limit_req_zone $binary_remote_addr zone=one:10m rate=1r/s;
这里,状态被存在名为“one”,最大10M字节的共享内存里面。对于这个限制域来说 平均处理的请求频率不能超过每秒一次。
键值是客户端的IP地址。 如果不使用$remote_addr变量,而用$binary_remote_addr变量, 可以将每条状态记录的大小减少到64个字节,这样1M的内存可以保存大约1万6千个64字节的记录。 如果限制域的存储空间耗尽了,对于后续所有请求,服务器都会返回 503 (Service Temporarily Unavailable)错误。
请求频率可以设置为每秒几次(r/s)。如果请求的频率不到每秒一次, 你可以设置每分钟几次(r/m)。比如每秒半次就是30r/m。
http://tengine.taobao.org/nginx_docs/cn/docs/http/ngx_http_limit_conn_module.html
ngx_http_limit_conn_module 马哥没讲,它是用来限制连接数的,还是与缓存相关,应该也是以后讲
ngx_http_limit_conn_module 模块
| 配置范例 指令 limit_conn 用来限制连接数的,还是与缓存相关, limit_conn_log_level limit_conn_zone limit_zone |
ngx_http_limit_conn_module 模块可以按照定义的键限定每个键值的连接数。特别的,可以设定单一 IP 来源的连接数。
并不是所有的连接都会被模块计数;只有那些正在被处理的请求(这些请求的头信息已被完全读入)所在的连接才会被计数。
配置范例
http {
    limit_conn_zone $binary_remote_addr zone=addr:10m;

    ...

    server {

        ...

        location /download/ {
            limit_conn addr 1;
        }
指令
| 语法: | limit_conn |
| 默认值: | — |
| 上下文: | http, server, location |
指定一块已经设定的共享内存空间,以及每个给定键值的最大连接数。当连接数超过最大连接数时,服务器将会返回 503 (Service Temporarily Unavailable) 错误。比如,如下配置
limit_conn_zone $binary_remote_addr zone=addr:10m;

server {
    location /download/ {
        limit_conn addr 1;
    }
表示,同一 IP 同一时间只允许有一个连接。
当多个 limit_conn 指令被配置时,所有的连接数限制都会生效。比如,下面配置不仅会限制单一IP来源的连接数,同时也会限制单一虚拟服务器的总连接数:
limit_conn_zone $binary_remote_addr zone=perip:10m;
limit_conn_zone $server_name zone=perserver:10m;

server {
    ...
    limit_conn perip 10;
    limit_conn perserver 100;
}
如果当前配置层级没有limit_conn指令,将会从更高层级继承连接限制配置。
| 语法: | limit_conn_log_level |
| 默认值: | limit_conn_log_level error; |
| 上下文: | http, server, location |
这个指令出现在版本 0.8.18.
指定当连接数超过设定的最大连接数,服务器限制连接时的日志等级。
| 语法: | limit_conn_zone |
| 默认值: | — |
| 上下文: | http |
设定保存各个键的状态的共享内存空间的参数。键的状态中保存了当前连接数。键的值可以是特定变量的任何非空值(空值将不会被考虑)。 使用范例:
limit_conn_zone $binary_remote_addr zone=addr:10m;
这里,设置客户端的IP地址作为键。注意,这里使用的是$binary_remote_addr变量,而不是$remote_addr变量。$remote_addr变量的长度为7字节到15字节不等,而存储状态在32位平台中占用32字节或64字节,在64位平台中占用64字节。而$binary_remote_addr变量的长度是固定的4字节,存储状态在32位平台中占用32字节或64字节,在64位平台中占用64字节。一兆字节的共享内存空间可以保存3.2万个32位的状态,1.6万个64位的状态。如果共享内存空间被耗尽,服务器将会对后续所有的请求返回 503 (Service Temporarily Unavailable) 错误。
| 语法: | limit_zone |
| 默认值: | — |
| 上下文: | http |
这条指令在 1.1.8 版本中已经被废弃,应该使用等效的limit_conn_zone指令。该指令的语法也有变化:
limit_conn_zone$variablezone=name:size;
https://www.nginx.cn/doc/optional/stubstatus.html
| Nginx中文站 › 文档首页 › StubStatus模块 |
StubStatus模块 显示状态信息
这个模块能够获取Nginx自上次启动以来的工作状态
此模块非核心模块,需要在编译的时候手动添加编译参数--with-http_stub_status_module
__配置说明__
location /nginx_status {
: # copied from http://blog.kovyrin.net/2006/04/29/monitoring-nginx-with-rrdtool/
: stub_status on;    #显示状态信息
: access_log   off;    #不把信息记录入日志里面
: allow SOME.IP.ADD.RESS;    #允许某某访问  我们的状态信息不应该开放给所有人访问的
: deny all; #拒绝某某访问
}
指令
[#stub_status stub_status]
stub_status
语法: stub_status on
默认值: None
作用域: location
创建一个 location 区域启用 stub_status
"stub status" 模块返回的状态信息跟 mathopd's 的状态信息很相似. 返回的状态信息如下:
Active connections: 291
server accepts(接受进来的连接数) handled(已经处理过了的连接数) requests(已经处理过了的请求数)


: 16630948 16630948 31070465
Reading: 6 Writing: 179 Waiting: 106
active connections-- 对后端发起的活动连接数
server accepts handled requests #服务器端已经接受处理的请求的个数??????-- nginx 总共处理了 16630948 个连接, 成功创建 16630948 次握手(一次握手应该就是一个连接吧) (证明中间没有失败的), 总共处理了 31070465 个请求 (平均每次握手处理了 1.8个数据请求)
reading nginx正在读请求首部的个数,有请求来了,正打算把它接进来了,,正在接进来的请求的个数 nginx正在 读取其首部请求的个数 -- nginx 读取到客户端的Header信息数
writing nginx读的请求的主体,处理了请求,正在响应给一个客户端,,请求已经接进来了,接进来之后,首部读完了,正在读请求的内容,,,,请求首部已经结束,正在处理它所请求的内容,或者正在读它请求的主体(不是首部),,正在发送给响应客户端 nginx正在读取其主体的请求的个数、正处理着其请求内容的请求的个数或者正在向其客户发送响应的个数 -- nginx 返回给客户端的Header信息数
waiting 处于长连接状态,而目前又处于活动状态(读状态加上写状态) 长连接模式的保持的连接个数 -- 开启 keep-alive 的情况下,这个值等于active - (reading + writing),意思就是Nginx说已经处理完正在等候下一次请求指令的驻留连接
Examples
http://blog.kovyrin.net/2006/04/29/monitoring-nginx-with-rrdtool/
http://dev.2xlp.com/svn/nginx_config/trunk/conf/_rrd/__README__.txt
nginx所输出的信息与apache所输出的信息不太一样,我们这样一个状态信息应该是不允许所有人都来读的, 由此可以限定谁能读,谁不能读,马哥不演示了
http://nginx.org/en/docs/http/ngx_http_stub_status_module.html
Module ngx_http_stub_status_module
| Example Configuration Directives stub_status Data Embedded Variables |
The ngx_http_stub_status_module module provides access to basic status information.
This module is not built by default, it should be enabled with the --with-http_stub_status_module configuration parameter.
Example Configuration
location = /basic_status {
    stub_status;
}
This configuration creates a simple web page with basic status data which may look like as follows:
Active connections: 291
server accepts handled requests
 16630948 16630948 31070465
Reading: 6 Writing: 179 Waiting: 106
Directives
| Syntax: | stub_status; |
|---|---|
| Default: | — |
| Context: | server, location |
The basic status information will be accessible from the surrounding location.
In versions prior to 1.7.5, the directive syntax required an arbitrary argument, for example, “stub_status on”.Data
The following status information is provided:
Active connections #当前处于活动状态的连接的个数The current number of active client connections including
Waitingconnections.acceptsThe total number of accepted client connections.
handledThe total number of handled connections. Generally, the parameter value is the same as
acceptsunless some resource limits have been reached (for example, the worker_connections limit).requestsThe total number of client requests.
ReadingThe current number of connections where nginx is reading the request header.
WritingThe current number of connections where nginx is writing the response back to the client.
WaitingThe current number of idle client connections waiting for a request.
Embedded Variables
The ngx_http_stub_status_module module supports the following embedded variables (1.3.14):
$connections_activesame as the
Active connectionsvalue;$connections_readingsame as the
Readingvalue;$connections_writingsame as the
Writingvalue;$connections_waitingsame as the
Waitingvalue.
[root@master nginx]# vim nginx.conf
........................................................
location /status {
stub_status on;
}
........................................................
[root@master nginx]# service nginx reload
nginx: the configuration file /etc/nginx/nginx.conf syntax is ok
nginx: configuration file /etc/nginx/nginx.conf test is successful
重新载入 nginx: [确定]
[root@master nginx]#
这个路径是自己定义的,无所谓的,
当前的活动连接数
服务器接受处理的请求数
Reading 0 Writing 1 Waiting: 1
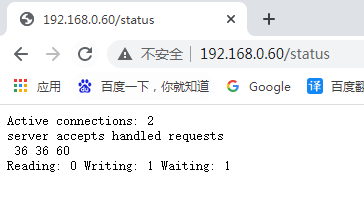
https://www.nginx.cn/doc/optional/ssl.html ssl 模块
HttpSSL
This module enables HTTPS support.
It supports checking client certificates with two limitations:
it is not possible to assign the list of the abolished certificates (revocation lists)
if you have a chain certificate file (sometimes called an intermediate certificate) you don't specify it separately like you do in Apache. Instead you need to add the information from the chain cert to the end of your main certificate file. This can be done by typing "cat chain.crt >> mysite.com.crt" on the command line. Once that is done you won't use the chain cert file for anything else, you just point Nginx to the main certificate file.
By default the module is not built, it is necessary to specify that it be built with with the --with-http_ssl_module parameter to ./configure. Building this module requires the OpenSSL libraries and include-files, often are the necessary files in separate packages.
The following is an example configuration, to reduce the CPU load it is recommended to run one worker process only and to enable keep-alive connections:
worker_processes 1;
http {

  server {
    listen               443;
    ssl                  on;
    ssl_certificate      /usr/local/nginx/conf/cert.pem;
    ssl_certificate_key  /usr/local/nginx/conf/cert.key;
    keepalive_timeout    70;
  }

}
When using chain certificates, just append the extra certificates into your .crt file (cert.pem in the example). Your own certificate needs to be on top of the file, otherwise key get a mismatch with the key.
Generate Certificates
To generate dummy certficates you can do this steps:
$ cd /usr/local/nginx/conf
$ openssl genrsa -des3 -out server.key 1024
$ openssl req -new -key server.key -out server.csr
$ cp server.key server.key.org
$ openssl rsa -in server.key.org -out server.key
$ openssl x509 -req -days 365 -in server.csr -signkey server.key -out server.crt
Configure the new certificate into nginx.conf:
server {

    server_name YOUR_DOMAINNAME_HERE;
    listen 443;
    ssl on;
    ssl_certificate /usr/local/nginx/conf/server.crt;
    ssl_certificate_key /usr/local/nginx/conf/server.key;

}
Restart Nginx.
Now all ready to access using:
https://YOUR_DOMAINNAME_HERE
指令
ssl
syntax: ssl [on|off]
default: ssl off
context: main, server
Enables HTTPS for a server.
ssl_certificate
syntax: ssl_certificate file
default: ssl_certificate cert.pem
context: main, server
Indicates file with the certificate in PEM format for this virtual server. The same file can contain other certificates, and also secret key in PEM format. Since version 0.6.7 the file path is relative to directory of nginx configuration file nginx.conf, but not to nginx prefix directory.
ssl_certificate_key
syntax: ssl_certificate_key file
default: ssl_certificate_key cert.pem
context: main, server
Indicates file with the secret key in PEM format for this virtual server. Since version 0.6.7 the filename path is relative to directory of nginx configuration file nginx.conf, but not to nginx prefix directory.
ssl_client_certificate
syntax: ssl_client_certificate file
default: none
context: main, server
Indicates file with certificates CA in PEM format, utilized for checking the client certificates.
ssl_dhparam
syntax: ssl_dhparam file
default: none
context: main, server
Indicates file with Diffie-Hellman parameters in PEM format, utilized for negotiating TLS session keys.
ssl_ciphers
syntax: ssl_ciphers file
default: ssl_ciphers ALL:!ADH:RC4+RSA:+HIGH:+MEDIUM:+LOW:+SSLv2:+EXP
context: main, server
Directive describes the permitted ciphers. Ciphers are assigned in the formats supported by OpenSSL, for example:
ssl_ciphersALL:!ADH:!EXPORT56:RC4+RSA:+HIGH:+MEDIUM:+LOW:+SSLv2:+EXP;Complete list can be looked with the following command:
openssl ciphers
ssl_crl
syntax: ssl_crl file
default: none
context: http, server
This directive (0.8.7+) specifies a file with the revoked certificates (CRL) in the PEM, which is used to check for client certificates.
ssl_prefer_server_ciphers
syntax: ssl_prefer_server_ciphers [on|off]
default: ssl_prefer_server_ciphers off
context: main, server
Requires protocols SSLv3 and TLSv1 server ciphers be preferred over the client's ciphers.
ssl_protocols
syntax: ssl_protocols [SSLv2] [SSLv3] [TLSv1]
default: ssl_protocols SSLv2 SSLv3 TLSv1
context: main, server
Directive enables the protocols indicated.
ssl_verify_client
syntax: ssl_verify_client on|off|ask
default: ssl_verify_client off
context: main, server
Directive enables verifying client certificates. Parameter 'ask' checks a client certificate if it was offered.
ssl_verify_depth
syntax: ssl_verify_depth number
default: ssl_verify_depth 1
context: main, server
Sets depth checking in the chain of client certificates.
ssl_session_cache
syntax: ssl_session_cache off|none|builtin:size and/or shared:name:size
default: ssl_session_cache off
context: main, server
The directive sets the types and sizes of caches to store the SSL sessions.
The cache types are:
off -- Hard off: nginx says explicitly to a client that sessions can not reused.
none -- Soft off: nginx says to a client that session can be resued, but nginx actually never reuses them. This is workaround for some mail clients as ssl_session_cache may be used in mail proxy as well as in HTTP server.
builtin -- the OpenSSL builtin cache, is used inside one worker process only. The cache size is assigned in the number of the sessions. Note: there appears to be a memory fragmentation issue using this method, please take that into consideration when using this. See "References" below.
shared -- the cache is shared between all worker processes. The size of cache is assigned in the bytes, 1 MB cache can contain about 4000 sessions. Each shared cache must have arbitrary name. Cache with the same name can be used in several virtual servers.
It is possible to use both types of cache simultaneously, for example:
ssl_session_cache builtin:1000 shared:SSL:10m;
However, the only shared cache usage without that builtin should be more effective.
ssl_session_timeout
syntax: ssl_session_timeout time
default: ssl_session_timeout 5m
context: main, server
Assigns the time during which the client can repeatedly use the parameters of the session, which is stored in the cache.
This module supports several nonstandard error codes which can be used for debugging with the aid of directive error_page:
495 - error checking client certificate
496 - client did not grant the required certificate
497 - normal request was sent to HTTPS
Debugging is done after the request is completely dismantled and are accessible via variables such as $request_uri, $uri, $arg and others. Built-in variables Module ngx_http_ssl_module supports several built-in variables:
$ssl_cipher returns the line of those utilized it is cipher for established SSL-connection
$ssl_client_serial returns the series number of client certificate for established SSL-connection
$ssl_client_s_dn returns line subject DN of client certificate for established SSL-connection
$ssl_client_i_dn returns line issuer DN of client certificate for established SSL-connection
$ssl_protocol returns the protocol of established SSL-connection
ssl_engine
syntax: ssl_engine
This allows specifying the OpenSSL engine to use, like Padlock for example. It requires a more recent version of OpenSSL.
References
Original Documentation SSL Memory Fragmentation and new default status for ssl_session_cache
http://tengine.taobao.org/nginx_docs/cn/docs/http/ngx_http_ssl_module.html
Module ngx_http_ssl_module
english
русский
简体中文
עברית
日本語
türkçe
news
about
download
security advisories
documentation
pgp keys
faq
links
books
support
donation
trac
wiki
twitter
nginx.com
This translation may be out of date. Check the English version for recent changes.
The ngx_http_ssl_module module provides the necessary support for HTTPS.
This module is not built by default, it should be enabled with the --with-http_ssl_module configuration parameter.
This module requires the OpenSSL library.
Example Configuration
To reduce the processor load it is recommended to
set the number of worker processes equal to the number of processors,
enable keep-alive connections,
enable shared session cache,
disable built-in session cache,
and possibly increase the session lifetime (by default, 5 minutes):
worker_processes 2;

http {

    ...

    server {
        listen              443;
        keepalive_timeout   70;

        ssl                 on;
        ssl_protocols       SSLv3 TLSv1 TLSv1.1 TLSv1.2;
        ssl_ciphers         AES128-SHA:AES256-SHA:RC4-SHA:DES-CBC3-SHA:RC4-MD5;
        ssl_certificate     /usr/local/nginx/conf/cert.pem;
        ssl_certificate_key /usr/local/nginx/conf/cert.key;
        ssl_session_cache   shared:SSL:10m;
        ssl_session_timeout 10m;

        ...
    }
Directives
| syntax: | ssl |
| default: | ssl off; |
| context: | http, server |
Enables the HTTPS protocol for the given virtual server.
| syntax: | ssl_certificate |
| default: | — |
| context: | http, server |
Specifies a file with a certificate in the PEM format for the given virtual server. If intermediate certificates should be specified in addition to a primary certificate, they should be specified in the same file in the following order: the primary certificate comes first, then the intermediate certificates. A secret key in the PEM format may be placed in the same file.
It should be kept in mind that due to the HTTPS protocol limitations virtual servers should listen on different IP addresses:
server {
    listen          192.168.1.1:443;
    server_name     one.example.com;
    ssl_certificate /usr/local/nginx/conf/one.example.com.cert;
    ...
}

server {
    listen          192.168.1.2:443;
    server_name     two.example.com;
    ssl_certificate /usr/local/nginx/conf/two.example.com.cert;
    ...
}
otherwise the first server’s certificate will be issued for the second site.
| syntax: | ssl_certificate_key |
| default: | — |
| context: | http, server |
Specifies a file with a secret key in the PEM format for the given virtual server.
| syntax: | ssl_ciphers |
| default: | ssl_ciphers HIGH:!aNULL:!MD5; |
| context: | http, server |
Specifies the enabled ciphers. The ciphers are specified in the format understood by the OpenSSL library, for example:
ssl_ciphers ALL:!aNULL:!EXPORT56:RC4+RSA:+HIGH:+MEDIUM:+LOW:+SSLv2:+EXP;
The full list can be viewed using the “openssl ciphers” command.
The previous versions of nginx used different ciphers by default.
| syntax: | ssl_client_certificate |
| default: | — |
| context: | http, server |
Specifies a file with CA certificates in the PEM format used for client certificate verification.
| syntax: | ssl_crl |
| default: | — |
| context: | http, server |
This directive appeared in version 0.8.7.
Specifies a file with revoked certificates (CRL) in the PEM format, used to client certificate verification.
| syntax: | ssl_dhparam |
| default: | — |
| context: | http, server |
This directive appeared in version 0.7.2.
Specifies a file with DH parameters for EDH ciphers.
| syntax: | ssl_prefer_server_ciphers |
| default: | ssl_prefer_server_ciphers off; |
| context: | http, server |
Specifies that server ciphers should be preferred over client ciphers when using the SSLv3 and TLS protocols.
| syntax: | ssl_protocols [ |
| default: | ssl_protocols SSLv3 TLSv1 TLSv1.1 TLSv1.2; |
| context: | http, server |
Enables the specified protocols. The parameters TLSv1.1 and TLSv1.2 work only when using the OpenSSL library version 1.0.1 and higher.
The parametersTLSv1.1andTLSv1.2are supported starting from versions 1.1.13 and 1.0.12 so when using OpenSSL version 1.0.1 and higher on older nginx versions these protocols will work but could not be disabled.
| syntax: | ssl_session_cache |
| default: | ssl_session_cache none; |
| context: | http, server |
Sets types and sizes of caches that store session parameters. A cache can be any of the following types:
offthe use of session cache is strictly prohibited: nginx explicitly tells a client that sessions may not be reused.
nonethe use of session cache is gently disallowed: nginx tells a client that sessions may be reused, but does not actually do that.
builtina cache built in OpenSSL; used by one worker process only. The cache size is specified in sessions. If size is not given, it is equal to 20480 sessions. Use of the built-in cache can cause memory fragmentation.
sharedshared between all worker processes. The cache size is specified in bytes; one megabyte can store about 4000 sessions. Each shared cache should have an arbitrary name. A cache with the same name can be used in several virtual servers.
Both cache types can be used simultaneously, for example:
ssl_session_cache builtin:1000 shared:SSL:10m;
but using only shared cache without the built-in cache should be more efficient.
| syntax: | ssl_session_timeout |
| default: | ssl_session_timeout 5m; |
| context: | http, server |
Specifies a time during which a client may reuse the session parameters stored in a cache.
| syntax: | ssl_verify_client |
| default: | ssl_verify_client off; |
| context: | http, server |
Enables the client certificate verification. The optional parameter (0.8.7+) requests the client certificate and verifies it if it was present. The result of verification is stored in the $ssl_client_verify variable.
| syntax: | ssl_verify_depth |
| default: | ssl_verify_depth 1; |
| context: | http, server |
Sets a verification depth in the client certificates chain.
Error Processing
The ngx_http_ssl_module module supports several non-standard error codes that can be used for redirects using the error_page directive:
495
an error has occurred during the client certificate verification;
496
a client did not present the required certificate;
497
a regular request was sent to the HTTPS port.
A redirection happens after the request was fully parsed and variables such as $request_uri, $uri, $args and others were made available.
Embedded Variables
The ngx_http_ssl_module module supports several embedded variables:
$ssl_cipherreturns the string of ciphers used for an established SSL connection;
$ssl_client_certreturns the client certificate in the PEM format for an established SSL connection, with each line except the first prepended with the tab character; this is intended for the use in the proxy_set_header directive;
$ssl_client_raw_certreturns the client certificate in the PEM format for an established SSL connection;
$ssl_client_serialreturns the serial number of the client certificate for an established SSL connection;
$ssl_client_s_dnreturns the “subject DN” string of the client certificate for an established SSL connection;
$ssl_client_i_dnreturns the “issuer DN” string of the client certificate for an established SSL connection;
$ssl_client_verifyreturns the result of client certificate verification: “
SUCCESS”, “FAILED”, and “NONE” if a certificate was not present;$ssl_protocolreturns the protocol of an established SSL connection;
$ssl_session_idreturns the session identifier of an established SSL connection.
我们想让nginx支持ssl,得自己先创建证书,私钥(当然得先创建私钥,才能创建证书的)
[root@master ~]# cd /etc/nginx/
[root@master nginx]# vim nginx.conf
.......................................................
server { #这是一个虚拟主机,,,支持端口吗?不就是443吗
listen 443;
server_name localhost;
ssl on;# 打开了ssl功能
#ssl_certificate cert.pem;#证书
ssl_certificate /etc/nginx/ssl/nginx.pem;
#ssl_certificate_key cert.key;#私钥
ssl_certificate_key /etc/nginx/ssl/nginx.key;
ssl_session_timeout 5m;#会话超时时间
ssl_protocols SSLv2 SSLv3 TLSv1;#使用的协议
ssl_ciphers HIGH:!aNULL:!MD5;#加密算法
ssl_prefer_server_ciphers on;#是否允许服务端选择其倾向的加密算法????
#ssl_prefer_server_ciphers on|off 作用:是否由服务器决定采用哪种加密算法,
#如果ssl协议支持tlsv1 tls1.1这种老协议,设置为 on ,并配合ssl_ciphers使用
#如果ssl协议只支持tlsv1.2 tlsv1.3新协议,设置为 off (nginx默认为off),,,,,因为新协议不再采纳此参数
location / {
#root html; #对应的网页文件在什么路径下 html是相对路径,相对于./configure 时 prefix指定的路径
root /web/ssl;
index index.html index.htm;
}
}
.......................................................
弄一下ssl
[root@master nginx]# vim /etc/pki/tls/openssl.cnf
.......................................................
####################################################################
[ CA_default ]
dir = /etc/pki/CA # Where everything is kept
certs = $dir/certs # Where the issued certs are kept
crl_dir = $dir/crl # Where the issued crl are kept
database = $dir/index.txt # database index file.
#unique_subject = no # Set to 'no' to allow creation of
# several ctificates with same subject.
new_certs_dir = $dir/newcerts # default place for new certs.
certificate = $dir/cacert.pem # The CA certificate
serial = $dir/serial # The current serial number
crlnumber = $dir/crlnumber # the current crl number
# must be commented out to leave a V1 CRL
crl = $dir/crl.pem # The current CRL
private_key = $dir/private/cakey.pem# The private key
RANDFILE = $dir/private/.rand # private random number file
x509_extensions = usr_cert # The extentions to add to the cert
# Comment out the following two lines for the "traditional"
# (and highly broken) format.
name_opt = ca_default # Subject Name options
cert_opt = ca_default # Certificate field options
.......................................................
[root@master nginx]# cd /etc/pki/CA/
[root@master CA]# ls
certs crl newcerts private
[root@master CA]#
[root@master CA]# ls private/ #没有文件
[root@master CA]#
生成一个私钥
[root@master CA]# (umask 077;openssl genrsa 2048 > private/cakey.pem)
Generating RSA private key, 2048 bit long modulus
.................................................................................................................+++
................+++
e is 65537 (0x10001)
[root@master CA]#
生成自签证书 (ca的证书)
[root@master CA]# openssl req -new -x509 -key private/cakey.pem -out cacert.pem
You are about to be asked to enter information that will be incorporated
into your certificate request.
What you are about to enter is what is called a Distinguished Name or a DN.
There are quite a few fields but you can leave some blank
For some fields there will be a default value,
If you enter '.', the field will be left blank.
-----
Country Name (2 letter code) [XX]:CN
State or Province Name (full name) []:HA
Locality Name (eg, city) [Default City]:ZZ
Organization Name (eg, company) [Default Company Ltd]:MageEdu
Organizational Unit Name (eg, section) []:Tech
Common Name (eg, your name or your server's hostname) []:ca.magedu.com #这个很关键
Email Address []:caadmin@magedu.com
[root@master CA]#
创建几个文件
[root@master CA]# ls
cacert.pem certs crl newcerts private
[root@master CA]# touch serial
[root@master CA]# echo 01 > serial
[root@master CA]# touch index.txt
[root@master CA]#
[root@master CA]# cd
[root@master ~]# cd /etc/nginx/
[root@master nginx]#
[root@master nginx]# mkdir ssl
[root@master nginx]# cd ssl
[root@master ssl]# pwd
/etc/nginx/ssl
[root@master ssl]#
[root@master ssl]# (umask 077;openssl genrsa 1024 > nginx.key)
Generating RSA private key, 1024 bit long modulus
....................................++++++
...................................................................++++++
e is 65537 (0x10001)
[root@master ssl]#
创建申请
[root@master ssl]# openssl req -new -key nginx.key -out nginx.csr
You are about to be asked to enter information that will be incorporated
into your certificate request.
What you are about to enter is what is called a Distinguished Name or a DN.
There are quite a few fields but you can leave some blank
For some fields there will be a default value,
If you enter '.', the field will be left blank.
-----
Country Name (2 letter code) [XX]:CN
State or Province Name (full name) []:HA
Locality Name (eg, city) [Default City]:ZZ
Organization Name (eg, company) [Default Company Ltd]:MageEdu
Organizational Unit Name (eg, section) []:Tech
Common Name (eg, your name or your server's hostname) []:www.magedu.com
Email Address []:
Please enter the following 'extra' attributes
to be sent with your certificate request
A challenge password []:
An optional company name []:
[root@master ssl]#
让ca签一下(就是本机)
[root@master ssl]# openssl ca -in nginx.csr -out nginx.crt -days 3650
Using configuration from /etc/pki/tls/openssl.cnf
Check that the request matches the signature
Signature ok
Certificate Details:
Serial Number: 1 (0x1)
Validity
Not Before: Apr 17 02:32:26 2021 GMT
Not After : Apr 15 02:32:26 2031 GMT
Subject:
countryName = CN
stateOrProvinceName = HA
organizationName = MageEdu
organizationalUnitName = Tech
commonName = www.magedu.com
X509v3 extensions:
X509v3 Basic Constraints:
CA:FALSE
Netscape Comment:
OpenSSL Generated Certificate
X509v3 Subject Key Identifier:
31:05:85:39:17:2C:EC:95:6B:E6:03:17:53:05:AB:62:82:8C:D4:66
X509v3 Authority Key Identifier:
keyid:7B:06:13:2D:FB:C0:65:3D:4F:57:B5:1A:3C:B3:20:2D:99:AA:72:8C
Certificate is to be certified until Apr 15 02:32:26 2031 GMT (3650 days)
Sign the certificate? [y/n]:y
1 out of 1 certificate requests certified, commit? [y/n]y
Write out database with 1 new entries
Data Base Updated
[root@master ssl]#
[root@master ssl]# service nginx restart
nginx: [emerg] BIO_new_file("/etc/nginx/ssl/nginx.pem") failed (SSL: error:02001002:system library:fopen:No such file or directory:fopen('/etc/nginx/ssl/nginx.pem','r') error:2006D080:BIO routines:BIO_new_file:no such file)
nginx: configuration file /etc/nginx/nginx.conf test failed
[root@master ssl]#
[root@master ssl]# vim /etc/nginx/nginx.conf
.......................................................
ssl_certificate /etc/nginx/ssl/nginx.crt;
.......................................................
[root@master ssl]# service nginx restart #因为启用了 ssl ,新的端口 443,所以要重启,重载好像不行
nginx: the configuration file /etc/nginx/nginx.conf syntax is ok
nginx: configuration file /etc/nginx/nginx.conf test is successful
停止 nginx: [确定]
正在启动 nginx: [确定]
[root@master ssl]#
[root@master ssl]# netstat -tnlp
Active Internet connections (only servers)
Proto Recv-Q Send-Q Local Address Foreign Address State PID/Program name
tcp 0 0 0.0.0.0:111 0.0.0.0:* LISTEN 1760/rpcbind
tcp 0 0 0.0.0.0:80 0.0.0.0:* LISTEN 3728/nginx
tcp 0 0 0.0.0.0:22 0.0.0.0:* LISTEN 2105/sshd
tcp 0 0 0.0.0.0:50422 0.0.0.0:* LISTEN 1783/rpc.statd
tcp 0 0 127.0.0.1:631 0.0.0.0:* LISTEN 1839/cupsd
tcp 0 0 127.0.0.1:25 0.0.0.0:* LISTEN 2637/master
tcp 0 0 0.0.0.0:443 0.0.0.0:* LISTEN 3728/nginx #看到了443
tcp 0 0 :::3306 :::* LISTEN 2568/mysqld
tcp 0 0 :::111 :::* LISTEN 1760/rpcbind
tcp 0 0 :::22 :::* LISTEN 2105/sshd
tcp 0 0 ::1:631 :::* LISTEN 1839/cupsd
tcp 0 0 ::1:25 :::* LISTEN 2637/master
tcp 0 0 :::37371 :::* LISTEN 1783/rpc.statd
[root@master ssl]#
https://192.168.0.60/ 可能会发警告的,我们没法验证它的证书


为什么没发现,见下图
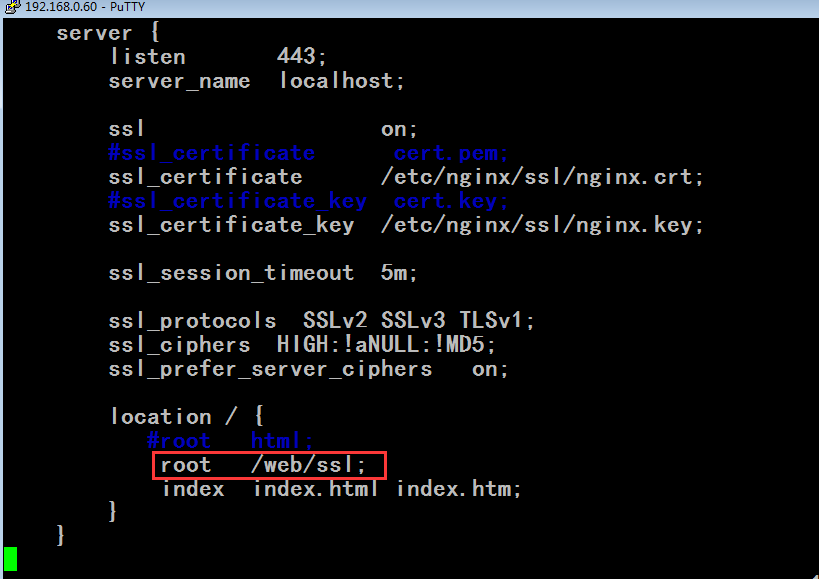
[root@master ssl]# vim /etc/nginx/nginx.conf
.......................................................................................
server {
listen 443;
server_name localhost;
ssl on;
#ssl_certificate cert.pem;
ssl_certificate /etc/nginx/ssl/nginx.crt;
#ssl_certificate_key cert.key;
ssl_certificate_key /etc/nginx/ssl/nginx.key;
ssl_session_timeout 5m;
ssl_protocols SSLv2 SSLv3 TLSv1;
ssl_ciphers HIGH:!aNULL:!MD5;
ssl_prefer_server_ciphers on;
location / {
#root html;
root /web/htdocs; #改它吧
index index.html index.htm;
}
}
.......................................................................................
[root@master ssl]# service nginx reload
nginx: the configuration file /etc/nginx/nginx.conf syntax is ok
nginx: configuration file /etc/nginx/nginx.conf test is successful
重新载入 nginx: [确定]
[root@master ssl]#
https://192.168.0.60/ 如下图,应该可以正常访问了, 只不过个这证书我们无法验证而已

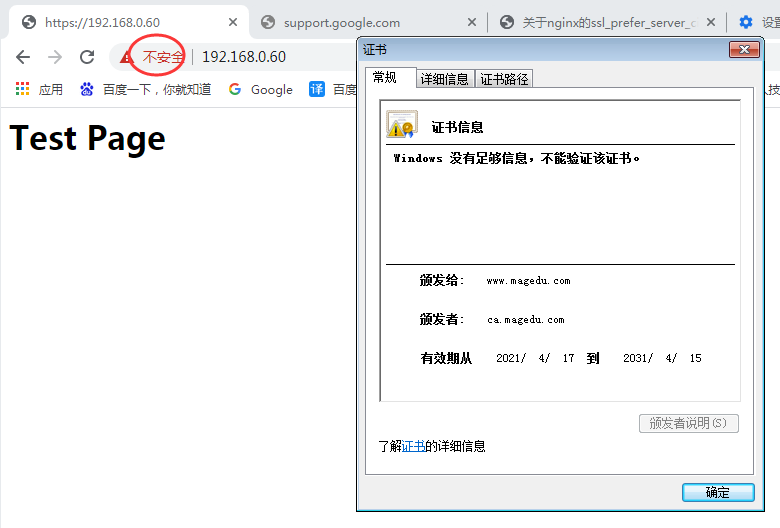
如何来使用nginx的虚拟主机,我们只需要在server之外再定义一个server即可,
[root@master ssl]# vim /etc/nginx/nginx.conf
..................................................................
#gzip on;
server {
listen 80;
#server_name localhost;
server_name www.magedu.com;
..................................................................
server {
listen 80;
server_name www.a.org;
location / {
root /web/a.org;
index index.html;
}
}
..................................................................
[root@master ssl]# mkdir /web/a.org
[root@master ssl]# vim /web/a.org/index.html
a.org
[root@master ssl]# nginx -t #测试 nginx.conf的语法
nginx: the configuration file /etc/nginx/nginx.conf syntax is ok
nginx: configuration file /etc/nginx/nginx.conf test is successful
[root@master ssl]#
[root@master ssl]# service nginx configtest #也是测试 nginx.conf的语法
nginx: the configuration file /etc/nginx/nginx.conf syntax is ok
nginx: configuration file /etc/nginx/nginx.conf test is successful
[root@master ssl]#
[root@master ssl]# service nginx restart #重启nginx ,是不是这里改了服务名server_name,必须要重启吗?
nginx: the configuration file /etc/nginx/nginx.conf syntax is ok
nginx: configuration file /etc/nginx/nginx.conf test is successful
停止 nginx: [确定]
正在启动 nginx: [确定]
[root@master ssl]#
找另一个linux
[root@slave ~]# vim /etc/hosts
127.0.0.1 localhost localhost.localdomain localhost4 localhost4.localdomain4
::1 localhost localhost.localdomain localhost6 localhost6.localdomain6
192.168.0.60 www.magedu.com
192.168.0.60 www.a.org
[root@slave ~]# curl http://www.magedu.com
<html>
<head><title>Index of /</title></head>
<body bgcolor="white">
<h1>Index of /</h1><hr><pre><a href="../">../</a>
<a href="404.html">404.html</a> 15-Apr-2021 07:49 18
<a href="index.html">index.html</a> 15-Apr-2021 06:56 20
</pre><hr></body>
</html>
[root@slave ~]#
[root@slave ~]# curl http://www.magedu.com/index.html
<h1>Test Page </h1>
[root@slave ~]#
[root@slave ~]# curl http://www.a.org/index.html
a.org
[root@slave ~]#
如何实现lemp (也有人称为lnmp)
linux+nginx+mysql+php
PHP+MySQL
nginx要想结合php,只能以fastcgi的方式,它不支持模块化的方式连入nginx的,
我们可以借助于php自带的php-fpm功能,把这个功能启起来,让它监听在127.0.0.1的9000端口上,所以我们只需要编译配置php-fpm,并且确保配置好我们的mysql就会工作起来了,
php-fpm,可以工作在另一台主机上,我们可以定义其监听外网端口并限定只有有限的前端web服务器能够访问,,,为了加速php的执行,我们可以提供xcache


[root@master ~]# cd
[root@master ~]#
我从 https://downloads.mysql.com/archives/community/ 下载 https://downloads.mysql.com/archives/get/p/23/file/mysql-5.6.10-linux-glibc2.5-i686.tar.gz
[root@master ~]# wget https://downloads.mysql.com/archives/get/p/23/file/mysql-5.6.10-linux-glibc2.5-i686.tar.gz

[root@master ~]# tar xf mysql-5.6.10-linux-glibc2.5-i686.tar.gz -C /usr/local/
[root@master ~]#
[root@master ~]# mkdir /mydata1/data -pv
mkdir: 已创建目录 "/mydata1"
mkdir: 已创建目录 "/mydata1/data"
[root@master ~]# useradd -r mysql
useradd:用户“mysql”已存在
[root@master ~]# chown -R mysql.mysql /mydata1/data
[root@master ~]#
[root@master ~]# cd /usr/local/
[root@master local]# ls
bin etc games include lib libexec mysql mysql-5.6.10-linux-glibc2.5-i686 sbin share src
[root@master local]# rm -f mysql #删除原来的mysql软链接
[root@master local]# ln -sv mysql-5.6.10-linux-glibc2.5-i686 mysql
"mysql" -> "mysql-5.6.10-linux-glibc2.5-i686"
[root@master local]# cd mysql
[root@master mysql]# ls
bin data include lib mysql-test scripts sql-bench
COPYING docs INSTALL-BINARY man README share support-files
[root@master mysql]# ll
总用量 76
drwxr-xr-x. 2 root root 4096 4月 17 17:10 bin
-rw-r--r--. 1 7161 wheel 17987 1月 23 2013 COPYING
drwxr-xr-x. 4 root root 4096 4月 17 17:10 data
drwxr-xr-x. 2 root root 4096 4月 17 17:10 docs
drwxr-xr-x. 3 root root 4096 4月 17 17:10 include
-rw-r--r--. 1 7161 wheel 7468 1月 23 2013 INSTALL-BINARY
drwxr-xr-x. 3 root root 4096 4月 17 17:10 lib
drwxr-xr-x. 4 root root 4096 4月 17 17:10 man
drwxr-xr-x. 10 root root 4096 4月 17 17:10 mysql-test
-rw-r--r--. 1 7161 wheel 2552 1月 23 2013 README
drwxr-xr-x. 2 root root 4096 4月 17 17:10 scripts
drwxr-xr-x. 28 root root 4096 4月 17 17:10 share
drwxr-xr-x. 4 root root 4096 4月 17 17:10 sql-bench
drwxr-xr-x. 3 root root 4096 4月 17 17:10 support-files
[root@master mysql]#
[root@master mysql]# chown -R root.mysql ./*
[root@master mysql]# ll
总用量 76
drwxr-xr-x. 2 root mysql 4096 4月 17 17:10 bin
-rw-r--r--. 1 root mysql 17987 1月 23 2013 COPYING
drwxr-xr-x. 4 root mysql 4096 4月 17 17:10 data
drwxr-xr-x. 2 root mysql 4096 4月 17 17:10 docs
drwxr-xr-x. 3 root mysql 4096 4月 17 17:10 include
-rw-r--r--. 1 root mysql 7468 1月 23 2013 INSTALL-BINARY
drwxr-xr-x. 3 root mysql 4096 4月 17 17:10 lib
drwxr-xr-x. 4 root mysql 4096 4月 17 17:10 man
drwxr-xr-x. 10 root mysql 4096 4月 17 17:10 mysql-test
-rw-r--r--. 1 root mysql 2552 1月 23 2013 README
drwxr-xr-x. 2 root mysql 4096 4月 17 17:10 scripts
drwxr-xr-x. 28 root mysql 4096 4月 17 17:10 share
drwxr-xr-x. 4 root mysql 4096 4月 17 17:10 sql-bench
drwxr-xr-x. 3 root mysql 4096 4月 17 17:10 support-files
[root@master mysql]#
[root@master mysql]# scripts/mysql_install_db --user=mysql --datadir=/mydata1/data
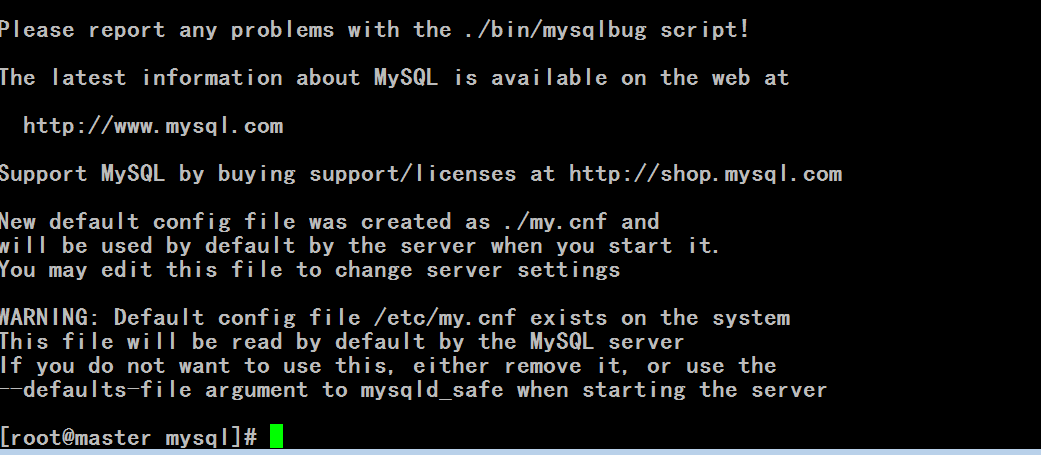
[root@master mysql]# ls
bin data include lib my.cnf README share support-files
COPYING docs INSTALL-BINARY man mysql-test scripts sql-bench
[root@master mysql]# pwd
/usr/local/mysql
[root@master mysql]#
[root@master mysql]# vim my.cnf
..................................................................
[mysqld]
..................................................................
datadir = /mydata1/data
innodb_file_per_table = ON
log-bin = master.bin
..................................................................
[root@master mysql]# cp support-files/mysql.server /etc/init.d/mysqld
cp:是否覆盖"/etc/init.d/mysqld"? y #覆盖以前的
[root@master mysql]#
我们仍然可以使用chkconfig,其实红帽6可以使用其它指令了
[root@master mysql]# chkconfig --add mysqld
[root@master mysql]#
[root@master mysql]# service mysqld start
Starting MySQL...The server quit without updating PID file [失败]ta1/data/master.magedu.com.pid).
[root@master mysql]#
[root@master mysql]# netstat -tnlp
Active Internet connections (only servers)
Proto Recv-Q Send-Q Local Address Foreign Address State PID/Program name
tcp 0 0 0.0.0.0:111 0.0.0.0:* LISTEN 1760/rpcbind
tcp 0 0 0.0.0.0:80 0.0.0.0:* LISTEN 4213/nginx
tcp 0 0 0.0.0.0:22 0.0.0.0:* LISTEN 2105/sshd
tcp 0 0 0.0.0.0:50422 0.0.0.0:* LISTEN 1783/rpc.sta td
tcp 0 0 127.0.0.1:631 0.0.0.0:* LISTEN 1839/cupsd
tcp 0 0 127.0.0.1:25 0.0.0.0:* LISTEN 2637/master
tcp 0 0 0.0.0.0:443 0.0.0.0:* LISTEN 4213/nginx
tcp 0 0 :::3306 :::* LISTEN 2568/mysqld #原来的mysqld
tcp 0 0 :::111 :::* LISTEN 1760/rpcbind
tcp 0 0 :::22 :::* LISTEN 2105/sshd
tcp 0 0 ::1:631 :::* LISTEN 1839/cupsd
tcp 0 0 ::1:25 :::* LISTEN 2637/master
tcp 0 0 :::37371 :::* LISTEN 1783/rpc.sta td
[root@master mysql]#
[root@master mysql]# killall mysqld #杀死原来的mysqld
[root@master mysql]# service mysqld start
Starting MySQL. [确定]
[root@master mysql]#
[root@master mysql]# /usr/local/mysql/bin/mysql #直接访问mysql
ERROR 2002 (HY000): Can't connect to local MySQL server through socket '/tmp/mysql.sock' (2) #为什么
[root@master mysql]#
[root@master mysql]# ls /tmp/ #没看到 mysql.sock
[root@master mysql]#
[root@master mysql]# netstat -tnlp
Active Internet connections (only servers)
Proto Recv-Q Send-Q Local Address Foreign Address State PID/Program name
tcp 0 0 0.0.0.0:111 0.0.0.0:* LISTEN 1760/rpcbind
tcp 0 0 0.0.0.0:80 0.0.0.0:* LISTEN 4213/nginx
tcp 0 0 0.0.0.0:22 0.0.0.0:* LISTEN 2105/sshd
tcp 0 0 0.0.0.0:50422 0.0.0.0:* LISTEN 1783/rpc.statd
tcp 0 0 127.0.0.1:631 0.0.0.0:* LISTEN 1839/cupsd
tcp 0 0 127.0.0.1:25 0.0.0.0:* LISTEN 2637/master
tcp 0 0 0.0.0.0:443 0.0.0.0:* LISTEN 4213/nginx
tcp 0 0 :::3306 :::* LISTEN 6488/mysqld #这个启动着呢
tcp 0 0 :::111 :::* LISTEN 1760/rpcbind
tcp 0 0 :::22 :::* LISTEN 2105/sshd
tcp 0 0 ::1:631 :::* LISTEN 1839/cupsd
tcp 0 0 ::1:25 :::* LISTEN 2637/master
tcp 0 0 :::37371 :::* LISTEN 1783/rpc.statd
[root@master mysql]#
[root@master mysql]# pwd
/usr/local/mysql
[root@master mysql]# ls
bin data include lib my.cnf README share support-files
COPYING docs INSTALL-BINARY man mysql-test scripts sql-bench
[root@master mysql]# vim my.cnf
.........................................................
[mysqld]
socket = /tmp/mysql.sock
.........................................................
[root@master mysql]# service mysqld restart
Shutting down MySQL.. [确定]
Starting MySQL. [确定]
[root@master mysql]#
[root@master mysql]# ls /tmp
mysql.sock #看到了
[root@master mysql]#
[root@master mysql]# /usr/local/mysql/bin/mysql
Welcome to the MySQL monitor. Commands end with ; or \g.
Your MySQL connection id is 3
Server version: 5.6.10-log MySQL Community Server (GPL)
Copyright (c) 2000, 2013, Oracle and/or its affiliates. All rights reserved.
Oracle is a registered trademark of Oracle Corporation and/or its
affiliates. Other names may be trademarks of their respective
owners.
Type 'help;' or '\h' for help. Type '\c' to clear the current input statement.
mysql>
输出一下库文件 (导出一下库文件) 因为我们将要针对它进行编译
[root@master mysql]# vim /etc/ld.so.conf.d/mysql.conf
/usr/local/mysql/lib
[root@master mysql]# ldconfig -v
/usr/lib/atlas:
libptf77blas.so.3 -> libptf77blas.so.3.0
libatlas.so.3 -> libatlas.so.3.0
libf77blas.so.3 -> libf77blas.so.3.0
liblapack.so.3 -> liblapack.so.3.0
libclapack.so.3 -> libclapack.so.3.0
libptcblas.so.3 -> libptcblas.so.3.0
libcblas.so.3 -> libcblas.so.3.0
/usr/local/mysql/lib:
libtcmalloc_minimal.so.0 -> libtcmalloc_minimal.so (改变)
libmysqlclient.so.18 -> libmysqlclient_r.so.18.0.0
/usr/lib/mysql:
libmysqlclient.so.16 -> libmysqlclient.so.16.0.0
libmysqlclient_r.so.16 -> libmysqlclient_r.so.16.0.0
/usr/lib/qt-3.3/lib:
libqt-mt.so.3 -> libqt-mt.so.3.3.8
libqui.so.1 -> libqui.so.1.0.0
/lib:
libfreebl3.so -> libfreebl3.so
libproc-3.2.8.so -> libproc-3.2.8.so
libgcc_s.so.1 -> libgcc_s-4.4.7-20120601.so.1
libdevmapper.so.1.02 -> libdevmapper.so.1.02
libfipscheck.so.1 -> libfipscheck.so.1.1.0
libc.so.6 -> libc-2.12.so
libcom_err.so.2 -> libcom_err.so.2.1
libblkid.so.1 -> libblkid.so.1.1.0
libext2fs.so.2 -> libext2fs.so.2.4
libSegFault.so -> libSegFault.so
libbz2.so.1 -> libbz2.so.1.0.4
libcidn.so.1 -> libcidn-2.12.so
liblber-2.4.so.2 -> liblber-2.4.so.2.10.3
libnss_compat.so.2 -> libnss_compat-2.12.so
libplc4.so -> libplc4.so
liblvm2cmd.so.2.02 -> liblvm2cmd.so.2.02
libnss_wins.so.2 -> libnss_wins.so.2
libpam.so.0 -> libpam.so.0.82.2
libnss_sss.so.2 -> libnss_sss.so.2
libz.so.1 -> libz.so.1.2.3
librt.so.1 -> librt-2.12.so
liblvm2app.so.2.2 -> liblvm2app.so.2.2
libaio.so.1.0.0 -> libaio.so.1.0.0
libsemanage.so.1 -> libsemanage.so.1
libnspr4.so -> libnspr4.so
libkrb5.so.3 -> libkrb5.so.3.3
libudev.so.0 -> libudev.so.0.5.1
libmount.so.1 -> libmount.so.1.1.0
libdevmapper-event-lvm2.so.2.02 -> libdevmapper-event-lvm2.so.2.02
libip6tc.so.0 -> libip6tc.so.0.0.0-1.4.7
ld-linux.so.2 -> ld-2.12.so
libcap.so.2 -> libcap.so.2.16
libauparse.so.0 -> libauparse.so.0.0.0
libnl.so.1 -> libnl.so.1.1.4
libnss_nis.so.2 -> libnss_nis-2.12.so
libpopt.so.0 -> libpopt.so.0.0.0
libpcre.so.0 -> libpcre.so.0.0.1
libkeyutils.so.1 -> libkeyutils.so.1.3
libdl.so.2 -> libdl-2.12.so
libsepol.so.1 -> libsepol.so.1
libiw.so.29 -> libiw.so.29
libdb-4.7.so -> libdb-4.7.so
libnih-dbus.so.1 -> libnih-dbus.so.1.0.0
libpthread.so.0 -> libpthread-2.12.so
libplds4.so -> libplds4.so
libldap_r-2.4.so.2 -> libldap_r-2.4.so.2.10.3
libgmodule-2.0.so.0 -> libgmodule-2.0.so.0.2800.8
libdmraid-events-isw.so.1 -> libdmraid-events-isw.so.1.0.0.rc16
libjson.so.0 -> libjson.so.0.1.0
libldap-2.4.so.2 -> libldap-2.4.so.2.10.3
libcgroup.so.1 -> libcgroup.so.1.0.40
libcryptsetup.so.1 -> libcryptsetup.so.1.1.0
libgssglue.so.1 -> libgssglue.so.1.0.0
libjson-c.so.2 -> libjson-c.so.2.0.1
libreadline.so.6 -> libreadline.so.6.0
libgobject-2.0.so.0 -> libgobject-2.0.so.0.2800.8
libncurses.so.5 -> libncurses.so.5.7
libgcrypt.so.11 -> libgcrypt.so.11.5.3
libk5crypto.so.3 -> libk5crypto.so.3.1
libtinfo.so.5 -> libtinfo.so.5.7
libdevmapper-event.so.1.02 -> libdevmapper-event.so.1.02
libgio-2.0.so.0 -> libgio-2.0.so.0.2800.8
libanl.so.1 -> libanl-2.12.so
libBrokenLocale.so.1 -> libBrokenLocale-2.12.so
libexpat.so.1 -> libexpat.so.1.5.2
libnss_dns.so.2 -> libnss_dns-2.12.so
libiptc.so.0 -> libiptc.so.0.0.0-1.4.7
libdmraid.so.1 -> libdmraid.so.1.0.0.rc16
libgpg-error.so.0 -> libgpg-error.so.0.5.0
libcap-ng.so.0 -> libcap-ng.so.0.0.0
libipq.so.0 -> libipq.so.0.0.0-1.4.7
libss.so.2 -> libss.so.2.0
libnih.so.1 -> libnih.so.1.0.0
libasound.so.2 -> libasound.so.2.0.0
libldif-2.4.so.2 -> libldif-2.4.so.2.10.3
libxtables.so.4 -> libxtables.so.4.0.0-1.4.7
libply-splash-core.so.2 -> libply-splash-core.so.2.0.0
libm.so.6 -> libm-2.12.so
libip4tc.so.0 -> libip4tc.so.0.0.0-1.4.7
libuuid.so.1 -> libuuid.so.1.3.0
libnss_hesiod.so.2 -> libnss_hesiod-2.12.so
libdbus-1.so.3 -> libdbus-1.so.3.4.0
libnss_files.so.2 -> libnss_files-2.12.so
libaio.so.1 -> libaio.so.1.0.1
libgthread-2.0.so.0 -> libgthread-2.0.so.0.2800.8
libaudit.so.1 -> libaudit.so.1.0.0
libkrb5support.so.0 -> libkrb5support.so.0.1
libidn.so.11 -> libidn.so.11.6.1
libpam_misc.so.0 -> libpam_misc.so.0.82.0
libgssapi_krb5.so.2 -> libgssapi_krb5.so.2.2
libnsl.so.1 -> libnsl-2.12.so
libpci.so.3 -> libpci.so.3.1.10
libresolv.so.2 -> libresolv-2.12.so
libnss_winbind.so.2 -> libnss_winbind.so.2
libply.so.2 -> libply.so.2.0.0
libnss_nisplus.so.2 -> libnss_nisplus-2.12.so
libpamc.so.0 -> libpamc.so.0.82.1
libfreeblpriv3.so -> libfreeblpriv3.so
libselinux.so.1 -> libselinux.so.1
libthread_db.so.1 -> libthread_db-1.0.so
libglib-2.0.so.0 -> libglib-2.0.so.0.2800.8
libtirpc.so.1 -> libtirpc.so.1.0.10
libcrypt.so.1 -> libcrypt-2.12.so
libattr.so.1 -> libattr.so.1.1.0
libutil.so.1 -> libutil-2.12.so
libe2p.so.2 -> libe2p.so.2.3
libgssrpc.so.4 -> libgssrpc.so.4.1
libncursesw.so.5 -> libncursesw.so.5.7
libparted-2.1.so.0 -> libparted-2.1.so.0.0.0
libacl.so.1 -> libacl.so.1.1.0
libwrap.so.0 -> libwrap.so.0.7.6
/usr/lib:
libwnck-1.so.22 -> libwnck-1.so.22.3.23
libasprintf.so.0 -> libasprintf.so.0.0.0
libcupsppdc.so.1 -> libcupsppdc.so.1
libgstbase-0.10.so.0 -> libgstbase-0.10.so.0.25.0
libgettextpo.so.0 -> libgettextpo.so.0.4.0
libsvn_wc-1.so.0 -> libsvn_wc-1.so.0.0.0
libfreetype.so.6 -> libfreetype.so.6.3.22
libhugetlbfs.so -> libhugetlbfs.so
libabrt.so.0 -> libabrt.so.0.0.1
libpython2.6.so.1.0 -> libpython2.6.so.1.0
libnl-route-3.so.200 -> libnl-route-3.so.200.16.1
libgstsdp-0.10.so.0 -> libgstsdp-0.10.so.0.20.0
libXxf86misc.so.1 -> libXxf86misc.so.1.1.0
libcups.so.2 -> libcups.so.2
libcdda_paranoia.so.0 -> libcdda_paranoia.so.0.10.2
libnssutil3.so -> libnssutil3.so
libGL.so.1 -> libGL.so.1.2.0
libpangoxft-1.0.so.0 -> libpangoxft-1.0.so.0.2800.1
libpangocairo-1.0.so.0 -> libpangocairo-1.0.so.0.2800.1
libltaudit.so.0.5.9 -> libltaudit.so.0.5.9
libxcb.so.1 -> libxcb.so.1.1.0
libpangoft2-1.0.so.0 -> libpangoft2-1.0.so.0.2800.1
libkadm5srv_mit.so.8 -> libkadm5srv_mit.so.8.0
libxmlrpc_util.so.3 -> libxmlrpc_util.so.3.16
libcupsmime.so.1 -> libcupsmime.so.1
libart_lgpl_2.so.2 -> libart_lgpl_2.so.2.3.20
libxcb-xvmc.so.0 -> libxcb-xvmc.so.0.0.0
libvorbisenc.so.2 -> libvorbisenc.so.2.0.6
libnuma.so.1 -> libnuma.so.1
libssh2.so.1 -> libssh2.so.1.0.1
libsamba-util.so.0 -> libsamba-util.so.0.0.1
libpyglib-2.0-python.so.0 -> libpyglib-2.0-python.so.0.0.0
libabrt_dbus.so.0 -> libabrt_dbus.so.0.0.1
libgpm.so.2 -> libgpm.so.2.1.0
libdhash.so.1 -> libdhash.so.1.0.2
libXrandr.so.2 -> libXrandr.so.2.2.0
libdns.so.81 -> libdns.so.81.4.1
libsvn_ra-1.so.0 -> libsvn_ra-1.so.0.0.0
libnsspem.so -> libnsspem.so
libreg.so -> libreg.so
libipa_hbac.so.0 -> libipa_hbac.so.0.0.1
libgpgme-pth.so.11 -> libgpgme-pth.so.11.6.6
libmemusage.so -> libmemusage.so
libxcb-composite.so.0 -> libxcb-composite.so.0.0.0
libmp.so.3 -> libmp.so.3.1.14
libnss_compat_ossl.so.0 -> libnss_compat_ossl.so.0.0.0
libXcursor.so.1 -> libXcursor.so.1.0.2
libcrypto.so.10 -> libcrypto.so.1.0.1e
libbonobo-activation.so.4 -> libbonobo-activation.so.4.0.0
libpulse-simple.so.0 -> libpulse-simple.so.0.0.3
libgnomecanvas-2.so.0 -> libgnomecanvas-2.so.0.2600.0
libnewt.so.0.52 -> libnewt.so.0.52.11
libgsf-1.so.114 -> libgsf-1.so.114.0.15
libICE.so.6 -> libICE.so.6.3.0
libimsettings-xim.so.1 -> libimsettings-xim.so.1.0.3
libxcb-atom.so.1 -> libxcb-atom.so.1.0.0
libtdb.so.1 -> libtdb.so.1.3.8
libgudev-1.0.so.0 -> libgudev-1.0.so.0.0.1
libsmbclient-raw.so.0 -> libsmbclient-raw.so.0.0.1
libxcb-icccm.so.1 -> libxcb-icccm.so.1.0.0
liblwres.so.80 -> liblwres.so.80.0.2
libmcpp.so.0 -> libmcpp.so.0.3.0
libkadm5clnt_mit.so.8 -> libkadm5clnt_mit.so.8.0
libgamin-1.so.0 -> libgamin-1.so.0.1.10
libpulsecommon-0.9.21.so -> libpulsecommon-0.9.21.so
libhal.so.1 -> libhal.so.1.0.0
librpm.so.1 -> librpm.so.1.0.0
libnl-nf-3.so.200 -> libnl-nf-3.so.200.16.1
libasm.so.1 -> libasm-0.164.so
libQtScript.so.4 -> libQtScript.so.4.6.2
libgmpxx.so.4 -> libgmpxx.so.4.1.0
libpixman-1.so.0 -> libpixman-1.so.0.32.8
libXRes.so.1 -> libXRes.so.1.0.0
libQtScriptTools.so.4 -> libQtScriptTools.so.4.6.2
liblber-2.4.so.2 -> liblber.so
libxcb-xf86dri.so.0 -> libxcb-xf86dri.so.0.0.0
libyajl.so.1 -> libyajl.so.1.0.7
libpytalloc-util.so.2 -> libpytalloc-util.so.2.1.5
libusb-0.1.so.4 -> libusb-0.1.so.4.4.4
librsvg-2.so.2 -> librsvg-2.so.2.26.0
libformw.so.5 -> libformw.so.5.7
libgettextsrc-0.17.so -> libgettextsrc.so
libXfixes.so.3 -> libXfixes.so.3.1.0
libneon.so.27 -> libneon.so.27.2.3
libnl-genl-3.so.200 -> libnl-genl-3.so.200.16.1
libgnutls.so.26 -> libgnutls.so.26.22.6
libnotify.so.1 -> libnotify.so.1.2.3
libnss3.so -> libnss3.so
libeggdbus-1.so.0 -> libeggdbus-1.so.0.0.0
libsmbldap.so.0 -> libsmbldap.so.0
libltdl.so.7 -> libltdl.so.7.2.1
libXft.so.2 -> libXft.so.2.3.2
libsmime3.so -> libsmime3.so
libgconf-2.so.4 -> libgconf-2.so.4.1.5
libform.so.5 -> libform.so.5.7
libmenu.so.5 -> libmenu.so.5.7
libnssdbm3.so -> libnssdbm3.so
libmagic.so.1 -> libmagic.so.1.0.0
libphonon.so.4 -> libphonon.so.4.3.1
libdbus-glib-1.so.2 -> libdbus-glib-1.so.2.1.0
libgailutil.so.18 -> libgailutil.so.18.0.1
libpanelw.so.5 -> libpanelw.so.5.7
libustr-1.0.so.1 -> libustr-1.0.so.1.0.4
libgif.so.4 -> libgif.so.4.1.6
libverto.so.0 -> libverto.so.0.0
libssl.so.10 -> libssl.so.1.0.1e
libxcb-xinerama.so.0 -> libxcb-xinerama.so.0.0.0
libldif-2.4.so.2 -> libldif.so
libpakchois.so.0 -> libpakchois.so.0.1.0
libgdk_pixbuf-2.0.so.0 -> libgdk_pixbuf-2.0.so.0.2400.1
libpcreposix.so.0 -> libpcreposix.so.0.0.0
libsamba-passdb.so.0 -> libsamba-passdb.so.0.24.1
libndr-standard.so.0 -> libndr-standard.so.0.0.1
libtevent.so.0 -> libtevent.so.0.9.26
libXdamage.so.1 -> libXdamage.so.1.1.0
libndr.so.0 -> libndr.so.0.0.3
libtar.so.1 -> libtar.so.1.2.11
libgcr.so.0 -> libgcr.so.0.0.0
libxcb-shm.so.0 -> libxcb-shm.so.0.0.0
libavahi-glib.so.1 -> libavahi-glib.so.1.0.1
librpmio.so.1 -> librpmio.so.1.0.0
libsndfile.so.1 -> libsndfile.so.1.0.20
libGLU.so.1 -> libGLU.so.1.3.1
libhunspell-1.2.so.0 -> libhunspell-1.2.so.0.0.0
libsgutils2.so.2 -> libsgutils2.so.2.0.0
libgstrtp-0.10.so.0 -> libgstrtp-0.10.so.0.20.0
libgnomevfs-2.so.0 -> libgnomevfs-2.so.0.2400.2
libgstreamer-0.10.so.0 -> libgstreamer-0.10.so.0.25.0
libdrm_radeon.so.1 -> libdrm_radeon.so.1.0.1
libxcb-xtest.so.0 -> libxcb-xtest.so.0.0.0
libdcerpc-binding.so.0 -> libdcerpc-binding.so.0.0.1
libnsssysinit.so -> libnsssysinit.so
libQtXmlPatterns.so.4 -> libQtXmlPatterns.so.4.6.2
libpath_utils.so.1 -> libpath_utils.so.1.0.1
libtalloc.so.2 -> libtalloc.so.2.1.5
libXmu.so.6 -> libXmu.so.6.2.0
libnl-3.so.200 -> libnl-3.so.200.16.1
libgnutlsxx.so.26 -> libgnutlsxx.so.26.14.12
libdrm_nouveau2.so.2 -> libdrm_nouveau2.so.2.0.0
libsvn_fs_fs-1.so.0 -> libsvn_fs_fs-1.so.0.0.0
libgstinterfaces-0.10.so.0 -> libgstinterfaces-0.10.so.0.20.0
libXtst.so.6 -> libXtst.so.6.1.0
libffi.so.5 -> libffi.so.5.0.6
libhistory.so.6 -> libhistory.so.6.0
libxmlrpc_server.so.3 -> libxmlrpc_server.so.3.16
libaprutil-1.so.0 -> libaprutil-1.so.0.3.9
libsvn_client-1.so.0 -> libsvn_client-1.so.0.0.0
libQtSvg.so.4 -> libQtSvg.so.4.6.2
libstartup-notification-1.so.0 -> libstartup-notification-1.so.0.0.0
libavahi-client.so.3 -> libavahi-client.so.3.2.5
libxcb-reply.so.1 -> libxcb-reply.so.1.0.0
libppl.so.7 -> libppl.so.7.1.0
libfontconfig.so.1 -> libfontconfig.so.1.4.4
libpcrecpp.so.0 -> libpcrecpp.so.0.0.0
libbonoboui-2.so.0 -> libbonoboui-2.so.0.0.0
libusb-1.0.so.0 -> libusb-1.0.so.0.1.0
libisccfg.so.82 -> libisccfg.so.82.0.1
libxcb-present.so.0 -> libxcb-present.so.0.0.0
libibus.so.2 -> libibus.so.2.0.0
libORBit-2.so.0 -> libORBit-2.so.0.1.0
libsctp.so.1 -> libsctp.so.1.0.10
libQtNetwork.so.4 -> libQtNetwork.so.4.6.2
libxcb-event.so.1 -> libxcb-event.so.1.0.0
libpcap.so.1 -> libpcap.so.1.4.0
libdrm_intel.so.1 -> libdrm_intel.so.1.0.0
libQtDBus.so.4 -> libQtDBus.so.4.6.2
libXfont.so.1 -> libXfont.so.1.4.1
libIDL-2.so.0 -> libIDL-2.so.0.0.0
libFLAC++.so.6 -> libFLAC++.so.6.2.0
libbonobo-2.so.0 -> libbonobo-2.so.0.0.0
libORBit-imodule-2.so.0 -> libORBit-imodule-2.so.0.0.0
libmng.so.1 -> libmng.so.1.0.0
libcanberra-gtk.so.0 -> libcanberra-gtk.so.0.1.5
libdcerpc.so.0 -> libdcerpc.so.0.0.1
libsoftokn3.so -> libsoftokn3.so
libtasn1.so.3 -> libtasn1.so.3.1.6
libpcsclite.so.1 -> libpcsclite.so.1.0.0
libtevent-util.so.0 -> libtevent-util.so.0.0.1
libogg.so.0 -> libogg.so.0.6.0
libhwloc.so.5 -> libhwloc.so.5.1.0
libpng12.so.0 -> libpng12.so.0.49.0
libldap_r-2.4.so.2 -> libldap_r.so
libelf.so.1 -> libelf-0.164.so
libijs-0.35.so -> libijs-0.35.so
libply-boot-client.so.2 -> libply-boot-client.so.2.0.0
libgstaudio-0.10.so.0 -> libgstaudio-0.10.so.0.20.0
libpulse.so.0 -> libpulse.so.0.12.2
libhwloc.so.1 -> libhwloc.so.1.0.1
libreport.so.0 -> libreport.so.0.0.1
libglapi.so.0 -> libglapi.so.0.0.0
libldb.so.1 -> libldb.so.1.1.25
libyaml-0.so.2 -> libyaml-0.so.2.0.4
libldap-2.4.so.2 -> libldap.so
libxcb-dri2.so.0 -> libxcb-dri2.so.0.0.0
libwbclient.so.0 -> libwbclient.so.0
libuser.so.1 -> libuser.so.1.2.2
libXinerama.so.1 -> libXinerama.so.1.0.0
libgfortran.so.3 -> libgfortran.so.3.0.0
libgpgme.so.11 -> libgpgme.so.11.6.6
libQtAssistantClient.so.4 -> libQtAssistantClient.so.4.6.2
libdrm_amdgpu.so.1 -> libdrm_amdgpu.so.1.0.0
libgstdataprotocol-0.10.so.0 -> libgstdataprotocol-0.10.so.0.25.0
libQtHelp.so.4 -> libQtHelp.so.4.6.2
libQtDesignerComponents.so.4 -> libQtDesignerComponents.so.4.6.2
libpth.so.20 -> libpth.so.20.0.27
libXmuu.so.1 -> libXmuu.so.1.0.0
libXv.so.1 -> libXv.so.1.0.0
libgdk_pixbuf_xlib-2.0.so.0 -> libgdk_pixbuf_xlib-2.0.so.0.2400.1
libORBitCosNaming-2.so.0 -> libORBitCosNaming-2.so.0.1.0
libkdb5.so.6 -> libkdb5.so.6.0
libxcb-xselinux.so.0 -> libxcb-xselinux.so.0.0.0
libgomp.so.1 -> libgomp.so.1.0.0
libdcerpc-atsvc.so.0 -> libdcerpc-atsvc.so.0.0.1
libtic.so.5 -> libtic.so.5.7
libcares.so.2 -> libcares.so.2.1.0
libQtTest.so.4 -> libQtTest.so.4.6.2
libsamba-credentials.so.0 -> libsamba-credentials.so.0.0.1
libxmlrpc_client.so.3 -> libxmlrpc_client.so.3.16
libgnome-keyring.so.0 -> libgnome-keyring.so.0.1.1
libQt3Support.so.4 -> libQt3Support.so.4.6.2
libsvn_subr-1.so.0 -> libsvn_subr-1.so.0.0.0
libssl3.so -> libssl3.so
libslang.so.2 -> libslang.so.2.2.1
libsvn_repos-1.so.0 -> libsvn_repos-1.so.0.0.0
libverto-k5ev.so.0 -> libverto-k5ev.so.0.0
libLLVM-3.6-mesa.so -> libLLVM-3.6-mesa.so
libxmlrpc_abyss.so.3 -> libxmlrpc_abyss.so.3.16
libgs.so.8 -> libgs.so.8.70
libsamba-policy.so.0 -> libsamba-policy.so.0.0.1
libSM.so.6 -> libSM.so.6.0.1
libgpgme-pthread.so.11 -> libgpgme-pthread.so.11.6.6
libgstvideo-0.10.so.0 -> libgstvideo-0.10.so.0.20.0
libproxy.so.0 -> libproxy.so.0.0.0
libsvn_ra_neon-1.so.0 -> libsvn_ra_neon-1.so.0.0.0
libgd.so.2 -> libgd.so.2.0.0
libxcb-screensaver.so.0 -> libxcb-screensaver.so.0.0.0
liblua-5.1.so -> liblua-5.1.so
libxcb-xinput.so.0 -> libxcb-xinput.so.0.1.0
libopenjpeg.so.2 -> libopenjpeg.so.2.1.3.0
libxcb-shape.so.0 -> libxcb-shape.so.0.0.0
libgstriff-0.10.so.0 -> libgstriff-0.10.so.0.20.0
libevent_extra-1.4.so.2 -> libevent_extra-1.4.so.2.1.3
libQtMultimedia.so.4 -> libQtMultimedia.so.4.6.2
libgcj-tools.so.10 -> libgcj-tools.so.10.0.0
libcairo.so.2 -> libcairo.so.2.10800.8
libQtCLucene.so.4 -> libQtCLucene.so.4.6.2
liboil-0.3.so.0 -> liboil-0.3.so.0.3.0
libsqlite3.so.0 -> libsqlite3.so.0.8.6
libusbpp-0.1.so.4 -> libusbpp-0.1.so.4.4.4
libgettextlib-0.17.so -> libgettextlib.so
libcloog.so.0 -> libcloog.so.0.0.0
libgstnetbuffer-0.10.so.0 -> libgstnetbuffer-0.10.so.0.20.0
libgcj.so.10 -> libgcj.so.10.0.0
libmenuw.so.5 -> libmenuw.so.5.7
libglade-2.0.so.0 -> libglade-2.0.so.0.0.7
libopcodes-2.20.51.0.2-5.48.el6.so -> libopcodes-2.20.51.0.2-5.48.el6.so
libnetapi.so.0 -> libnetapi.so.0
libvorbis.so.0 -> libvorbis.so.0.4.3
libpolkit-gobject-1.so.0 -> libpolkit-gobject-1.so.0.0.0
libdrm.so.2 -> libdrm.so.2.4.0
libpangox-1.0.so.0 -> libpangox-1.0.so.0.2800.1
libxcb-glx.so.0 -> libxcb-glx.so.0.0.0
libxcb-render.so.0 -> libxcb-render.so.0.0.0
libgstpbutils-0.10.so.0 -> libgstpbutils-0.10.so.0.20.0
libFLAC.so.8 -> libFLAC.so.8.2.0
libdb_cxx-4.7.so -> libdb_cxx.so
libfprint.so.0 -> libfprint.so.0.0.0
libgstrtsp-0.10.so.0 -> libgstrtsp-0.10.so.0.20.0
libcupsimage.so.2 -> libcupsimage.so.2
libgdk-x11-2.0.so.0 -> libgdk-x11-2.0.so.0.2400.23
libgstfft-0.10.so.0 -> libgstfft-0.10.so.0.20.0
libgij.so.10 -> libgij.so.10.0.0
libXcomposite.so.1 -> libXcomposite.so.1.0.0
liblcms.so.1 -> liblcms.so.1.0.19
librpcsecgss.so.3 -> librpcsecgss.so.3.0.0
libevent-1.4.so.2 -> libevent-1.4.so.2.1.3
libfontenc.so.1 -> libfontenc.so.1.0.0
libSDL-1.2.so.0 -> libSDL-1.2.so.0.11.3
libX11.so.6 -> libX11.so.6.3.0
libck-connector.so.0 -> libck-connector.so.0.0.0
libxcb-property.so.1 -> libxcb-property.so.1.0.0
libdrm_nouveau.so.1 -> libdrm_nouveau.so.1.0.0
libxcb-xfixes.so.0 -> libxcb-xfixes.so.0.0.0
libfam.so.0 -> libfam.so.0.0.0
libpciaccess.so.0 -> libpciaccess.so.0.11.1
libQtOpenGL.so.4 -> libQtOpenGL.so.4.6.2
libxcb-xevie.so.0 -> libxcb-xevie.so.0.0.0
libQtGui.so.4 -> libQtGui.so.4.6.2
libxcb-record.so.0 -> libxcb-record.so.0.0.0
libsvn_delta-1.so.0 -> libsvn_delta-1.so.0.0.0
libxcb-xv.so.0 -> libxcb-xv.so.0.0.0
libQtCore.so.4 -> libQtCore.so.4.6.2
libavahi-common.so.3 -> libavahi-common.so.3.5.1
libXxf86vm.so.1 -> libXxf86vm.so.1.0.0
libbfd-2.20.51.0.2-5.48.el6.so -> libbfd-2.20.51.0.2-5.48.el6.so
libndr-nbt.so.0 -> libndr-nbt.so.0.0.1
libsmbconf.so.0 -> libsmbconf.so.0
libregistry.so.0 -> libregistry.so.0.0.1
libsss_sudo.so -> libsss_sudo.so
libvirt.so.0 -> libvirt.so.0.10.2
libsvn_ra_local-1.so.0 -> libsvn_ra_local-1.so.0.0.0
libmpfr.so.1 -> libmpfr.so.1.2.0
libedit.so.0 -> libedit.so.0.0.27
libcrack.so.2 -> libcrack.so.2.8.1
libref_array.so.1 -> libref_array.so.1.2.0
libgnome-2.so.0 -> libgnome-2.so.0.2800.0
libisccc.so.80 -> libisccc.so.80.0.0
libtopology.so.0 -> libtopology.so.0.3
libXrender.so.1 -> libXrender.so.1.3.0
libutempter.so.0 -> libutempter.so.1.1.5
libcroco-0.6.so.3 -> libcroco-0.6.so.3.0.1
libpanel.so.5 -> libpanel.so.5.7
libQtSql.so.4 -> libQtSql.so.4.6.2
libvorbisfile.so.3 -> libvorbisfile.so.3.3.2
libgstcdda-0.10.so.0 -> libgstcdda-0.10.so.0.20.0
libgstnet-0.10.so.0 -> libgstnet-0.10.so.0.25.0
libxmlrpc.so.3 -> libxmlrpc.so.3.16
libxcb-sync.so.1 -> libxcb-sync.so.1.0.0
libcollection.so.4 -> libcollection.so.4.0.0
libpoppler.so.5 -> libpoppler.so.5.0.0
libxcb-res.so.0 -> libxcb-res.so.0.0.0
libbasicobjects.so.0 -> libbasicobjects.so.0.1.0
libXau.so.6 -> libXau.so.6.0.0
libsvn_fs-1.so.0 -> libsvn_fs-1.so.0.0.0
libxcb-dpms.so.0 -> libxcb-dpms.so.0.0.0
libcdda_interface.so.0 -> libcdda_interface.so.0.10.2
libxcb-xkb.so.1 -> libxcb-xkb.so.1.0.0
libQtXml.so.4 -> libQtXml.so.4.6.2
libpolkit-backend-1.so.0 -> libpolkit-backend-1.so.0.0.0
libp11-kit.so.0 -> libp11-kit.so.0.0.0
libapr-1.so.0 -> libapr-1.so.0.3.9
libtiff.so.3 -> libtiff.so.3.9.4
libsss_idmap.so.0 -> libsss_idmap.so.0.5.0
libxcb-randr.so.0 -> libxcb-randr.so.0.1.0
libcupscgi.so.1 -> libcupscgi.so.1
libbind9.so.80 -> libbind9.so.80.0.4
libQtDesigner.so.4 -> libQtDesigner.so.4.6.2
libasyncns.so.0 -> libasyncns.so.0.3.1
libsatyr.so.3 -> libsatyr.so.3.0.0
libxcb-dri3.so.0 -> libxcb-dri3.so.0.0.0
libini_config.so.5 -> libini_config.so.5.0.0
libfa.so.1 -> libfa.so.1.4.0
libsasl2.so.2 -> libsasl2.so.2.0.23
libsvn_ra_svn-1.so.0 -> libsvn_ra_svn-1.so.0.0.0
libtheoradec.so.1 -> libtheoradec.so.1.1.3
libatk-1.0.so.0 -> libatk-1.0.so.0.3009.1
libxcb-damage.so.0 -> libxcb-damage.so.0.0.0
libXpm.so.4 -> libXpm.so.4.11.0
libgensec.so.0 -> libgensec.so.0.0.1
libnfsidmap.so.0 -> libnfsidmap.so.0.3.0
libXext.so.6 -> libXext.so.6.4.0
libpango-1.0.so.0 -> libpango-1.0.so.0.2800.1
libpolkit-agent-1.so.0 -> libpolkit-agent-1.so.0.0.0
libvirt-qemu.so.0 -> libvirt-qemu.so.0.10.2
libaugeas.so.0 -> libaugeas.so.0.16.0
libthai.so.0 -> libthai.so.0.1.4
libgp11.so.0 -> libgp11.so.0.0.0
libexslt.so.0 -> libexslt.so.0.8.15
libisc.so.83 -> libisc.so.83.0.3
libgdbm.so.2 -> libgdbm.so.2.0.0
libsvn_diff-1.so.0 -> libsvn_diff-1.so.0.0.0
libgnomeui-2.so.0 -> libgnomeui-2.so.0.2400.1
libsamba-hostconfig.so.0 -> libsamba-hostconfig.so.0.0.1
libpng.so.3 -> libpng.so.3.49.0
liblzo2.so.2 -> liblzo2.so.2.0.0
libtiffxx.so.3 -> libtiffxx.so.3.9.4
libtheoraenc.so.1 -> libtheoraenc.so.1.1.2
libxmlrpc_server_cgi.so.3 -> libxmlrpc_server_cgi.so.3.16
libgcj_bc.so.1 -> libgcj_bc.so.1.0.0
libX11-xcb.so.1 -> libX11-xcb.so.1.0.0
libcanberra.so.0 -> libcanberra.so.0.2.1
libdcerpc-samr.so.0 -> libdcerpc-samr.so.0.0.1
libgmp.so.3 -> libgmp.so.3.5.0
libimsettings.so.4 -> libimsettings.so.4.2.0
libvisual-0.4.so.0 -> libvisual-0.4.so.0.0.0
libtheora.so.0 -> libtheora.so.0.3.9
libsamdb.so.0 -> libsamdb.so.0.0.1
libhesiod.so.0 -> libhesiod.so.0.0.0
libgstapp-0.10.so.0 -> libgstapp-0.10.so.0.20.0
libgxim.so.2 -> libgxim.so.2.1.1
libxml2.so.2 -> libxml2.so.2.7.6
libpcprofile.so -> libpcprofile.so
libxcb-aux.so.0 -> libxcb-aux.so.0.0.0
libsvn_fs_base-1.so.0 -> libsvn_fs_base-1.so.0.0.0
librpmbuild.so.1 -> librpmbuild.so.1.0.0
libndr-krb5pac.so.0 -> libndr-krb5pac.so.0.0.1
liblzma.so.0 -> liblzma.so.0.0.0
libjasper.so.1 -> libjasper.so.1.0.0
libevent_core-1.4.so.2 -> libevent_core-1.4.so.2.1.3
libdw.so.1 -> libdw-0.164.so
libungif.so.4 -> libungif.so.4.1.6
libxmlrpc_server_abyss.so.3 -> libxmlrpc_server_abyss.so.3.16
libcupsdriver.so.1 -> libcupsdriver.so.1
libabrt_web.so.0 -> libabrt_web.so.0.0.1
libXi.so.6 -> libXi.so.6.1.0
libgnutls-extra.so.26 -> libgnutls-extra.so.26.22.6
libjpeg.so.62 -> libjpeg.so.62.0.0
libgsttag-0.10.so.0 -> libgsttag-0.10.so.0.20.0
libxslt.so.1 -> libxslt.so.1.1.26
libsvn_fs_util-1.so.0 -> libsvn_fs_util-1.so.0.0.0
libgstcontroller-0.10.so.0 -> libgstcontroller-0.10.so.0.25.0
libXt.so.6 -> libXt.so.6.0.0
libgtk-x11-2.0.so.0 -> libgtk-x11-2.0.so.0.2400.23
libsnappy.so.1 -> libsnappy.so.1.1.4
libhal-storage.so.1 -> libhal-storage.so.1.0.0
libdb-4.7.so -> libdb.so
libcurl.so.4 -> libcurl.so.4.1.1
libstdc++.so.6 -> libstdc++.so.6.0.13
libppl_c.so.2 -> libppl_c.so.2.1.0
libsvn_swig_py-1.so.0 -> libsvn_swig_py-1.so.0.0.0
/lib/tls: (hwcap: 0x8000000000000000)
/lib/i686: (hwcap: 0x0008000000000000)
/usr/lib/sse2: (hwcap: 0x0000000004000000)
libmp.so.3 -> libmp.so.3.1.14
libgmpxx.so.4 -> libgmpxx.so.4.1.0
libgmp.so.3 -> libgmp.so.3.5.0
/usr/lib/tls: (hwcap: 0x8000000000000000)
/lib/i686/nosegneg: (hwcap: 0x0028000000000000)
libc.so.6 -> libc-2.12.so
librt.so.1 -> librt-2.12.so
libpthread.so.0 -> libpthread-2.12.so
libm.so.6 -> libm-2.12.so
libthread_db.so.1 -> libthread_db-1.0.so
[root@master mysql]#
输出头文件
[root@master mysql]# ln -sv /usr/local/mysql/include /usr/include/mysql
"/usr/include/mysql" -> "/usr/local/mysql/include"
[root@master mysql]#
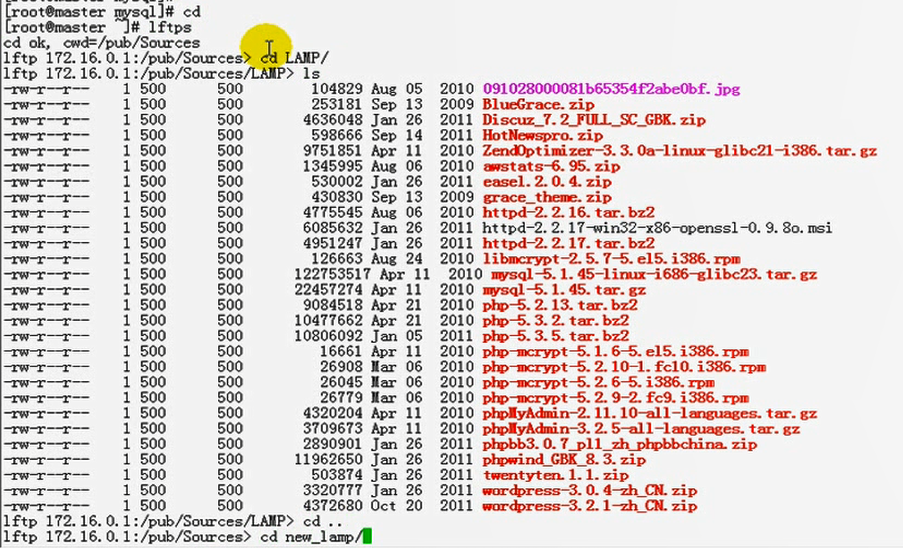

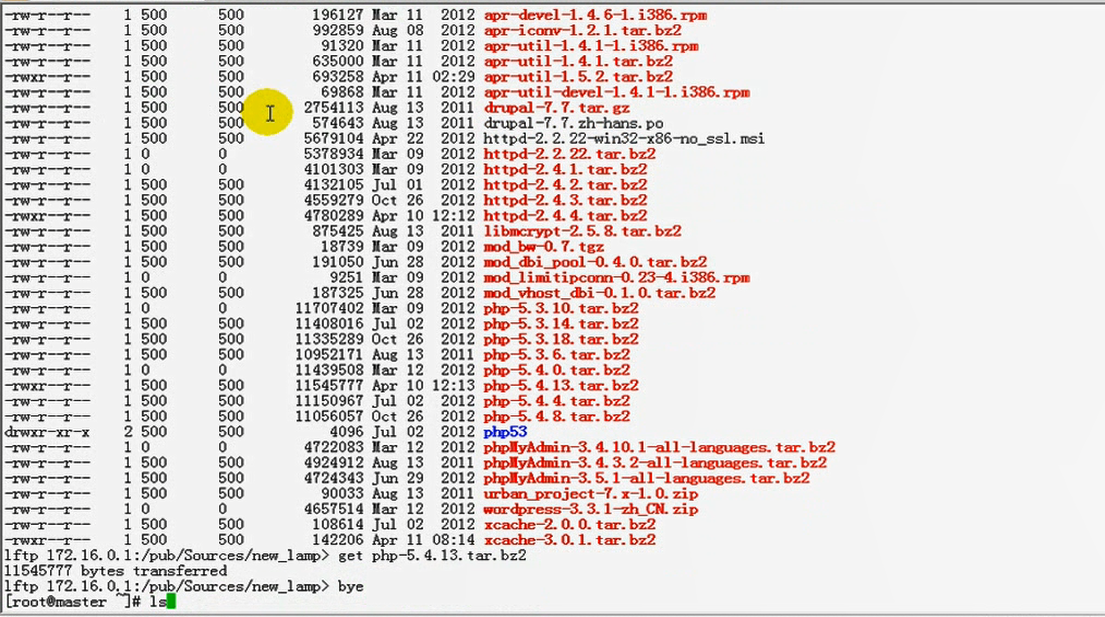

我下载 php
https://www.php.net/downloads.php 官方下载
https://www.php.net/releases/ 官方历史下载 可以通过wget 或者
[root@www ~]# wget http://museum.php.net/php5/php-5.4.13.tar.bz2 --no-check-certificate
[root@master ~]# tar xf php-5.4.13.tar.bz2
[root@master ~]# cd php-5.4.13
[root@master php-5.4.13]# ls
acinclude.m4 install-sh README.EXTENSIONS run-tests.php
aclocal.m4 LICENSE README.EXT_SKEL sapi
build ltmain.sh README.GIT-RULES scripts
buildconf main README.input_filter server-tests-config.php
buildconf.bat makedist README.MAILINGLIST_RULES server-tests.php
CODING_STANDARDS Makefile.frag README.namespaces snapshot
config.guess Makefile.gcov README.NEW-OUTPUT-API stamp-h.in
config.sub Makefile.global README.PARAMETER_PARSING_API stub.c
configure makerpm README.PHP4-TO-PHP5-THIN-CHANGES svnclean.bat
configure.in missing README.REDIST.BINS tests
CREDITS mkinstalldirs README.RELEASE_PROCESS TSRM
ext netware README.SELF-CONTAINED-EXTENSIONS UPGRADING
EXTENSIONS NEWS README.STREAMS UPGRADING.INTERNALS
footer pear README.SUBMITTING_PATCH vcsclean
generated_lists php5.spec.in README.TESTING win32
genfiles php.gif README.TESTING2 Zend
header php.ini-development README.UNIX-BUILD-SYSTEM
INSTALL php.ini-production README.WIN32-BUILD-SYSTEM
[root@master php-5.4.13]#

后面演示使用cati的话,要把 cati安装nginx上,mcrpt,mhash,libevent这几个功能必须得有,如下图尤其是enable-sockets功能必须要有,才能装cati???

[root@master php-5.4.13]# rpm -q mcrypt #没装
package mcrypt is not installed
[root@master php-5.4.13]#
[root@master php-5.4.13]# yum -y install mcrypt #没有mcrypt
已加载插件:product-id, search-disabled-repos, security, subscription-manager
This system is not registered with an entitlement server. You can use subscription-manager to register.
设置安装进程
Base | 4.1 kB 00:00 ...
No package mcrypt available.
错误:无须任何处理
[root@master php-5.4.13]#
到 红帽6的 epl中去下载 mcrpt,mhash,libevent 吧
我们现在在编译时暂时不支持这些功能吧
./configure --prefix=/usr/local/php -with-mysql=/usr/local/mysql --with-openssl --enable-fpm --enable-sockets --enable-sysvshm --with-mysqli=/usr/local/mysql/bin/mysql_config --enable-mbstring --with-freetype-dir --with-jpeg-dir --with-png-dir --with-zlib-dir --with-libxml-dir=/usr --enable-xml --with-mhash --with-mcrypt --with-config-file-path=/etc --with-config-file-scan-dir=/etc/php.d --with-bz2 --with-curl
上面 有些东西暂时去掉吧,为了编译能顺利进行
--enable-fpm --enable-sockets 这两项很重要
如果没有安装libmcrypt,mhash包,,编译时去掉 --with-mhash --with-mcrypt
[root@master php-5.4.13]# ./configure --prefix=/usr/local/php -with-mysql=/usr/local/mysql --with-openssl --enable-fpm --enable-sockets --enable-sysvshm --with-mysqli=/usr/local/mysql/bin/mysql_config --enable-mbstring --with-freetype-dir --with-jpeg-dir --with-png-dir --with-zlib-dir --with-libxml-dir=/usr --enable-xml --with-config-file-path=/etc --with-config-file-scan-dir=/etc/php.d --with-bz2 --with-curl

[root@master php-5.4.13]# yum list all | grep xml
libxml2.i686 2.7.6-21.el6_8.1 @anaconda-RedHatEnterpris eLinux-201805250237.i386/6.10
libxml2-python.i686 2.7.6-21.el6_8.1 @anaconda-RedHatEnterpris eLinux-201805250237.i386/6.10
perl-libxml-perl.noarch 0.08-10.el6 @anaconda-RedHatEnterpris eLinux-201805250237.i386/6.10
python-lxml.i686 2.2.3-1.1.el6 @anaconda-RedHatEnterpris eLinux-201805250237.i386/6.10
xml-common.noarch 0.6.3-33.el6 @anaconda-RedHatEnterpris eLinux-201805250237.i386/6.10
xmlrpc-c.i686 1.16.24-1210.1840.el6 @anaconda-RedHatEnterpris eLinux-201805250237.i386/6.10
xmlrpc-c-client.i686 1.16.24-1210.1840.el6 @anaconda-RedHatEnterpris eLinux-201805250237.i386/6.10
libxml2-devel.i686 2.7.6-21.el6_8.1 Base #这个没有装
php-xml.i686 5.3.3-49.el6 Base
php-xmlrpc.i686 5.3.3-49.el6 Base
xml-commons-apis.i686 1.3.04-3.6.el6 Base
xml-commons-resolver.i686 1.1-4.18.el6 Base
xmldb-api.noarch 1:0.1-0.4.20011111cvs.1.5.el6 Base
xmldb-api-sdk.noarch 1:0.1-0.4.20011111cvs.1.5.el6 Base
xmlgraphics-commons.noarch 1.3.1-1.2.el6 Base
xmlrpc3-client.noarch 3.0-4.15.el6 Base
xmlrpc3-common.noarch 3.0-4.15.el6 Base
xmlsec1.i686 1.2.20-4.el6 Base
xmlsec1-openssl.i686 1.2.20-4.el6 Base
xmltex.noarch 20020625-16.el6 Base
xmlto.i686 0.0.23-3.el6 Base
xmlto-tex.noarch 0.0.23-3.el6 Base
xmltoman.noarch 0.4-4.el6 Base
[root@master php-5.4.13]#
[root@master php-5.4.13]# yum list all | grep xml
libxml2.i686 2.7.6-21.el6_8.1 @anaconda-RedHatEnterpriseLinux-201805250237.i386/6.10
libxml2-python.i686 2.7.6-21.el6_8.1 @anaconda-RedHatEnterpriseLinux-201805250237.i386/6.10
perl-libxml-perl.noarch 0.08-10.el6 @anaconda-RedHatEnterpriseLinux-201805250237.i386/6.10
python-lxml.i686 2.2.3-1.1.el6 @anaconda-RedHatEnterpriseLinux-201805250237.i386/6.10
xml-common.noarch 0.6.3-33.el6 @anaconda-RedHatEnterpriseLinux-201805250237.i386/6.10
xmlrpc-c.i686 1.16.24-1210.1840.el6 @anaconda-RedHatEnterpriseLinux-201805250237.i386/6.10
xmlrpc-c-client.i686 1.16.24-1210.1840.el6 @anaconda-RedHatEnterpriseLinux-201805250237.i386/6.10
libxml2-devel.i686 2.7.6-21.el6_8.1 Base
php-xml.i686 5.3.3-49.el6 Base
php-xmlrpc.i686 5.3.3-49.el6 Base
xml-commons-apis.i686 1.3.04-3.6.el6 Base
xml-commons-resolver.i686 1.1-4.18.el6 Base
xmldb-api.noarch 1:0.1-0.4.20011111cvs.1.5.el6 Base
xmldb-api-sdk.noarch 1:0.1-0.4.20011111cvs.1.5.el6 Base
xmlgraphics-commons.noarch 1.3.1-1.2.el6 Base
xmlrpc3-client.noarch 3.0-4.15.el6 Base
xmlrpc3-common.noarch 3.0-4.15.el6 Base
xmlsec1.i686 1.2.20-4.el6 Base
xmlsec1-openssl.i686 1.2.20-4.el6 Base
xmltex.noarch 20020625-16.el6 Base
xmlto.i686 0.0.23-3.el6 Base
xmlto-tex.noarch 0.0.23-3.el6 Base
xmltoman.noarch 0.4-4.el6 Base
[root@master php-5.4.13]# yum -y install libxml2-devel #安装它
已加载插件:product-id, search-disabled-repos, security, subscription-manager
This system is not registered with an entitlement server. You can use subscription-manager to register.
设置安装进程
解决依赖关系
--> 执行事务检查
---> Package libxml2-devel.i686 0:2.7.6-21.el6_8.1 will be 安装
--> 完成依赖关系计算
依赖关系解决
====================================================================================================
软件包 架构 版本 仓库 大小
====================================================================================================
正在安装:
libxml2-devel i686 2.7.6-21.el6_8.1 Base 1.1 M
事务概要
====================================================================================================
Install 1 Package(s)
总下载量:1.1 M
Installed size: 8.5 M
下载软件包:
运行 rpm_check_debug
执行事务测试
事务测试成功
执行事务
正在安装 : libxml2-devel-2.7.6-21.el6_8.1.i686 1/1
Verifying : libxml2-devel-2.7.6-21.el6_8.1.i686 1/1
已安装:
libxml2-devel.i686 0:2.7.6-21.el6_8.1
完毕!
[root@master php-5.4.13]#
[root@master php-5.4.13]# ./configure --prefix=/usr/local/php -with-mysql=/usr/local/mysql --with-openssl --enable-fpm --enable-sockets --enable-sysvshm --with-mysqli=/usr/local/mysql/bin/mysql_config --enable-mbstring --with-freetype-dir --with-jpeg-dir --with-png-dir --with-zlib-dir --with-libxml-dir=/usr --enable-xml --with-config-file-path=/etc --with-config-file-scan-dir=/etc/php.d --with-bz2 --with-curl
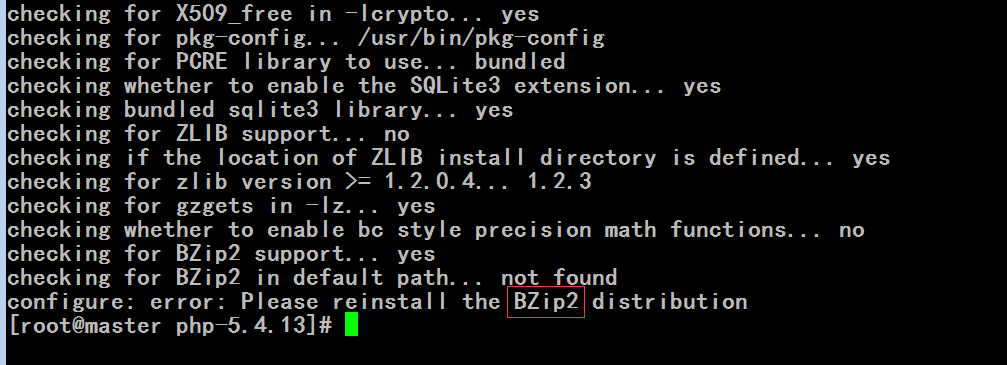
[root@master php-5.4.13]# yum list all | grep bzip2
bzip2.i686 1.0.5-7.el6_0 @anaconda-RedHatEnterpriseLinux-201805250237.i386/6.10
bzip2-libs.i686 1.0.5-7.el6_0 @anaconda-RedHatEnterpriseLinux-201805250237.i386/6.10
bzip2-devel.i686 1.0.5-7.el6_0 Base #又是devel包没装 在红帽6上编译php所依赖的组可能与红帽5上有点不同
[root@master php-5.4.13]#
[root@master php-5.4.13]# yum list all | grep bzip2
bzip2.i686 1.0.5-7.el6_0 @anaconda-RedHatEnterpriseLinux-201805250237.i386/6.10
bzip2-libs.i686 1.0.5-7.el6_0 @anaconda-RedHatEnterpriseLinux-201805250237.i386/6.10
bzip2-devel.i686 1.0.5-7.el6_0 Base
[root@master php-5.4.13]# yum -y install bzip2-devel
已加载插件:product-id, search-disabled-repos, security, subscription-manager
This system is not registered with an entitlement server. You can use subscription-manager to register.
设置安装进程
解决依赖关系
--> 执行事务检查
---> Package bzip2-devel.i686 0:1.0.5-7.el6_0 will be 安装
--> 完成依赖关系计算
依赖关系解决
====================================================================================================
软件包 架构 版本 仓库 大小
====================================================================================================
正在安装:
bzip2-devel i686 1.0.5-7.el6_0 Base 250 k
事务概要
====================================================================================================
Install 1 Package(s)
总下载量:250 k
Installed size: 412 k
下载软件包:
运行 rpm_check_debug
执行事务测试
事务测试成功
执行事务
正在安装 : bzip2-devel-1.0.5-7.el6_0.i686 1/1
Verifying : bzip2-devel-1.0.5-7.el6_0.i686 1/1
已安装:
bzip2-devel.i686 0:1.0.5-7.el6_0
完毕!
[root@master php-5.4.13]#
[root@master php-5.4.13]# ./configure --prefix=/usr/local/php -with-mysql=/usr/local/mysql --with-openssl --enable-fpm --enable-sockets --enable-sysvshm --with-mysqli=/usr/local/mysql/bin/mysql_config --enable-mbstring --with-freetype-dir --with-jpeg-dir --with-png-dir --with-zlib-dir --with-libxml-dir=/usr --enable-xml --with-config-file-path=/etc --with-config-file-scan-dir=/etc/php.d --with-bz2 --with-curl

[root@master php-5.4.13]# yum list all | grep curl
curl.i686 7.19.7-53.el6_9 @anaconda-RedHatEnterpriseLinux-201805250237.i386/6.10
libcurl.i686 7.19.7-53.el6_9 @anaconda-RedHatEnterpriseLinux-201805250237.i386/6.10
python-pycurl.i686 7.19.0-9.el6 @anaconda-RedHatEnterpriseLinux-201805250237.i386/6.10
libcurl-devel.i686 7.19.7-53.el6_9 Base
[root@master php-5.4.13]# yum -y install libcurl-devel #安装 libcurl-devel
已加载插件:product-id, search-disabled-repos, security, subscription-manager
This system is not registered with an entitlement server. You can use subscription-manager to register.
设置安装进程
解决依赖关系
--> 执行事务检查
---> Package libcurl-devel.i686 0:7.19.7-53.el6_9 will be 安装
--> 处理依赖关系 libidn-devel,它被软件包 libcurl-devel-7.19.7-53.el6_9.i686 需要
--> 执行事务检查
---> Package libidn-devel.i686 0:1.18-2.el6 will be 安装
--> 完成依赖关系计算
依赖关系解决
====================================================================================================
软件包 架构 版本 仓库 大小
====================================================================================================
正在安装:
libcurl-devel i686 7.19.7-53.el6_9 Base 247 k
为依赖而安装:
libidn-devel i686 1.18-2.el6 Base 137 k
事务概要
====================================================================================================
Install 2 Package(s)
总下载量:384 k
Installed size: 889 k
下载软件包:
----------------------------------------------------------------------------------------------------
总计 15 MB/s | 384 kB 00:00
运行 rpm_check_debug
执行事务测试
事务测试成功
执行事务
正在安装 : libidn-devel-1.18-2.el6.i686 1/2
正在安装 : libcurl-devel-7.19.7-53.el6_9.i686 2/2
Verifying : libidn-devel-1.18-2.el6.i686 1/2
Verifying : libcurl-devel-7.19.7-53.el6_9.i686 2/2
已安装:
libcurl-devel.i686 0:7.19.7-53.el6_9
作为依赖被安装:
libidn-devel.i686 0:1.18-2.el6
完毕!
[root@master php-5.4.13]#
[root@master php-5.4.13]# ./configure --prefix=/usr/local/php -with-mysql=/usr/local/mysql --with-openssl --enable-fpm --enable-sockets --enable-sysvshm --with-mysqli=/usr/local/mysql/bin/mysql_config --enable-mbstring --with-freetype-dir --with-jpeg-dir --with-png-dir --with-zlib-dir --with-libxml-dir=/usr --enable-xml --with-config-file-path=/etc --with-config-file-scan-dir=/etc/php.d --with-bz2 --with-curl # 终于不出错了
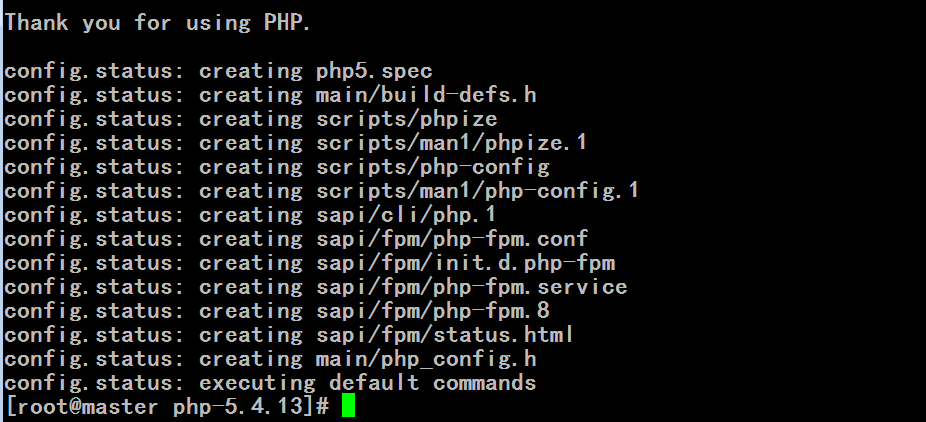
[root@master php-5.4.13]# make && make install
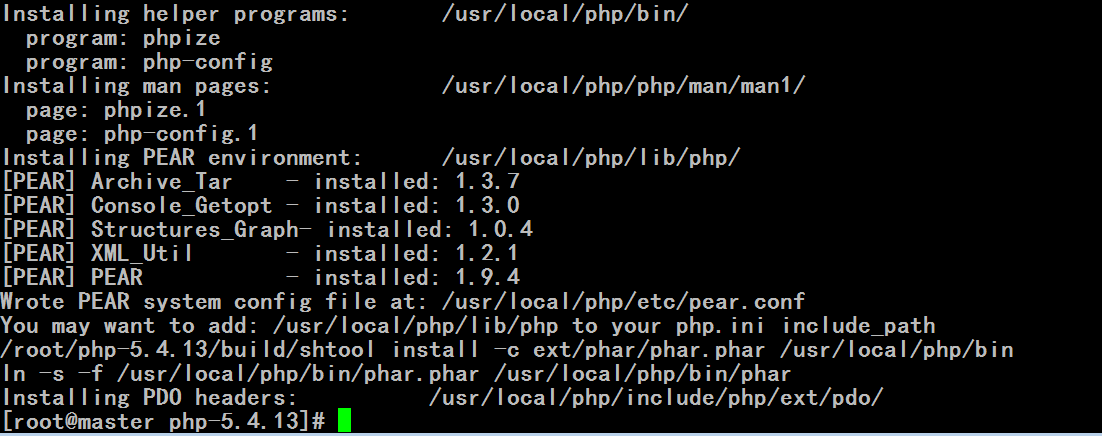

为php提供配置文件:
# cp php.ini-production /etc/php.ini
为php-fpm提供Sysv init脚本,并将其添加至服务列表:
# cp sapi/fpm/init.d.php-fpm /etc/rc.d/init.d/php-fpm
# chmod +x /etc/rc.d/init.d/php-fpm
# chkconfig --add php-fpm
# chkconfig php-fpm on
为php-fpm提供配置文件:
# cp /usr/local/php/etc/php-fpm.conf.default /usr/local/php/etc/php-fpm.conf
编辑php-fpm的配置文件:
# vim /usr/local/php/etc/php-fpm.conf
配置fpm的相关选项为你所需要的值,并启用pid文件(如下最后一行):
pm.max_children = 150 #最大子进程个数
pm.start_servers = 8 #刚开始时启动的进程个数
pm.min_spare_servers = 5 #最小空闲数为5个
pm.max_spare_servers = 10 #最大空闲数为5个
pid = /usr/local/php/var/run/php-fpm.pid #pid文件
如果nginx与php-fpm不在同一个主机上,我们要监听php-fpm在外网地址上,默认是监听在127.0.0.1上
接下来就可以启动php-fpm了:
# service php-fpm start
使用如下命令来验证(如果此命令输出有中几个php-fpm进程就说明启动成功了):
# ps aux | grep php-fpm
四、整合nginx和php5
1、编辑/etc/nginx/nginx.conf,启用如下选项: 要想nginx支持fpm格式的php5,我们需要在nginx的主配置文件中启用以下的location 选项
location ~ \.php$ {
root html; #.php结尾的文件都到这个路径下去找
fastcgi_pass 127.0.0.1:9000; #表示反向代理,fastcgi的代理方式,所有对php页面的请求都代理至传送给127.0.0.1:9000,由127.0.0.1:9000来处理
fastcgi_index index.php; #主页面
fastcgi_param SCRIPT_FILENAME /scripts$fastcgi_script_name; #额外参数配置文件,我们把它的脚本文件名称直接原样不动的传递给fpm的服务器端
include fastcgi_params; #包含的其它参数 fastcgi_params这是一个文件 (可以是fastcgi_conf 但是内容要与 下面的/etc/nginx/fastcgi_params内容一样 )
}
2、编辑/etc/nginx/fastcgi_params,将其内容更改为如下内容:
fastcgi_param GATEWAY_INTERFACE CGI/1.1; #网关CGI接口,(CGI:全称是 Common Gate Intergace 通用网关接口)
fastcgi_param SERVER_SOFTWARE nginx; #服务器端的软件程序是nginx
fastcgi_param QUERY_STRING $query_string; #查询方式为 $query_string,这些都是变量,都是nginx所能够接受的变量,每一个变量的值当作fastcgi的参数传递给fpm服务器 $query_string查询字符串,比如 http://www.magedu.com/test.php?user=a user=a就是查询字符串
fastcgi_param REQUEST_METHOD $request_method; #请求方法
fastcgi_param CONTENT_TYPE $content_type; #内容类型,通过mime来定义的,用户每一个请求的页面中页面本身是有类型的
fastcgi_param CONTENT_LENGTH $content_length; #内容长度
fastcgi_param SCRIPT_FILENAME $document_root$fastcgi_script_name; #$document_root是网页文件的根目录(这里对应的上面的 html 目录吧),fastcgi_script_name用户请求的网页页面文件(是用户请求的php文件名称) fpm通过SCRIPT_FILENAME变量来调用,看用户倒底访问的是哪个页面文件
fastcgi_param SCRIPT_NAME $fastcgi_script_name; #又定义了一次脚本名称,使用SCRIPT_NAME 来定义
fastcgi_param REQUEST_URI $request_uri; #请求的是哪一个uri http://www.magedu.com/test.php?user=a uri是 test.php?user=a?
fastcgi_param DOCUMENT_URI $document_uri; #网页路径的uri
fastcgi_param DOCUMENT_ROOT $document_root; #网页根路径
fastcgi_param SERVER_PROTOCOL $server_protocol; #server的协议版本 http 1.0 1.1等等
fastcgi_param REMOTE_ADDR $remote_addr; #远程地址,客户端地址
fastcgi_param REMOTE_PORT $remote_port; #客户端端口
fastcgi_param SERVER_ADDR $server_addr; #服务器端地址
fastcgi_param SERVER_PORT $server_port; #服务器端端口
fastcgi_param SERVER_NAME $server_name; #服务器端名称
并在所支持的主页面格式中添加php格式的主页,类似如下:
location / {
root html;
index index.php index.html index.htm;
}
而后重新载入nginx的配置文件:
# service nginx reload
3、在/usr/html新建index.php的测试页面,测试php是否能正常工作:
# cat > /usr/html/index.php << EOF
<?php
phpinfo();
?>
接着就可以通过浏览器访问此测试页面了。
[root@master php-5.4.13]# pwd
/root/php-5.4.13
[root@master php-5.4.13]#
[root@master php-5.4.13]# cp php.ini-production /etc/php.ini
[root@master php-5.4.13]#
给我们的php-fpm提供配置文件
[root@master php-5.4.13]# cd /usr/local/php/etc/
[root@master etc]# ls
pear.conf php-fpm.conf.default
[root@master etc]# cp php-fpm.conf.default php-fpm.conf
[root@master etc]#
[root@master etc]# vim php-fpm.conf
....................................................................................................
pm = dynamic #pm PM (process manager) 是动态
pm.max_children = 150 #最多启动150个子进程
pm.start_servers = 8 #启动的时候启动8个子进程
pm.min_spare_servers = 5 #最小空闲为5个子进程
pm.max_spare_servers = 10 #最大空闲为10个子进程
pm.process_idle_timeout = 10s; #超时时间
pm.max_requests = 500 # pm 最大的请求个数
; Pool Definitions ; #连接池
listen = 127.0.0.1:9000 #监听的地址端口
....................................................................................................
[root@master etc]# cd - #cd 中短横,返回上一次的路径
/root/php-5.4.13
[root@master php-5.4.13]# pwd
/root/php-5.4.13
[root@master php-5.4.13]#
php-fpm服务脚本
[root@master php-5.4.13]# cp sapi/fpm/init.d.php-fpm /etc/init.d/php-fpm
[root@master php-5.4.13]#
[root@master php-5.4.13]# chmod +x /etc/init.d/php-fpm #给它执行权限
[root@master php-5.4.13]#
[root@master php-5.4.13]# chkconfig --add php-fpm #加入服务列表
[root@master php-5.4.13]#
[root@master php-5.4.13]# service php-fpm start #启动
Starting php-fpm done
[root@master php-5.4.13]#
[root@master php-5.4.13]# netstat -tnlp
Active Internet connections (only servers)
Proto Recv-Q Send-Q Local Address Foreign Address State PID/Program name
tcp 0 0 0.0.0.0:111 0.0.0.0:* LISTEN 1759/rpcbind
tcp 0 0 0.0.0.0:80 0.0.0.0:* LISTEN 2597/nginx
tcp 0 0 0.0.0.0:22 0.0.0.0:* LISTEN 2104/sshd
tcp 0 0 127.0.0.1:631 0.0.0.0:* LISTEN 1838/cupsd
tcp 0 0 127.0.0.1:25 0.0.0.0:* LISTEN 2464/master
tcp 0 0 0.0.0.0:443 0.0.0.0:* LISTEN 2597/nginx
tcp 0 0 0.0.0.0:44187 0.0.0.0:* LISTEN 1781/rpc.statd
tcp 0 0 127.0.0.1:9000 0.0.0.0:* LISTEN 4468/php-fpm #启动了
tcp 0 0 :::3306 :::* LISTEN 2358/mysqld
tcp 0 0 :::111 :::* LISTEN 1759/rpcbind
tcp 0 0 :::22 :::* LISTEN 2104/sshd
tcp 0 0 ::1:631 :::* LISTEN 1838/cupsd
tcp 0 0 ::1:25 :::* LISTEN 2464/master
tcp 0 0 :::47230 :::* LISTEN 1781/rpc.statd
[root@master php-5.4.13]#
[root@master php-5.4.13]# cd /etc/nginx/
[root@master nginx]# ls
fastcgi.conf mime.types scgi_params.default
fastcgi.conf.default mime.types.default ssl
fastcgi_params nginx.conf uwsgi_params
fastcgi_params.default nginx.conf.bak uwsgi_params.default
koi-utf nginx.conf.default win-utf
koi-win scgi_params
[root@master nginx]#
[root@master nginx]# ps auxf #这里 f 可以显示进程树的
USER PID %CPU %MEM VSZ RSS TTY STAT START TIME COMMAND
root 2 0.0 0.0 0 0 ? S 08:26 0:00 [kthreadd]
root 3 0.0 0.0 0 0 ? S 08:26 0:00 \_ [migration]
root 4 0.0 0.0 0 0 ? S 08:26 0:00 \_ [ksoftirqd]
root 5 0.0 0.0 0 0 ? S 08:26 0:00 \_ [stopper/0]
root 6 0.0 0.0 0 0 ? S 08:26 0:00 \_ [watchdog/]
root 7 0.0 0.0 0 0 ? S 08:26 0:00 \_ [migration]
root 8 0.0 0.0 0 0 ? S 08:26 0:00 \_ [stopper/1]
root 9 0.0 0.0 0 0 ? S 08:26 0:00 \_ [ksoftirqd]
root 10 0.0 0.0 0 0 ? S 08:26 0:00 \_ [watchdog/]
root 11 0.0 0.0 0 0 ? S 08:26 0:00 \_ [migration]
root 12 0.0 0.0 0 0 ? S 08:26 0:00 \_ [stopper/2]
root 13 0.0 0.0 0 0 ? S 08:26 0:00 \_ [ksoftirqd]
root 14 0.0 0.0 0 0 ? S 08:26 0:00 \_ [watchdog/]
root 15 0.0 0.0 0 0 ? S 08:26 0:00 \_ [migration]
root 16 0.0 0.0 0 0 ? S 08:26 0:00 \_ [stopper/3]
root 17 0.0 0.0 0 0 ? S 08:26 0:00 \_ [ksoftirqd]
root 18 0.0 0.0 0 0 ? S 08:26 0:00 \_ [watchdog/]
root 19 0.0 0.0 0 0 ? S 08:26 0:00 \_ [migration]
root 20 0.0 0.0 0 0 ? S 08:26 0:00 \_ [stopper/4]
root 21 0.0 0.0 0 0 ? S 08:26 0:00 \_ [ksoftirqd]
root 22 0.0 0.0 0 0 ? S 08:26 0:00 \_ [watchdog/]
root 23 0.0 0.0 0 0 ? S 08:26 0:00 \_ [migration]
root 24 0.0 0.0 0 0 ? S 08:26 0:00 \_ [stopper/5]
root 25 0.0 0.0 0 0 ? S 08:26 0:00 \_ [ksoftirqd]
root 26 0.0 0.0 0 0 ? S 08:26 0:00 \_ [watchdog/]
root 27 0.0 0.0 0 0 ? S 08:26 0:00 \_ [migration]
root 28 0.0 0.0 0 0 ? S 08:26 0:00 \_ [stopper/6]
root 29 0.0 0.0 0 0 ? S 08:26 0:00 \_ [ksoftirqd]
root 30 0.0 0.0 0 0 ? S 08:26 0:00 \_ [watchdog/]
root 31 0.0 0.0 0 0 ? S 08:26 0:00 \_ [migration]
root 32 0.0 0.0 0 0 ? S 08:26 0:00 \_ [stopper/7]
root 33 0.0 0.0 0 0 ? S 08:26 0:00 \_ [ksoftirqd]
root 34 0.0 0.0 0 0 ? S 08:26 0:00 \_ [watchdog/]
root 35 0.0 0.0 0 0 ? S 08:26 0:00 \_ [events/0]
root 36 0.0 0.0 0 0 ? S 08:26 0:00 \_ [events/1]
root 37 0.0 0.0 0 0 ? S 08:26 0:00 \_ [events/2]
root 38 0.0 0.0 0 0 ? S 08:26 0:00 \_ [events/3]
root 39 0.0 0.0 0 0 ? S 08:26 0:00 \_ [events/4]
root 40 0.0 0.0 0 0 ? S 08:26 0:00 \_ [events/5]
root 41 0.0 0.0 0 0 ? S 08:26 0:00 \_ [events/6]
root 42 0.0 0.0 0 0 ? S 08:26 0:00 \_ [events/7]
root 43 0.0 0.0 0 0 ? S 08:26 0:00 \_ [events/0]
root 44 0.0 0.0 0 0 ? S 08:26 0:00 \_ [events/1]
root 45 0.0 0.0 0 0 ? S 08:26 0:00 \_ [events/2]
root 46 0.0 0.0 0 0 ? S 08:26 0:00 \_ [events/3]
root 47 0.0 0.0 0 0 ? S 08:26 0:00 \_ [events/4]
root 48 0.0 0.0 0 0 ? S 08:26 0:00 \_ [events/5]
root 49 0.0 0.0 0 0 ? S 08:26 0:00 \_ [events/6]
root 50 0.0 0.0 0 0 ? S 08:26 0:00 \_ [events/7]
root 51 0.0 0.0 0 0 ? S 08:26 0:00 \_ [events_lo]
root 52 0.0 0.0 0 0 ? S 08:26 0:00 \_ [events_lo]
root 53 0.0 0.0 0 0 ? S 08:26 0:00 \_ [events_lo]
root 54 0.0 0.0 0 0 ? S 08:26 0:00 \_ [events_lo]
root 55 0.0 0.0 0 0 ? S 08:26 0:00 \_ [events_lo]
root 56 0.0 0.0 0 0 ? S 08:26 0:00 \_ [events_lo]
root 57 0.0 0.0 0 0 ? S 08:26 0:00 \_ [events_lo]
root 58 0.0 0.0 0 0 ? S 08:26 0:00 \_ [events_lo]
root 59 0.0 0.0 0 0 ? S 08:26 0:00 \_ [events_po]
root 60 0.0 0.0 0 0 ? S 08:26 0:00 \_ [events_po]
root 61 0.0 0.0 0 0 ? S 08:26 0:00 \_ [events_po]
root 62 0.0 0.0 0 0 ? S 08:26 0:00 \_ [events_po]
root 63 0.0 0.0 0 0 ? S 08:26 0:00 \_ [events_po]
root 64 0.0 0.0 0 0 ? S 08:26 0:00 \_ [events_po]
root 65 0.0 0.0 0 0 ? S 08:26 0:00 \_ [events_po]
root 66 0.0 0.0 0 0 ? S 08:26 0:00 \_ [events_po]
root 67 0.0 0.0 0 0 ? S 08:26 0:00 \_ [cgroup]
root 68 0.0 0.0 0 0 ? S 08:26 0:00 \_ [khelper]
root 69 0.0 0.0 0 0 ? S 08:26 0:00 \_ [netns]
root 70 0.0 0.0 0 0 ? S 08:26 0:00 \_ [async/mgr]
root 71 0.0 0.0 0 0 ? S 08:26 0:00 \_ [pm]
root 72 0.0 0.0 0 0 ? S 08:26 0:00 \_ [sync_supe]
root 73 0.0 0.0 0 0 ? S 08:26 0:00 \_ [bdi-defau]
root 74 0.0 0.0 0 0 ? S 08:26 0:00 \_ [kintegrit]
root 75 0.0 0.0 0 0 ? S 08:26 0:00 \_ [kintegrit]
root 76 0.0 0.0 0 0 ? S 08:26 0:00 \_ [kintegrit]
root 77 0.0 0.0 0 0 ? S 08:26 0:00 \_ [kintegrit]
root 78 0.0 0.0 0 0 ? S 08:26 0:00 \_ [kintegrit]
root 79 0.0 0.0 0 0 ? S 08:26 0:00 \_ [kintegrit]
root 80 0.0 0.0 0 0 ? S 08:26 0:00 \_ [kintegrit]
root 81 0.0 0.0 0 0 ? S 08:26 0:00 \_ [kintegrit]
root 82 0.0 0.0 0 0 ? S 08:26 0:00 \_ [kblockd/0]
root 83 0.0 0.0 0 0 ? S 08:26 0:00 \_ [kblockd/1]
root 84 0.0 0.0 0 0 ? S 08:26 0:00 \_ [kblockd/2]
root 85 0.0 0.0 0 0 ? S 08:26 0:00 \_ [kblockd/3]
root 86 0.0 0.0 0 0 ? S 08:26 0:00 \_ [kblockd/4]
root 87 0.0 0.0 0 0 ? S 08:26 0:00 \_ [kblockd/5]
root 88 0.0 0.0 0 0 ? S 08:26 0:00 \_ [kblockd/6]
root 89 0.0 0.0 0 0 ? S 08:26 0:00 \_ [kblockd/7]
root 90 0.0 0.0 0 0 ? S 08:26 0:00 \_ [kacpid]
root 91 0.0 0.0 0 0 ? S 08:26 0:00 \_ [kacpi_not]
root 92 0.0 0.0 0 0 ? S 08:26 0:00 \_ [kacpi_hot]
root 93 0.0 0.0 0 0 ? S 08:26 0:00 \_ [ata_aux]
root 94 0.0 0.0 0 0 ? S 08:26 0:00 \_ [ata_sff/0]
root 95 0.0 0.0 0 0 ? S 08:26 0:00 \_ [ata_sff/1]
root 96 0.0 0.0 0 0 ? S 08:26 0:00 \_ [ata_sff/2]
root 97 0.0 0.0 0 0 ? S 08:26 0:00 \_ [ata_sff/3]
root 98 0.0 0.0 0 0 ? S 08:26 0:00 \_ [ata_sff/4]
root 99 0.0 0.0 0 0 ? S 08:26 0:00 \_ [ata_sff/5]
root 100 0.0 0.0 0 0 ? S 08:26 0:00 \_ [ata_sff/6]
root 101 0.0 0.0 0 0 ? S 08:26 0:00 \_ [ata_sff/7]
root 102 0.0 0.0 0 0 ? S 08:26 0:00 \_ [ksuspend_]
root 103 0.0 0.0 0 0 ? S 08:26 0:00 \_ [khubd]
root 104 0.0 0.0 0 0 ? S 08:26 0:00 \_ [kseriod]
root 105 0.0 0.0 0 0 ? S 08:26 0:00 \_ [md/0]
root 106 0.0 0.0 0 0 ? S 08:26 0:00 \_ [md/1]
root 107 0.0 0.0 0 0 ? S 08:26 0:00 \_ [md/2]
root 108 0.0 0.0 0 0 ? S 08:26 0:00 \_ [md/3]
root 109 0.0 0.0 0 0 ? S 08:26 0:00 \_ [md/4]
root 110 0.0 0.0 0 0 ? S 08:26 0:00 \_ [md/5]
root 111 0.0 0.0 0 0 ? S 08:26 0:00 \_ [md/6]
root 112 0.0 0.0 0 0 ? S 08:26 0:00 \_ [md/7]
root 113 0.0 0.0 0 0 ? S 08:26 0:00 \_ [md_misc/0]
root 114 0.0 0.0 0 0 ? S 08:26 0:00 \_ [md_misc/1]
root 115 0.0 0.0 0 0 ? S 08:26 0:00 \_ [md_misc/2]
root 116 0.0 0.0 0 0 ? S 08:26 0:00 \_ [md_misc/3]
root 117 0.0 0.0 0 0 ? S 08:26 0:00 \_ [md_misc/4]
root 118 0.0 0.0 0 0 ? S 08:26 0:00 \_ [md_misc/5]
root 119 0.0 0.0 0 0 ? S 08:26 0:00 \_ [md_misc/6]
root 120 0.0 0.0 0 0 ? S 08:26 0:00 \_ [md_misc/7]
root 121 0.0 0.0 0 0 ? S 08:26 0:00 \_ [linkwatch]
root 122 0.0 0.0 0 0 ? S 08:26 0:00 \_ [khungtask]
root 123 0.0 0.0 0 0 ? S 08:26 0:00 \_ [lru-add-d]
root 124 0.0 0.0 0 0 ? S 08:26 0:00 \_ [lru-add-d]
root 125 0.0 0.0 0 0 ? S 08:26 0:00 \_ [lru-add-d]
root 126 0.0 0.0 0 0 ? S 08:26 0:00 \_ [lru-add-d]
root 127 0.0 0.0 0 0 ? S 08:26 0:00 \_ [lru-add-d]
root 128 0.0 0.0 0 0 ? S 08:26 0:00 \_ [lru-add-d]
root 129 0.0 0.0 0 0 ? S 08:26 0:00 \_ [lru-add-d]
root 130 0.0 0.0 0 0 ? S 08:26 0:00 \_ [lru-add-d]
root 131 0.0 0.0 0 0 ? S 08:26 0:00 \_ [kswapd0]
root 132 0.0 0.0 0 0 ? SN 08:26 0:00 \_ [ksmd]
root 133 0.0 0.0 0 0 ? S 08:26 0:00 \_ [aio/0]
root 134 0.0 0.0 0 0 ? S 08:26 0:00 \_ [aio/1]
root 135 0.0 0.0 0 0 ? S 08:26 0:00 \_ [aio/2]
root 136 0.0 0.0 0 0 ? S 08:26 0:00 \_ [aio/3]
root 137 0.0 0.0 0 0 ? S 08:26 0:00 \_ [aio/4]
root 138 0.0 0.0 0 0 ? S 08:26 0:00 \_ [aio/5]
root 139 0.0 0.0 0 0 ? S 08:26 0:00 \_ [aio/6]
root 140 0.0 0.0 0 0 ? S 08:26 0:00 \_ [aio/7]
root 141 0.0 0.0 0 0 ? S 08:26 0:00 \_ [crypto/0]
root 142 0.0 0.0 0 0 ? S 08:26 0:00 \_ [crypto/1]
root 143 0.0 0.0 0 0 ? S 08:26 0:00 \_ [crypto/2]
root 144 0.0 0.0 0 0 ? S 08:26 0:00 \_ [crypto/3]
root 145 0.0 0.0 0 0 ? S 08:26 0:00 \_ [crypto/4]
root 146 0.0 0.0 0 0 ? S 08:26 0:00 \_ [crypto/5]
root 147 0.0 0.0 0 0 ? S 08:26 0:00 \_ [crypto/6]
root 148 0.0 0.0 0 0 ? S 08:26 0:00 \_ [crypto/7]
root 155 0.0 0.0 0 0 ? S 08:26 0:00 \_ [kthrotld/]
root 156 0.0 0.0 0 0 ? S 08:26 0:00 \_ [kthrotld/]
root 157 0.0 0.0 0 0 ? S 08:26 0:00 \_ [kthrotld/]
root 158 0.0 0.0 0 0 ? S 08:26 0:00 \_ [kthrotld/]
root 159 0.0 0.0 0 0 ? S 08:26 0:00 \_ [kthrotld/]
root 160 0.0 0.0 0 0 ? S 08:26 0:00 \_ [kthrotld/]
root 161 0.0 0.0 0 0 ? S 08:26 0:00 \_ [kthrotld/]
root 162 0.0 0.0 0 0 ? S 08:26 0:00 \_ [kthrotld/]
root 163 0.0 0.0 0 0 ? S 08:26 0:00 \_ [pciehpd]
root 165 0.0 0.0 0 0 ? S 08:26 0:00 \_ [kpsmoused]
root 166 0.0 0.0 0 0 ? S 08:26 0:00 \_ [usbhid_re]
root 167 0.0 0.0 0 0 ? S 08:26 0:00 \_ [deferwq]
root 200 0.0 0.0 0 0 ? S 08:26 0:00 \_ [kdmremove]
root 201 0.0 0.0 0 0 ? S 08:26 0:00 \_ [kstriped]
root 231 0.0 0.0 0 0 ? S 08:26 0:00 \_ [ttm_swap]
root 409 0.0 0.0 0 0 ? S 08:26 0:00 \_ [scsi_eh_0]
root 410 0.0 0.0 0 0 ? S 08:26 0:00 \_ [scsi_eh_1]
root 481 0.0 0.0 0 0 ? S 08:26 0:00 \_ [mpt_poll_]
root 482 0.0 0.0 0 0 ? S 08:26 0:00 \_ [mpt/0]
root 483 0.0 0.0 0 0 ? S 08:26 0:00 \_ [scsi_eh_2]
root 565 0.0 0.0 0 0 ? S 08:26 0:00 \_ [kdmflush]
root 567 0.0 0.0 0 0 ? S 08:26 0:00 \_ [kdmflush]
root 633 0.0 0.0 0 0 ? S 08:26 0:00 \_ [jbd2/dm-0]
root 634 0.0 0.0 0 0 ? S 08:26 0:00 \_ [ext4-dio-]
root 934 0.0 0.0 0 0 ? S 08:26 0:00 \_ [vmmemctl]
root 1163 0.0 0.0 0 0 ? S 08:26 0:00 \_ [flush-253]
root 1223 0.0 0.0 0 0 ? S 08:26 0:00 \_ [jbd2/sda1]
root 1224 0.0 0.0 0 0 ? S 08:26 0:00 \_ [ext4-dio-]
root 1320 0.0 0.0 0 0 ? S 08:26 0:00 \_ [kauditd]
root 1379 0.0 0.0 0 0 ? S 08:26 0:00 \_ [ib_addr]
root 1384 0.0 0.0 0 0 ? S 08:26 0:00 \_ [infiniban]
root 1385 0.0 0.0 0 0 ? S 08:26 0:00 \_ [infiniban]
root 1386 0.0 0.0 0 0 ? S 08:26 0:00 \_ [infiniban]
root 1387 0.0 0.0 0 0 ? S 08:26 0:00 \_ [infiniban]
root 1388 0.0 0.0 0 0 ? S 08:26 0:00 \_ [infiniban]
root 1389 0.0 0.0 0 0 ? S 08:26 0:00 \_ [infiniban]
root 1390 0.0 0.0 0 0 ? S 08:26 0:00 \_ [infiniban]
root 1391 0.0 0.0 0 0 ? S 08:26 0:00 \_ [infiniban]
root 1400 0.0 0.0 0 0 ? S 08:26 0:00 \_ [ib_mcast]
root 1405 0.0 0.0 0 0 ? S 08:26 0:00 \_ [iw_cm_wq]
root 1410 0.0 0.0 0 0 ? S 08:26 0:00 \_ [ib_cm/0]
root 1411 0.0 0.0 0 0 ? S 08:26 0:00 \_ [ib_cm/1]
root 1412 0.0 0.0 0 0 ? S 08:26 0:00 \_ [ib_cm/2]
root 1413 0.0 0.0 0 0 ? S 08:26 0:00 \_ [ib_cm/3]
root 1415 0.0 0.0 0 0 ? S 08:26 0:00 \_ [ib_cm/4]
root 1416 0.0 0.0 0 0 ? S 08:26 0:00 \_ [ib_cm/5]
root 1417 0.0 0.0 0 0 ? S 08:26 0:00 \_ [ib_cm/6]
root 1418 0.0 0.0 0 0 ? S 08:26 0:00 \_ [ib_cm/7]
root 1423 0.0 0.0 0 0 ? S 08:26 0:00 \_ [rdma_cm]
root 1444 0.0 0.0 0 0 ? S 08:26 0:00 \_ [ipoib_flu]
root 1 0.0 0.0 2900 1432 ? Ss 08:26 0:02 /sbin/init
root 743 0.0 0.0 2716 1016 ? S<s 08:26 0:00 /sbin/udevd -d
root 2715 0.0 0.0 3392 1840 ? S< 08:27 0:00 \_ /sbin/udevd
root 2716 0.0 0.0 3392 1840 ? S< 08:27 0:00 \_ /sbin/udevd
root 1673 0.0 0.0 13016 848 ? S<sl 08:26 0:00 auditd
root 1707 0.0 0.0 36996 1536 ? Sl 08:26 0:00 /sbin/rsyslogd
root 1741 0.0 0.0 3708 772 ? Ss 08:26 0:00 irqbalance --pi
rpc 1759 0.0 0.0 2584 836 ? Ss 08:26 0:00 rpcbind
rpcuser 1781 0.0 0.0 2852 1276 ? Ss 08:26 0:00 rpc.statd
dbus 1816 0.0 0.0 13276 1096 ? Ssl 08:26 0:00 dbus-daemon --s
root 1838 0.0 0.1 13224 2788 ? Ss 08:26 0:00 cupsd -C /etc/c
root 1870 0.0 0.0 2020 604 ? Ss 08:26 0:00 /usr/sbin/acpid
68 1882 0.0 0.2 17324 4396 ? Ssl 08:26 0:00 hald
root 1883 0.0 0.0 4052 1136 ? S 08:26 0:00 \_ hald-runner
root 1915 0.0 0.0 4124 1060 ? S 08:26 0:00 \_ hald-ad
68 1926 0.0 0.0 3712 1020 ? S 08:26 0:00 \_ hald-ad
root 1950 0.0 0.0 32492 1772 ? Ssl 08:26 0:01 automount --pid
root 2104 0.0 0.0 8708 1072 ? Ss 08:26 0:00 /usr/sbin/sshd
root 2747 0.0 0.2 11908 3940 ? Ss 08:35 0:00 \_ sshd: root@
root 2751 0.0 0.0 6744 1672 pts/0 Ss 08:35 0:00 \_ -bash
root 4485 0.0 0.0 6664 1112 pts/0 R+ 15:46 0:00 \_ ps
ntp 2115 0.0 0.0 5404 1708 ? Ss 08:26 0:00 ntpd -u ntp:ntp
root 2132 0.0 0.0 6276 1392 ? S 08:26 0:00 /bin/sh /usr/lo
mysql 2358 0.0 4.3 429984 83712 ? Sl 08:26 0:12 \_ /usr/local/
root 2464 0.0 0.1 12792 2616 ? Ss 08:26 0:00 /usr/libexec/po
postfix 2471 0.0 0.1 12944 2640 ? S 08:26 0:00 \_ qmgr -l -t
postfix 4375 0.0 0.1 12868 2588 ? S 15:07 0:00 \_ pickup -l -
root 2478 0.0 0.1 15092 2148 ? Ss 08:26 0:00 /usr/sbin/abrtd
root 2597 0.0 0.0 7252 704 ? Ss 08:27 0:00 nginx: master p
nginx 2599 0.0 0.0 7420 1172 ? S 08:27 0:00 \_ nginx: work
root 2610 0.0 0.0 6812 1312 ? Ss 08:27 0:00 crond
root 2625 0.0 0.0 2648 480 ? Ss 08:27 0:00 /usr/sbin/atd
root 2642 0.0 0.0 6520 644 ? Ss 08:27 0:00 /usr/bin/rhsmce
root 2659 0.0 0.0 9008 1256 ? Ss 08:27 0:00 /usr/sbin/certm
root 2699 0.0 0.0 2008 488 tty1 Ss+ 08:27 0:00 /sbin/mingetty
root 2702 0.0 0.0 2008 484 tty2 Ss+ 08:27 0:00 /sbin/mingetty
root 2705 0.0 0.0 2008 484 tty3 Ss+ 08:27 0:00 /sbin/mingetty
root 2708 0.0 0.0 2008 484 tty4 Ss+ 08:27 0:00 /sbin/mingetty
root 2711 0.0 0.0 2008 488 tty5 Ss+ 08:27 0:00 /sbin/mingetty
root 2718 0.0 0.0 2008 480 tty6 Ss+ 08:27 0:00 /sbin/mingetty
root 4468 0.0 0.1 38784 3476 ? Ss 15:43 0:00 php-fpm: master
nobody 4469 0.0 0.1 38784 2620 ? S 15:43 0:00 \_ php-fpm: po #启动了8个子进程
nobody 4470 0.0 0.1 38784 2620 ? S 15:43 0:00 \_ php-fpm: po
nobody 4471 0.0 0.1 38784 2620 ? S 15:43 0:00 \_ php-fpm: po
nobody 4472 0.0 0.1 38784 2620 ? S 15:43 0:00 \_ php-fpm: po
nobody 4473 0.0 0.1 38784 2620 ? S 15:43 0:00 \_ php-fpm: po
nobody 4474 0.0 0.1 38784 2620 ? S 15:43 0:00 \_ php-fpm: po
nobody 4475 0.0 0.1 38784 2620 ? S 15:43 0:00 \_ php-fpm: po
nobody 4476 0.0 0.1 38784 2620 ? S 15:43 0:00 \_ php-fpm: po
[root@master nginx]#
[root@master nginx]# pwd
/etc/nginx
[root@master nginx]# vim nginx.conf
.................................................................................
#对于某一个server而言,如果支持php功能,定义如下的这一项
location ~ \.php$ { #所有以.php结尾的文件(只是页面文件,没说参数)
#root html;
root /web/htdocs; #我们让与主页在同一个位置吧
fastcgi_pass 127.0.0.1:9000; #php-fpm地址端口
fastcgi_index index.php; #首页,这里表示 当以目录访问的时候,就传index.php作为首页,给php-fpm解析
fastcgi_param SCRIPT_FILENAME /scripts$fastcgi_script_name;
include fastcgi_params;
}
.................................................................................
[root@master nginx]# vim fastcgi_params #把以前的内容全部删了吧
fastcgi_param QUERY_STRING $query_string;
fastcgi_param REQUEST_METHOD $request_method;
fastcgi_param CONTENT_TYPE $content_type;
fastcgi_param CONTENT_LENGTH $content_length;
fastcgi_param SCRIPT_NAME $fastcgi_script_name;
fastcgi_param REQUEST_URI $request_uri;
fastcgi_param DOCUMENT_URI $document_uri;
fastcgi_param DOCUMENT_ROOT $document_root;
fastcgi_param SERVER_PROTOCOL $server_protocol;
fastcgi_param HTTPS $https if_not_empty;
fastcgi_param GATEWAY_INTERFACE CGI/1.1;
fastcgi_param SERVER_SOFTWARE nginx/$nginx_version;
fastcgi_param REMOTE_ADDR $remote_addr;
fastcgi_param REMOTE_PORT $remote_port;
fastcgi_param SERVER_ADDR $server_addr;
fastcgi_param SERVER_PORT $server_port;
fastcgi_param SERVER_NAME $server_name;
# PHP only, required if PHP was built with --enable-force-cgi-redirect
fastcgi_param REDIRECT_STATUS 200;
[root@master nginx]# vim fastcgi_params #改成马哥提供的内容,如果不是马哥提供的内容, 很可能无法通过
fastcgi_param GATEWAY_INTERFACE CGI/1.1;
fastcgi_param SERVER_SOFTWARE nginx;
fastcgi_param QUERY_STRING $query_string;
fastcgi_param REQUEST_METHOD $request_method;
fastcgi_param CONTENT_TYPE $content_type;
fastcgi_param CONTENT_LENGTH $content_length;
fastcgi_param SCRIPT_FILENAME $document_root$fastcgi_script_name;
fastcgi_param SCRIPT_NAME $fastcgi_script_name;
fastcgi_param REQUEST_URI $request_uri;
fastcgi_param DOCUMENT_URI $document_uri;
fastcgi_param DOCUMENT_ROOT $document_root;
fastcgi_param SERVER_PROTOCOL $server_protocol;
fastcgi_param REMOTE_ADDR $remote_addr;
fastcgi_param REMOTE_PORT $remote_port;
fastcgi_param SERVER_ADDR $server_addr;
fastcgi_param SERVER_PORT $server_port;
fastcgi_param SERVER_NAME $server_name;
[root@master nginx]# nginx -t #验证语法
nginx: the configuration file /etc/nginx/nginx.conf syntax is ok
nginx: configuration file /etc/nginx/nginx.conf test is successful
[root@master nginx]#
[root@master nginx]# service nginx reload #重载
nginx: the configuration file /etc/nginx/nginx.conf syntax is ok
nginx: configuration file /etc/nginx/nginx.conf test is successful
重新载入 nginx: [确定]
[root@master nginx]#
测一下php文件看看
[root@master nginx]# cd /web/htdocs
[root@master htdocs]# ls
404.html index.html
[root@master htdocs]# mv index.html index.php
[root@master htdocs]#
[root@master htdocs]# vim index.php
<h1>Test Page </h1>
<?php
phpinfo();
?>
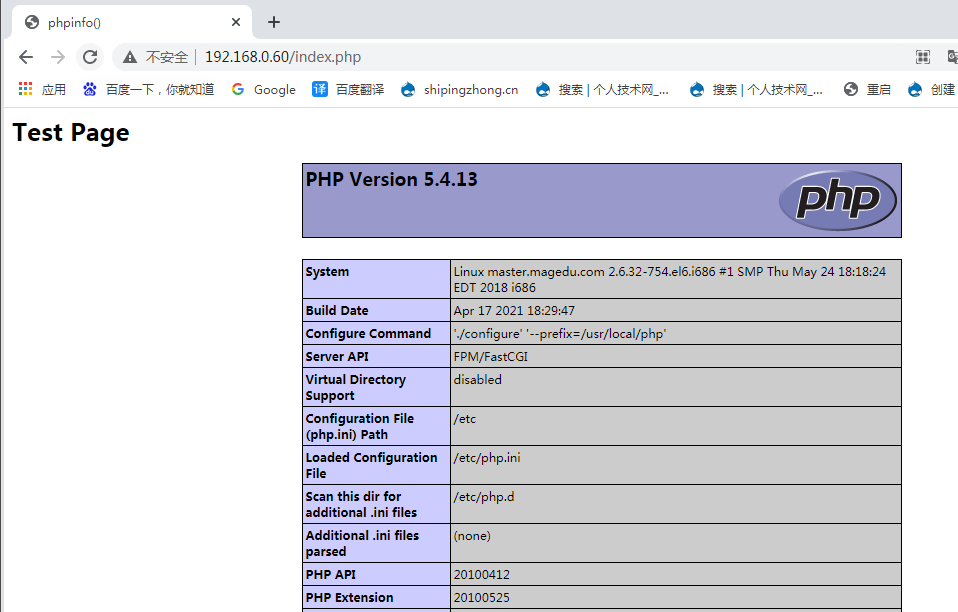
http://192.168.0.60/ 为什么没有识别主页

[root@master htdocs]# cd -
/etc/nginx
[root@master nginx]# vim nginx.conf #加上index看看
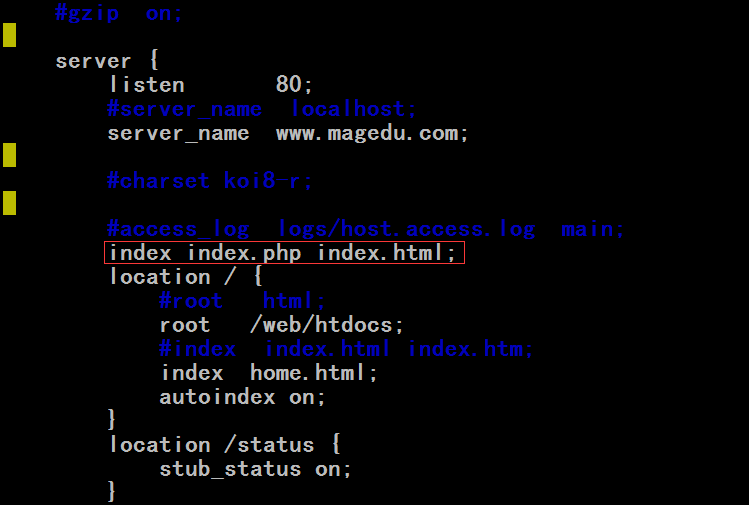
[root@master nginx]# service nginx reload
nginx: the configuration file /etc/nginx/nginx.conf syntax is ok
nginx: configuration file /etc/nginx/nginx.conf test is successful
重新载入 nginx: [确定]
[root@master nginx]#
http://192.168.0.60/ 还不能默认主页

[root@master nginx]# vim nginx.conf #把autoindex off 试试
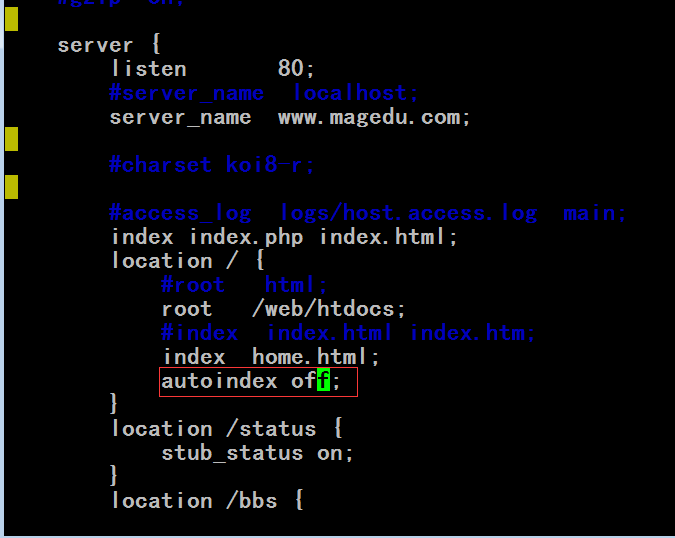
[root@master nginx]# service nginx reload
nginx: the configuration file /etc/nginx/nginx.conf syntax is ok
nginx: configuration file /etc/nginx/nginx.conf test is successful
重新载入 nginx: [确定]
[root@master nginx]#
http://192.168.0.60/ 还是不行

[root@master nginx]# vim nginx.conf #照如下图改一下
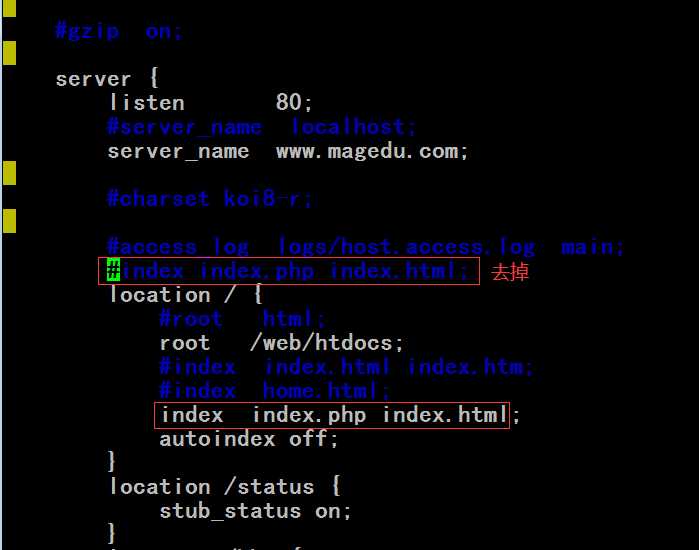
[root@master nginx]# service nginx reload
nginx: the configuration file /etc/nginx/nginx.conf syntax is ok
nginx: configuration file /etc/nginx/nginx.conf test is successful
重新载入 nginx: [确定]
[root@master nginx]#
http://192.168.0.60/ 现在可以自动识别主页了
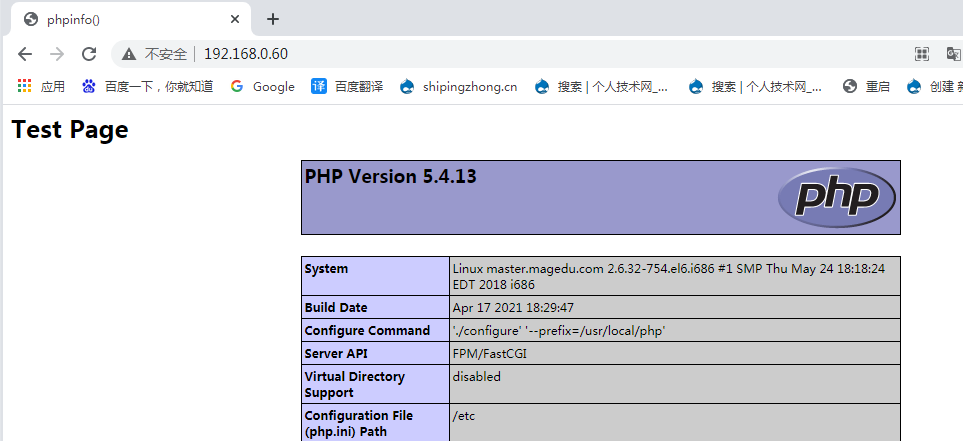
php要想加速,就要装xcache,我们可以装xcache3.0
五、安装xcache,为php加速:
1、安装
# tar xf xcache-2.0.0.tar.gz
# cd xcache-2.0.0
# /usr/local/php/bin/phpize
# ./configure --enable-xcache --with-php-config=/usr/local/php/bin/php-config
# make && make install
安装结束时,会出现类似如下行:
Installing shared extensions: /usr/local/php/lib/php/extensions/no-debug-zts-20100525/
2、编辑php.ini,整合php和xcache:
首先将xcache提供的样例配置导入php.ini
# mkdir /etc/php.d
# cp xcache.ini /etc/php.d
说明:xcache.ini文件在xcache的源码目录中。
接下来编辑/etc/php.d/xcache.ini,找到zend_extension开头的行,修改为如下行:
zend_extension = /usr/local/php/lib/php/extensions/no-debug-zts-20100525/xcache.so
注意:如果php.ini文件中有多条zend_extension指令行,要确保此新增的行排在第一位。
3、重新启动php-fpm
# service php-fpm restart
六、补充说明
如果要在SSL中使用php,需要在php的location中添加此选项:
fastcgi_param HTTPS on;
补充阅读材料:
Events is one of paradigms to achieve asynchronous execution. But not all asynchronous systems use events. That is about semantic meaning of these two - one is super-entity of another.
epoll and aio use different metaphors:
epoll is a blocking operation (epoll_wait()) - you block the thread until some event happens and then you dispatch the event to different procedures/functions/branches in your code.
In AIO you pass address of you callback function (completion routine) to the system and the system calls your function when something happens.
Problem with AIO is that your callback function code runs from system thread and so on top of system stack. A few problems with that as you can imagine.
可以使用ab对我们的nginx作一下压力测试,看ab的性能到底怎么样,建议别人同时对自己的主机发起测试,一个人自己测试是没有意义的,,模拟30多个人同时发起ab测试效果会很不错的,同时发起请求,可能自己页面都打不开了,
别忘了,要装xcache
nginx的基于keep-alived高可用实现
马哥不要求在使用keep-alived高可用的时候非得配置好php和mysql,但是nginx自身要配置好,
LEMP 应该做一个独立的实现, RHEL6.4 + Nginx-1.4.1 + MySQL-5.6.10 + php-5.4.13 + xcache-3
要确保验证xcache是生效的
